
The Switch User Account Screen displays all users configured for Authenticated Switch Access (ASA) through UPAM. You can also enable or disable the UPAM local database for ASA, and enable or disable an existing Switch User Account. After creating a Switch user, you create an AAA Server Profile for the user, set UPAM as the server used for switch access, and assign the AAA Server Profile to network switches.
Use the Switch User Account screen to display information about all of the existing Authenticated Switch user accounts in the UPAM database. This screen also allows you to create, edit, and delete accounts. Refer to the troubleshooting section for solutions to your queries. To access the Switch User Account screen screen, click on Auth & Automation > UPAM- NAC > Accounts > Switch User under the “Configure” section of the OmniVista Cirrus Menu.
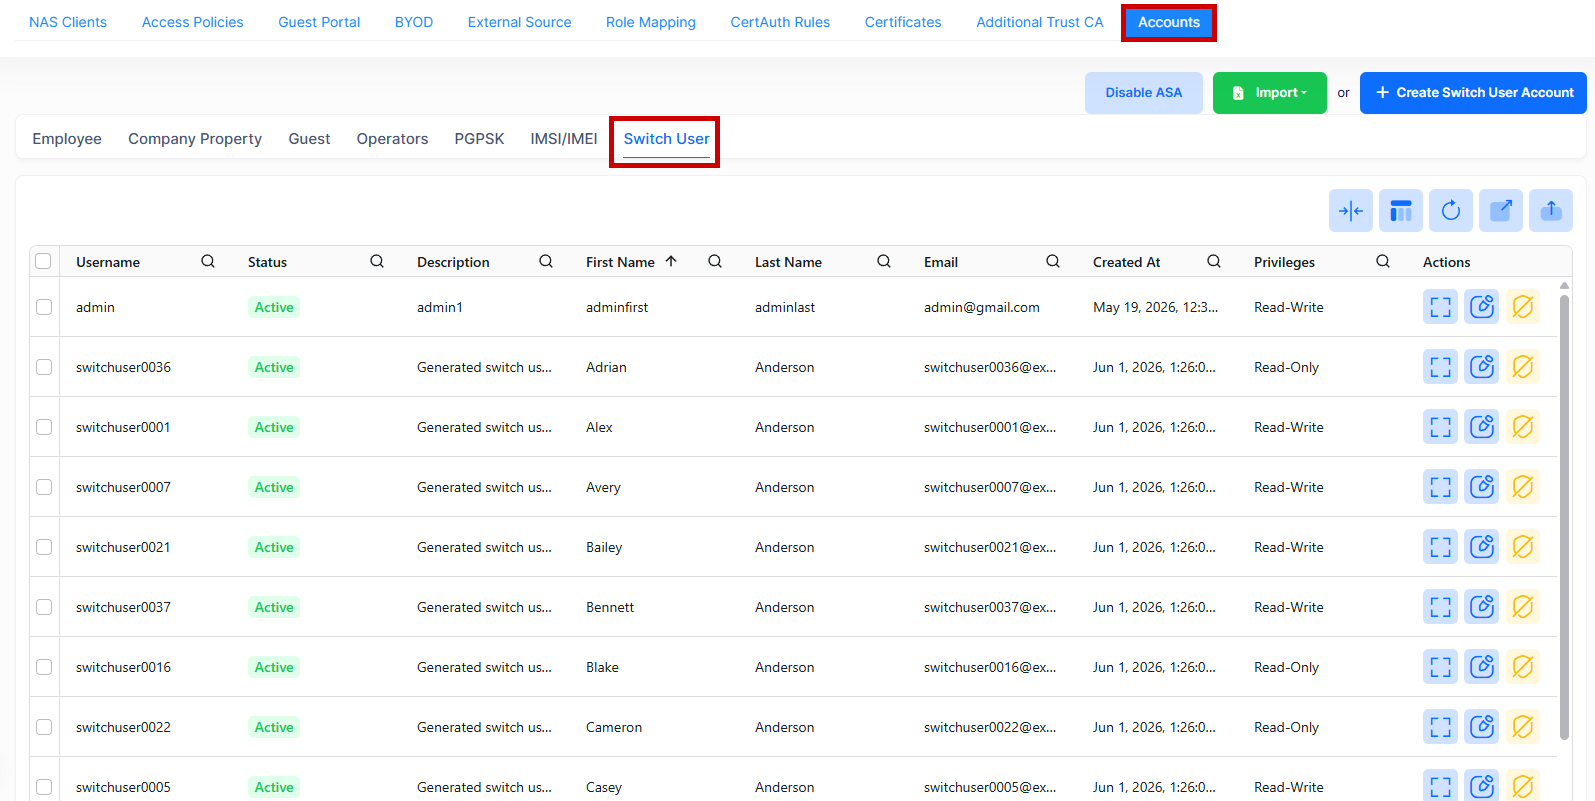
Creating a Switch User Account
There are three methods for creating a Switch User Account for an UPAM Network: Import an Excel XLSX file, Import a CSV file or manually create a Switch User Account.
To create a new Switch User account, click on the add icon to display the Create Switch User Account screen. The screen opens as shown below.
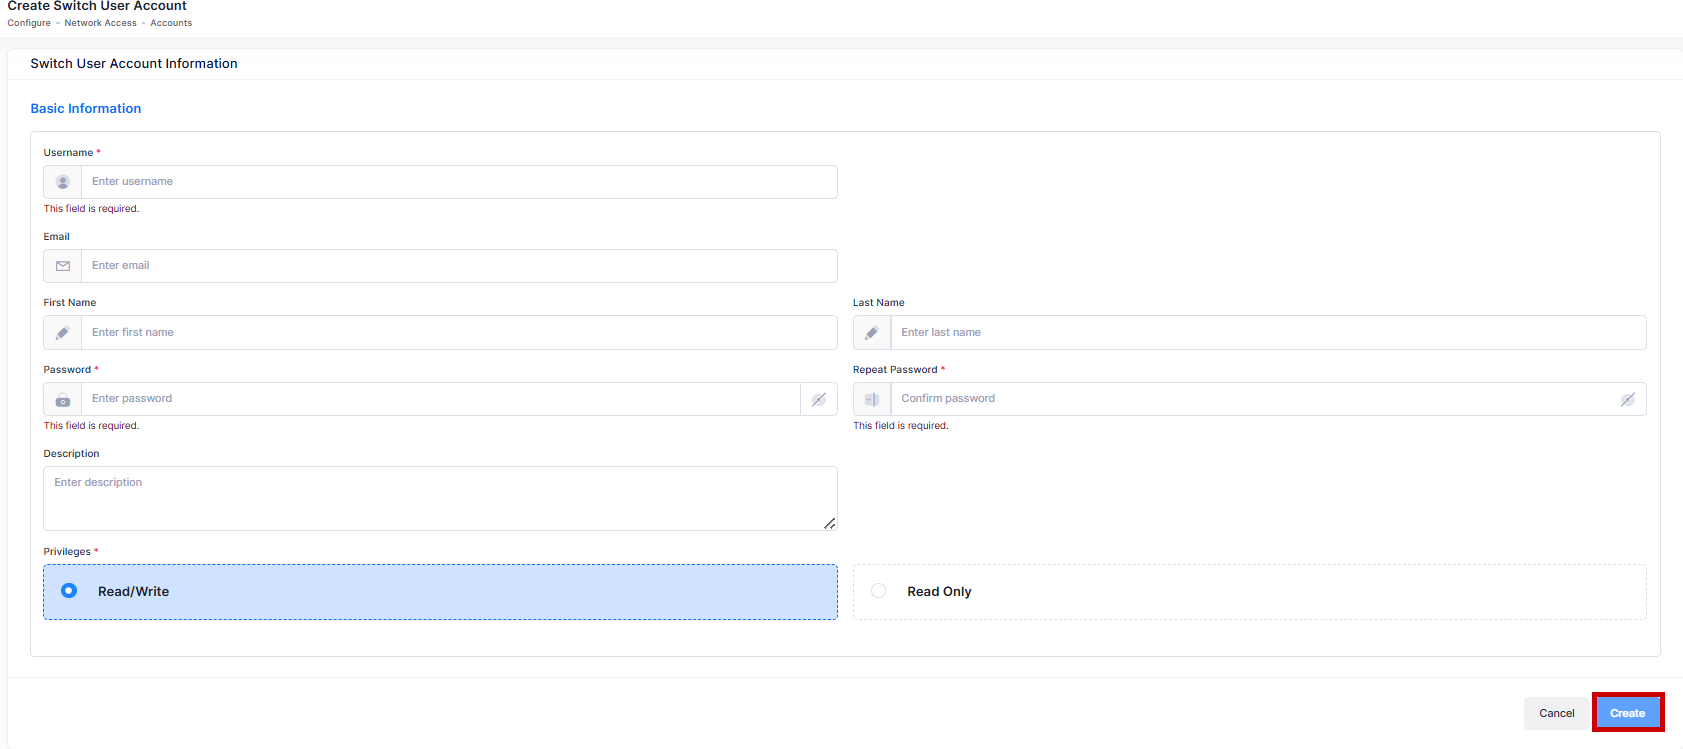
Complete the following fields as described:
-
Username - Switch login account name used for authentication. (Default = none).
-
Email - The User’s contact E-mail address. (optional).
-
First Name - The first Name of the user.
-
Last Name - The last Name of the user.
-
Password - The Switch login account password.
-
Repeat Password - Re-enter the password.
-
Description - Optional description for the Switch user account.
-
Privileges - Select the access level granted to the account.
-
Read/Write - Read or Write access for all Domain Families (e.g. System Domain, Physical Domain) on the switch. (Note: By Default, this is selected.)
-
Read Only - Read Only access for all for all Domain Families.
-
After you have finished with the field values, click on the Create button to create the account.
Import the User Account from an Excel Sheet
To import multiple Switch User accounts from an existing Excel sheet (.xlxs), click on Import from… and select XLSX template file. You will then be prompted to download an XLSX template file that contains steps on how to define the user account in the Excel file to create multiple accounts.
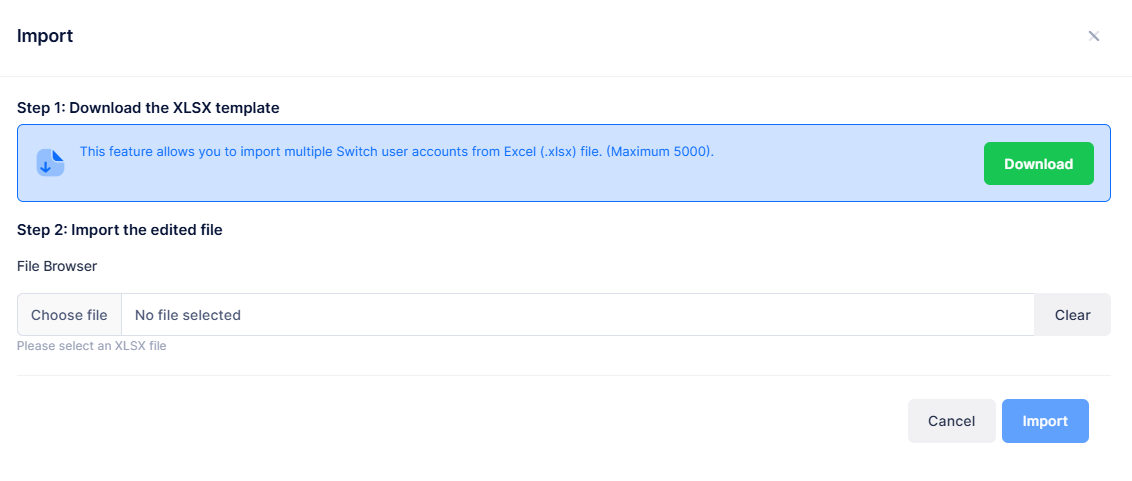
Step 1: Click on Download XLSX template and specify where you would like to save the template file. When you open the template file, instructions are provided about how to define the Switch user account to be added.
The following sample template file is an example of the template provided for add Switch user account.
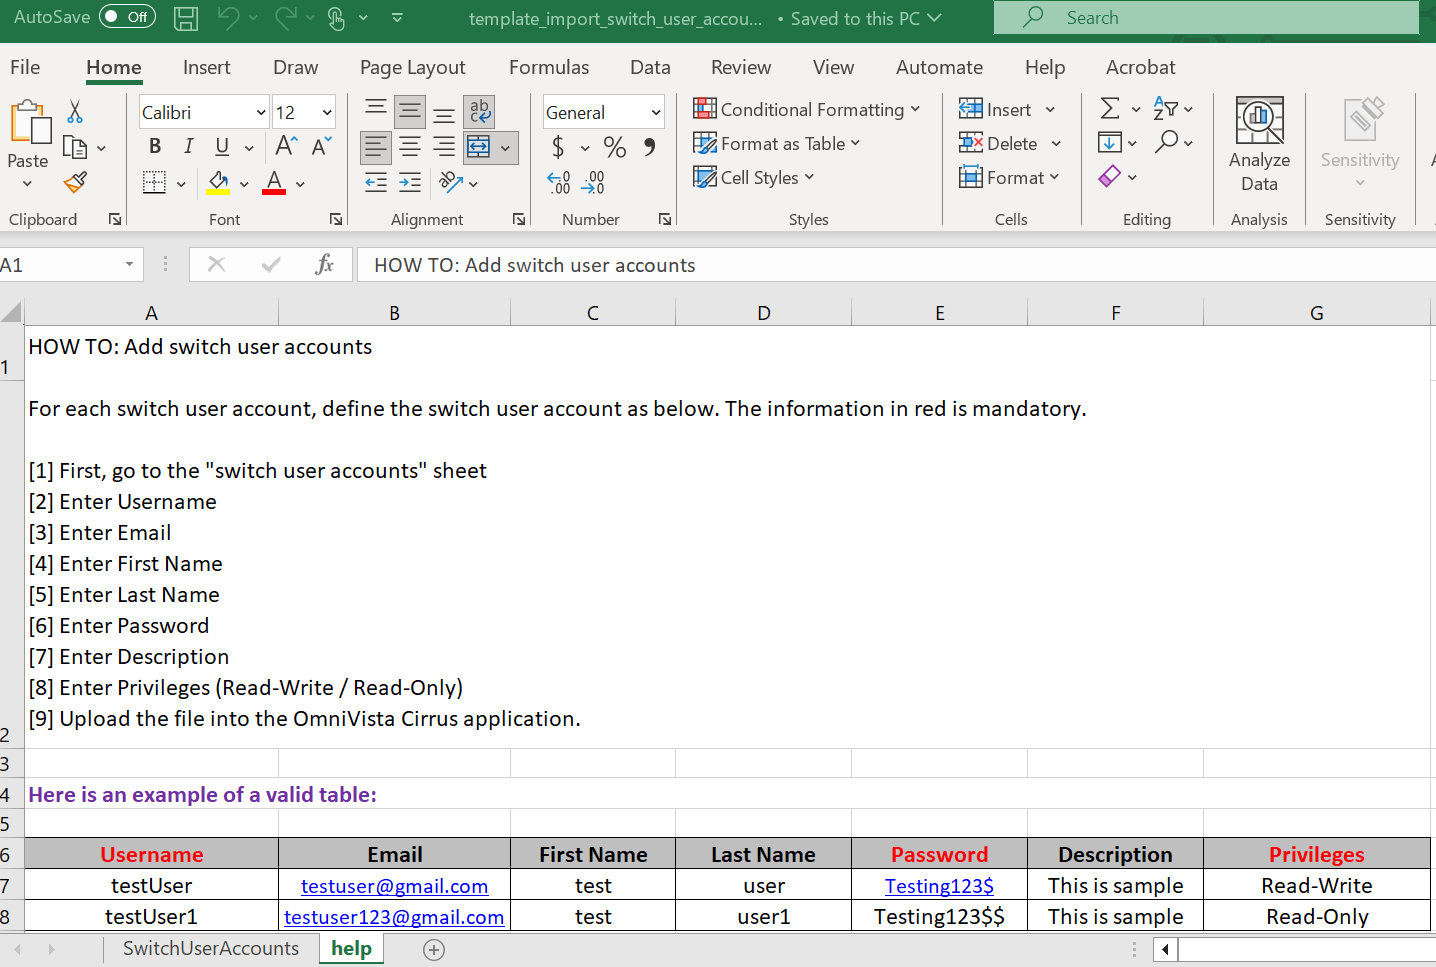
Fill out the template with information for each Switch user account that is to be imported.
Step 2: Import the edited file and select the site of attachment
-
File Browser - Click in this field to find and select the existing template file to import.
Once the Import form is complete, click on Import. The Switch user account list is populated with the imported Switch user accounts.
Import the User Account from a CSV Sheet
To import multiple Switch User accounts from an existing .csv file, click on Import from… and select CSV template file. You will then be prompted to download the CSV template file that contains steps on how to define the Switch user account from a csv file to create multiple accounts.
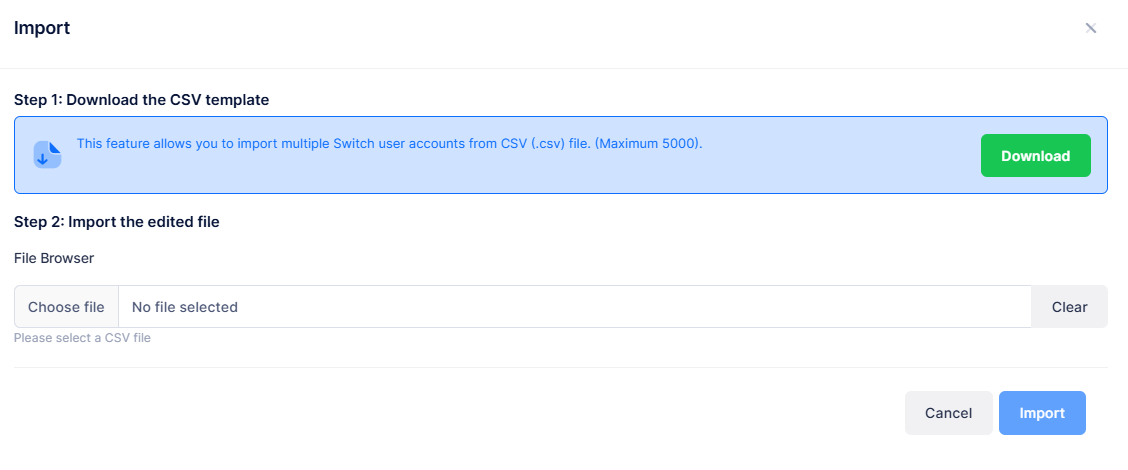
Step 1: Download the CSV template file and add Switch user account information based on the template instructions.
Step 2: Import the edited file and select the site of attachment
Complete the following fields as described to select and upload the CSV file.
-
File Browser - Click in this field to find and select the existing CSV file to import.
Click on Import. The Switch user account list is populated with the imported user accounts.
Editing a Switch User Account
You can edit the parameter values for a Switch user account by accessing the Edit Switch user account screen. Click on the pencil icon under the “Actions” column next to the user account that you want to edit.
The following Edit Switch user account screen displays. Edit the fields as described above, then click on Save.
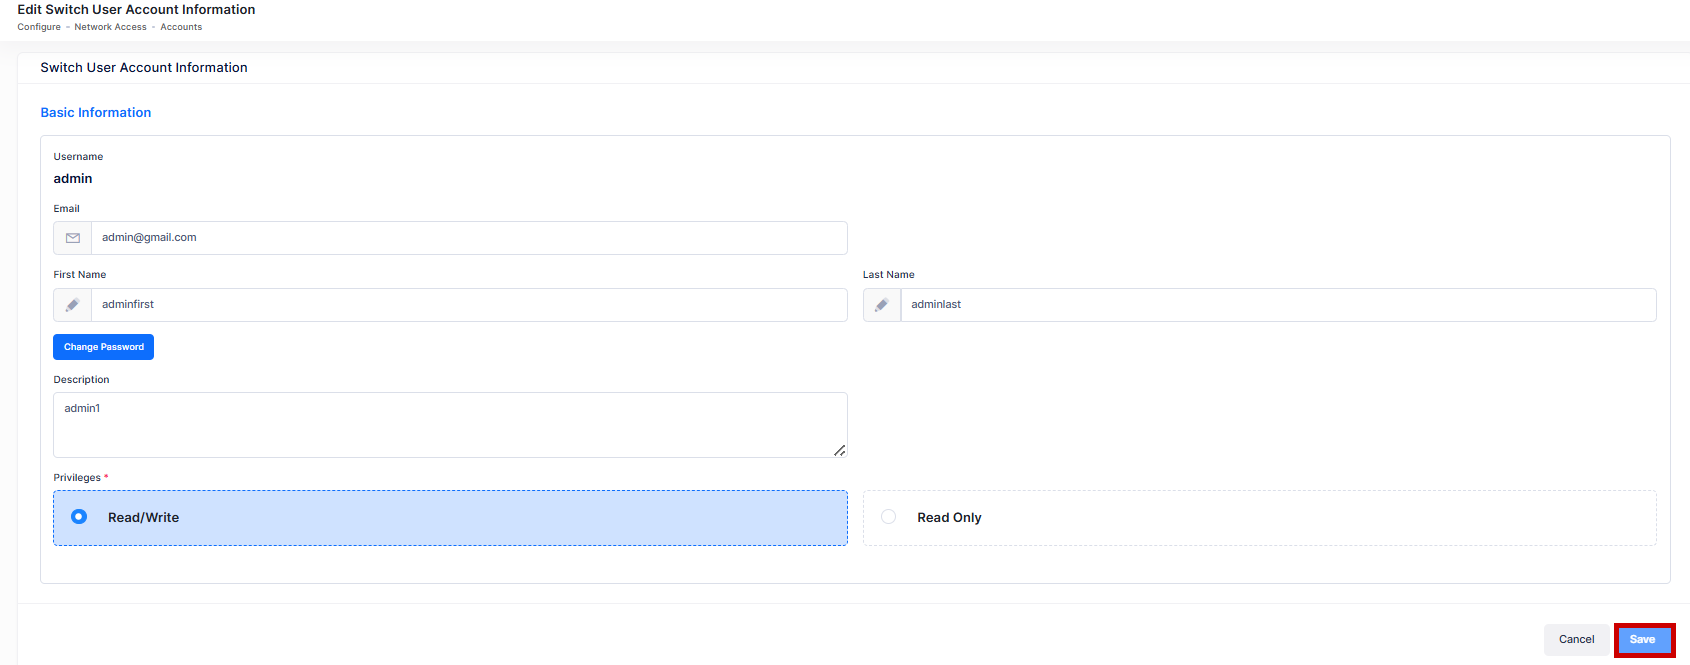
Note: You cannot edit the Username.
Deleting a Switch User Account
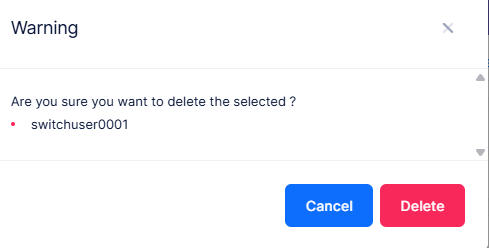
Select a Switch user account from the list and click on the Delete icon under the “Actions” column or click on the Actions button and select Delete from the drop-down menu. When the following confirmation prompt appears, click on Delete to delete the Switch User Account.
Display Switch User Account list
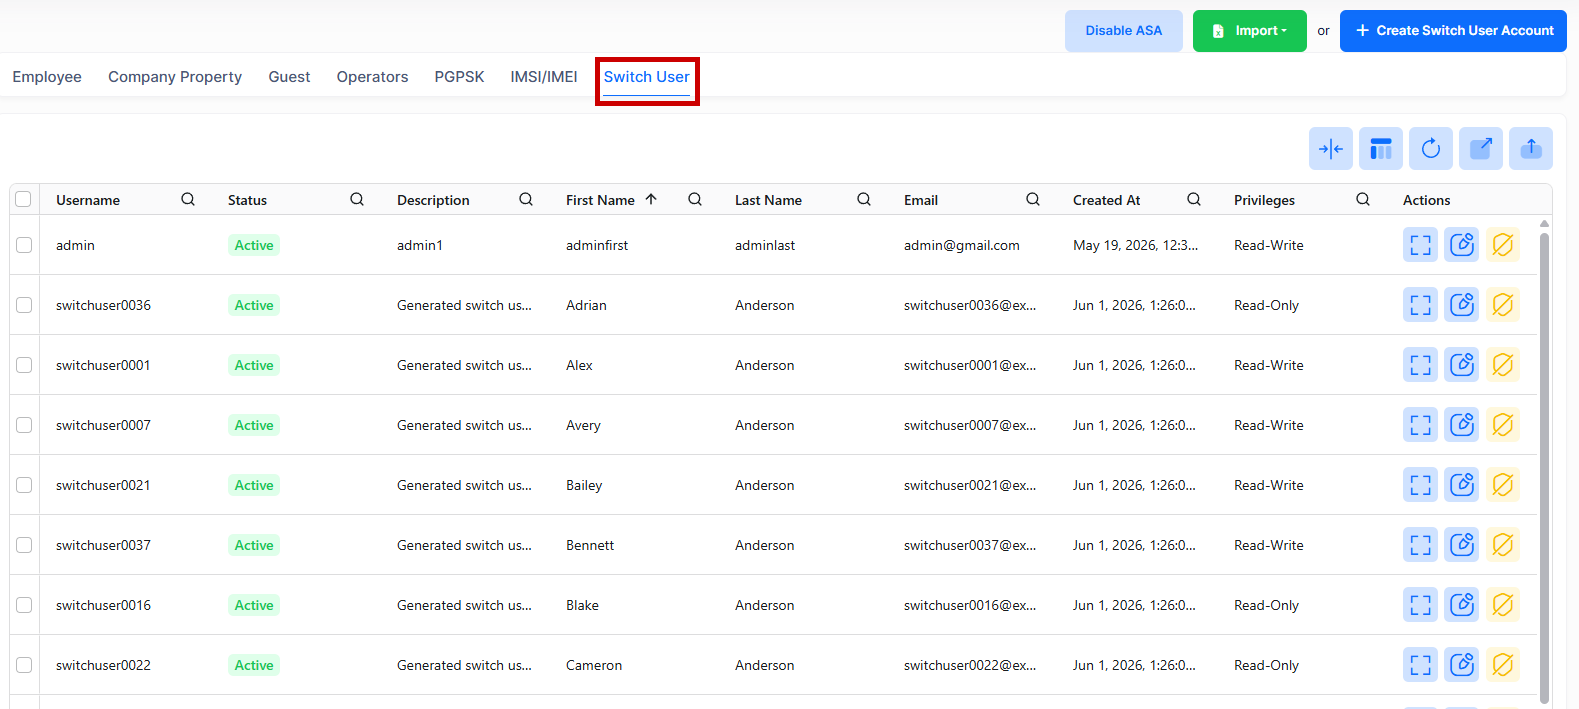
The Switch user account list displays information for the all users configured for Authenticated Switch access. To display detailed information about a specific profile, click on the Additional Information icon under the “Actions” column. The information displayed on this screen is defined below.
-
Username - The user’s Username to access a Switch.
-
Status - The current account administrative state for switch authentication. (Active or Blocked).
-
Description - Description of the user.
-
First Name - The first Name of the user.
-
Last Name - The last Name of the user.
-
Email - The user’s contact email ID.
-
Created At - The date and time when the user account was created.
-
Updated At - The latest date and time when the user account was updated.
-
Privileges - The access level granted to the account. (Read only or Read/Write).
Enable or Disable the UPAM Database for ASA
You can enable or disable switch user authentication through the local Switch User Account Database in UPAM. By default, this option is disabled, and switch user accounts are authenticated through an external authentication server.
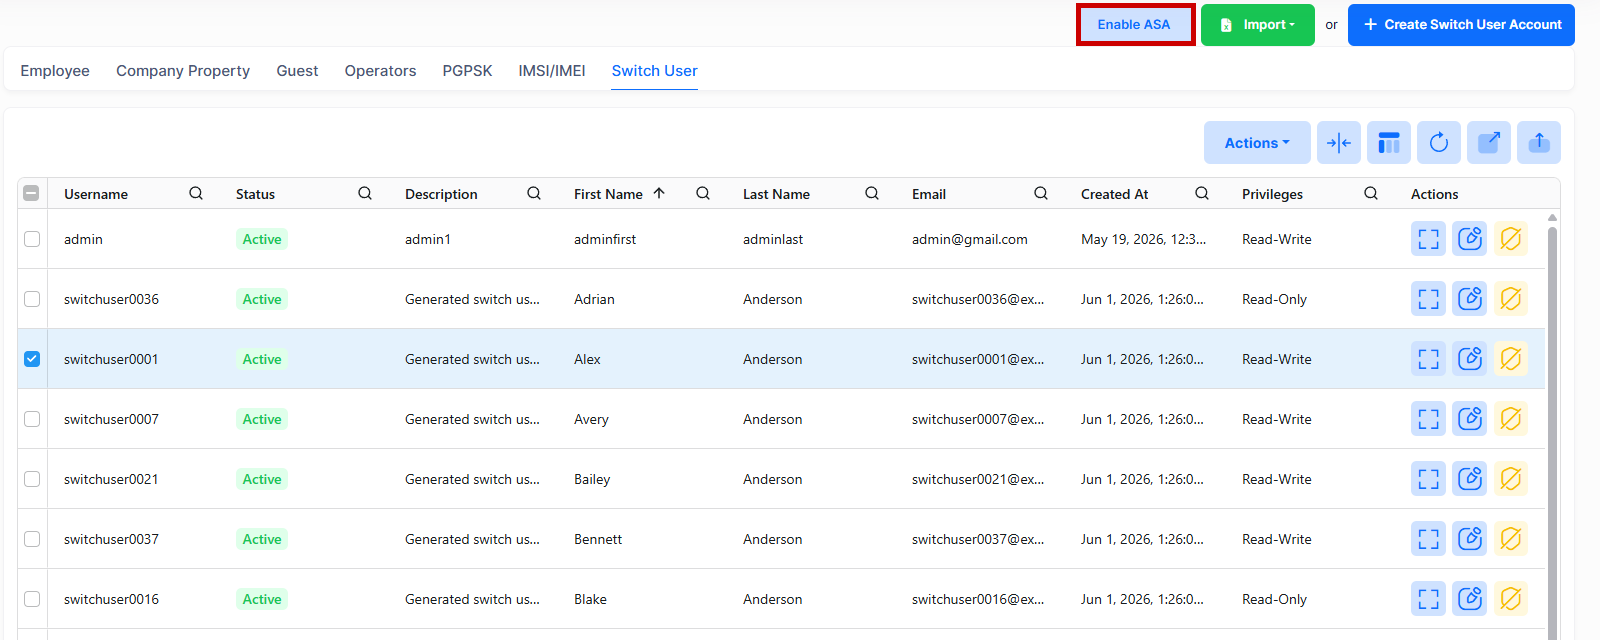
To enable ASA using the local UPAM Database, select a username(s) from the list and click on the Enable ASA button as shown below. To disable, select a username(s) and click on the Disable ASA button.
Consider the following use cases for authentication:
• You can use the UPAM local database for network, switch, and client authentication.
• Use the UPAM local database for network and switch authentication (ASA) and an external RADIUS server for client authentication.
• Use an external RADIUS server for both network or switch authentication (ASA) and client authentication.
• Using an external RADIUS server for network or switch authentication (ASA) and the UPAM local database for client authentication is not supported.
Disable a Switch User Account
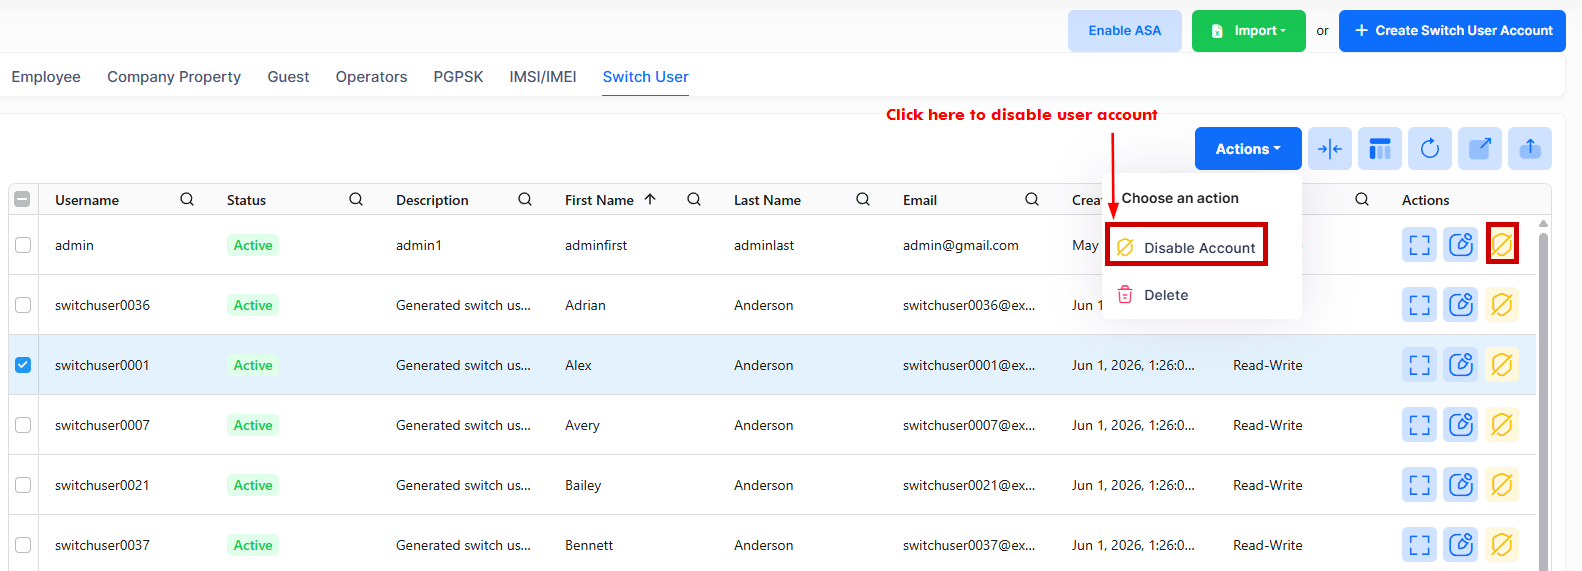
When a Switch User Account is created, it is enabled by default. You can disable a user account by selecting the account(s) and clicking on the Disable Account icon under the Actions column as shown below.
The following confirmation prompt appears:
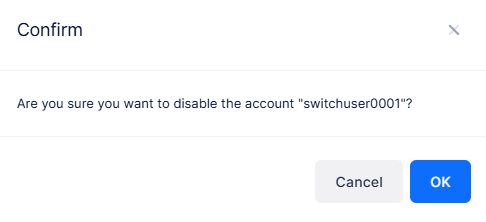
Click on OK for confirmation to disable the account. The user(s) will no longer have access to Network Switches through UPAM.
Enable a Switch User Account
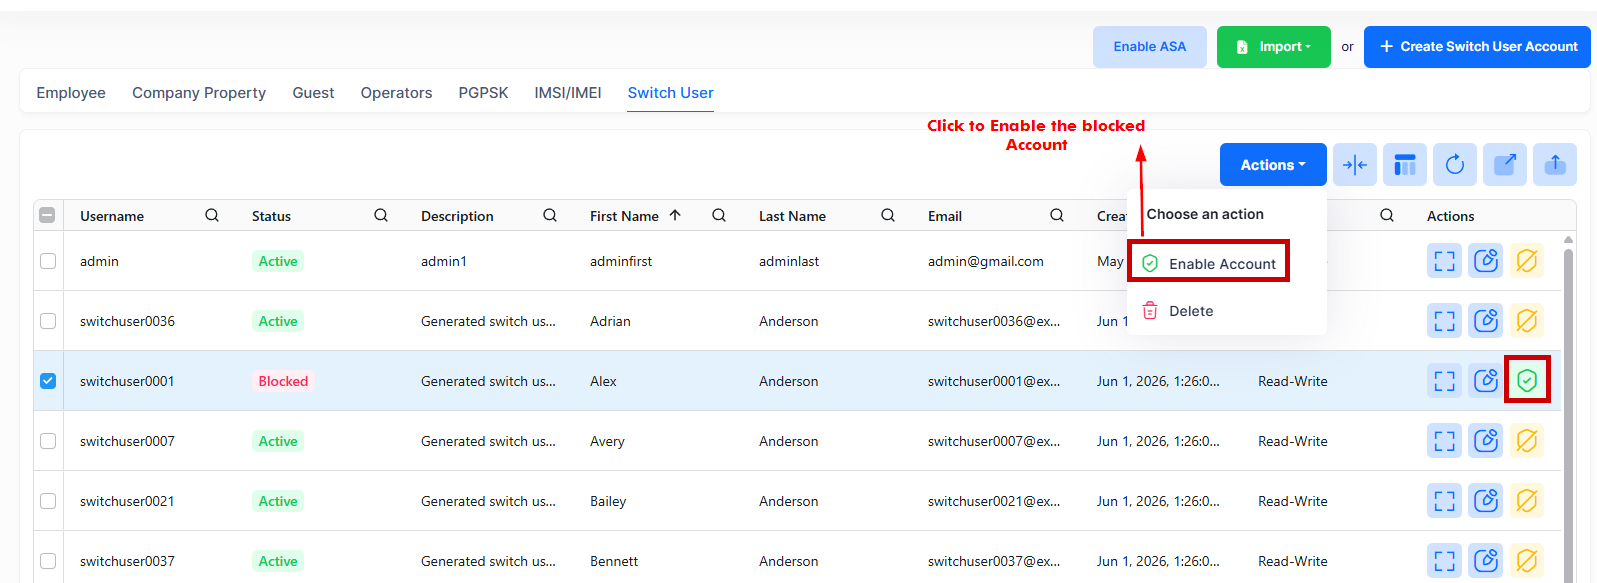
To enable a disabled account, select the disabled account(s) and click on the Enable Account icon under the Actions column as shown below.
The following confirmation prompt appears:
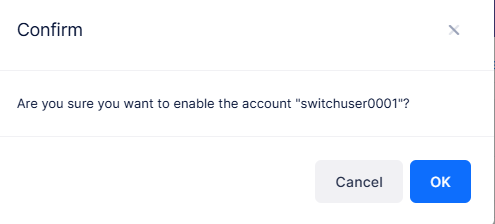
Click on OK to confirm enabling the account. The user(s) will then have access to Network Switches through UPAM again.
Troubleshooting/FAQs
I am not able to click on create Switch User Account button.
Verify that your role has administrator permissions for organization settings. If the button is missing, you have read-only access.
My Account changes are not visible in the Switch User Account List.
Refresh the table using the toolbar reload action, clear active filters, and confirm you are on the correct results page.
I see the failed authentication entries In Switch Access records List.
Open the record row and review the reject reason and related session fields. Correct the account credentials or status. Now, test the switch login again.
I cannot find the older Switch Access records.
You can use the search and filters option to check the records, then check if your retention policy has aged out older entries.
I cannot find the AAA settings in the Switch User Accounts screen.
AAA server setup for switch user access is missing in the Switch User Accounts screen. Configure AAA using the CLI scripting application, then verify access behavior on the Switch user account list and access record screen.