Additional Trust CA
The Trusted Certificate Authority screen displays information about all RADIUS Trust CAs and RadSec Trust CAs in the UPAM Trust RADIUS Store. Use this screen to add, download, and delete a certificate in the UPAM RADIUS server for client authentication.
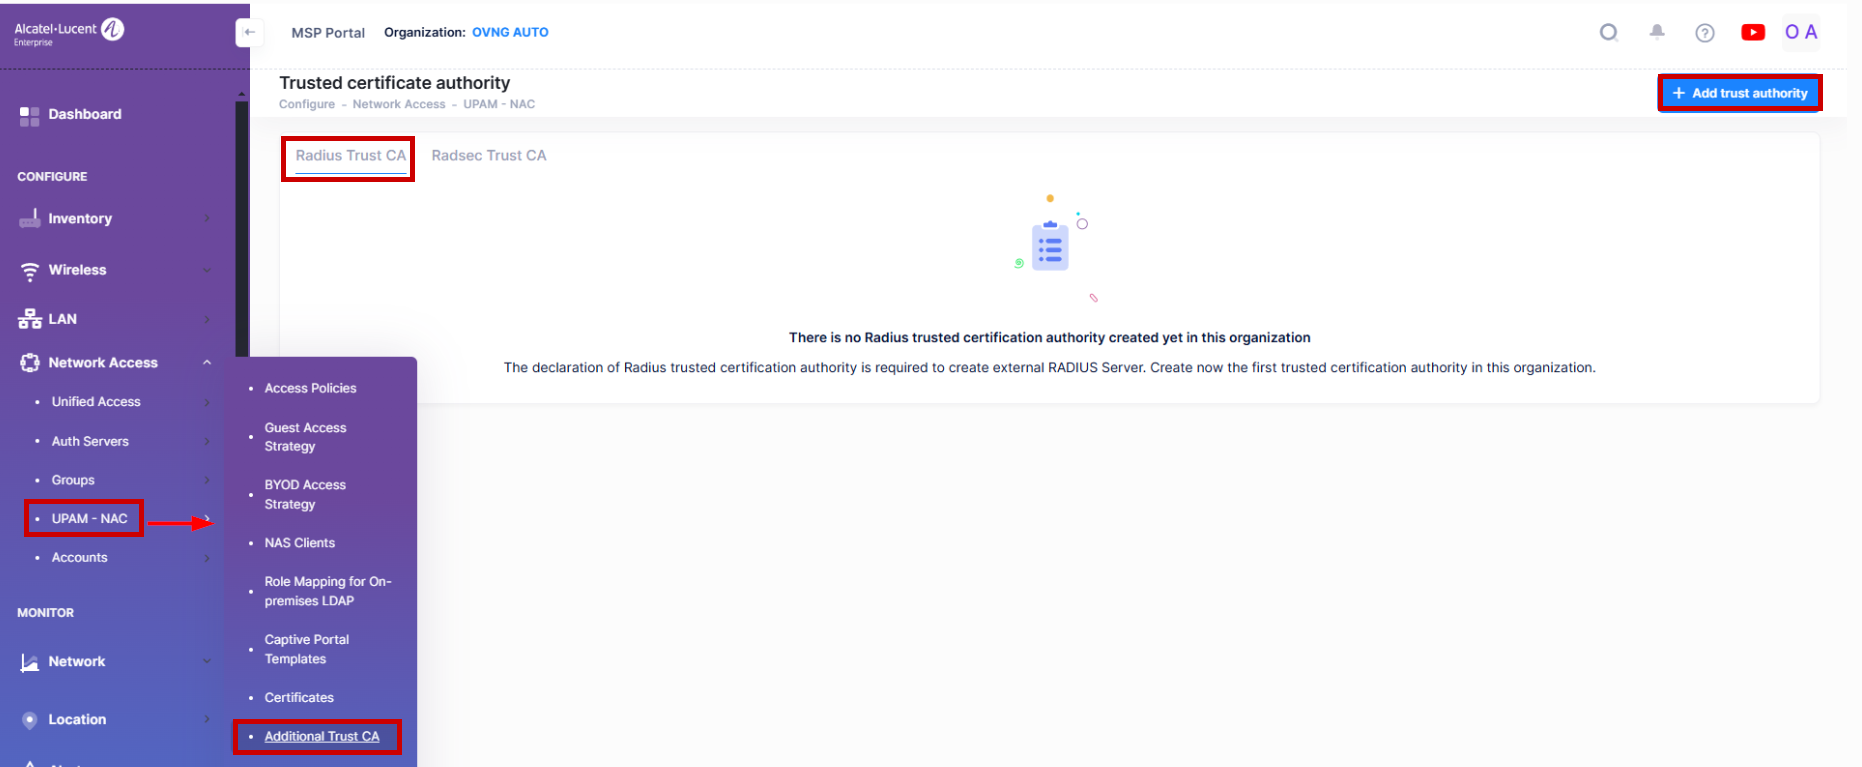
To manage Trusted Certificate Authorities, click on Network Access > UPAM-NAC > Additional Trust CA under the “Configure” section of the OmniVista Cirrus Menu.

Adding a Certificate to the Trust RADIUS Store
Click on one of the two tabs shown on the Trusted Certificate Authority screen to select which certificate you want to create and upload.
Adding a RADIUS Trust CA

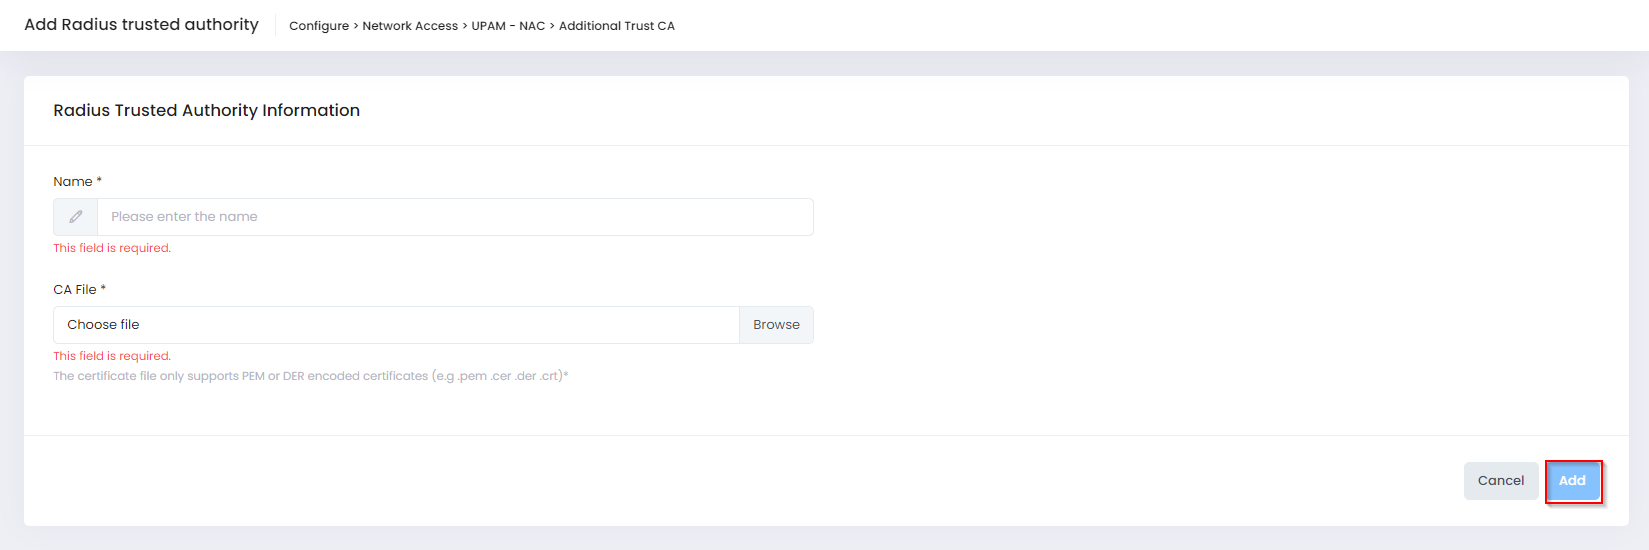
To add a RADIUS Trust CA to the UPAM RADIUS server for client authentication, select the RADIUS Trust CA tab on the Trusted Certificate Authority screen, then click on Add Trust Authority. The following RADIUS Trusted Authority Information screen opens:

Complete the fields as described below, then click on Add.
Name - Enter a name to identify the certificate.
CA File - Click on Browse to locate and import the CA Certificate (PEM or DER encoded certificates only).
The certificate is now available and appears in the list of certificates on the RADIUS Trust CA screen.
Trust a RADIUS Certificate Authority
When a RADIUS Trust CA is added, it is untrusted by default. To trust a certificate, select the certificate from the RADIUS Trusted Certification Authorities List and click on the Trust Certification icon under the “Actions” column. The “Status” column for the selected certificate will change from Untrusted to Trusted if the trust certificate operation was successful.
Note: The Trust Certificate option will only appear under the Actions column when there is at least one RADIUS Server Certificate in use under Network Access > UPAM-NAC > Certificates > Radius Server Certificate.
Adding a RadSec Trust CA

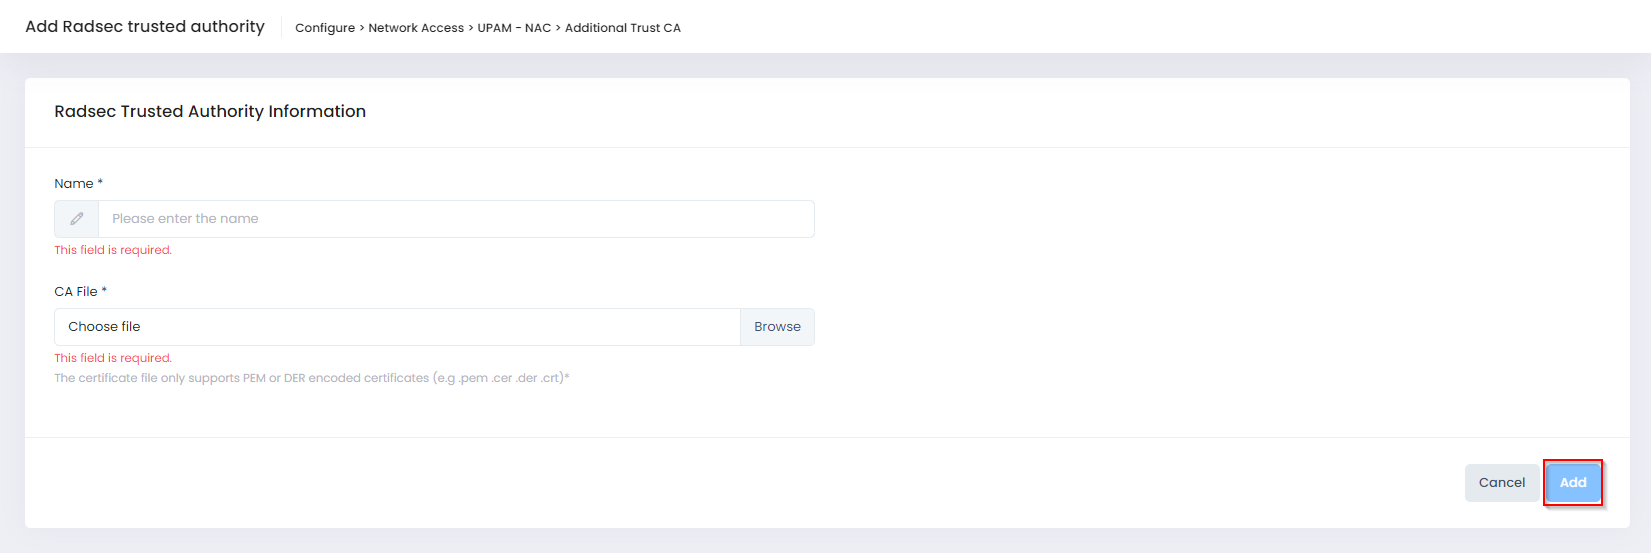
To add a RadSec Trust CA to the UPAM RADIUS server for client authentication, select the RadSec Trust CA tab on the Trusted Certificate Authority screen, then click on Add Trust Authority. The following RADIUS Trusted Authority Information screen opens:

Complete the fields as described below, then click on Add.
Name - Enter a name to identify the certificate.
CA File - Click on Browse to locate and import the CA file (PEM or DER encoded certificates only).
The certificate is now available and appears in the list of certificates on the RadSec Trust CA screen.
Downloading a Certificate
You can download a certificate from the RADIUS Trusted Authority Information List or from the RadSec Trusted Authority Information List to your machine. Select the certificate in the list and click on the download icon under the “Actions” column. The certificate will be downloaded to your designated Download folder.
Deleting a Certificate
Select a certificate in the RADIUS Trusted Authority Information List or from the RadSec Trusted Authority Information List and click on the Delete icon. Click Delete at the Confirmation Prompt.
Trusted Certificate Authority List
The RADIUS Trusted Authority Information List and the RadSec Trusted Authority Information List displays the following information for each certificate:
Name - Identifier for the certificate in UPAM.
CA File Name - The name of the uploaded CA Certificate file.
Created At - The date and time the certificate was added.
Validity Start Time - The start date and time when the certificate is valid.
Validity End Time - The end date and time when the certificate is valid.
Status - Indicates the trust status for the certificate (Trusted or UnTrusted).
Type - The type of Trust CA file stored in the RADIUS server (RADIUS or RadSec).
Issued By - The certification authority (CA) that issued the certificate.
Issued To - The entity to which the certificate is assigned.
