The UPAM-NAC Cloud Identity integrates with Microsoft Entra ID Connect via the Certificate Connector for Microsoft, enabling support for Employee 802.1x clients using EAP-TTLS. Microsoft Entra ID Connect is a standard protocol that ensures secure authentication and authorization between identity providers (like Entra ID) and relying party applications. Implementing Entra ID Connect allows organizations to establish trust between their identity provider and third-party applications, facilitating seamless and secure access to resources. Additionally, Microsoft Entra ID can synchronize with on-premises Active Directory, providing authentication access to OmniVista Cirrus 10.
Before you begin, you must create an identity in Microsoft Entra ID (formerly Azure Active Directory). For more details, refer to Microsoft Help.
In this release of UPAM, cloud identity is only available for devices that use 802.1X authentication. Cloud identity cannot be used with BYOD or Guest Captive Portal at this time.
To apply a Cloud Identity to AP's SSID, Assign the Cloud Identity to an Access Policy in Authentication Strategy section. You can then assign this Access Policy to a SSID Authentication Strategy and choose the Access Policy.
Microsoft Entra ID Overview
Microsoft provides an overview of Microsoft Entra Domain Services (part of Microsoft Entra ID) to help customers continue using their legacy applications. Legacy domain services, such as domain join, group policy, LDAP, and Kerberos/NTLM authentication, are still supported, with the key difference being that these services now run in the cloud.
Additionally, Microsoft Entra can serve as the backend account database to support 802.1X clients using EAP-TTLS with PAP as the inner authentication protocol.
Implementing Microsoft Entra ID provides organizations with several advantages.
-
Identity Management: Allows organizations to create, manage, and authenticate user identities across multiple platforms and services.
-
Access Control: Enables the definition and enforcement of access policies based on user roles, groups, and permissions to protect sensitive data and resources.
-
Single Sign-On (SSO): Provides users with the convenience of accessing multiple applications and services using a single set of credentials, boosting productivity.
-
Multi-Factor Authentication (MFA): Enhances security by requiring users to verify their identity through multiple authentication factors, such as passwords, biometrics, or one-time codes.
Creating a Cloud Identity
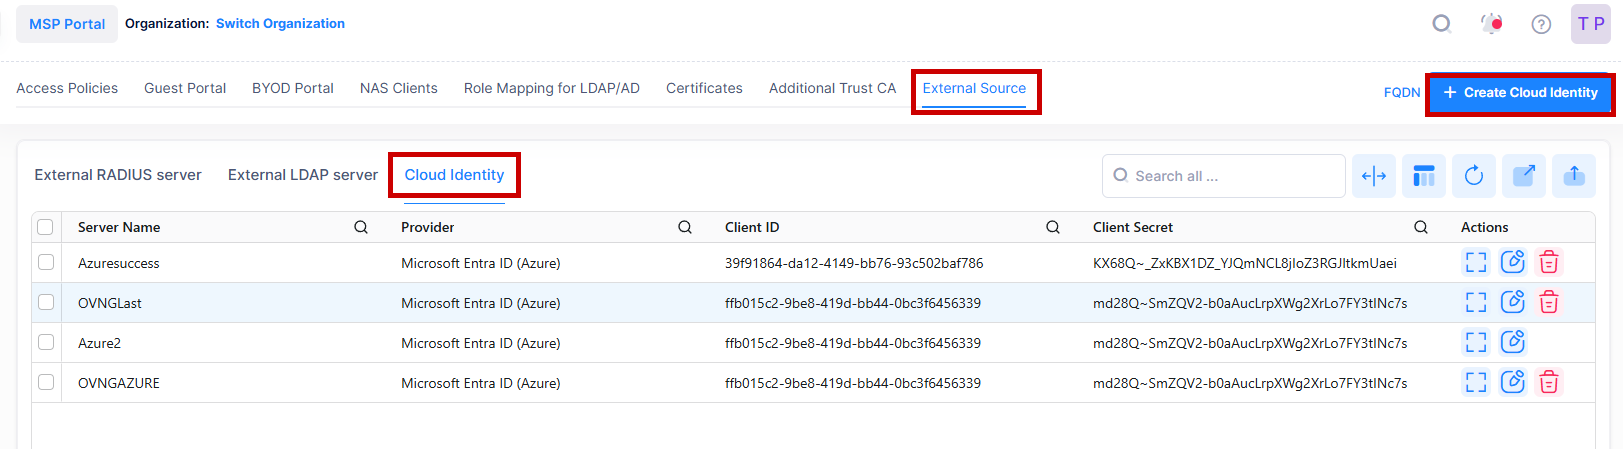
To create a Cloud Identity, click on Network Access > UPAM-NAC > External Source under the “Configure” section of the OmniVista Cirrus Menu.
Click on Cloud Identity tab shown on the External Source screen to create a Cloud Identity.
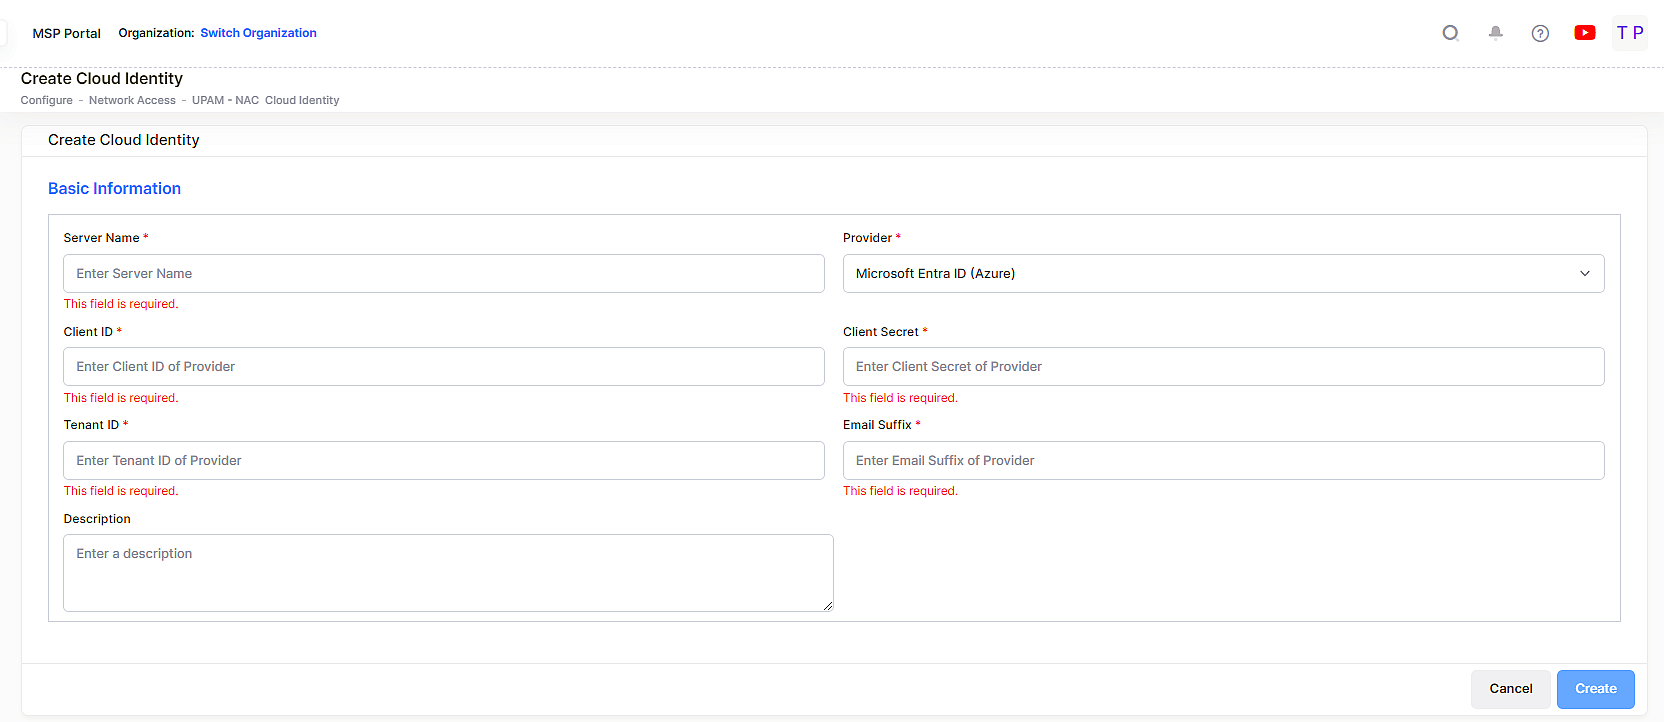
Complete the fields as described below, then click on Create.
-
Server Name - Enter a name to identify the Cloud Identity Server configuration..
-
Provider- Select the name of the Cloud service provider. (Microsoft Entra ID)
-
Client ID - Enter the Client ID Provider
-
Client Secret - Enter the Client Secret of the Provider.
-
Tenant ID- .Enter the Tenant ID of the Provider.
-
Email Suffix- Enter the email suffix of the Provider.
-
Description- Enter a description for the Cloud Identity.
Click Create to create a Cloud Identity.
Editing a Cloud Identity
Select a server name in the Cloud Identity List and click on the Edit icon. The Edit Cloud Identity screen opens on which you can edit the fields as described above, When you are done making changes to the Server attributes, click on Save to return to the External RADIUS Server List.
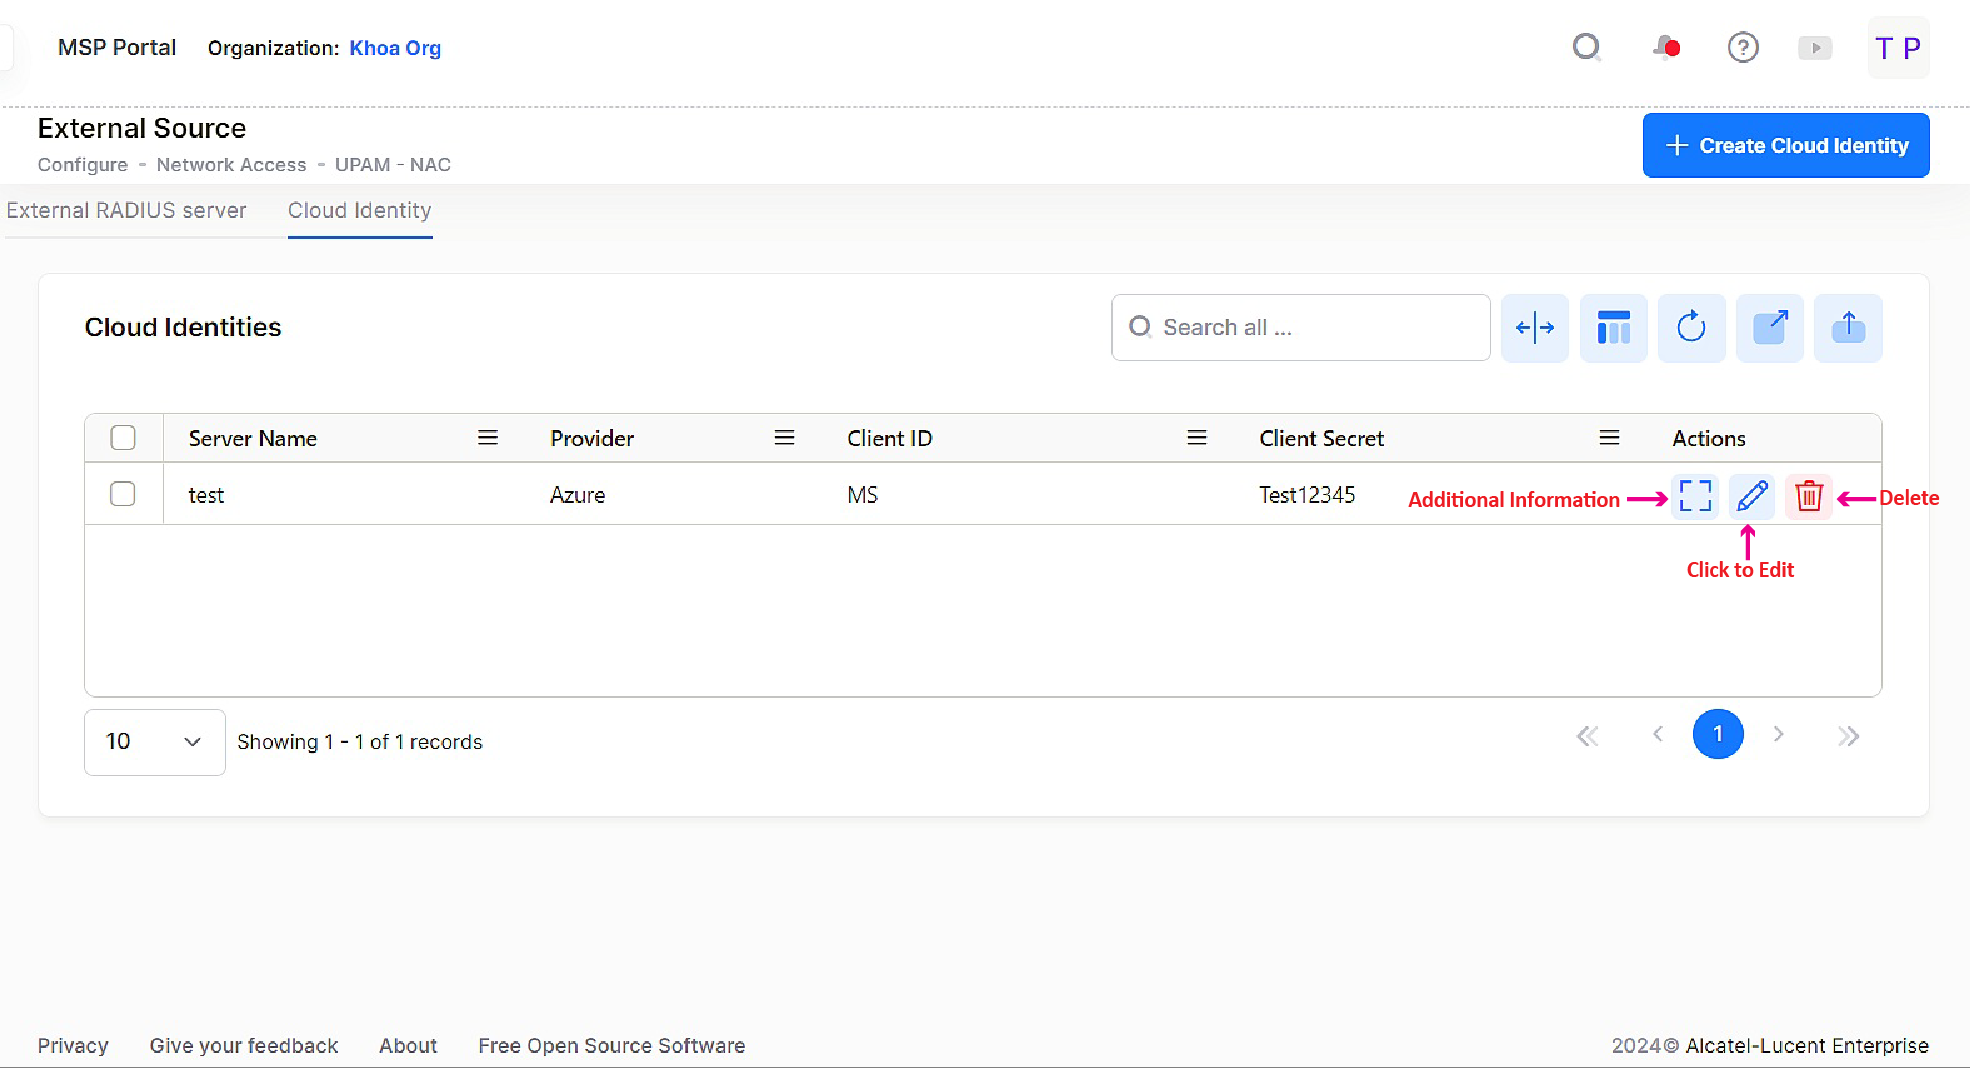
Deleting a Cloud Identity
Select a server name in the Cloud Identity List and click on the Delete icon. Click on Delete to confirm deleting the External RADIUS Server List.
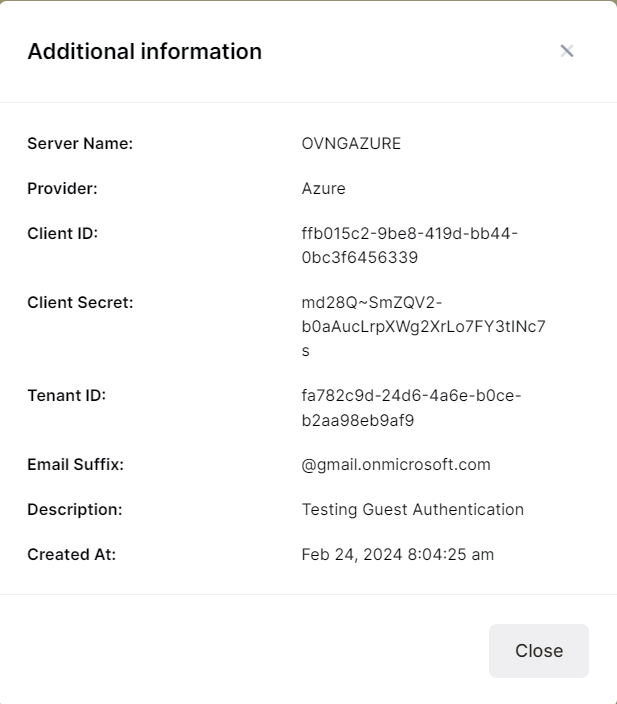
View Information About a Cloud Identity
Select a server name in the Cloud Identity List and click on the Additional Information icon. The Additional Information Cloud Identity screen opens on which you can view the fields of the selected server.