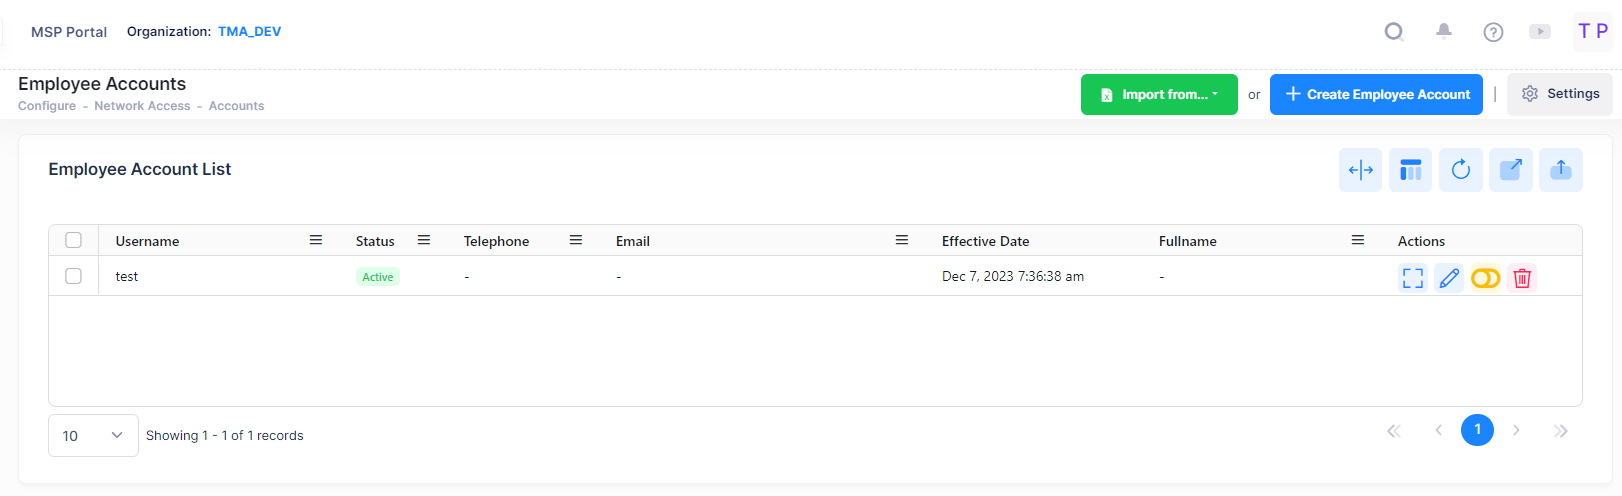
The Authentication Employee Accounts screen is used to create the login accounts for the employee users in the UPAM network. The employee accounts screen will display all configured employee accounts under the UPAM network.
Use the Employee Account list screen to display information about all of the configured employee accounts in the UPAM database. This screen also allows you to create, edit, and delete accounts. To access the Employee Accounts screen, click on Network Access > Accounts > Employee Accounts under the “Configure” section of the OmniVista Cirrus Menu.
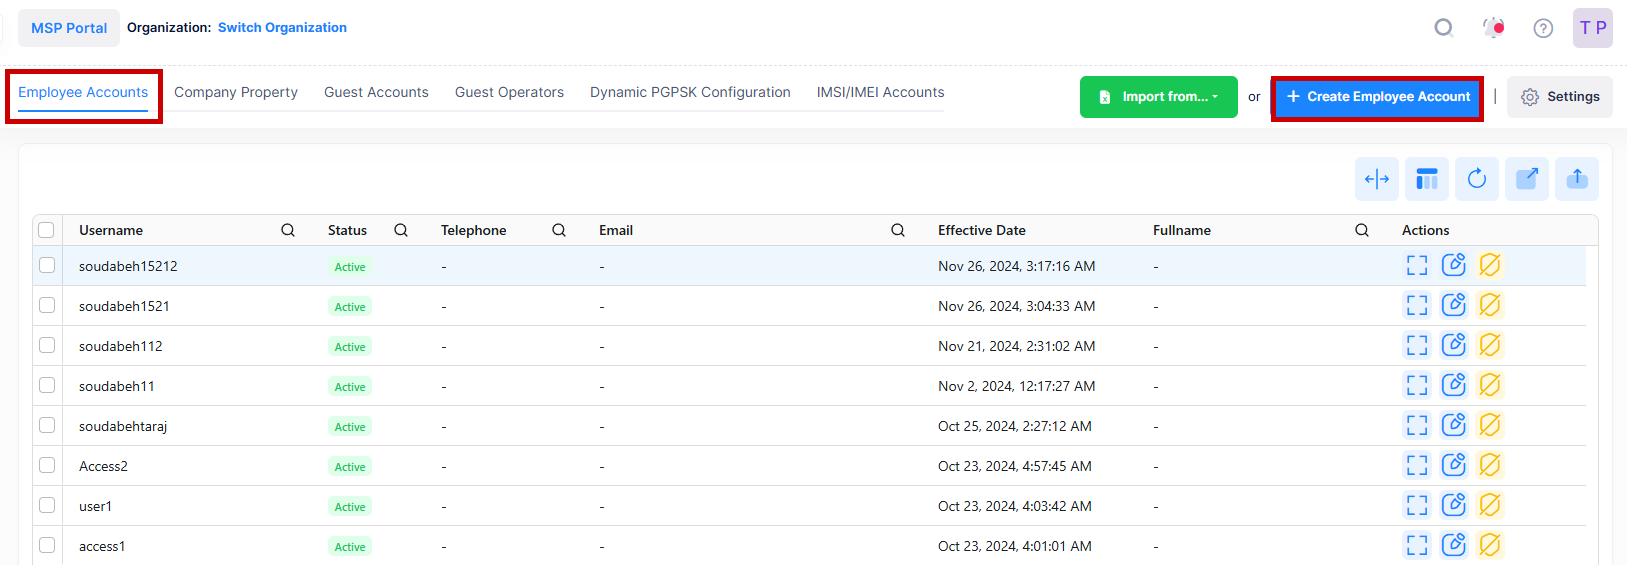
Data displayed in each widget can be exported into a CSV, PDF or Excel sheet format. You can also switch the widgets to full-screen mode for a better display.
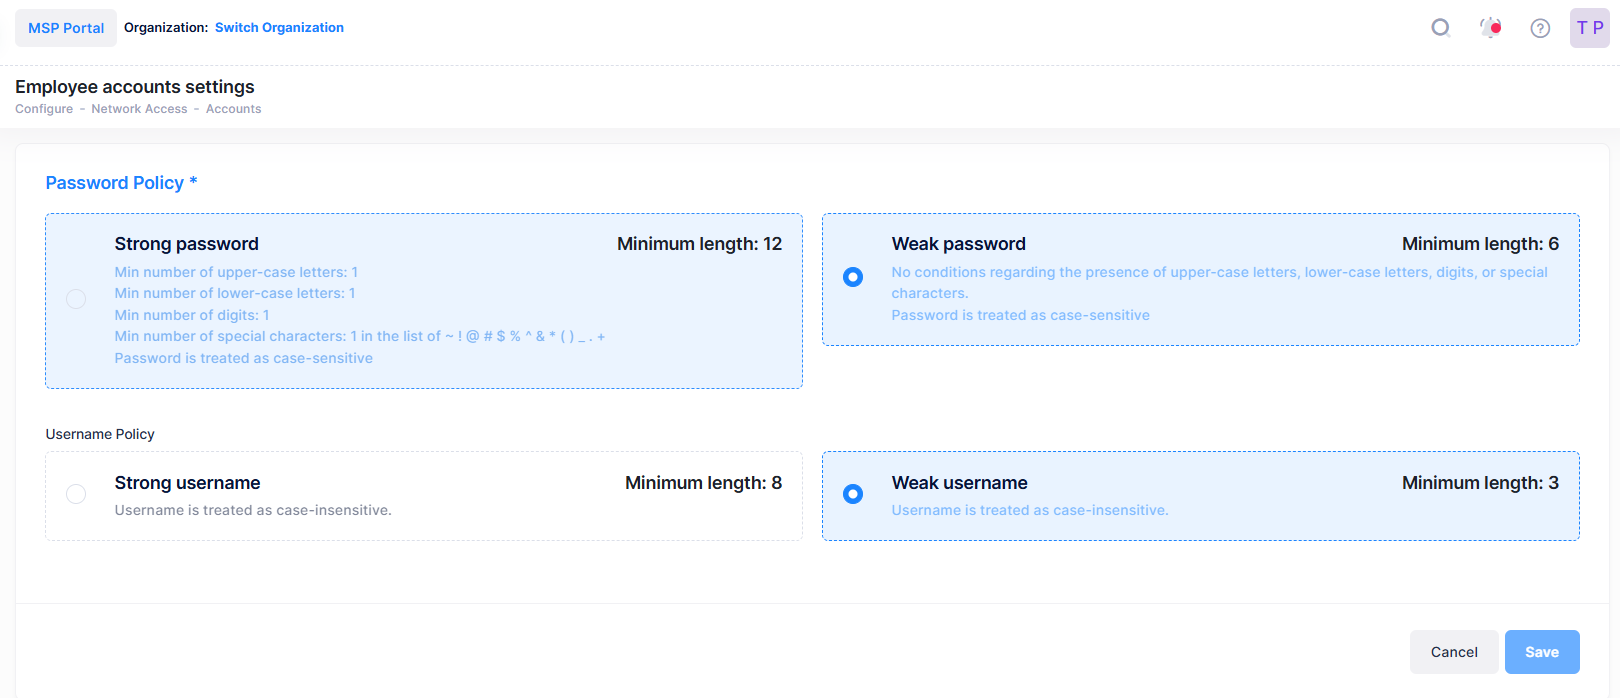
Employee Accounts Settings
To create Employee Accounts username and password , go to Settings to access the Employee Account Settings screen as shown below.
-
Password Policy - Select the password policy to enforce when the user logins in.
-
Strong Password - Minimum password length is 12 with the following required guidelines:
-
Min number of upper-case letters: 1
-
Min number of lower-case letters: 1
-
Min number of digits: 1
-
Min number of special characters: 1 in the list of ~ ! @ # $ % ^ & * ( ) _ . +
-
Password should not contain username
-
Password is treated as case-sensitive
-
-
Weak Password - Minimum password length is 8 with no required guidelines. Password is case-sensitive.
-
-
Username Policy - Select the username policy to enforce when the user logins in.
-
Strong Username - Minimum username length is 8 characters. Username is case insensitive.
-
Weak Username - Minimum username length is 3 characters. Username is case insensitive.
-
Creating an Employee Account
There are three methods for creating an Employee Account for an UPAM Network: Import an Excel XLSX file, Import a CSV file or manually create an Employee Account.
To create a new employee account, click on the add icon to display the Create Employee Account screen. The Create Employee Account screen opens as shown below.
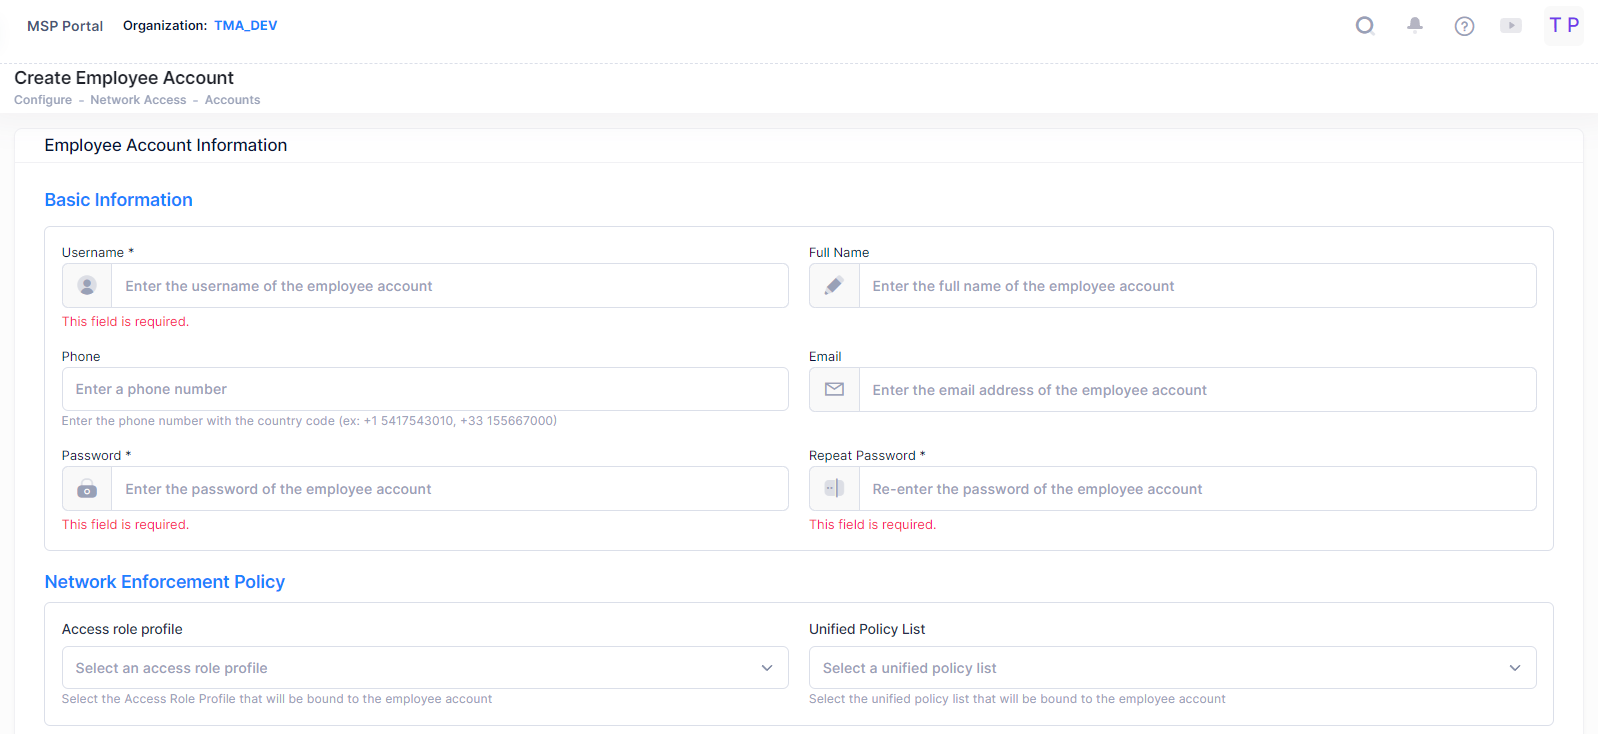
Complete the following fields as described:
-
Username: Username for the employee account.
-
Full Name: Full Name of the employee.
-
Password: Password for the employee account.
-
Repeat Password: Re-enter to confirm the employee password.
-
Telephone: Telephone number of the employee. (optional).
-
E-mail: E-mail address of the employee. (optional).
-
Access Role Profile: Access Role Profile that is bound to the employee account.
-
Unified Policy List: Policy List that is bound to employee account.
-
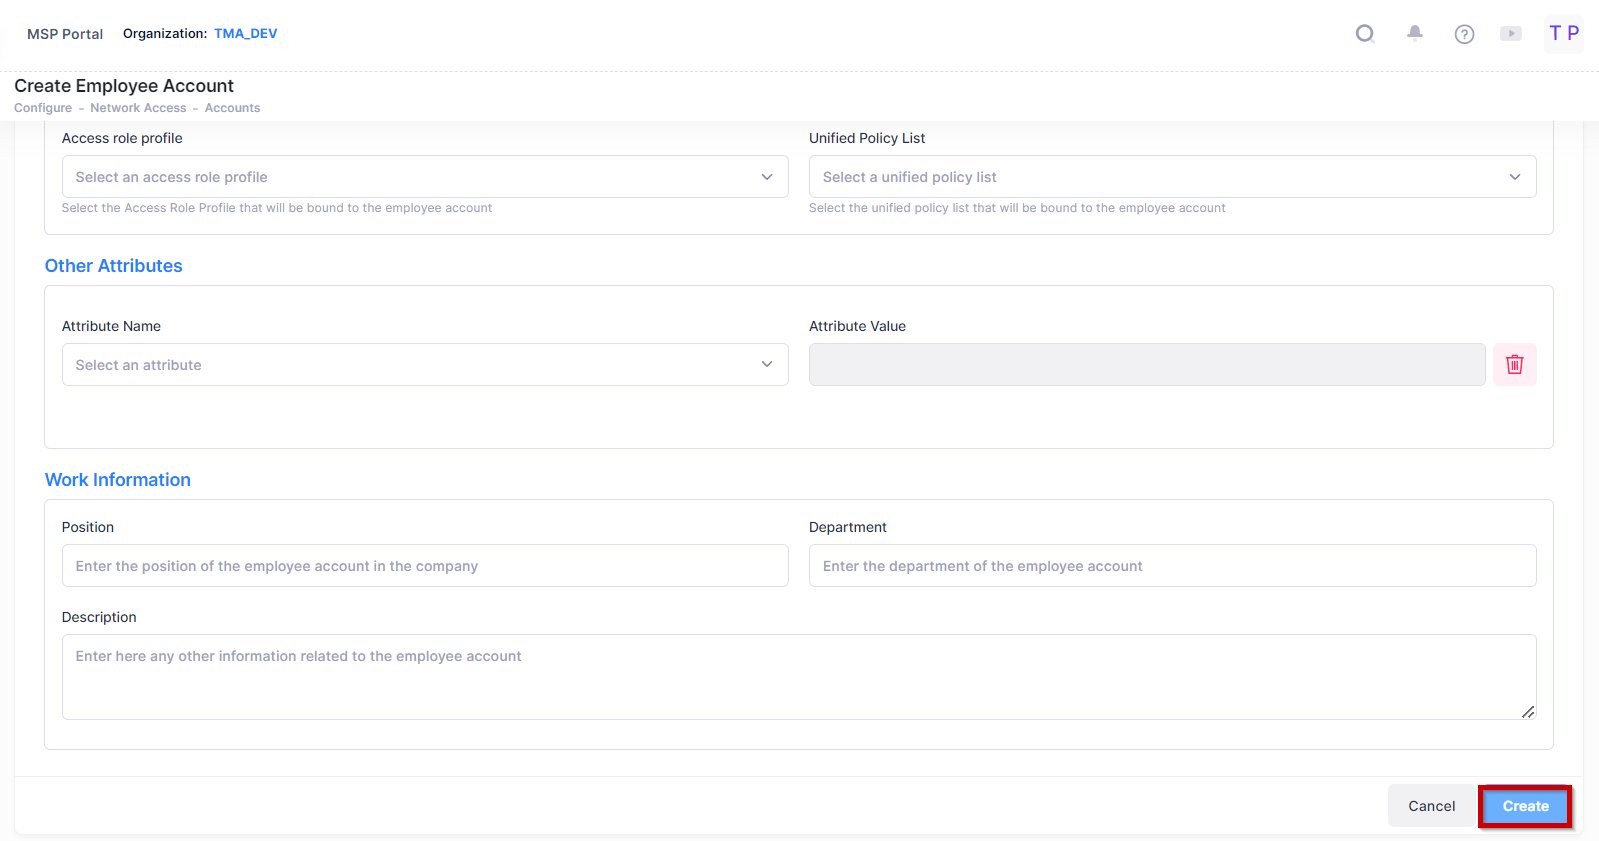
Attribute Name: Select an attribute from the drop-down list, enter a value and click on the Add icon to add the attribute. Repeat the process to add the additional attributes.
-
Session Timeout: The Session Timeout Interval is the maximum number of consecutive seconds of connection allowed to the user before termination of the session or prompt.
-
Accounting Interim Interval: Interval for RADIUS accounting, in seconds.
-
WISPr Bandwidth Max Up: The user upstream bandwidth in Kbit/s.
-
WISPr Bandwidth Max Down: The user downstream bandwidth in Kbit/s.
-
Tunnel Private Group ID - The Tunnel Private Group ID is used to determine the UNP for the device, if applicable. It is a RADIUS attribute that indicates the group ID for a particular tunnel session. It may be included in the Access-request packet if the tunnel initiator can pre-determine the group resulting from a particular connection, and should be included in the Access-Accept packet if this tunnel session is to be treated as belonging to a particular private group. In most cases, L2 VLAN domain is a private group, and the Tunnel Group ID is pointing to the VLAN ID. (Range= 1-4094).
-
-
Attribute Value: The user downstream bandwidth in kbit/s. By default, it is set to 0.
-
Department: Department of the employee.
-
Position: Employee Position in the organization.
-
Description: Description of employee account.
After you have finished with the field values, click on the Create button to create the account.
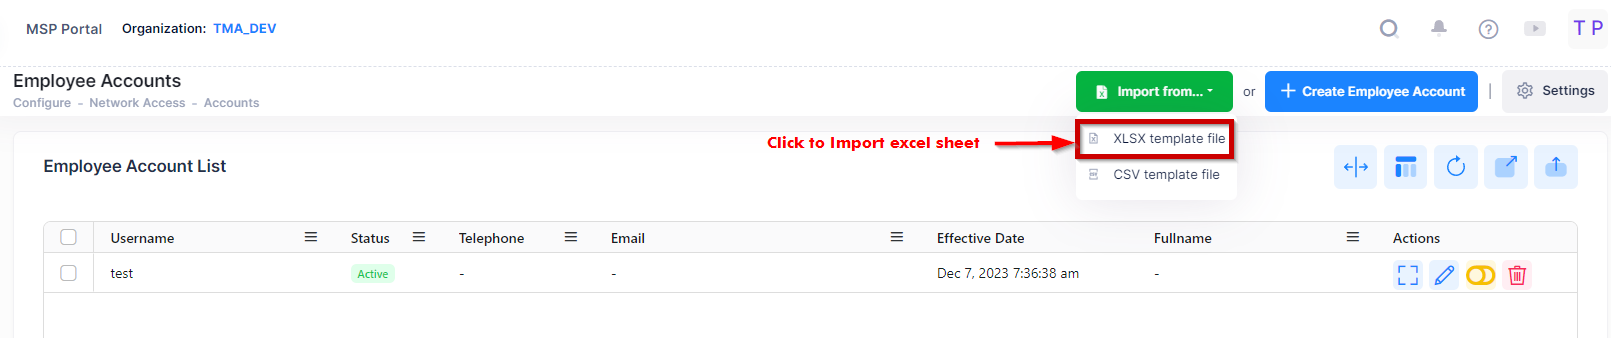
Import the Employee Accounts from an Excel Sheet
To import multiple employee accounts from an existing Excel sheet (.xlxs), click on Import from… and select XLSX template file. You will then be prompted to download an XLSX template file that contains steps on how to define the employee account in the Excel file to create multiple accounts.
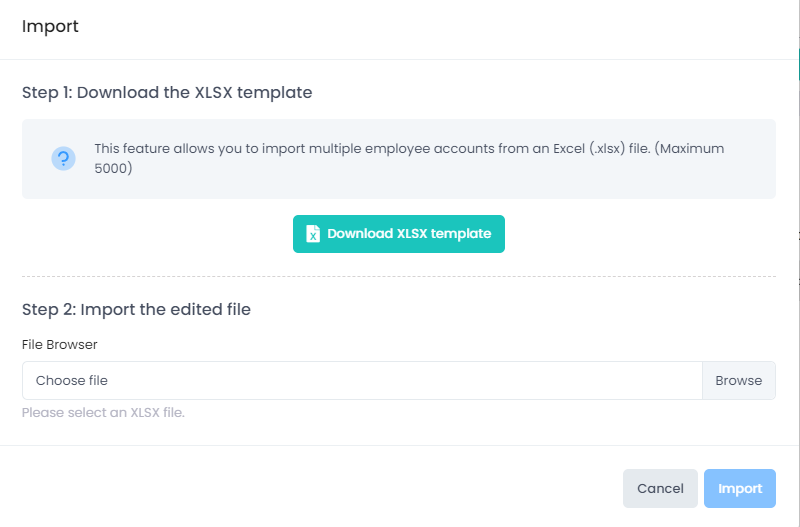
Step 1: Click on Download XLSX template and specify where you would like to save the template file. When you open the template file, instructions are provided about how to define the employee account to be added.
The following sample template file is an example of the template provided for add employee account.
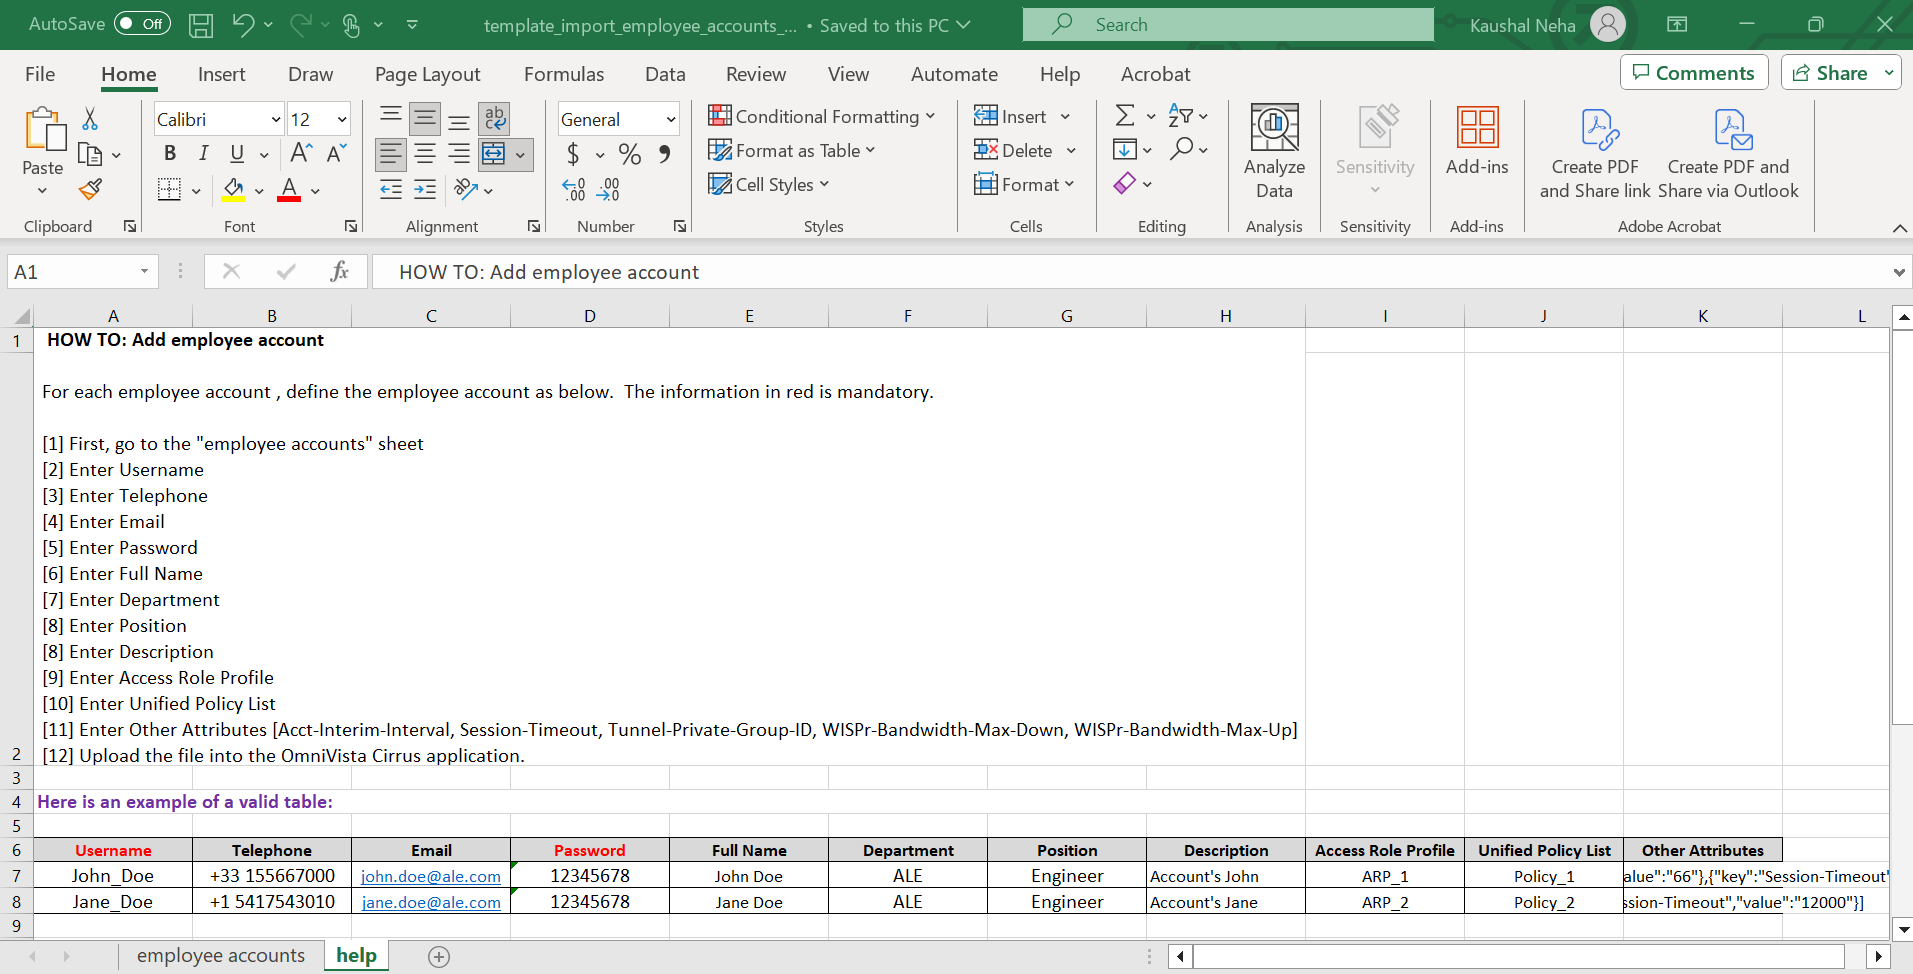
Fill out the template with information for each employee account that is to be imported.
Step 2: Import the edited file and select the site of attachment
-
File Browser - Click in this field to find and select the existing template file to import.
Once the Import form is complete, click on Import. The Employee Account list is populated with the imported Employee Accounts.
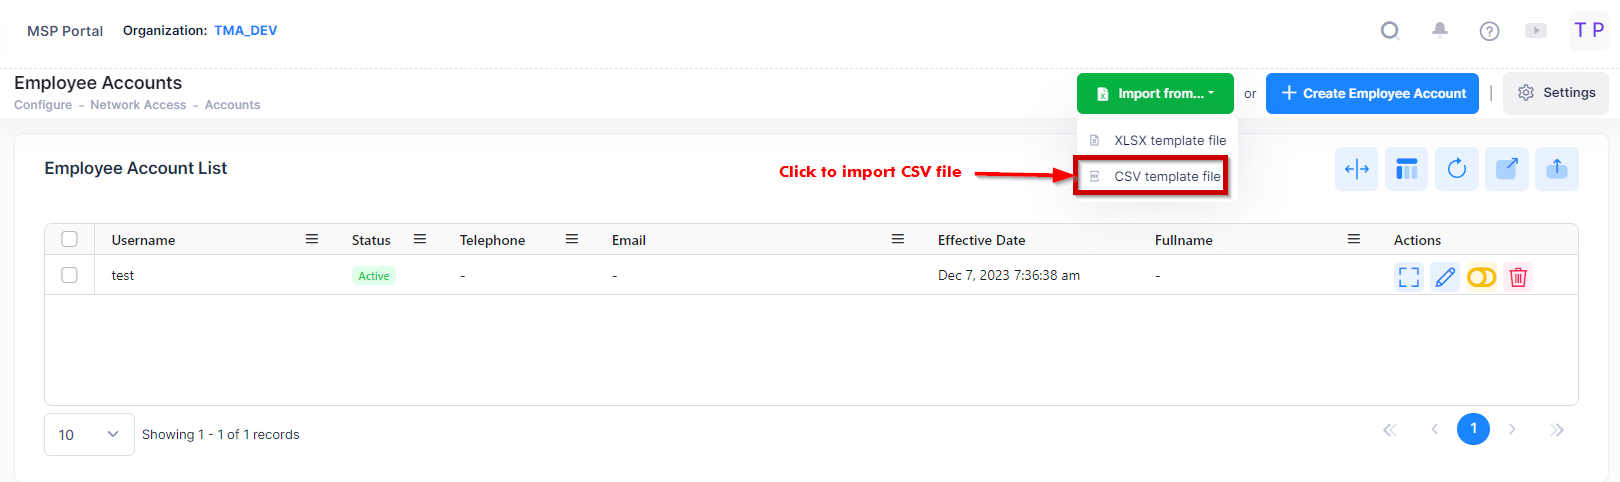
Import the Employee Accounts from CSV File
To import multiple employee accounts from an existing .csv file, click on Import from… and select CSV template file. You will then be prompted to download the CSV template file that contains steps on how to define the employee account from a csv file to create multiple accounts.
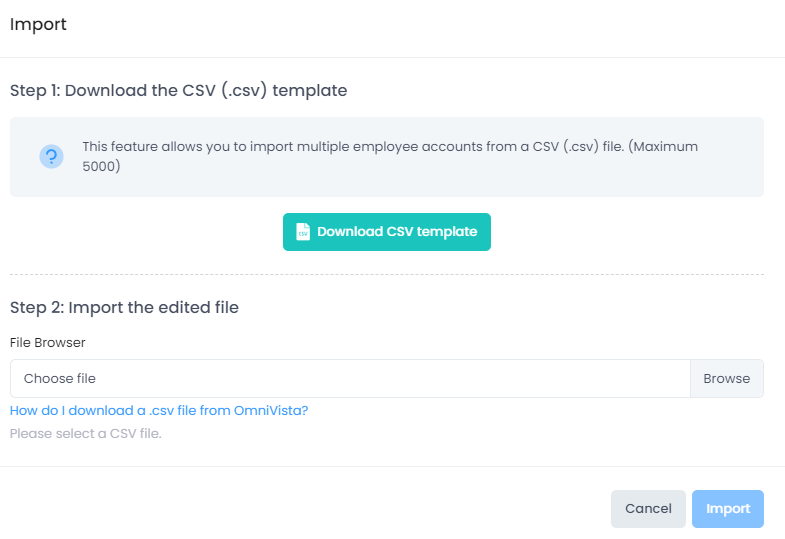
Step 1: Download the CSV template file and add employee account information based on the template instructions.
Step 2: Import the edited file and select the site of attachment
Complete the following fields as described to select and upload the CSV file.
-
File Browser - Click in this field to find and select the existing CSV file to import.
Click on Import. The employee account list is populated with the imported employee accounts.
Editing an Employee Account
The Employee account can be edited by using the Actions menu from the Employee Account List home page.
Select an Employee from the Employee Account List and click on Actions to open the Actions menu. Select “Edit” option to edit the account.
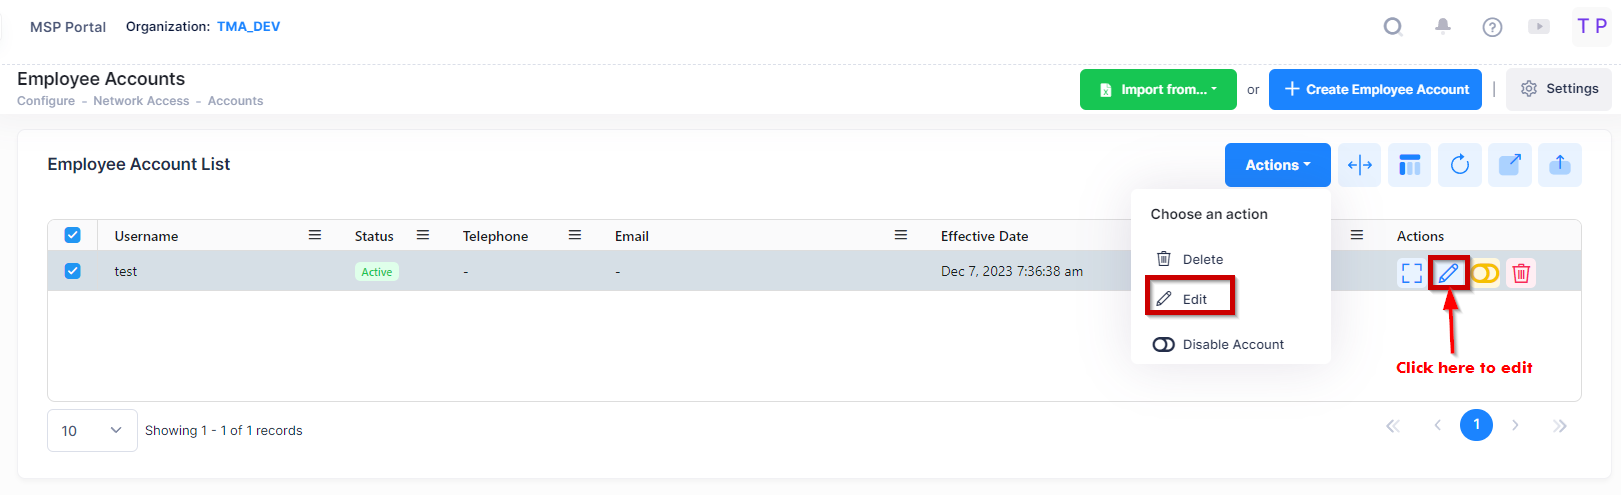
The edit Employee Account screen appears and edit the fields as described above to make any changes. Then click on the Save button to save the changes. Note that you cannot edit an username.
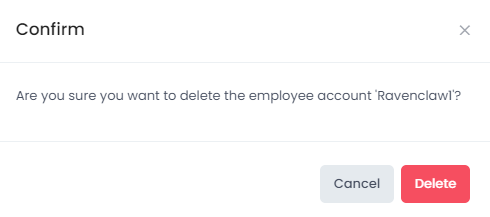
Deleting an Employee Account
Select an Employee from the Employee Account list and click on the Delete icon under the “Actions” column or click on the Actions button and select Delete from the drop-down menu. When the following confirmation prompt appears, click on Delete to delete the Employee Account.
Display Employee Account
The Employee Account list displays information for the all configured Employee Accounts. To display detailed information about a specific profile, click on the Additional Information icon under the “Actions” column. The information displayed on this screen is defined below.
-
Username - User name for the employee account.
-
Telephone - Optional telephone number of the employee.
-
Email - Optional Email address of the employee.
-
Effective Date - The date and time the account was created.
-
Full Name - Full name of the employee.
-
Department - Department of the employee.
-
Position - Employee position in the company.
-
Description - Description of the employee account.
-
Access Role Profile - Access Role Profile that is bound to the employee account. It is prior to the Access Role Profile configured in Authentication Strategy.
-
Policy List - Policy List that is bound to the employee account. It is prior to the Policy List configured in an Authentication Strategy.
-
Status - The administrative status of the account (Enable/Disable).