A Layer 2 profile determines how control frames ingressing on an access port are processed.
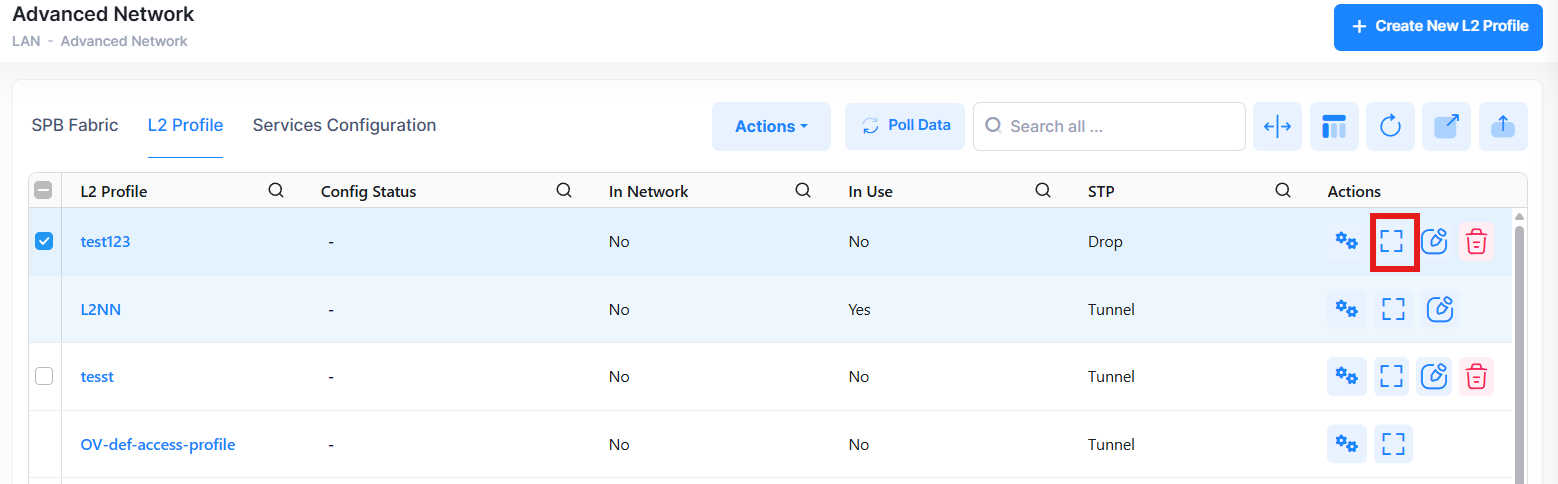
Use the L2 Profile screen to display information about all of the configured L2 profiles. This screen also allows you to create, edit, and delete L2 profiles. To access the L2 profile screen, click on LAN > Advance Network under the “Configure” section of the OmniVista Cirrus Menu and select the L2 Profile. The L2 Profile screen is displayed.
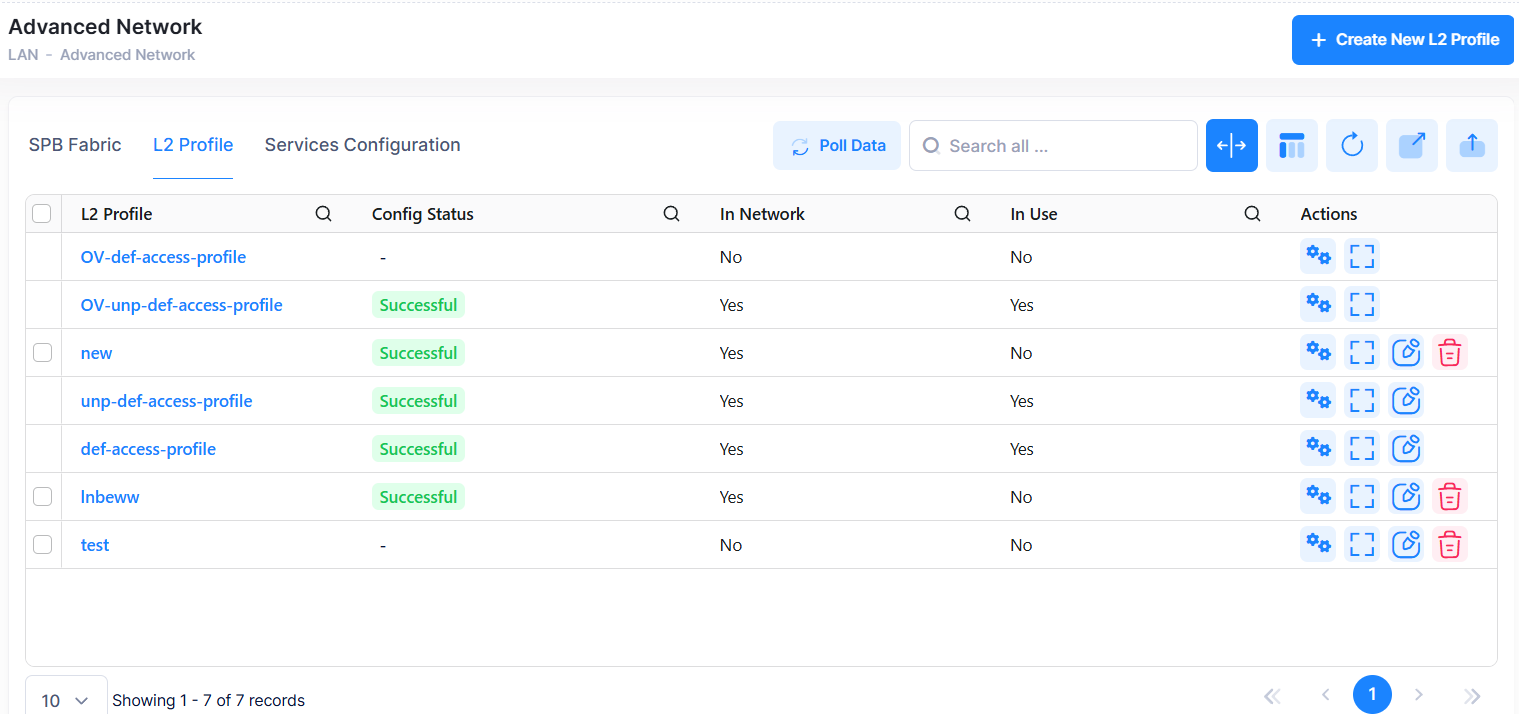
Two default profiles are visible on the L2 Profile screen: OV-def-access-profile for service access ports and OV-unp-def-access-profile for UNP access ports. These are the default profiles managed by OV. When a port is configured as an access port, a default L2 profile (OV-def-access-profile) is applied with the default values for processing control frames. When a port is configured as a UNP access port, default L2 profile (OV-unp-def-access-profile) is assigned. These default L2 profiles cannot be edited or deleted.
The screen also displays two additional L2 profiles: def-access-profile and unp-def-access-profile. These default profiles originate from the switch and appear in the UI through polling. They function like standard profiles, allowing viewing, editing, and deletion (if permitted).
Creating an L2 Profile
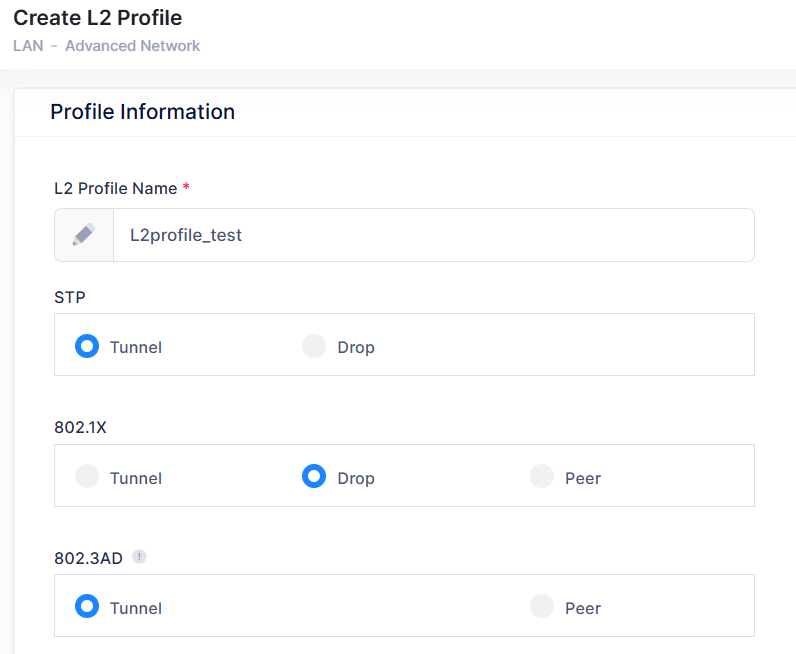
To create a new L2 profile, click on Create New L2 Profile at the top of the L2 Profile screen and complete the fields as described below.
-
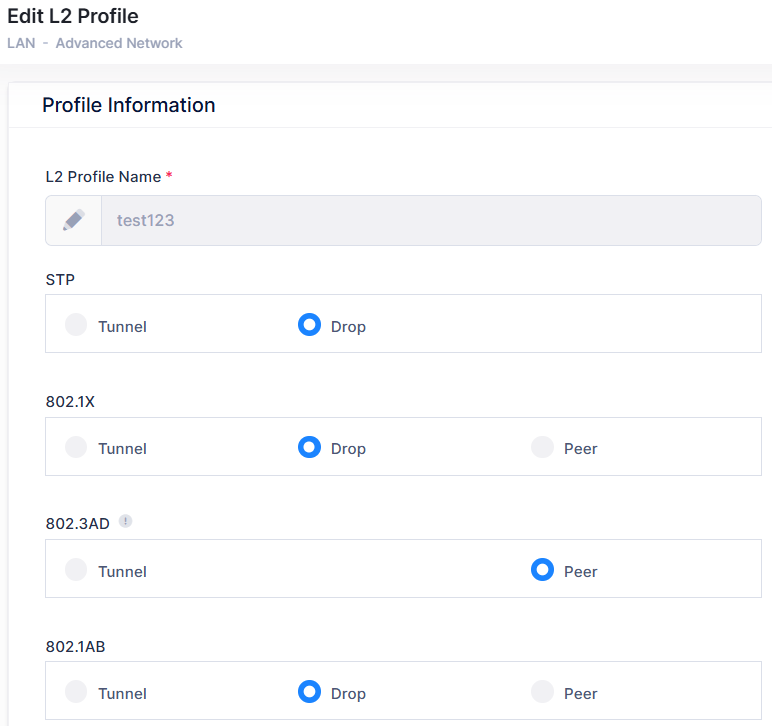
L2 Profile Name - Enter the L2 profile name.
-
STP - Specify how to process Spanning Tree BPDUs by either selecting Tunnel or Drop option.
-
Tunnel - Select this option to tunnel Spanning Tree BPDUs across the provider network.
-
Drop - Select this option to discard the Spanning Tree BPDUs.
-
-
802.1X - Specify how to process 802.1x control frames by either selecting Tunnel, Drop, or Peer option.
-
Tunnel - Select this option to tunnel 802.1x control frames across the provider network.
-
Drop - Select this option to discard the 802.1x control frames.
-
Peer - Select this option to allow the access port to participate in the specified protocol. 802.1x control frames are not sent to the network side of the node.
-
-
802.3AD - Specify how to process process 802.3AD control frames by either selecting Tunnel or Drop option.
-
Tunnel - Select this option to tunnel 802.3AD control frames across the provider network.
-
Drop - Select this option to discard 802.3AD control frames.
-
-
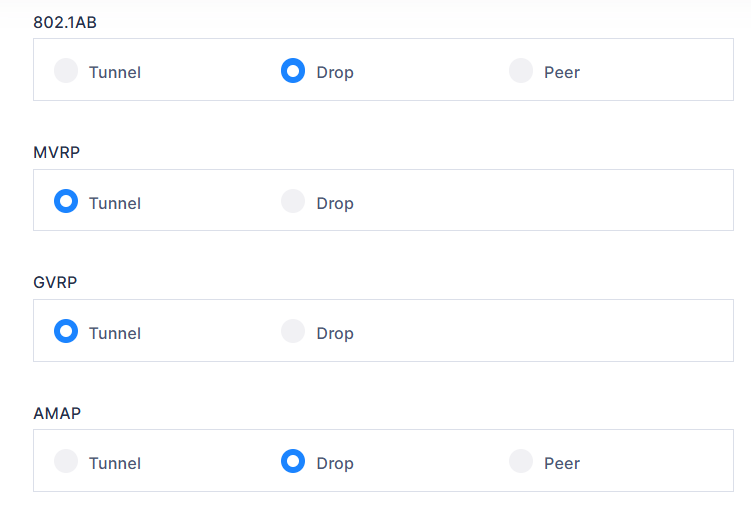
802.1AB - Specify how to process 802.1AB control frames by either selecting Tunnel, Drop, or Peer option.
-
Tunnel - Select this option to tunnel 802.1AB control frames across the provider network.
-
Drop - Select this option to discard 802.1AB control frames.
-
Peer - Select this option to allow the access port to participate in the specified protocol. 802.1AB control frames are not sent to the network side of the node.
-
-
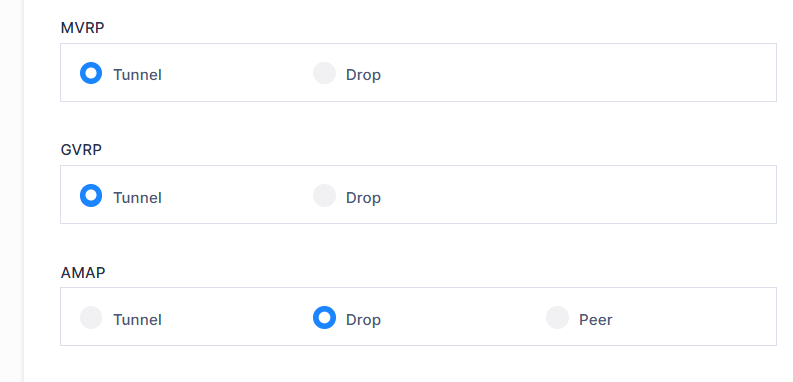
MVRP - Specify how to process MVRP (Multiple VLAN Registration Protocol) packets by either selecting Tunnel or Drop option.
-
Tunnel - Select this option to tunnel MVRP packets across the provider network.
-
Drop - Select this option to discard MVRP packets.
-
-
GVRP - Specify how to process GVRP (GARP VLAN Registration Protocol) packets by either selecting Tunnel or Drop option.
-
Tunnel - Select this option to tunnel GVRP packets across the provider network.
-
Drop - Select this option to discard GVRP packets.
-
-
AMAP - Specify how to process Alcatel-Lucent Enterprise Management Adjacency Protocol packets by either selecting Tunnel, Drop, or Peer option.
-
Tunnel - Select this option to tunnel AMAP packets across the provider network.
-
Drop - Select this option to discard AMAP packets.
-
Peer - Select this option to allow the access port to participate in the specified protocol. AMAP packets are not sent to the network side of the node.
-
When you are finished, click on the Create button.
Editing an L2 Profile
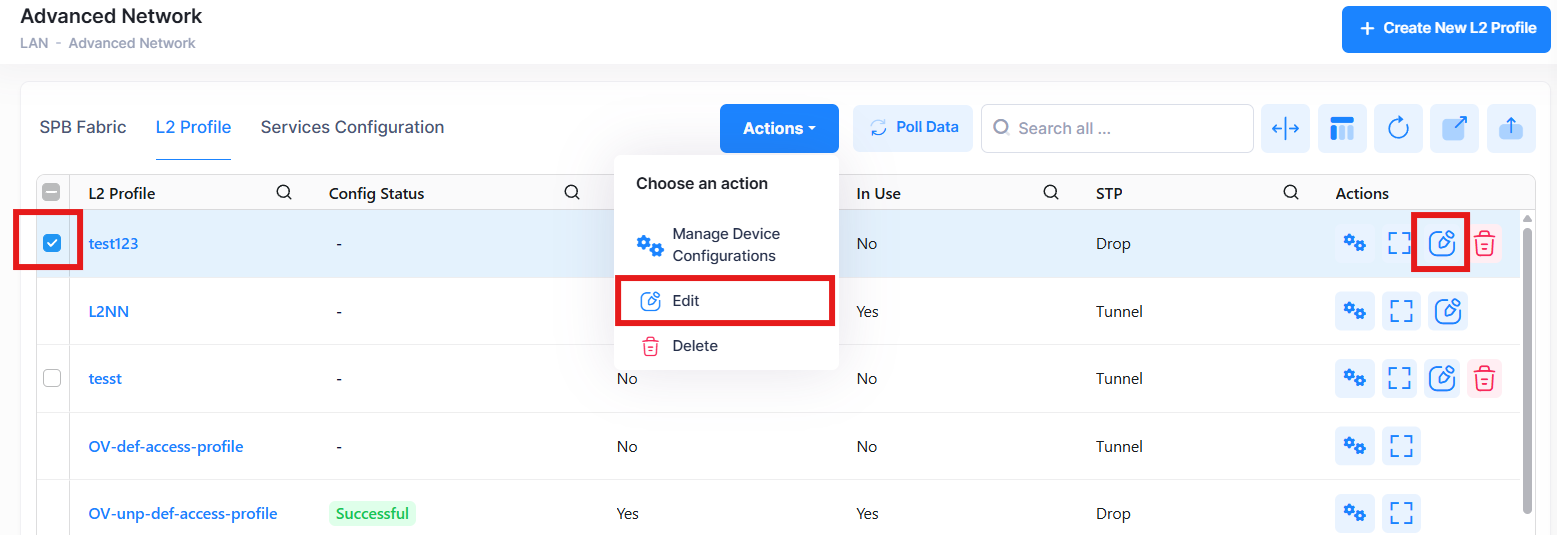
You can edit the parameter values for an existing L2 Profile by accessing the Edit L2 Profile screen.
Use one of the following methods to access the Edit an L2 Profile screen:
-
Select the profile to edit by clicking on the checkbox next to the profile, click on Actions, then select Edit from the drop-down menu.
-
Click on the pencil icon under the “Actions” column next to the profile that you want to edit.
The following Edit L2 Profile screen is displayed. Edit the required fields and then click Save.
You cannot edit the OV default profiles.
Deleting an L2 Profile
Use one of the following methods to delete an L2 Profile:
-
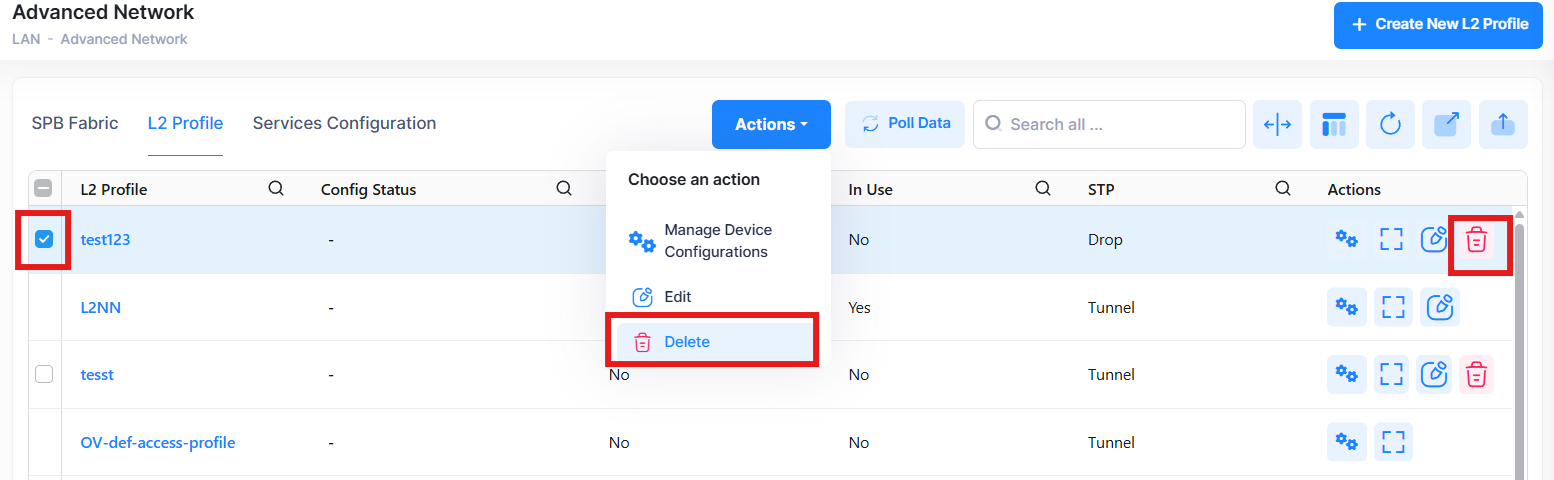
Select the profile to delete by clicking on the checkbox next to the profile, click on Actions, then select Delete from the drop-down menu.
-
Click on the trash can icon under the “Actions” column next to the profile that you want to delete.
When you select the profile you want to delete, the following confirmation prompt appears:
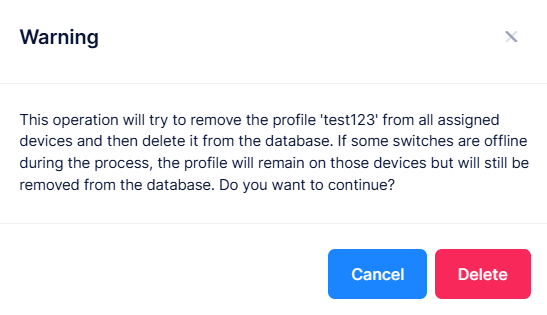
Click Delete to confirm that you want to delete the L2 profile.
-
You cannot delete the OV default profiles, the profiles that are currently in the network, and the profiles that are in use.
-
Remove any profile associations with access ports before attempting to delete the profile.
Display L2 Profile Additional Information
To display additional information about a specific L2 profile, click on the Additional Information icon under the “Actions” column.
The following Additional Information window is displayed.
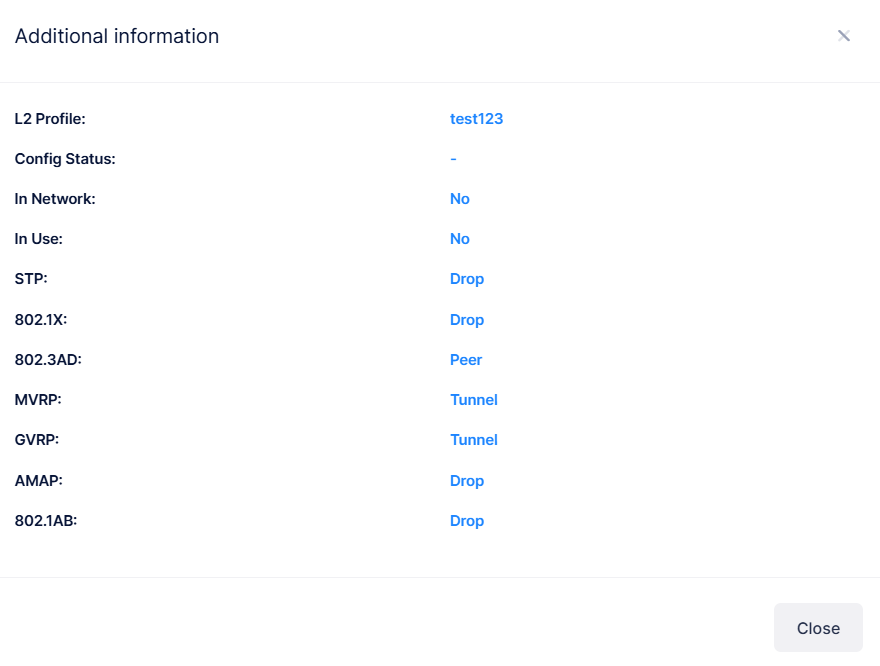
The following information is displayed for each L2 Profile:
-
L2 Profile - The name of the L2 Profile.
-
Config Status - The status of applying the profile to devices (Successful, Failed, Pending, or Partially Failed).
-
Pending - The configuration is being pushed to the devices and has still not received any response from any device.
-
Failed - The configuration failed to apply to all the selected devices. Possible reasons include a timeout while applying the configuration due to the device being unreachable or a network issue, or the configuration being invalid and rejected by the device. Check alerts to identify the specific reason.
-
Successful - The configuration is pushed to all the selected devices successfully.
-
Partially Failed - The configuration is pushed to some devices successfully, while to others it failed or remains in a pending state.
-
-
In Network - Displays that the L2 profile is in the network (Yes or No).
-
In Use - Displays that the L2 profile is linked to another profile (SPB-SAP configuration or Access Auth Profile) or assigned to an access port (Yes or No).
-
STP - Indicates how Spanning Tree traffic control packets are processed.
-
802.1X - Indicates how IEEE 802.1x control packets are processed.
-
802.3AD - Indicates how IEEE 802.3AD control packets are processed.
-
802.1AB - Indicates how IEEE 802.1AB control packets are processed.
-
MVRP - Indicates how MVRP packets are processed.
-
GVRP - Indicates how GVRP packets are processed.
-
AMAP - Indicates how AMAP packets are processed.
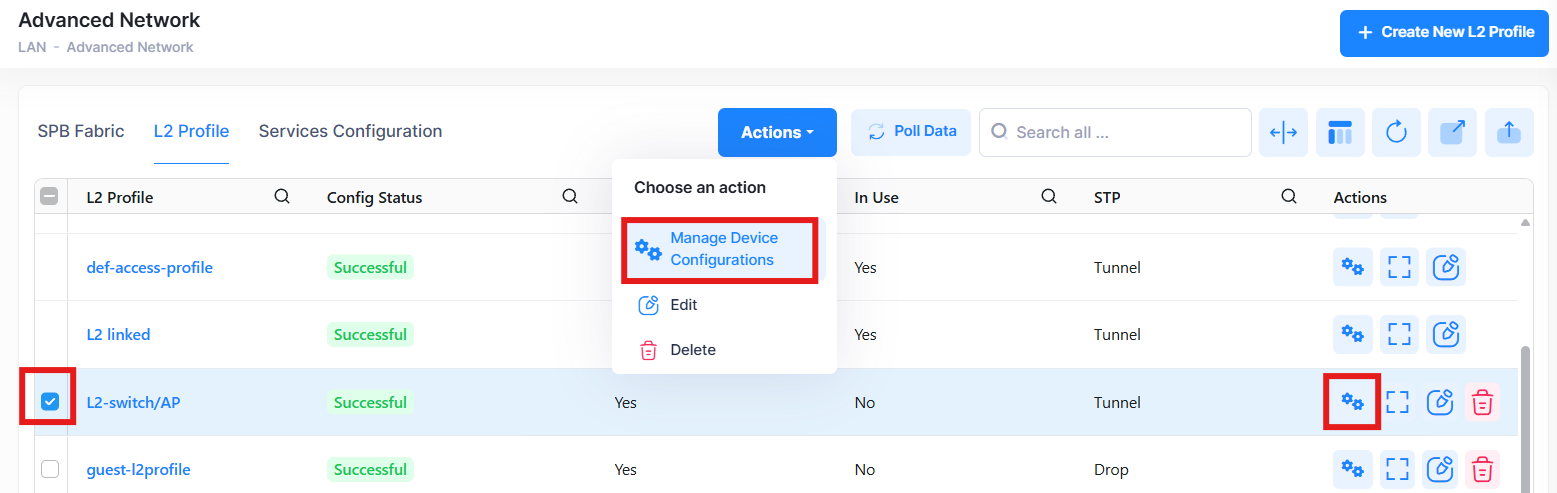
Display and Manage L2 Profile
The L2 Profile screen shows information for the configured L2 Profiles. To view detailed configuration for a specific profile, click the Profile Name or the Manage Device Configurations button under the Actions column.
The following screen appears:
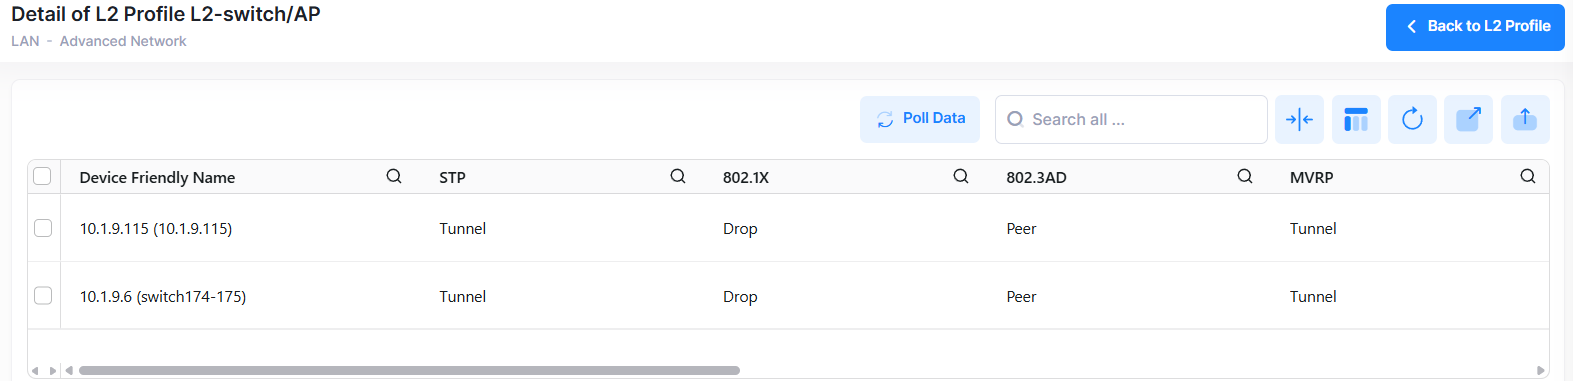
You can now view the details of the selected L2 profile. This screen also allows you to export, search and filter the data. You can click the back icon on the top right to navigate to the L2 Profile list screen.
You can also edit, delete or view additional information for the selected profile in this screen.
The following Profile settings and device information for the selected Profile is displayed.
-
Device Friendly Name - The name assigned to the device is derived from the Preferred Device Naming convention specified in the user preference settings. By default, the Friendly Name is set to IP Address (System Name).
-
STP - Indicates how Spanning Tree traffic control packets are processed.
-
802.1X - Indicates how IEEE 802.1x control packets are processed.
-
802.3AD - Indicates how IEEE 802.3AD control packets are processed.
-
MVRP - Indicates how MVRP packets are processed.
-
GVRP - Indicates how GVRP packets are processed.
-
AMAP - Indicates how AMAP packets are processed.
-
802.1AB - Indicates how IEEE 802.1AB control packets are processed.
-
Config Status - The configuration status of the device. (Success or Failed or Pending).
-
Pending - The configuration is being pushed to the device and is still not receiving a response from the device.
-
Failed - The configuration failed to apply to the device. Possible reasons include a timeout while applying the configuration due to the device being unreachable or a network issue, or the configuration being invalid and rejected by the device. Check alerts to identify the specific reason.
-
Success - The configuration is pushed to the device successfully.
-
-
IPv4 Address - The IPv4 address of the device.
-
Last Polled Time - The last time the system synchronized data from the switch device.
Polling Switches for L2 Profile Information
By default, OmniVista is automatically scheduled to poll switches for L2 profile information every one hour. To perform an immediate poll, click the Poll Data button on the L2 Profile screen. OmniVista will retrieve the latest data from the switches. To poll L2 profile data from all the switches, click Poll Data button in the SPB Topology page. This page will be updated with the most recent information.