
The CLI Executions tab displays all executions in the organization.
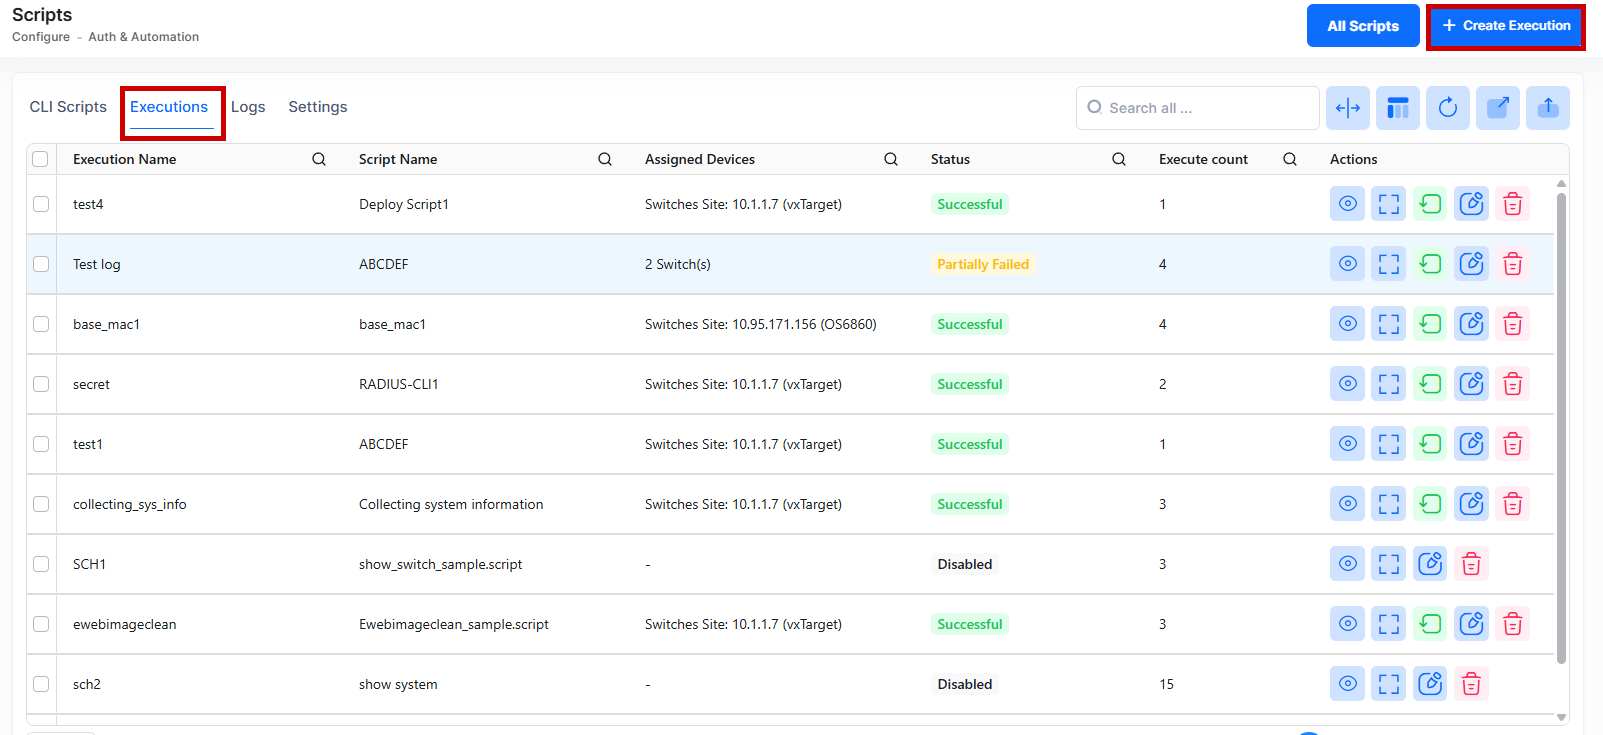
Use the CLI Execution screen to display information about all of the CLI executions across the organization. Refer to the troubleshooting section for solutions to your queries. This screen also allows you to create, edit, delete, stop or re-execute CLI executions. To access the CLI Executions screen, click on Auth & Automation > Scripts > Executions under the “Configure” section of the OmniVista Cirrus Menu. The below screen appears:
Creating an Execution
An execution combines a CLI script, a set of target devices, a schedule, and device credentials into a single runnable configuration. Scripts can be applied to OmniSwitch (AOS 6x and AOS 8x) and 3rd-party devices. Click on Create Execution to access the create Execution screen as shown below:
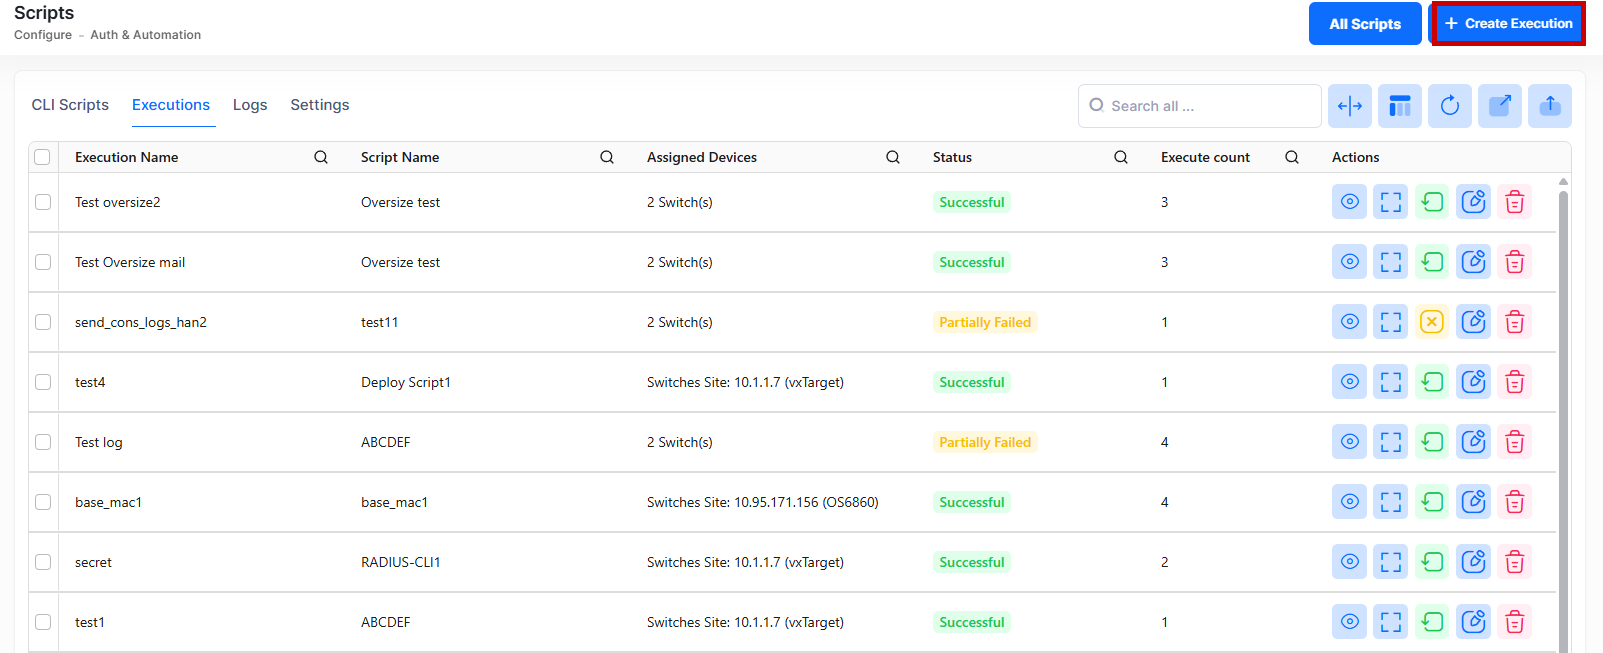
The Create Execution screen provides the following step-by-step process to create an Execution. Complete the fields for the sections on the Create Execution tab as described below, then click Next to move to the next tab (Step 2).
1. Script Info
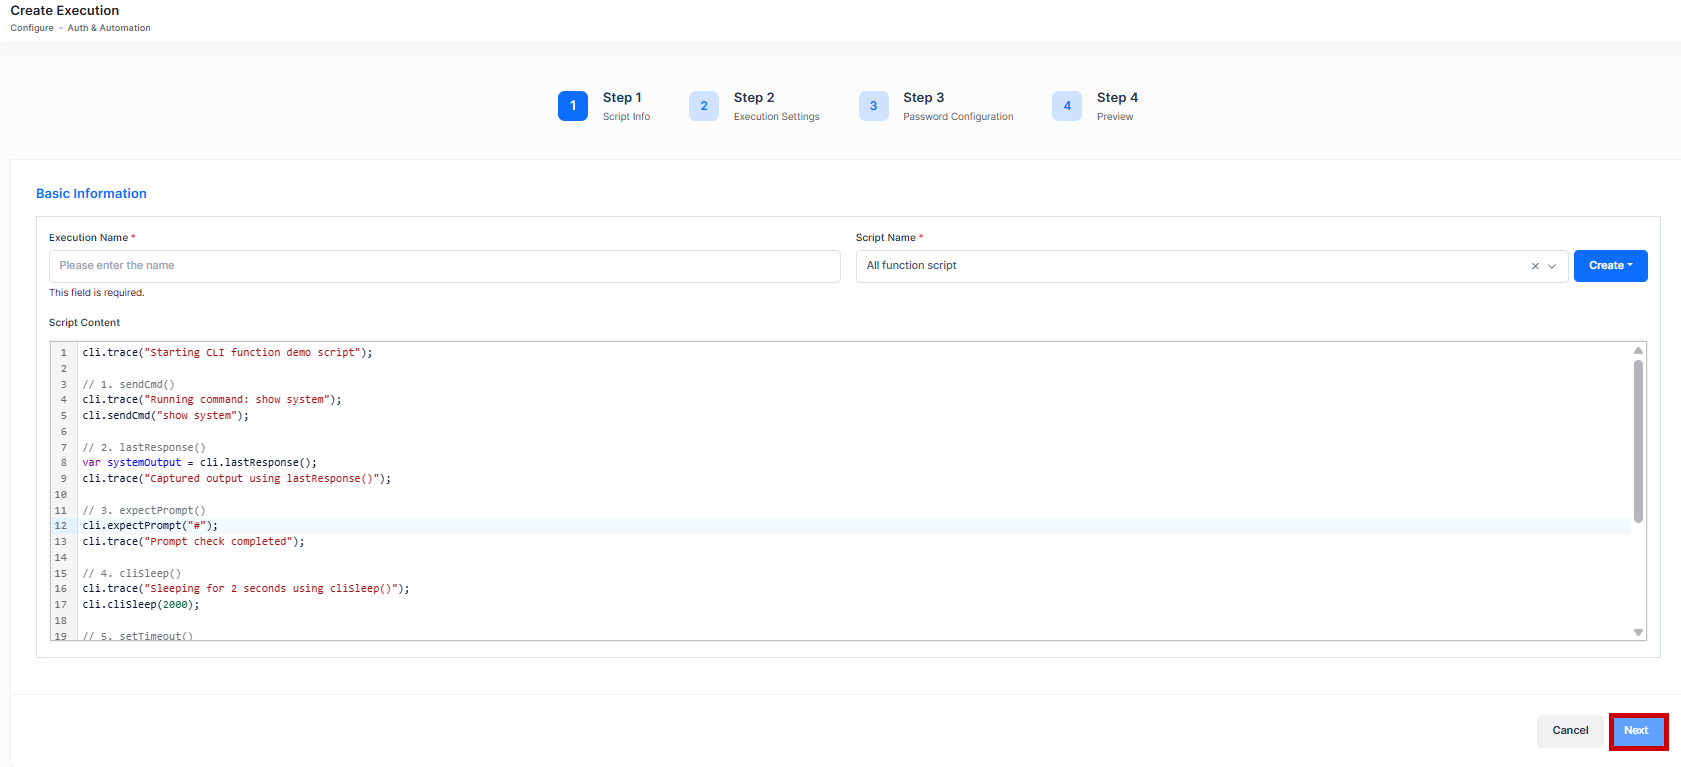
Complete the fields as described below to assign a Execution name:
-
Execution Name - Enter the name of the execution configuration.
-
Script Name - Select the Script Name from the drop-down menu or click on Create CLI Script to open the Create CLI Script screen and create a new CLI Script.
-
Script Content - Displays the content below for reference (read-only). If the script contains user-defined variable placeholders, fill them in under Define User Variables.
2. Execution Settings
Email Delivery
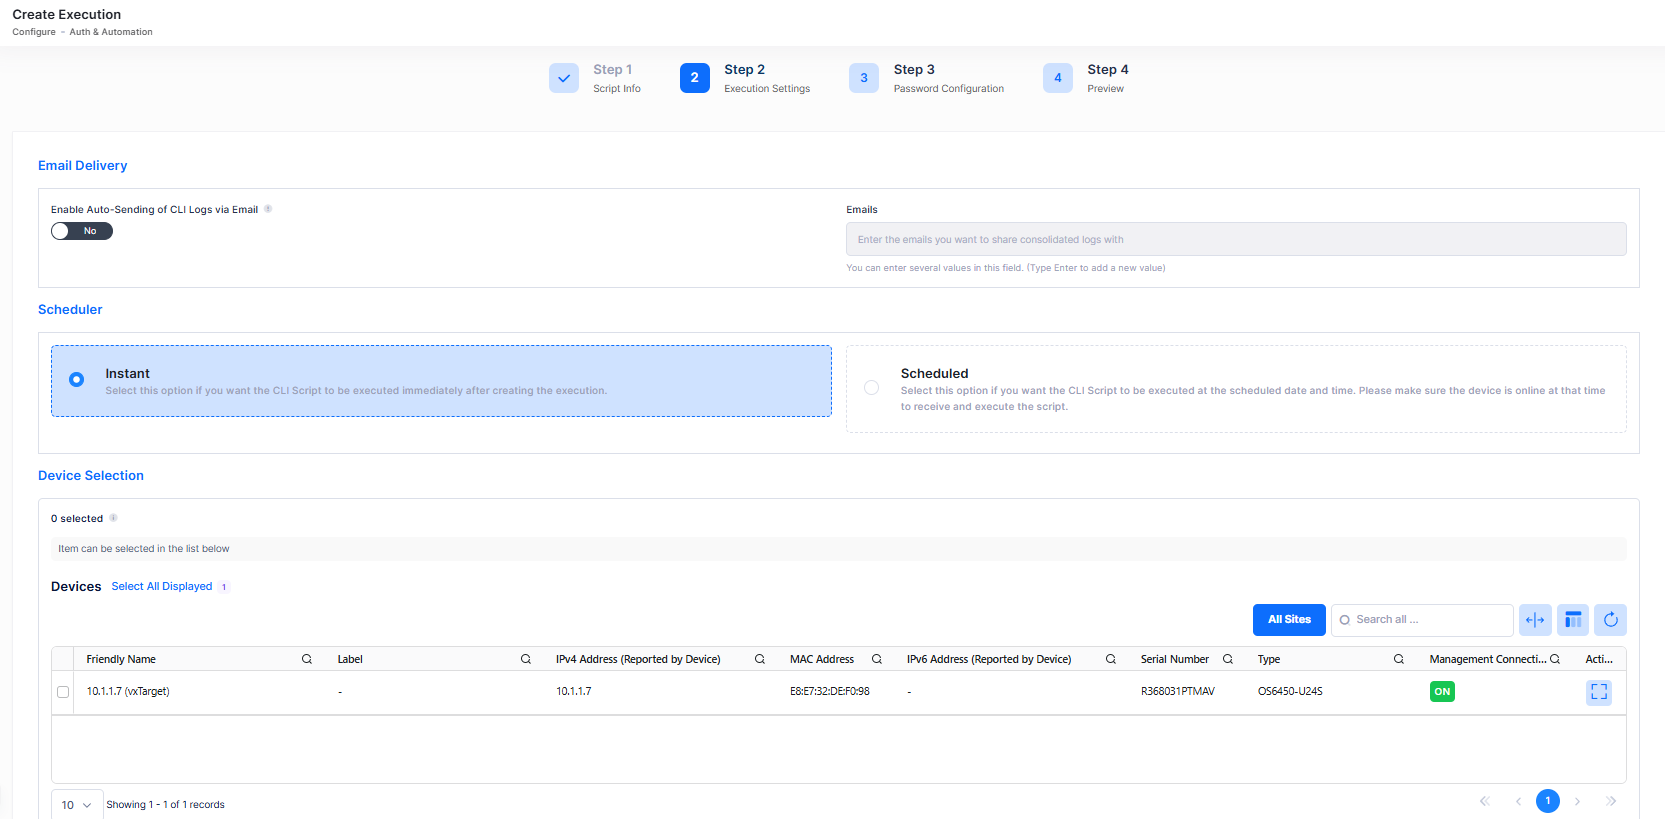
Consolidated execution logs can be delivered automatically by email on a defined schedule. Complete the fields as described below and move to next tab (Step 3).
-
Enable Auto-Sending of CLI Logs via Email - When enabled, consolidated logs are automatically sent via email based on the Email Scheduler time settings. By default, disabled.
-
Emails - Enter the email addresses to share consolidated logs with.
Scheduler
Select the type of schedular to generate the execution logs.
-
Instant - The script runs immediately after the execution is created.
-
Scheduled - The script runs at the configured date and time. Set the recurrence (daily, weekly, or monthly), the start date, the end date (or enable Never for no end date), and the execution time.
Device Selection
Select devices to include in the execution from the available device list.
3. Password Configuration
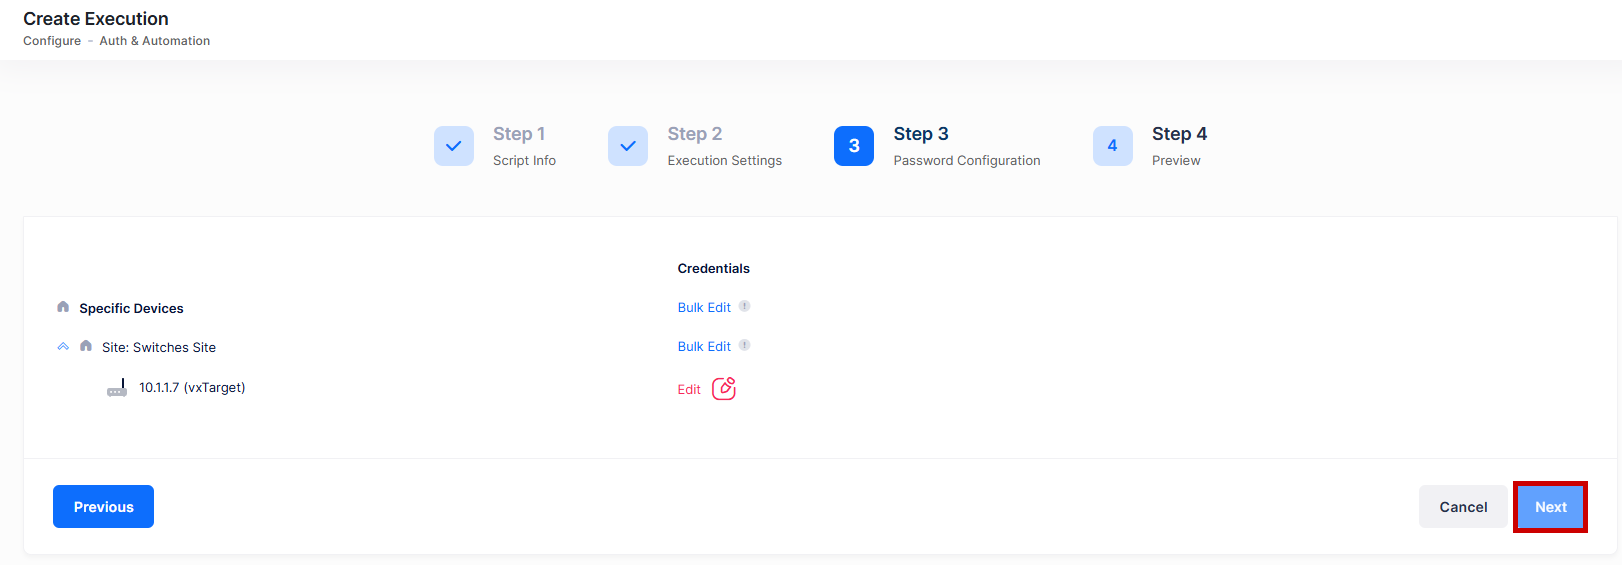
For each selected device, enter the login credentials. Click on edit tab to enter the credentials for the specific selected device. The below screen appears:
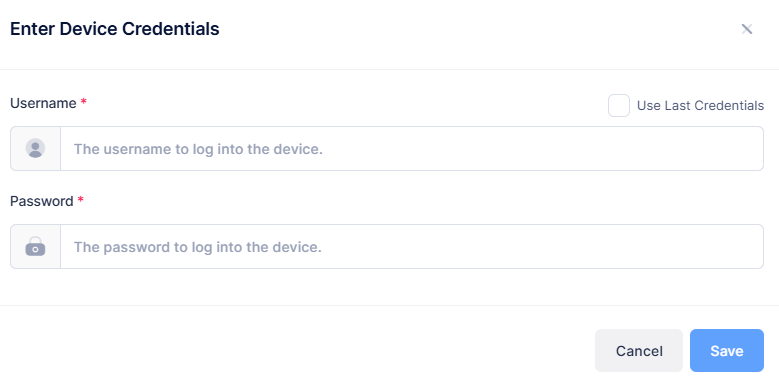
Enter the device credentials. To reuse the credentials from a previous execution on the same device, click the checkbox for Use Last Credentials. Click Next to move to the next tab (Step 4).
4. Preview
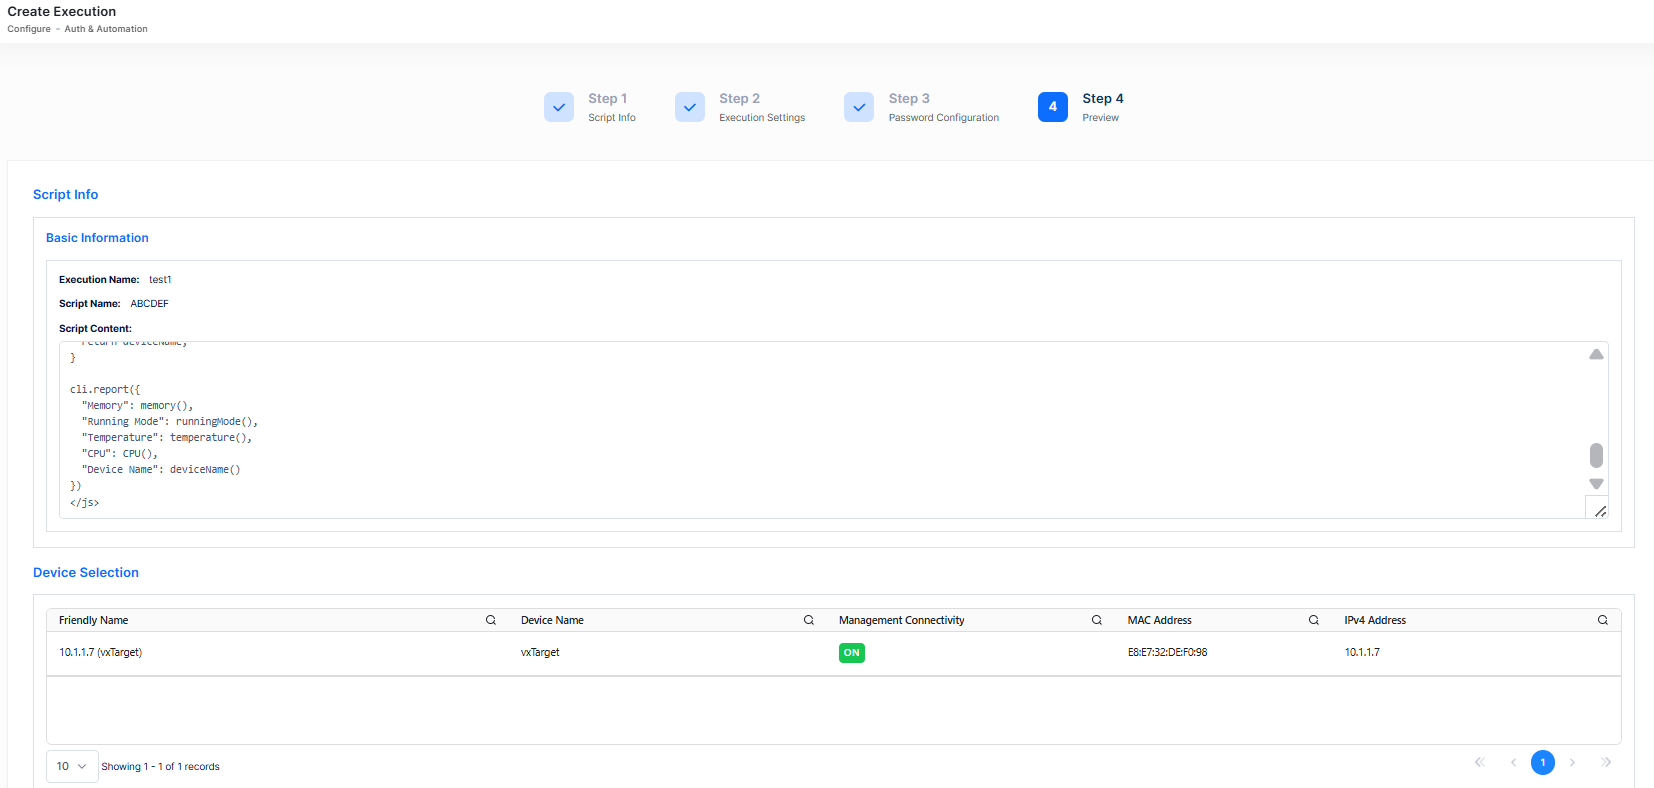

Review the full configuration such as selected script, devices, schedule, and email settings. Click on Create to submit the execution.
For scheduled executions, target devices must be online at the scheduled time to receive and run the script. When a script runs on multiple devices, the system processes devices in parallel.
Editing an Execution
Use one of the following methods to access the Edit Execution screen:
-
Select the Execution Name to edit by clicking on the checkbox next to the name, click on Actions, then select Edit from the drop-down menu.
-
Click on the pencil icon under the “Actions” column next to the Execution Name that you want to edit.
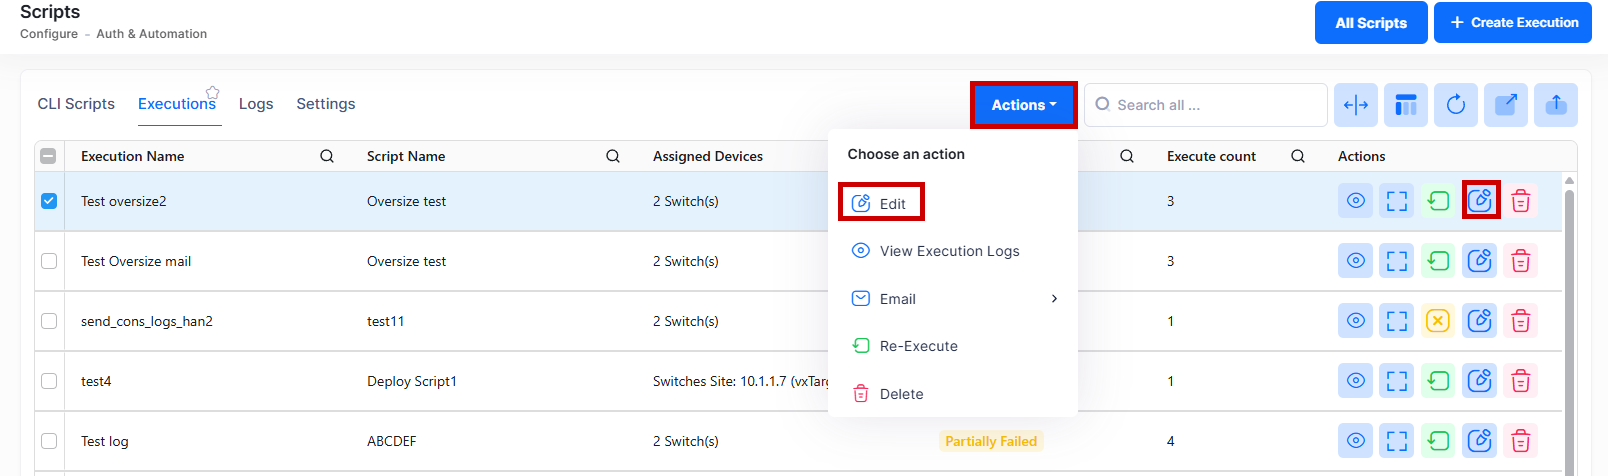
The following Edit Execution screen appears. Edit the fields as described above, then click on Save.
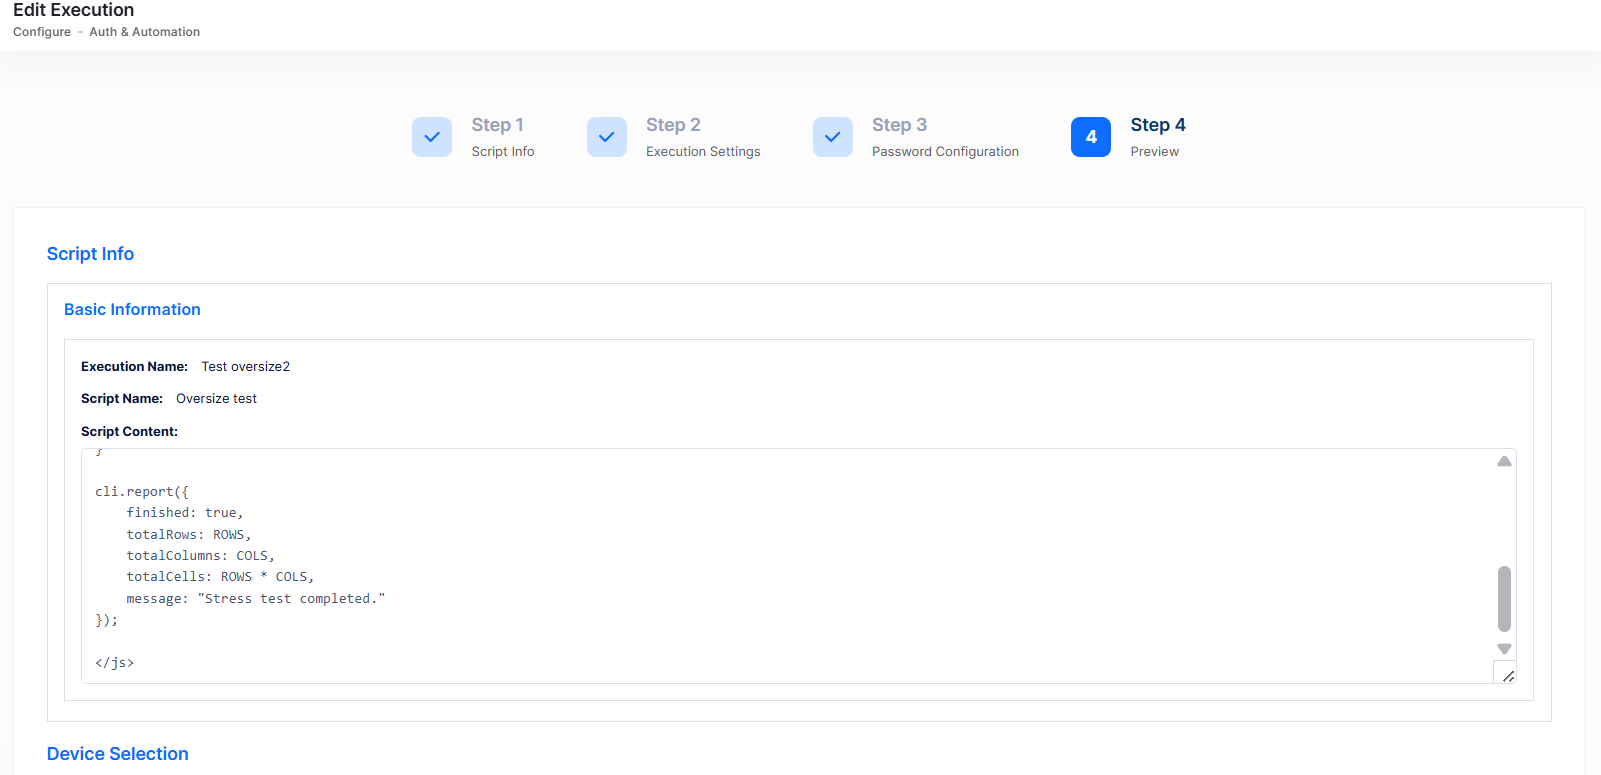
If significant changes are detected after saving, the execution is automatically rerun.
Deleting an Execution
To delete an Execution, use one of the following methods to select the Execution Name you want to delete:
-
Select the name to delete by clicking on the checkbox next to the list, click on Actions, then select Delete from the drop-down menu.
-
Click on the trash can icon under the “Actions” column next to the Execution Name that you want to delete.
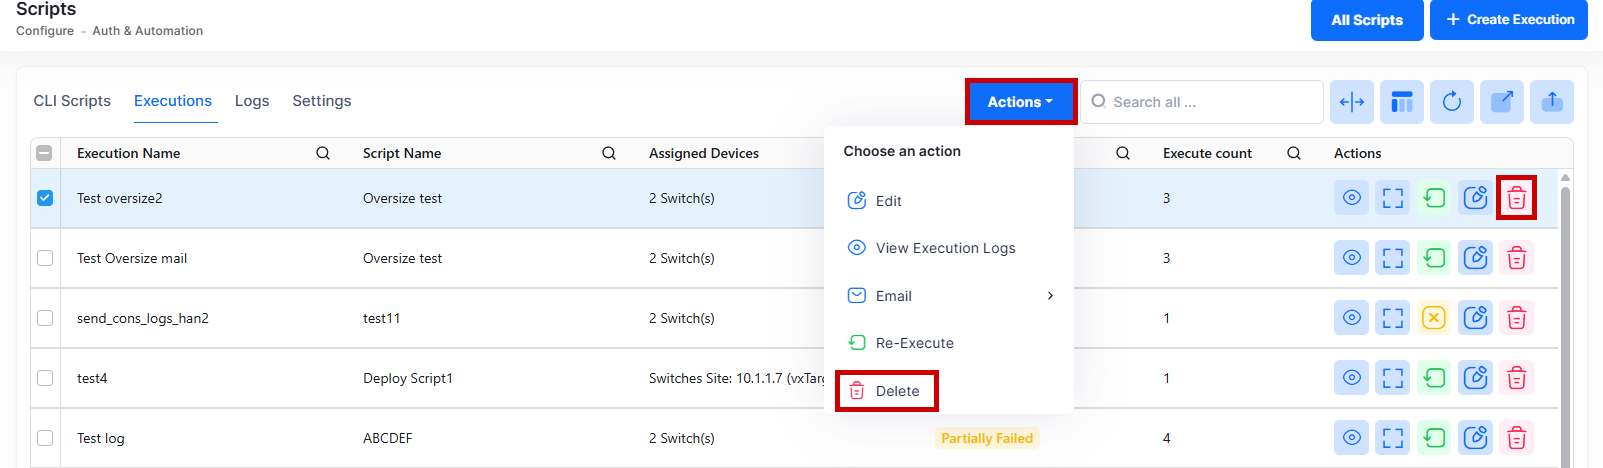
The following confirmation prompt appears:
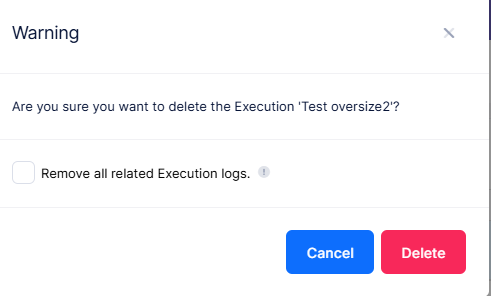
Click on Delete to confirm. All related execution logs will also be deleted.
Display Executions
The Executions tab displays all executions in the organization. Data displayed can be exported into a CSV, PDF or Excel sheet format. You can also switch to full-screen mode for a better display. The following screen appears:
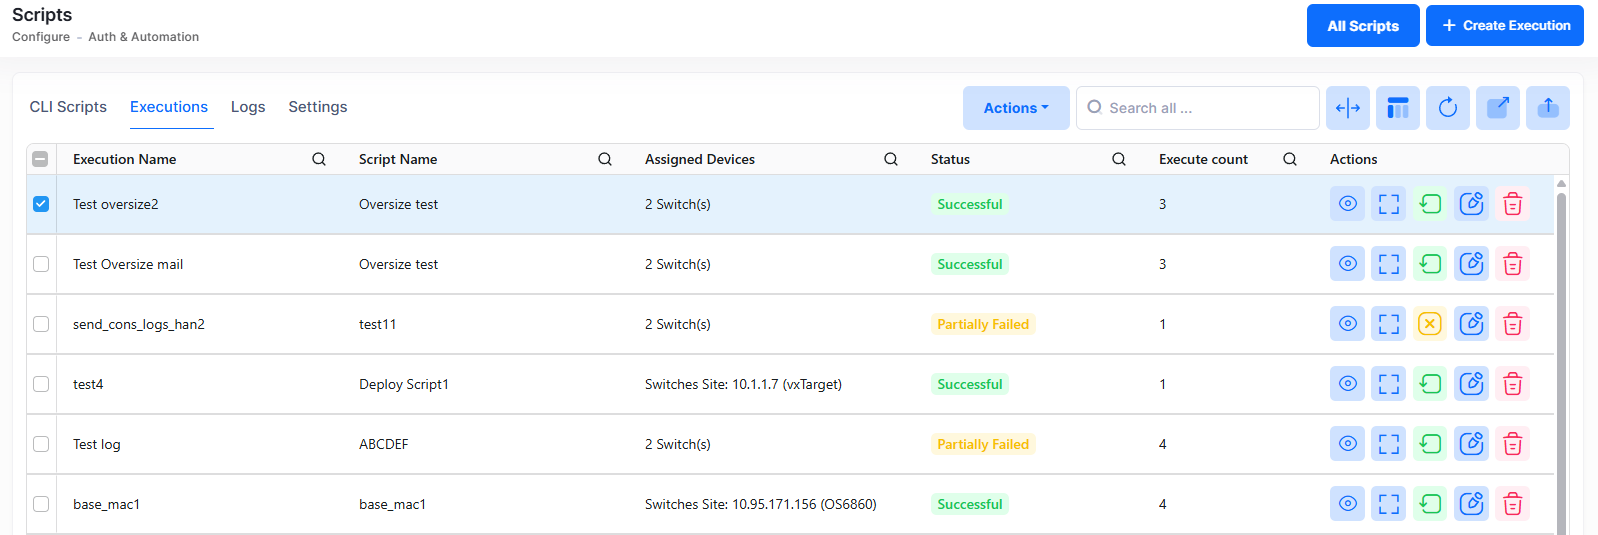
The following information is displayed:
-
Execution Name - The name of the execution configuration.
-
Status - The current state of the execution. Refer the section below for status details.
-
Assigned Devices - The devices targeted by this execution.
-
Run Times - The number of times this execution has run or is scheduled to run.
-
Description - A description for the execution.
-
Created By - The user who created the execution.
-
Start Date - The scheduled start date.
-
End Date - The scheduled end date.
-
Next Generation At - The date and time of the next scheduled run.
-
Send Logs via Email - Whether automatic email delivery is enabled for this execution.
-
Created At - The date and time the execution was created.
-
Script Name - The name of the CLI Script.
-
Execute Count - The number of times executions are performed.
Execution Status values
-
Pending - The execution is queued and has not yet started processing on any device.
-
In Progress - The execution is actively running on one or more devices.
-
Successful - All target devices completed the script without errors.
-
Failed - The script failed on all target devices.
-
Partially Failed - The script completed successfully on some devices but failed on others.
-
Disabled - The execution was stopped by a user, or a scheduled execution has been halted before its next run.
-
Aborted - The per-device status assigned to devices that were queued but not started when an execution was stopped.
Stopping an Execution
You can stop an execution that is in Pending or In Progress state. Use one of the following methods to stop an execution:
-
Select the Execution Name to stop by clicking on the checkbox next to the name, click on Actions, then select Stop from the drop-down menu.
-
Click on the cross icon under the “Actions” column next to the Execution Name that you want to stop.
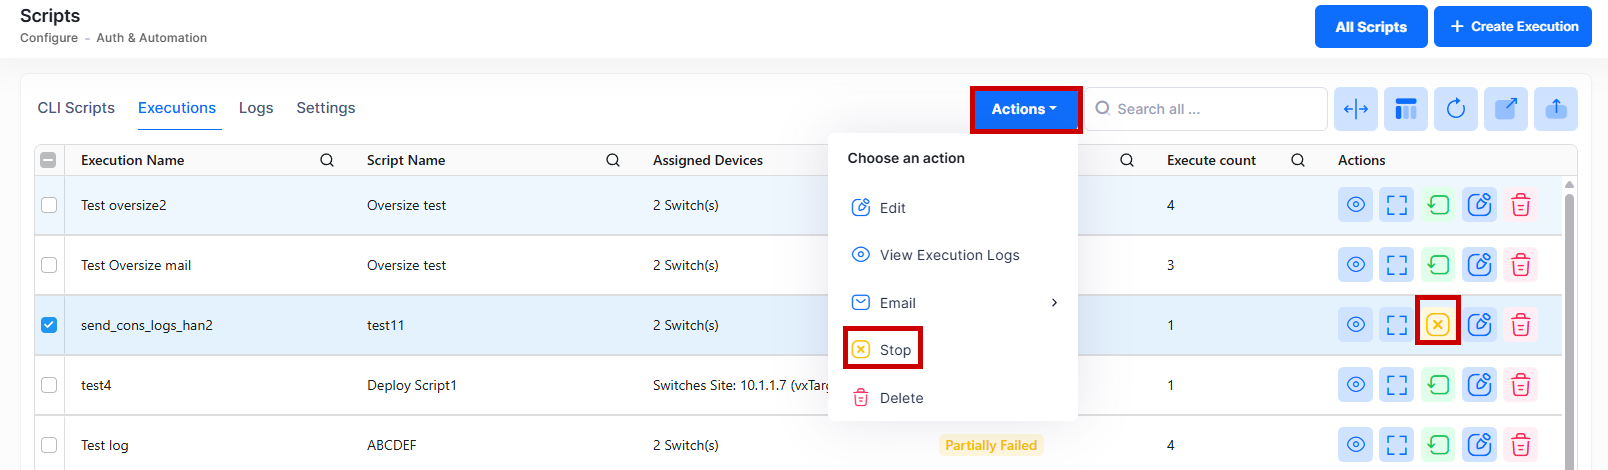
The execution status changes to Disabled. All devices that had not yet started processing are set to Aborted.
If a device is already being processed when the stop request is made, that device is allowed to complete its current command flow. Subsequent devices in the queue are not started. For scheduled executions, stopping also prevents the next scheduled run from starting.
Re-executing
You can re-execute a completed or stopped execution without recreating it from scratch. Use one of the following methods to Re-Execute:
-
Select the Execution Name to Re-Execute by clicking on the checkbox next to the name, click on Actions, then select Re-Execute from the drop-down menu.
-
Click on the green icon under the “Actions” column next to the Execution Name that you want to Re-Execute as shown below.
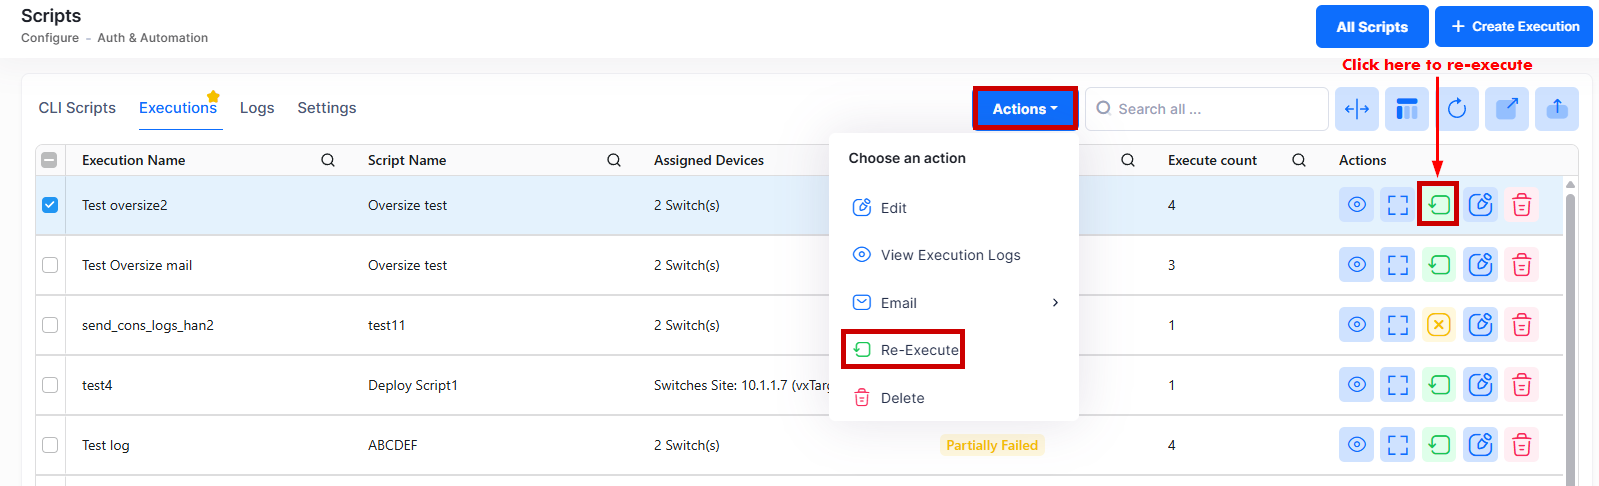
You cannot re-execute executions with a Pending or In Progress status. For scheduled executions, re-execution is available only when the configured end date has not yet passed.
Enabling or disabling email delivery after creation
You can enable or disable email delivery of auto-send logs from the Execution screen. Click the Actions column, select Email from the drop-down menu, then choose Enable or Disable auto-send logs.
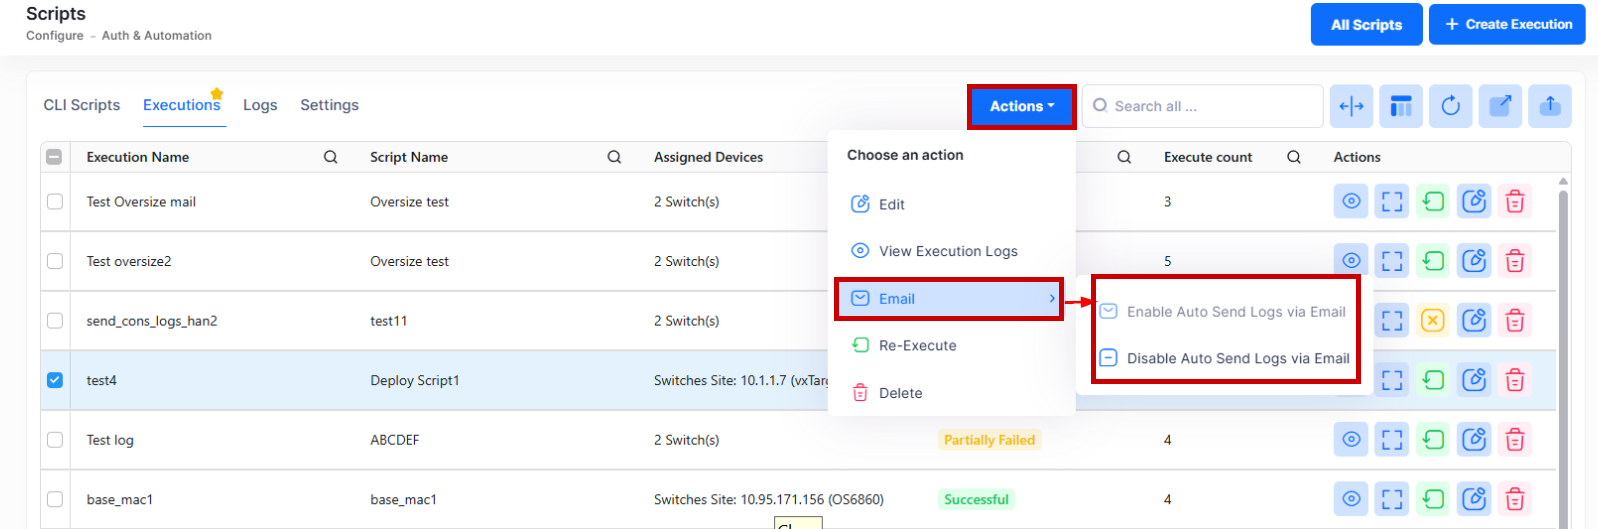
When enabled, consolidated logs are sent by email according to the Email Scheduler settings. Configure the scheduler to define the sending times, and OmniVista will deliver the logs accordingly.
View Execution Logs
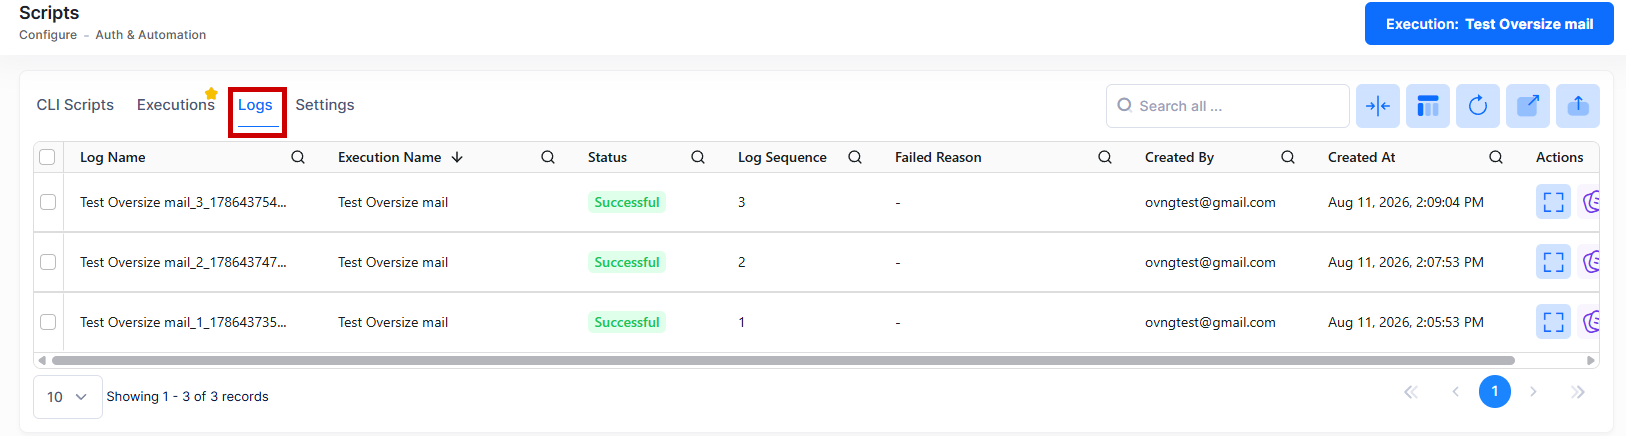
The Execution Logs lists all execution log entries for past runs in your organization. From this screen, view Execution Logs using one of the following methods:
-
Select the Execution Name to view Execution Logs by clicking on the checkbox next to the name, click on Actions, then select View Execution Logs from the drop-down menu.
-
Click on the eye icon under the “Actions” column next to the Execution Name for which you want to view the Execution Logs as shown below.
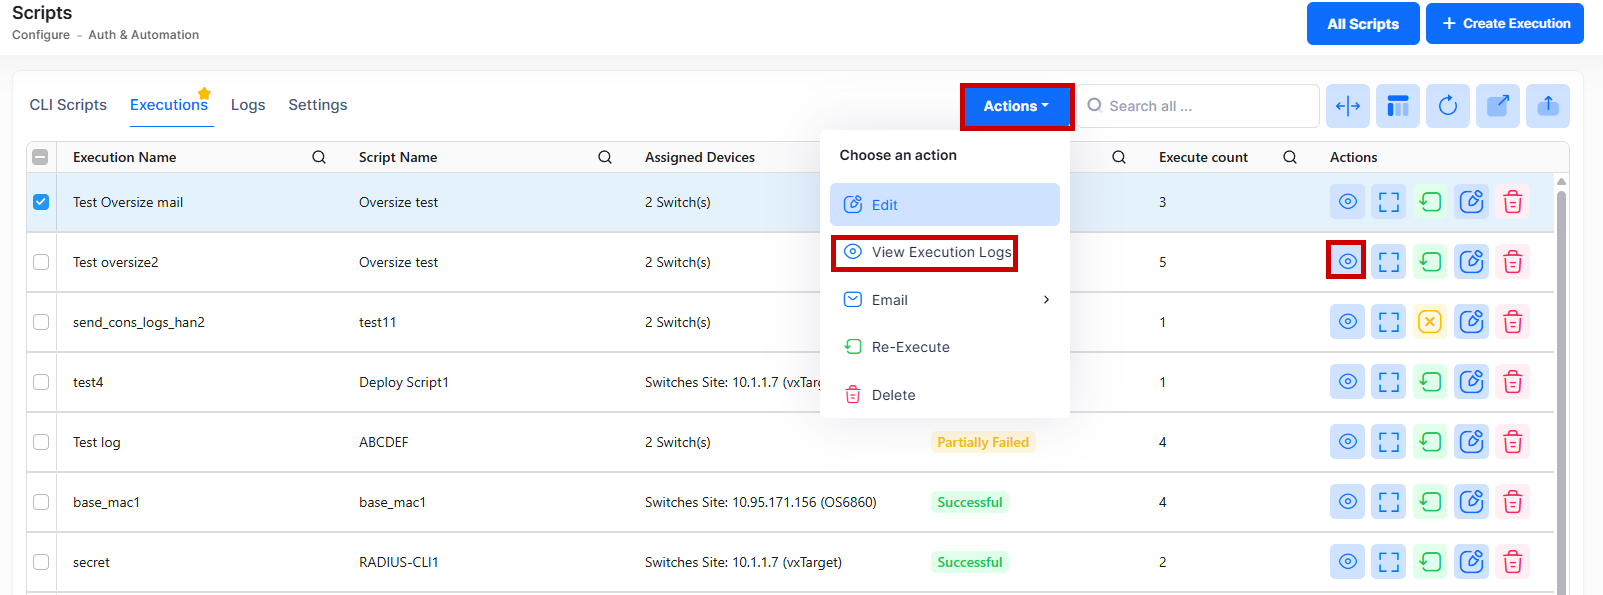
It will redirect you to the following screen:
Troubleshooting/FAQs
An alert appeared for a failed execution.
When a CLI script execution fails, the system automatically raises an alert in the Alerts screen. The alert shows the execution name, severity, and first and last occurrence times. Navigate to the ‘Alerts’ screen to review details and take corrective action. Repeated failures from the same execution are deduplicated per the existing alert recurrence rules.
The "Re-Execute" option is not available.
The Re-execution option is available only for executions with Successful, Failed, Partially Failed, or Disabled status. For scheduled executions, the option is also unavailable if the configured end date has already passed.
The "Abort Execution" option has no effect.
If the execution has already completed or was previously stopped, it cannot be stopped again. The system displays the notification as "Execution already completed or stopped, cannot be stopped." Re-execution is available for completed executions using Re-Execute tab.
The execution log shows "Invalid credentials" for a device.
The username or password entered in the Password Configuration step while creating an execution is incorrect for the target device. Click Re-Execute and re-enter the correct credentials for the affected device. If you are using $LOGIN_PWD or other credential variables, verify that the device's credentials are correctly configured in the OmniVista Cirrus database for the device.