OmniVista Terra provides disaster recovery capabilities to protect your network configuration against cluster failures. The following scenarios are examples of supported recovery capabilities:
-
Adding a New VM to an Existing Cluster - You can add a new virtual machine to expand an existing OmniVista Terra cluster or replace a failed node. This operation is certified on:
-
VMware vSphere
-
Microsoft Hyper-V
-
Proxmox VE
-
When adding a new VM, the cluster automatically rebalances services and data across nodes while maintaining service continuity.
-
VM Migration Between Physical Hosts - You can migrate an OmniVista Terra virtual machine from one physical server to another using your hypervisor's native migration capabilities:
-
VMware vMotion
-
Hyper-V Live Migration
-
Proxmox Migration
-
During migration, the cluster maintains data integrity and minimizes service interruption. After migration completes, services resume automatically without requiring manual database or Kafka recovery.
-
Restore Backups - You can restore your system to a previous state using backups that capture organization data, device configurations, site settings, and operational state.
For more information, refer to the following sections:
Managing Backups
A backup captures the state of your OmniVista Terra system at a specific point in time. Each backup includes three components:
-
MongoDB - Stores organization data, user accounts, device inventory, and configuration settings.
-
TimescaleDB - Stores site configuration, activation state, and network configuration data.
-
Kafka - Stores device state, provisioning flows, and service coordination data.
Backups are triggered automatically on a schedule. The system stores backups on the cluster and tracks their status.
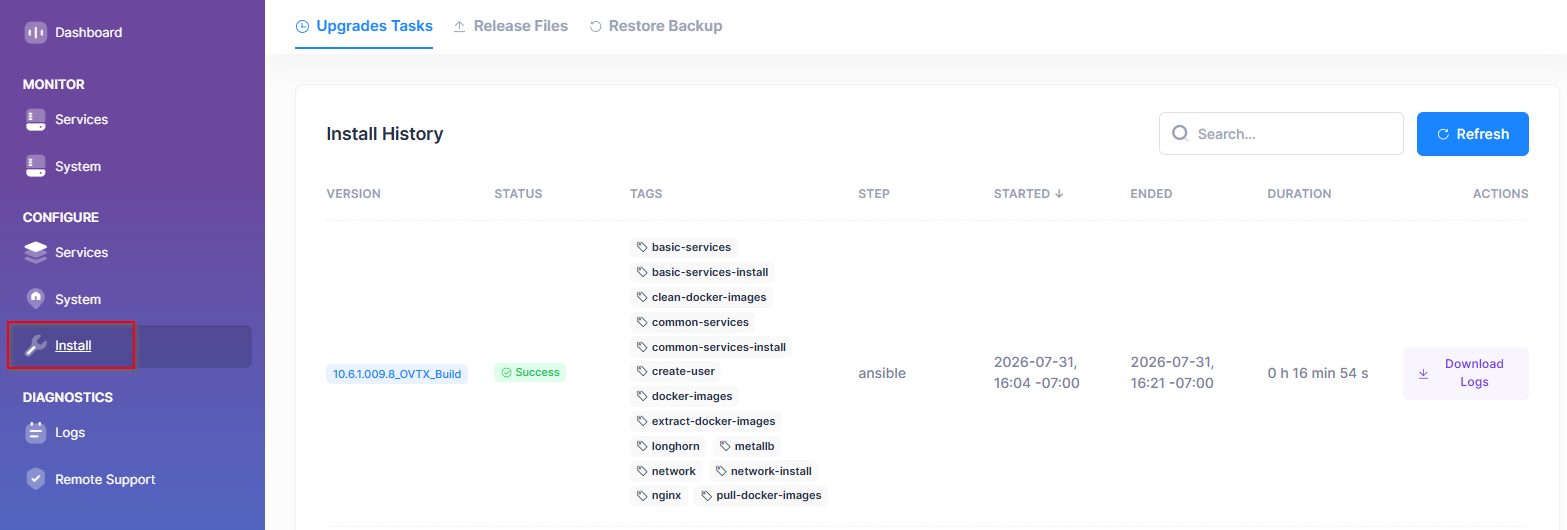
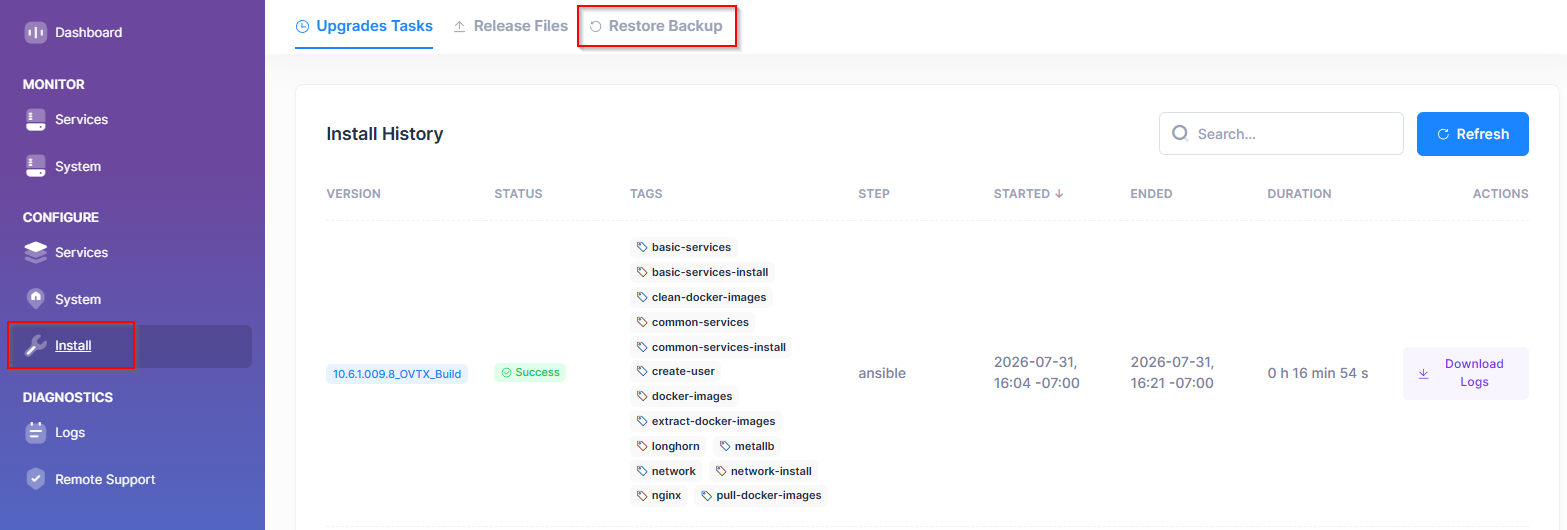
To view a list of available backups, select the Restore Backup tab on the Install screen.
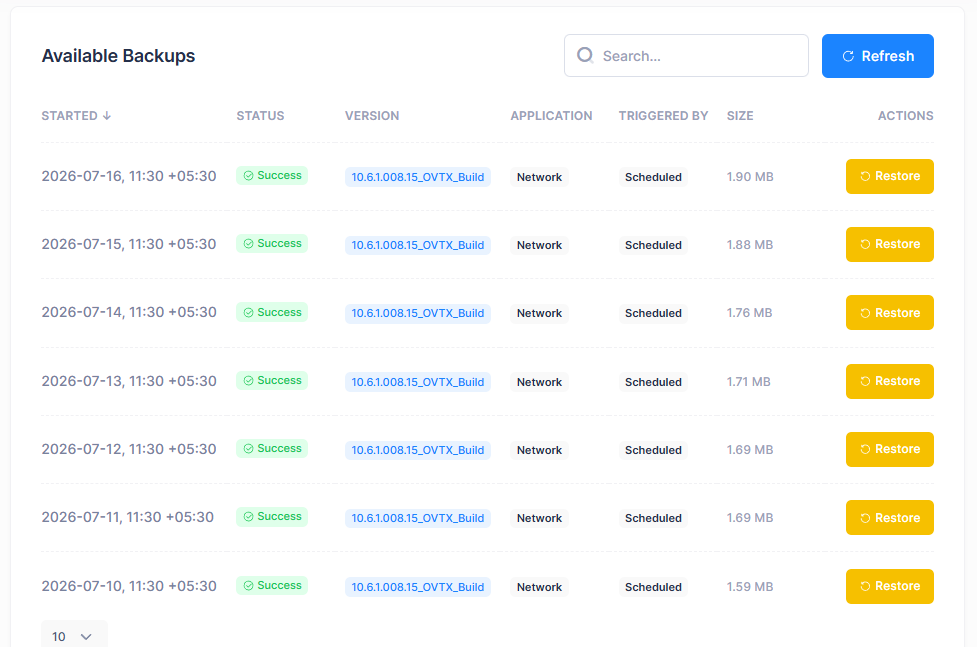
The Available Backups table shows the following information:
-
Started - The date and time when the backup was initiated, displayed in your configured timezone.
-
Status - The outcome of the backup operation:
-
Success - All components (MongoDB, TimescaleDB, Kafka) were backed up without errors.
-
Partial - The backup completed but one or more components encountered issues.
-
-
Version - The software release version that was installed when the backup was created.
-
Application - The type of deployment that was backed up (Network, Advisor Edge).
-
Triggered By - Indicates how the backup was initiated:
-
Manual - An administrator initiated the backup.
-
Scheduled - The backup ran automatically based on the configured schedule.
-
-
Size - The total size of the backup archive, combining all backed-up components.
To refresh the backup list, click Refresh in the upper-right corner of the table.
Scheduled Backups
OmniVista Terra automatically creates backups on a scheduled basis to ensure you always have a recent recovery point. By default, scheduled backups run on the first day of each month at 2:00 AM.
Scheduled backups exclude analytics-related databases (such as analytics, IoT, and DPI data) to minimize backup size and duration. These backups focus on preserving configuration and operational state necessary for disaster recovery.
You can identify scheduled backups in the Available Backups table by the "Scheduled" label in the "Triggered By" column.
Restoring From a Backup
Before restoring from a backup, ensure you have:
-
Administrator access to the OmniVista Terra Admin Center console.
-
At least one completed backup available (status shows "Success" or "Partial").
-
Sufficient storage space on the cluster for the restore operation.
To restore your system from a backup:
-
Locate the backup you want to restore in the Available Backups table.
-
Click Restore in the “Actions” column for that backup. A confirmation window appears displaying the backup version, date, and time.
-
Review the information carefully, then click Start Restore to begin the restore operation.
The restore replaces current data with the backup. This action cannot be undone. Make sure you selected the correct backup before proceeding.
The system begins restoring each component (MongoDB, TimescaleDB, Kafka) sequentially. You can monitor the progress on the same screen.
Monitoring the Restore Backup Progress
When a restore backup operation is in progress, a panel appears at the top of the Restore Backup screen displaying the following information:
-
The overall progress percentage.
-
The backup date and version being restored.
-
Individual status for each component:
-
MongoDB - Document database
-
TimescaleDB - Time-series database
-
Kafka - Message streaming
The status is shown for each component: Pending, Running, Success, Failed, or Skipped.
-
The restore button is disabled while a restore operation is in progress. Wait for the current operation to complete before initiating another restore.
When the restore backup completes, the following is indicated:
-
Success - All components restored without errors.
-
Partial - Some components restored; check for warnings.
-
Failed - Restore encountered errors; some data may not have been restored.
After a successful restore, verify your system configuration and services are operating correctly.
Troubleshooting/FAQs
No backups appear in the Available Backups table
The Restore Backup screen only displays backups with a status of "Success" or "Partial". If no backups appear:
-
Verify that at least one backup has been created (either manually or by schedule).
-
Click Refresh to update the backup list.
-
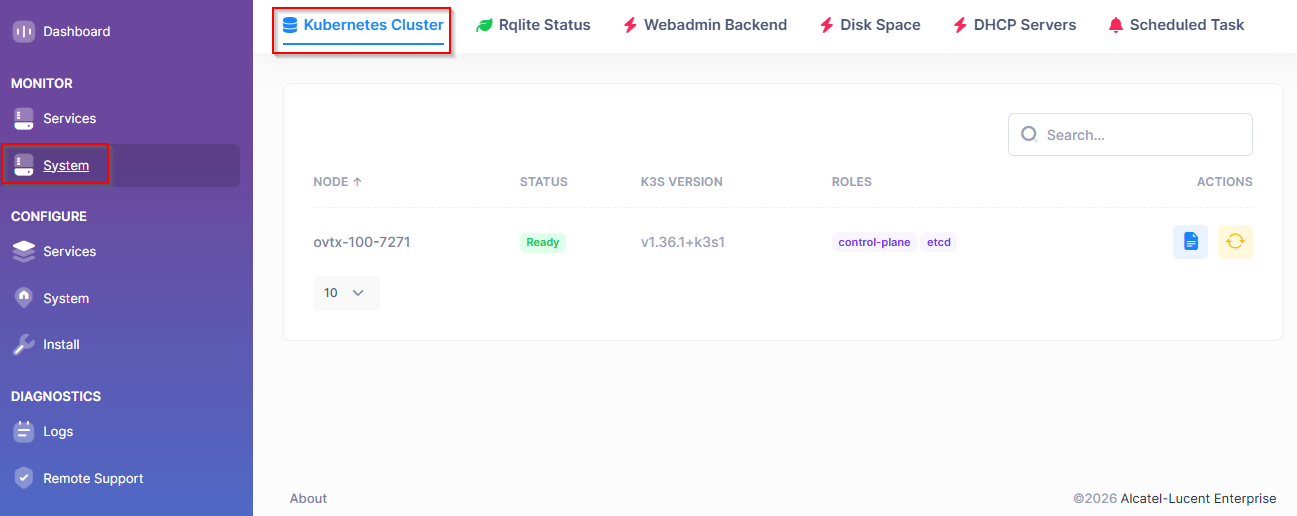
Check the cluster health in Monitor > System > Kubernetes Cluster to ensure all services are running.
The Restore button is disabled
The Restore button is disabled when a restore operation is already in progress. Wait for the current operation to complete before starting another restore. Check the progress panel at the top of the screen for the current restore status.
Restore completed with warnings
A "Partial" or warning status indicates that one or more components encountered issues during restore. Review the individual component statuses (MongoDB, TimescaleDB, Kafka) to identify which component had problems. If a critical component failed, you may need to attempt the restore again or use a different backup.
Restore operation is taking a long time
Restore duration depends on the backup size and cluster performance. Large backups with extensive MongoDB, TimescaleDB, and Kafka data may take longer to restore. Monitor the progress panel to track completion. Do not interrupt the restore operation while it is running.
Cluster health shows issues after restore
After a restore completes, verify cluster health:
-
Navigate to Monitor > System > Kubernetes Cluster.
-
Confirm all nodes show a "Ready" status.
-
Check that pods are running without errors.
If services remain unhealthy after restore, review the installation history in Configuration > Install > Upgrades Tasks to check for any recent deployment issues.