
The Create and Schedule Report screen provides you to create and manage Report definitions with scheduling options and manual execution. The Create and Schedule Report Screen displays all Reports and is used to create, edit, run, download, and delete Reports.
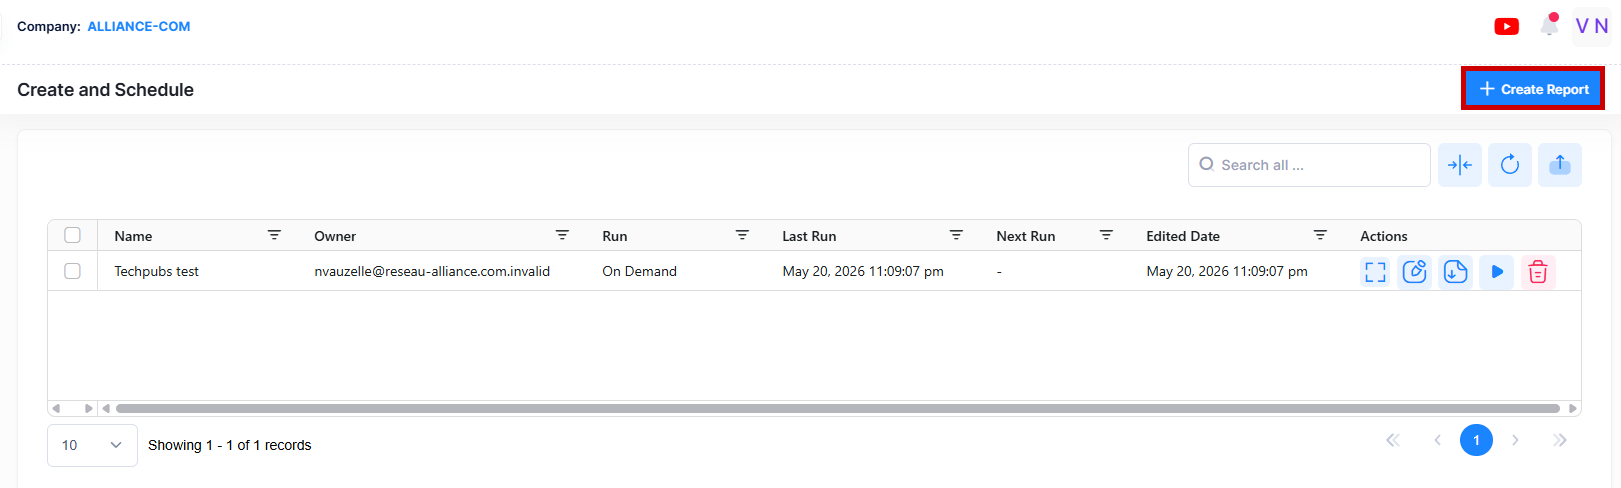
Create a Report
To create a new Report, click on the add icon to display the Create Report screen. The Create Report screen opens as shown below.
Users have the following permissions to view, create, edit, download, and delete reports.
-
Users with “view” permission can only view and download the latest report after the last run completes.
-
Users with “modify” permission can view, create, run, and download reports after the last run completes.
-
Users with “modify” permission who own the report can view, create, edit, delete, run, and download it after the last run completes.
-
Users with “admin” permission can perform all report actions, but cannot edit reports they do not own.
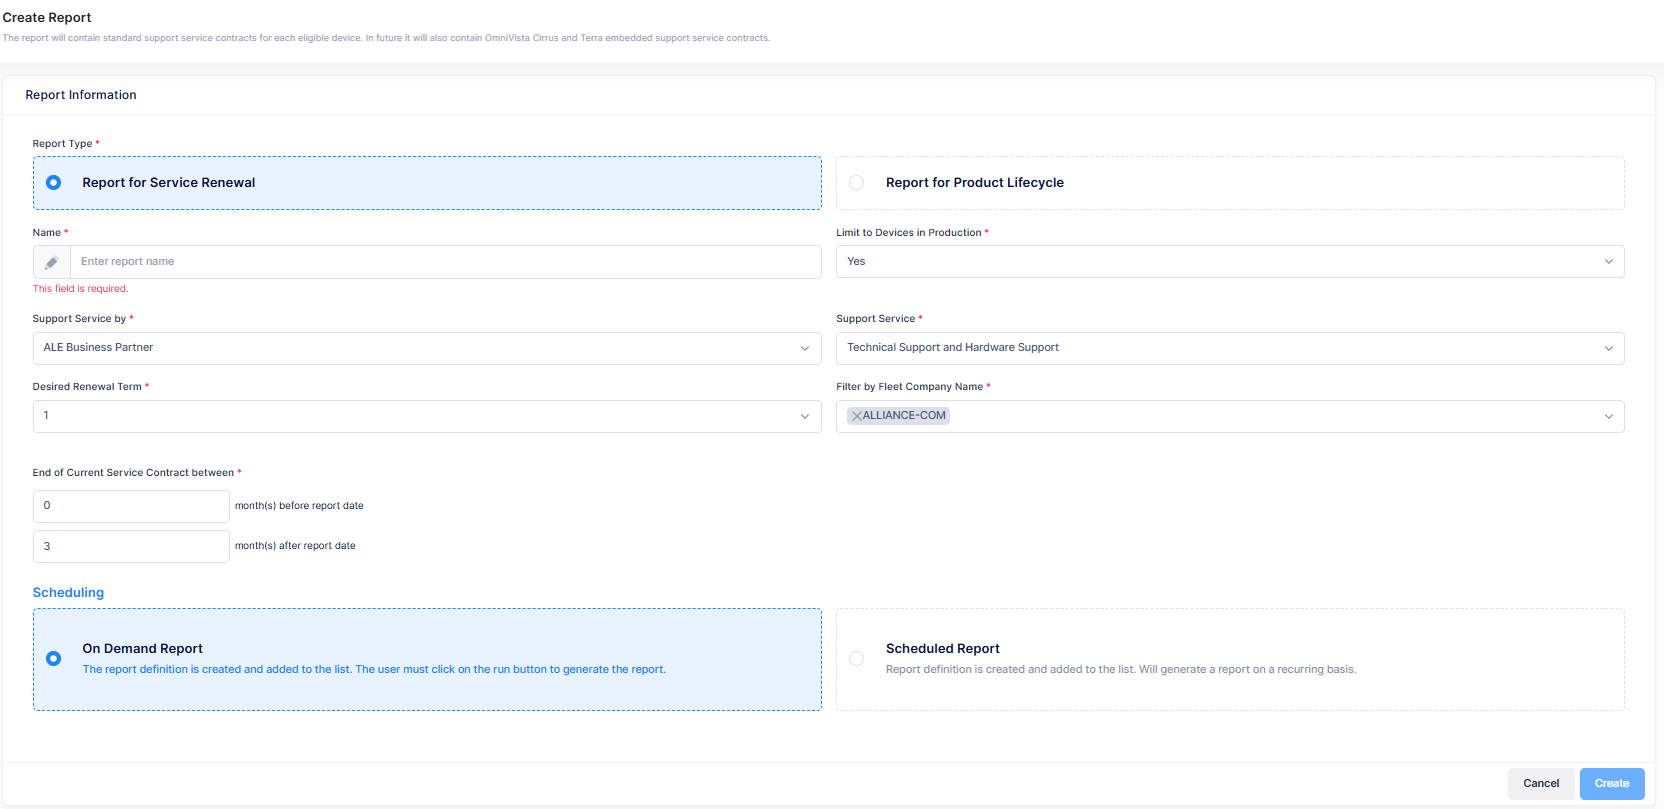
Create Report for Service Renewal
The Create Report for Service Renewal identifies devices nearing subscription expiry and supports the service renewal and sales renewal process for pricing, including the service part number. Enter the fields as described below and click on Create button to complete the process.
-
Name - Enter the name of the Report. (Range- 3 to 30 characters).
-
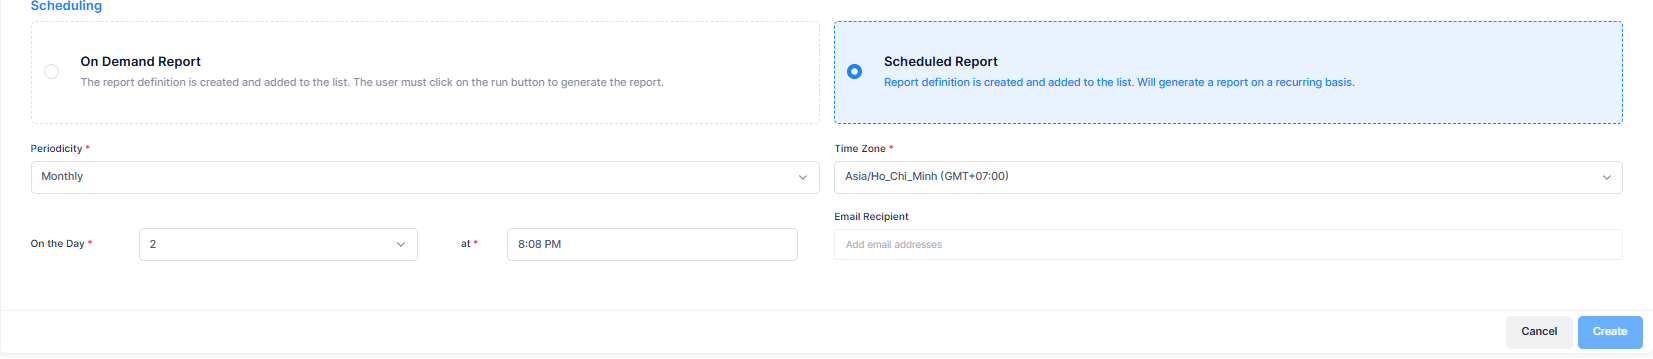
Email Recipient - Enter one or multiple email addresses. After the report file is generated, it will be sent to all these addresses. (Note: This field is valid for Scheduled Reports only).
-
Limit to Devices in Production - Select Yes or No from the drop-down menu list. (By default, Yes is selected).
-
Support Service By - Select the support service option from the drop-down menu, either by ALE Business Partner or ALE Directly.
-
Support Service - Select the Support service type from the drop-down menu, Technical Support and Hardware support or Technical Support and Hardware support based on Warranty.
-
Desired Renewal Term - The Desired Renewal Term is 1, 3 or 5 year.
-
Filter by Fleet Company Name - Select the End Customer company from the available list supervised by the current Partner company or Partner company. (Note: This option is enabled for Partner companies only).
-
End of Current Service Contract between - Enter the months in between the Service Contract.
-
month(s) before report date - Input the month in numeric format. Default= 0.
-
month(s) after report date - Input the month in numeric format. Default= 3.
-
-
Scheduling - Select the option to generate the report on demand or on a schedule.
-
On Demand Report - The report definition is created and added to the list. You must click on run button to generate the report.
-
Scheduled Report - Report definition is created and added to the list. The report will generate monthly, quarterly, or yearly.
-
Monthly - Select the day of the month and time of the day when the report will be generated.
-
Quarterly - Select the month in the quarter, the day of the month, and the time of the day when the report will be generated.
-
Yearly - Select the month of the year, the day of the month, and the time of the day when the report will be generated.
-
-
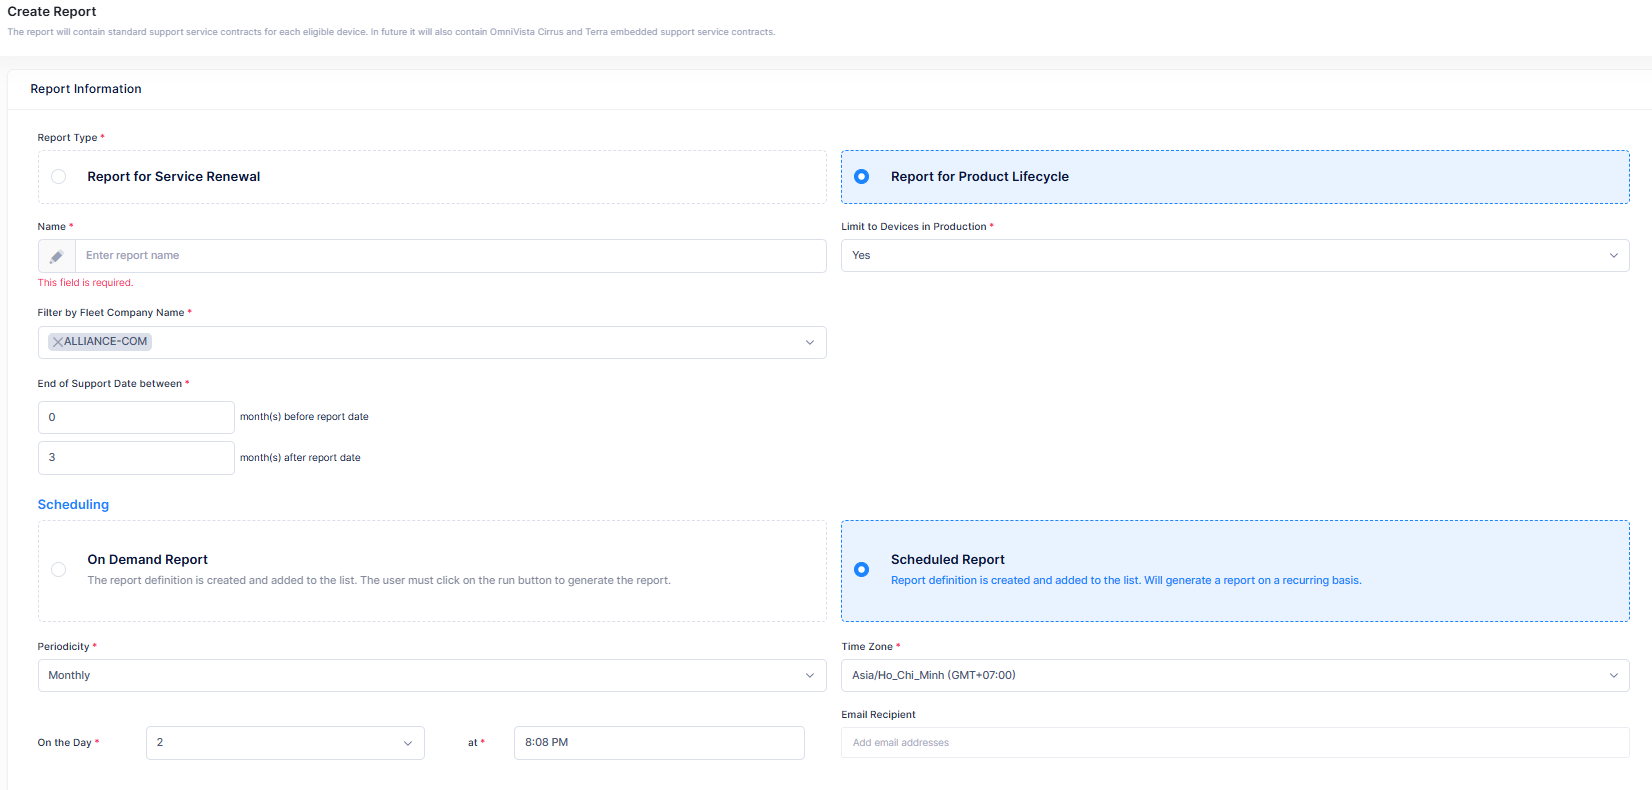
Create Report for Product Lifecycle
The Product Lifecycle Report tracks devices nearing or reaching the end of product support to aid replacement planning. Enter the fields as described below and click on Create button to complete the process.
-
Name - Enter the name of the Report. (Range- 3 to 30 characters).
-
Email Recipient - Enter one or multiple email addresses. After the report file is generated, it will be sent to all these addresses. (Note: This field is valid for Scheduled Reports only).
-
Filter by Fleet Company Name - Select the End Customer company from the available list supervised by the current Partner company or Partner company. (Note: This option is enabled for Partner companies only).
-
End of Support date between - Enter the date when support and updates for the product will officially end.
-
month(s) before report date - Input the month in numeric format. Default= 0.
-
month(s) after report date - Input the month in numeric format. Default= 3.
-
-
Limit to Devices in Production - Select Yes or No from the drop-down menu list. (By default, Yes is selected).
-
Scheduling - Select the option to generate the report on demand or on a schedule.
-
On Demand Report - The report definition is created and added to the list. You must click on run button to generate the report.
-
Scheduled Report - Report definition is created and added to the list. The report will generate monthly, quarterly, or yearly.
-
Monthly - Select the day of the month and time of the day when the report will be generated.
-
Quarterly - Select the month in the quarter, the day of the month, and the time of the day when the report will be generated.
-
Yearly - Select the month of the year, the day of the month, and the time of the day when the report will be generated.
-
-
Display Create and Schedule Report Information
The following information is displayed for each report generated.
-
Name - The name of the Report.
-
Owner - The email address of the user who created the report definition.
-
Run - The report runs on a recurring basis.
-
Scheduled - The report runs on a recurring basis.
-
On-Demand - The report runs after being created or runs manually; it does not run periodically.
-
-
Last Run - Indicates the most recent attempt to run the report, including both successful and failed executions.
-
Null - The report has not been run yet.
-
Datetime - The report was successfully run at the specified time.
-
Failed - The most recent attempt to run the report failed.
-
-
Next Run - The next scheduled time the report will run.
-
Edited Date - The report definition created or edited date.
Download Report
The download tab allows users to download the report, but only when the report has been successfully generated.
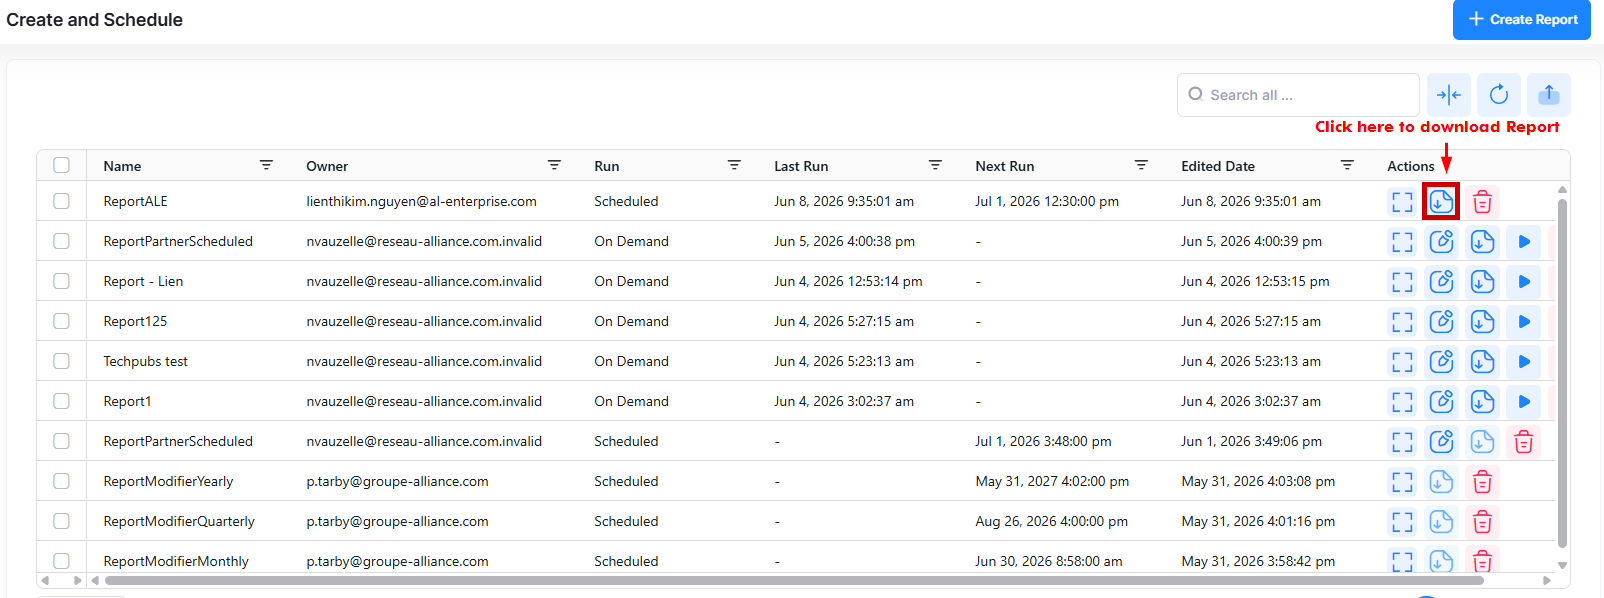
Consider the following when downloading the report:
-
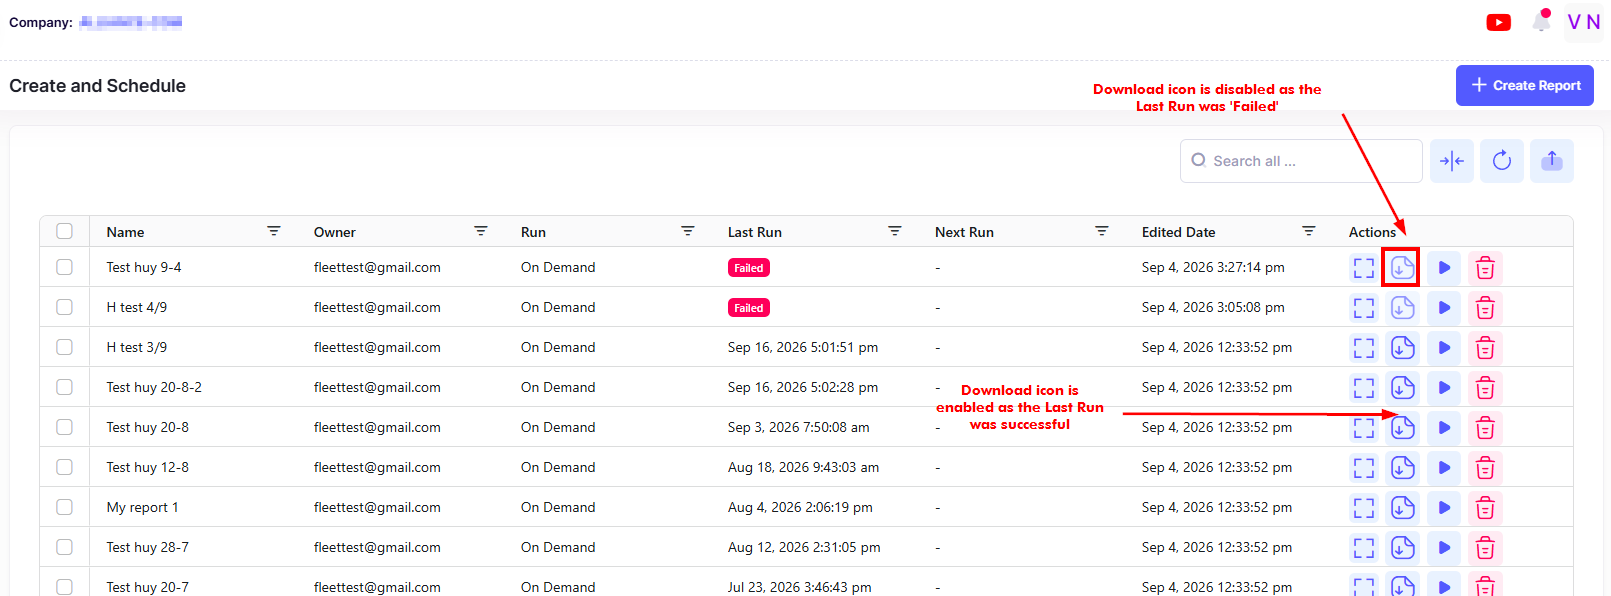
The download button is enabled only when the Last Run field contains a valid datetime, meaning the report was successfully generated.
-
The download icon is disabled if the report has never run or if the last run failed as shown below:
Run a Report
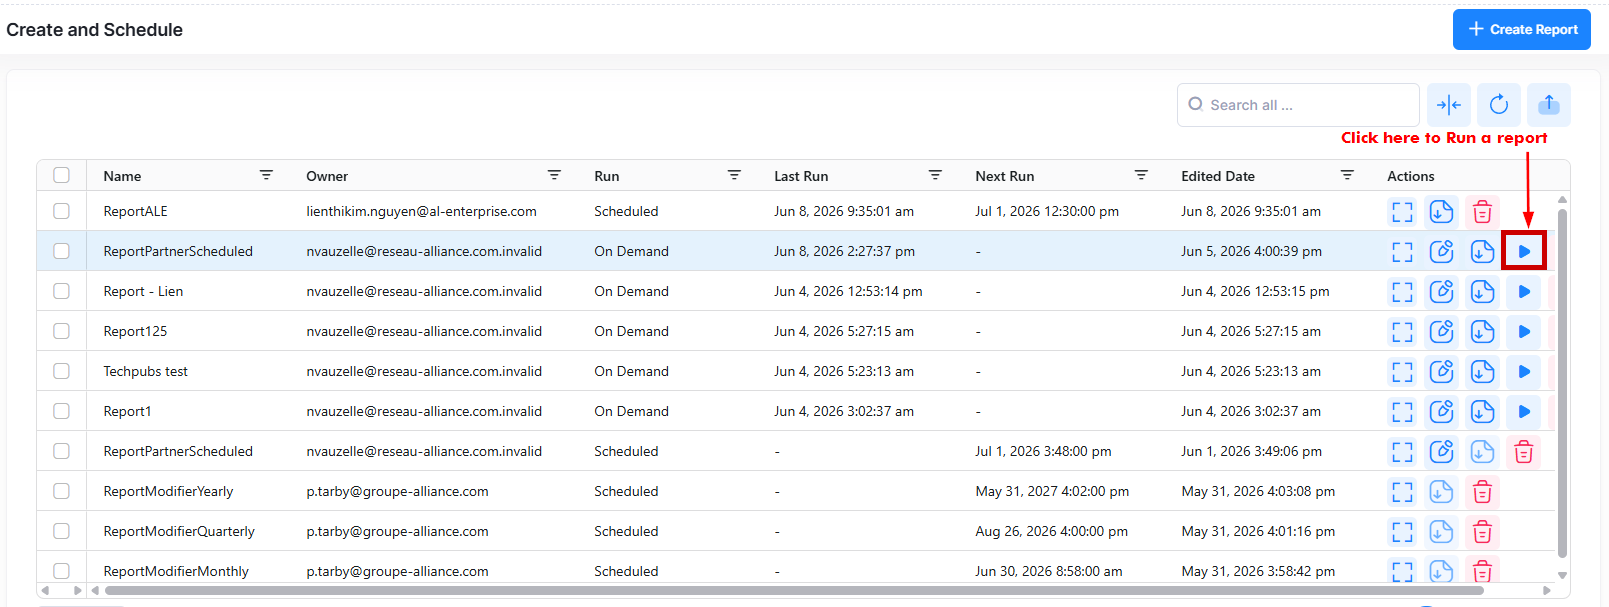
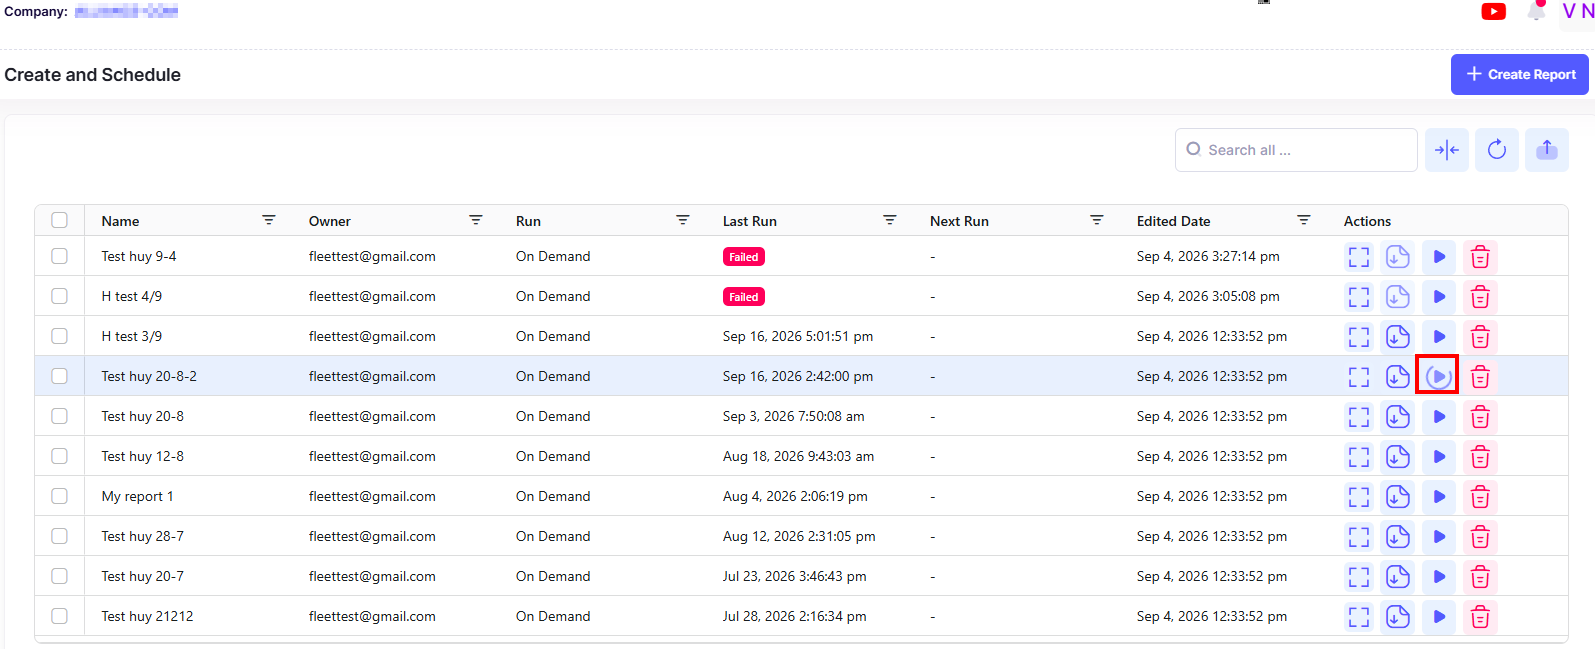
The Run button generates a report, providing immediate visual feedback and updating the report status upon completion. The running button displays a spinner or loading indicator. Once the report is being generated, the Run button is disabled to prevent multiple clicks.
Once the report generates successfully, the Last Run field updates to the new report's timestamp. The spinner disappears, and the run button returns to normal. If report generation fails, the Last Run field updates to ‘Failed’. The running tab behavior is shown below:
Edit a Report
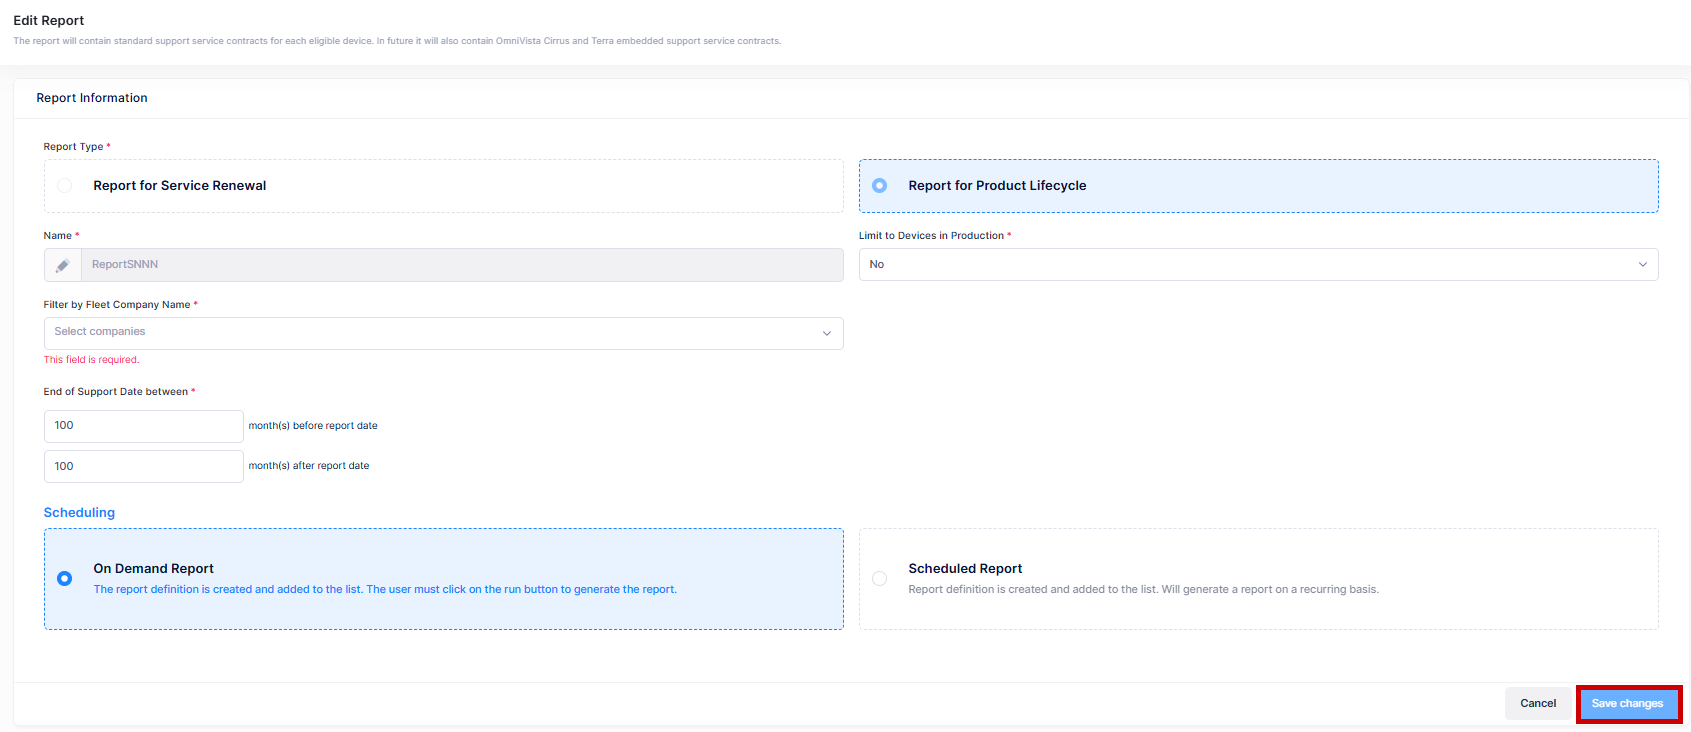
You can edit the parameter values for an existing Report by accessing the Edit Report screen. Click on the pencil icon under the “Actions” column next to the Report name that you want to edit.
The following Edit Report screen displays. Edit the fields as described above, then click on Save changes. You cannot edit the Report name and Report type.
Delete a Report
To delete a Report, select the Report you want to delete. Click on the trash can icon under the “Actions” column next to the Report name that you want to delete.
When you select the Report you want to delete, the following confirmation prompt appears:
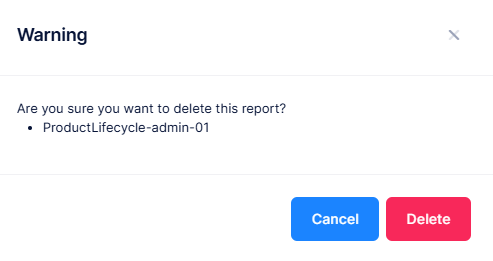
Click on Delete to confirm that you want to delete the Report.