
Copy the OVA file to the Proxmox Server
Before running the import, copy the appliance installer to one of your physical Proxmox servers.
-
Open an SSH session to the Proxmox physical server.
-
Copy the OmniVista Terra appliance
.runfile to a working directory on that server (for example,/tmp):
root@proxmox:~# cp <ovtx-10.6.1-appliance>.run /tmp/
-
Verify the file is present:
root@proxmox:~# ls /tmp/
Import the Virtual Machine Into Proxmox
Run the appliance installer from the Proxmox server shell. The installer guides you through a series of prompts to name the VM, configure CPU and memory, select the network bridge, and choose the storage target.
-
Navigate to the appliance directory:
root@proxmox:~# ls /tmp/
-
Run the installer:
root@proxmox:/tmp# ./<ovtx-10.6.1-appliance>.run
-
Answer each prompt shown by the installer:
-
When prompted for the VM name, enter
ovtx(or a unique name for each node, for exampleovtx-1,ovtx-2,ovtx-3for an HA cluster). -
When prompted for the number of CPUs, enter the vCPU count for your deployment option: 8 for each HA node or 16 for a single-node cluster.
-
When prompted for the memory, enter 32768 (32 GB in MB) for either deployment option.
-
When prompted for the network bridge, select the bridge assigned to you for this VM.
-
When prompted for the storage target, select a storage backend that meets the required performance profile (SSD or NVMe-backed storage).
-
-
Wait for the installer to finish. When complete, the VM appears in the Proxmox inventory.
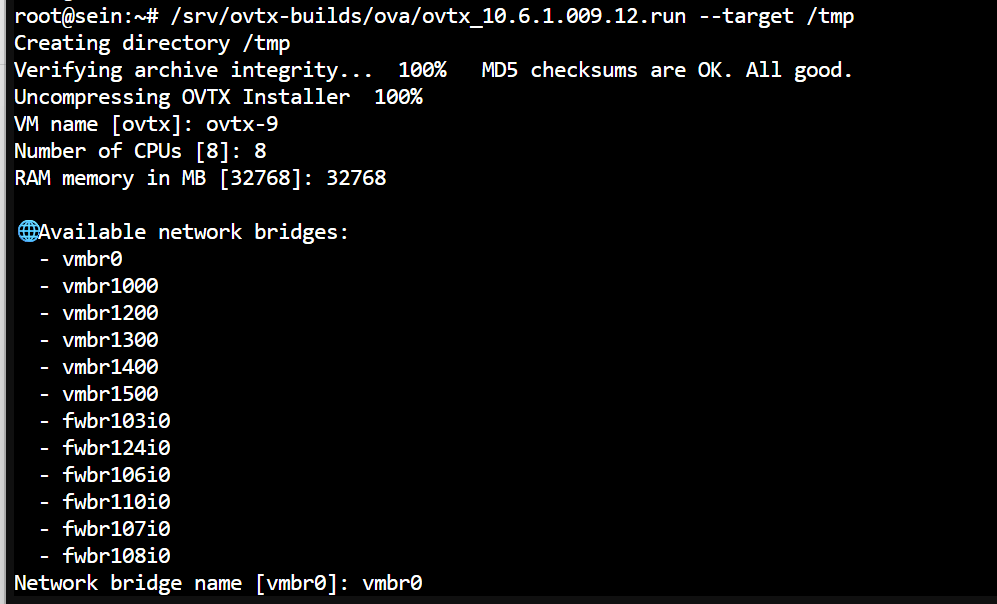
Proxmox appliance import - Enter the VM name, CPU count, memory, and network bridge before continuing.
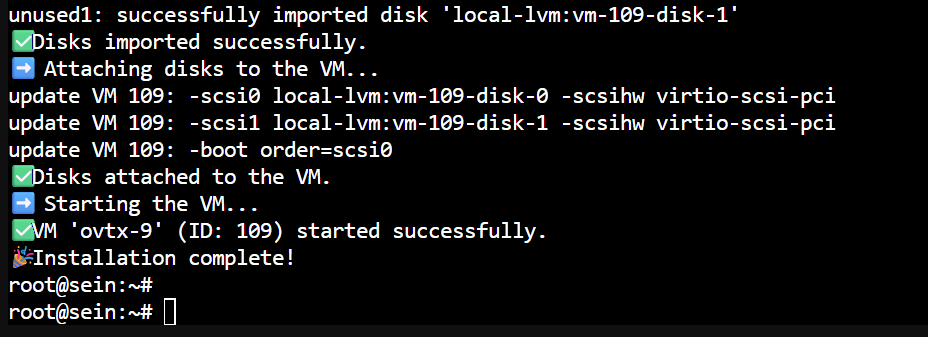
Appliance import completion - Verify disks are attached and the VM starts successfully.
Complete the First Boot Configuration
Once the VM is created and powered on, you configure it through an interactive console session. This section covers every prompt you will see during the first boot, in the order they appear.
Opening the VM Console
-
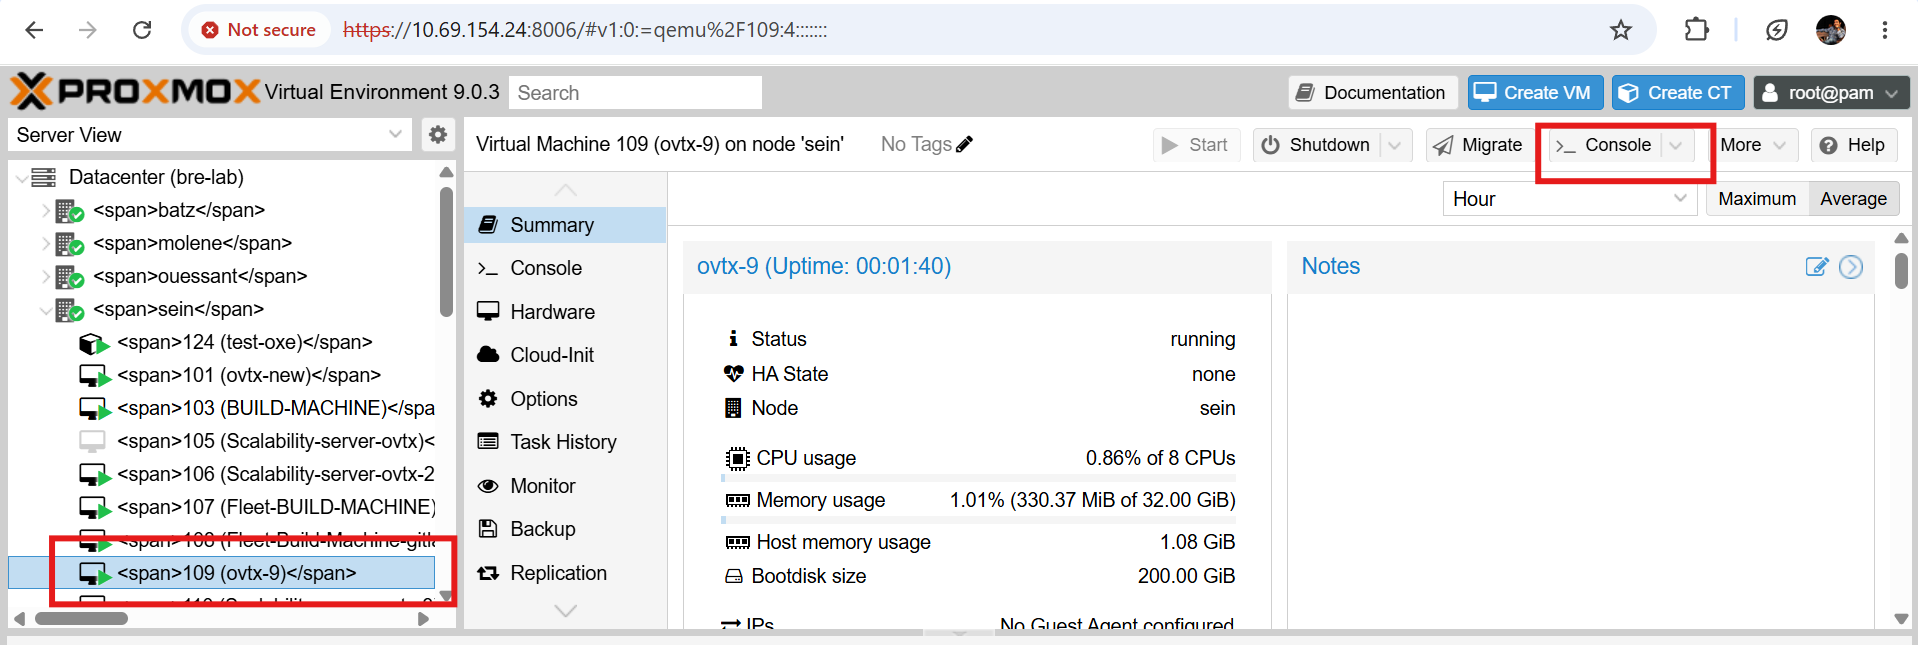
In the Proxmox inventory, select the newly created VM.
-
Click Console to open the VM console window.
-
When the console window opens, press Enter to begin the configuration wizard.
Step 1 - Disk Performance Test
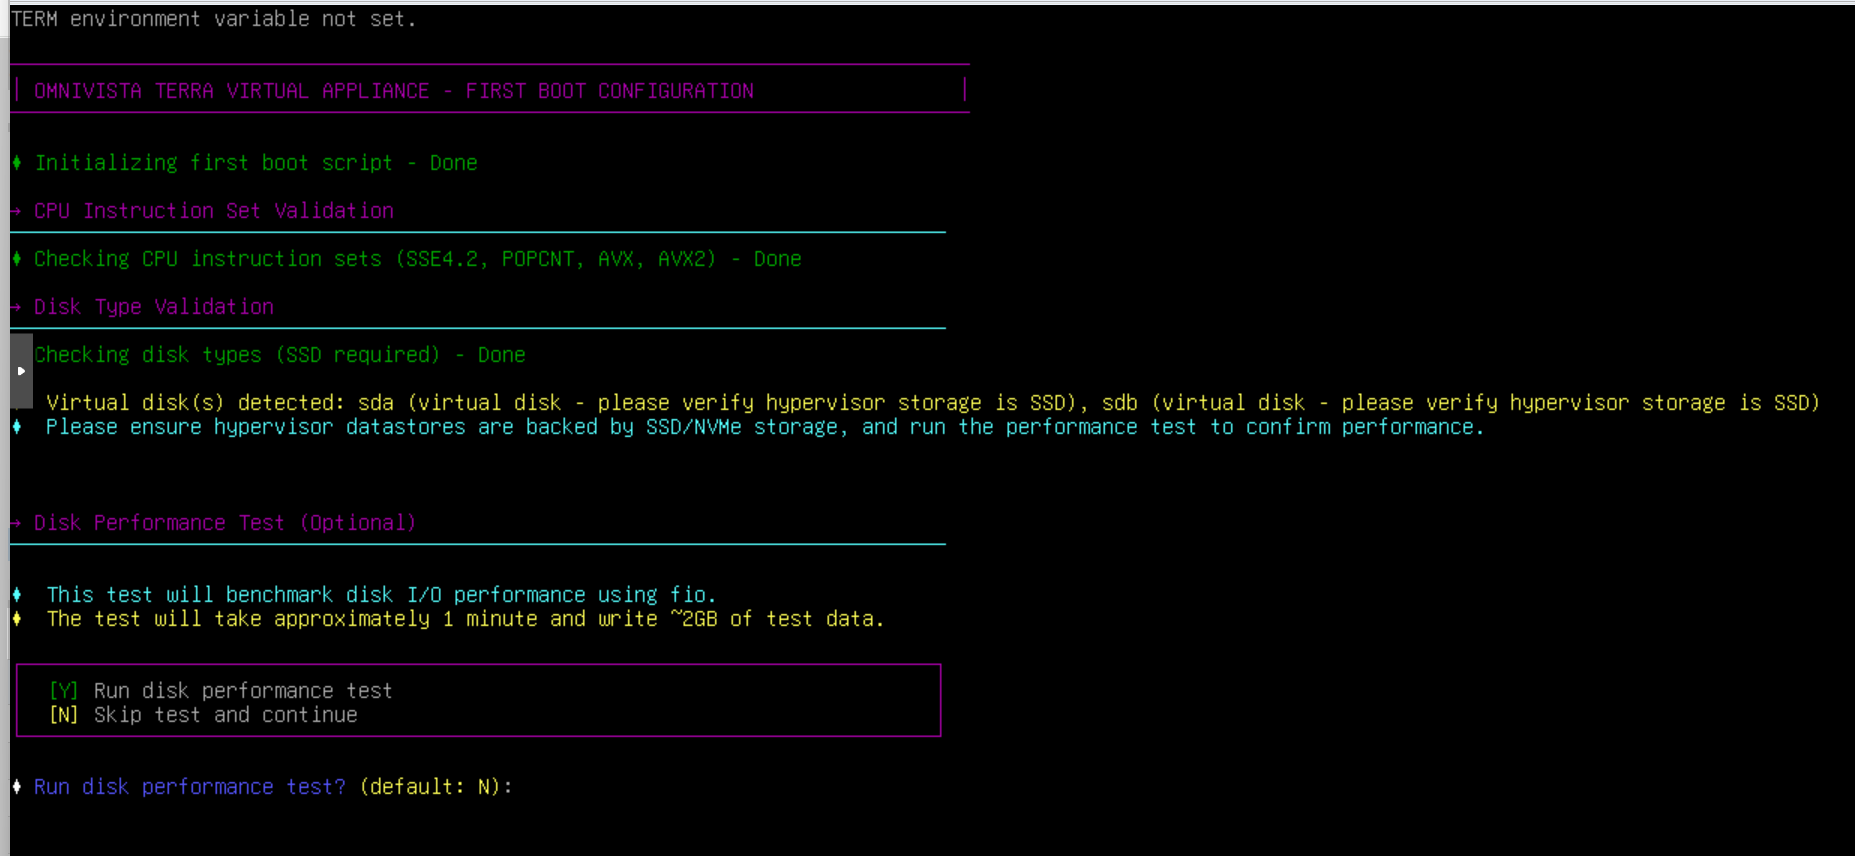
The first prompt asks whether to run a disk performance test before proceeding.
# Disk Performance Test prompt
Run disk performance test? [Y/N]:
-
Enter
Nto skip the disk performance test and proceed immediately. -
Enter
Yto run the test. The test validates that the storage meets the required I/O performance for OmniVista Terra.
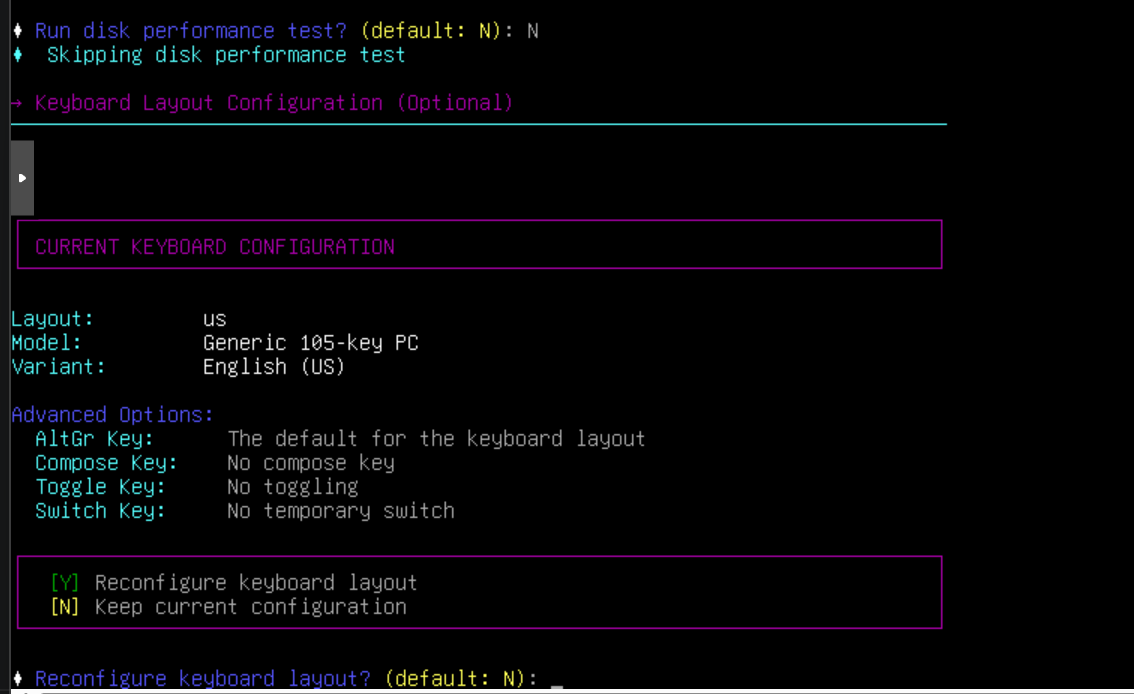
Step 2 - Keyboard Configuration
The next prompt asks whether to customize the keyboard layout.
# Keyboard configuration prompt
Use default keyboard settings? [Y/N]:
-
Enter
Nto keep the default keyboard settings. -
Enter
Yto select a custom keyboard layout from the available options.
Step 3 - Hostname and IP Stack Selection
Enter a unique hostname for this node. Each node in the cluster must have a different hostname. The system then automatically detects the network interface and presents the IP stack selection.
# Hostname entry
Enter hostname (default: debian): ovtx-100
One network interface found. Automatically selected: ens192
Choose the IP stack policy you want to set up:
  1. IPv4
  2. Dual-stack
Your option:
If you deploy a 3-node HA cluster, give each VM a distinct hostname, for example ovtx-1, ovtx-2, and ovtx-3.
Step 4 - IP Stack Policy
|
Option |
Behavior |
|---|---|
|
1. IPv4 |
The system uses IPv4 exclusively. Access Points and Switches are managed through the IPv4 network. Only IPv4 details are required in the next steps. |
|
2. Dual-stack |
The system uses both IPv4 and IPv6. For this procedure, continue with IPv4 only. |
Enter 1 to select IPv4 only.
Step 5 - IPv4 Network Configuration
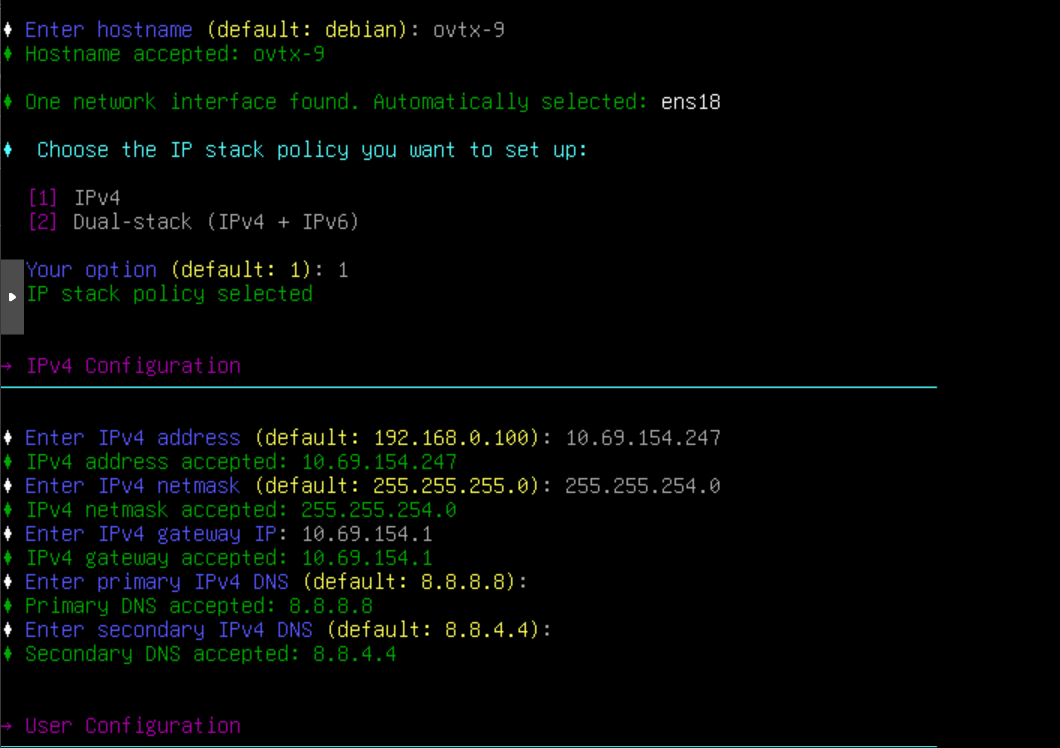
Enter the IP address, netmask, gateway, and DNS values that correspond to the network bridge you selected during the VM import.
-
IP address - An available address in the range for your assigned subnet. Replace
Xwith a free host number. Assign a different IP to each node. -
Netmask - Always
255.255.255.0for these subnets. -
Gateway IP - Use the gateway address from the table for your subnet.
-
Primary DNS - Use your own DNS server IP address, or leave blank to use the default value.
-
Secondary DNS - You may leave this blank. The system will use the default.
Step 6 - Set the ovtx User Password
Create a password for the ovtx operating system user on this node. This password is used to log in to the VM console directly.
# Password configuration
Enter ovtx user password: ************
Confirm ovtx user password: ************
Apply this configuration (y/n): y
After you enter y, the system applies the configuration. Wait for the process to complete. When finished, the OmniVista Terra login prompt appears.
Step 7 - Verify the Configuration
-
At the login prompt, enter the username
ovtxand the password you set above. -
After logging in, run the following command to confirm the IP address was applied correctly:
ovtx@ovtx-1:~$ ip addr
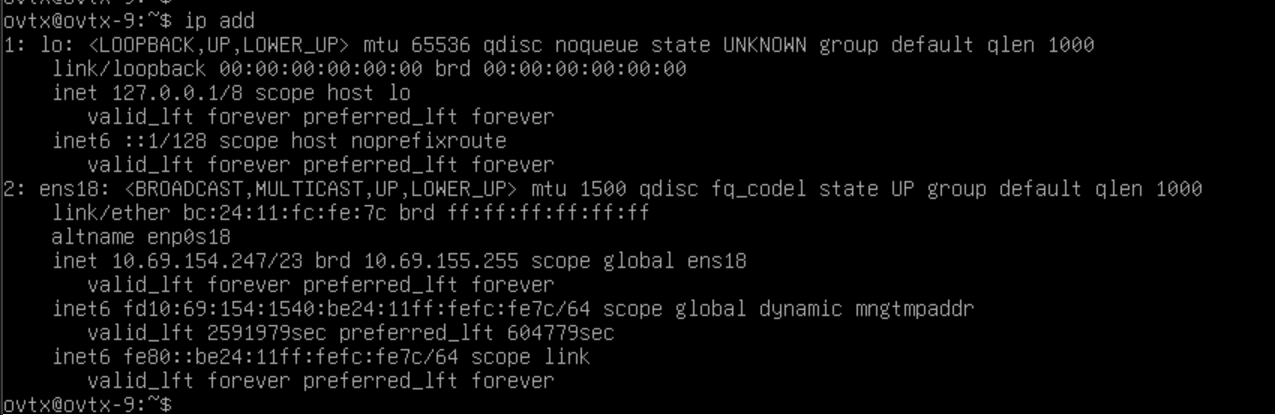
Check that the IPv4 address you entered appears on the correct network interface. If the address is missing or incorrect, repeat the first-boot configuration for this node.
For an HA cluster, repeat the entire VM import and first-boot configuration for the 2nd and 3rd nodes, assigning unique hostnames and IP addresses to each.
Access OmniVista Admin Center to Configure OmniVista Terra
After importing the VM and completing the first boot configuration, access the OmniVista Admin Center to create an account. See the OmniVista Admin Center online help for the next steps required to configure OmniVista Terra.