Manually Add a Device in Full Management Mode
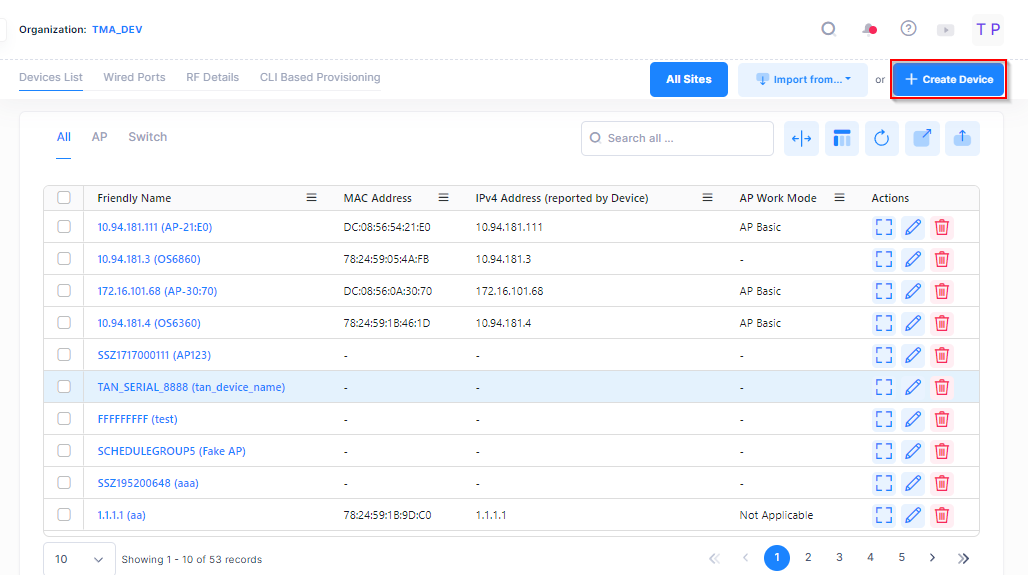
The Device List screen displays a list of devices that are known to an organization site. The list will be empty if no devices have been added to the site. There are three methods for adding a device to a site: import an OmniVista CSV file, import an Excel XLSX file, or manually add a device.
To manually add a single device to a specific Site, click Create Device on the Device List screen to bring up the Create Device form.
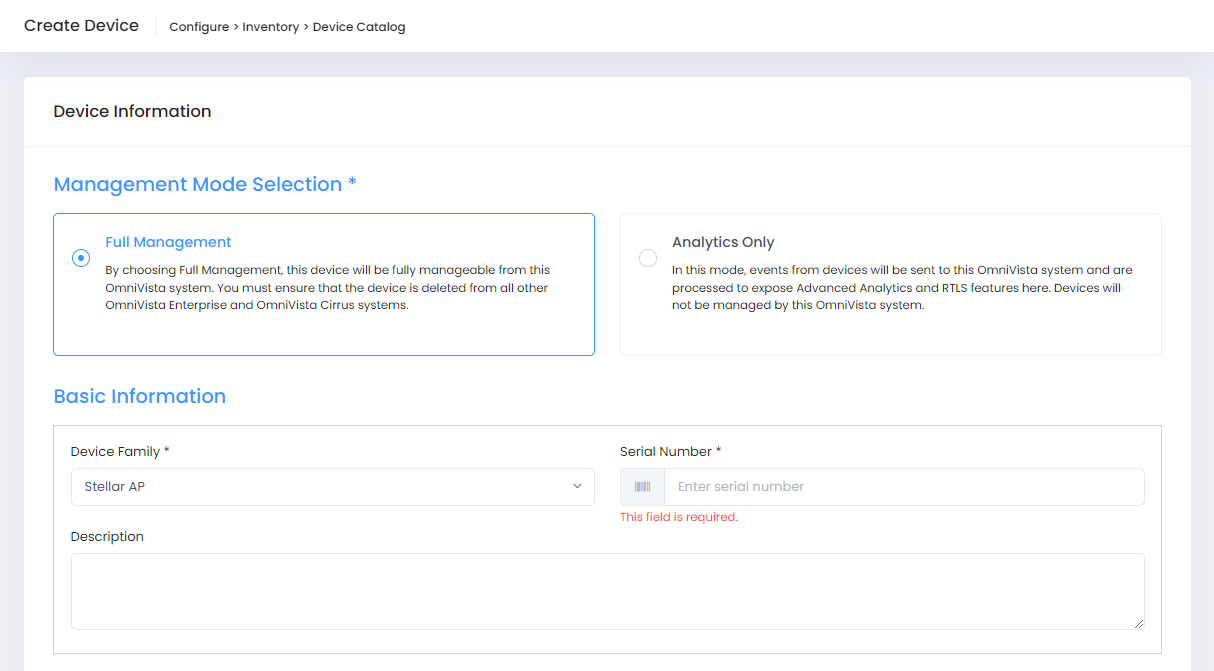
The Create Device form is where you specify that the device is going to be managed by OmniVista Cirrus in Full Management Mode, then enter information to identify and describe the device and where that device is located. Selecting the management mode is the first required step for adding a device to the Device Catalog.
The Management Mode Selection option defaults to Full Management. In this mode, you can directly configure the device and view the device configuration from the OmniVista Cirrus 10 user interface. This is different from Analytics Only mode, where you add a device to monitor and analyze from OmniVista Cirrus 10 but the device is configured from a legacy instance of OmniVista (such as OmniVista 2500 NMS or OmniVista Cirrus 4).
OmniVista Cirrus 10 supports only the Full Management Mode for Switches. The Full Management Mode and Analytics Only Mode are both supported for Access Points.
Once the Management Mode has been selected, you can complete the rest of the Create Device form, which is divided into the following sections:
Complete the required fields and any optional fields in each section, as described below, then click on Create Device.
Click on Create another to return to the Create Device form to fill out for another device. If this box is not checked, the display returns to the Device Catalog screen.
Basic Information
Basic Information
Device Family - Select the device family to which the device that you want to manage belongs (for example, Stellar APs or Switches).
Serial Number - Enter the serial number of the device. Note the following when entering the serial number of the device that you want to manage:
Make sure the device is not already managed by another instance of OmniVista. If so, remove the device from the other instance, then add the device to OmniVista Cirrus 10.
When adding a Virtual Chassis (VC), enter the serial number of the switch that is designated as the Master chassis. Do not use the serial number of any other switch in the VC configuration.
Description - Enter an optional description for the device.
Software Information and Assigned Site
Software Information
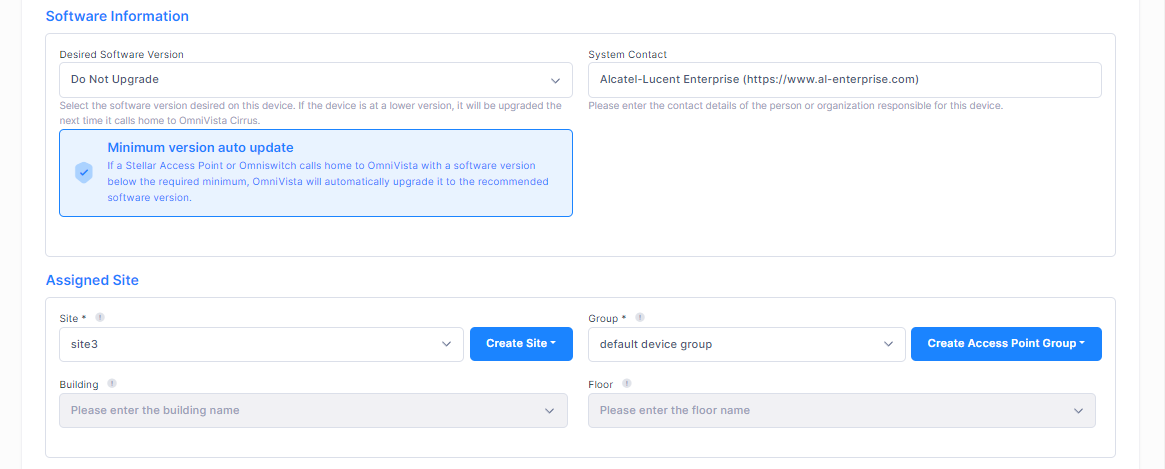
Desired Software Version - Select a specific software version for the device from the drop-down menu. This will trigger the device to automatically download and install the selected software version as part of the activation process. Note that the selected software version must be higher than the version currently installed on the device. Also note that if the device does not support the selected software version, the "Desired Software Version" field will be set to "Do Not Upgrade" after the device is validated.
Do Not Upgrade - Select "Do Not Upgrade" if you do not want to change the installed software on the device. If the device is part of an existing network, selecting “Do Not Upgrade” will leave your device running its current software version. If this is a new device, updating to the latest release is recommended. In general, you should only select a specific release if you understand the features of the specific release.
Minimum Version Automatic Update. If a device calls home to OmniVista with a software version below the required minimum, OmniVista will automatically upgrade the device to the recommended software version.
System Contact - The contact information for the device (for example, “My Company Inc https://www.mycompany.com”).
Assigned Site
Site - Select the Organization Site where the device is physically located and installed. To select an existing Site, click on the Site name in the drop-down menu or click on Create Site to create a new Site to assign to the device.
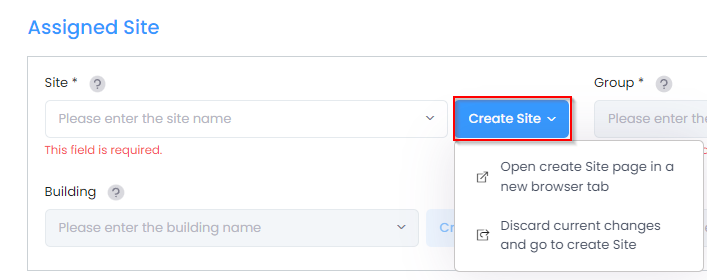
When you click on Create Site, a drop-down menu appears from which you can select how you want to access the Create Site screen. See Configure and Manage a Site for steps on how to define a site for an Organization.
Group (AP only) - The Access Point group from which the device will get its provisioning configuration. When you selected a Site for the device, a list of Access Point Groups associated with the Site is automatically provided in this field. Select one of the existing groups or the “Mgmt VLAN based automatic grouping” option from the drop-down list. You can also click on Create Access Point Group to create a new group for the Site.
Mgmt VLAN based automatic grouping - If you select this option, the AP device is automatically assigned to an AP Group that is associated with a Provisioning Configuration that specifies VLAN IDs for the Auto-Group VLANs attribute. The assignment is based on the AP management VLAN ID received by LLDP. If the management VLAN matches a VLAN ID specified for Auto-Group VLANs, the AP is assigned to the corresponding AP Group.
If the Extended SSID Scale option is enabled for the selected group, make sure that the serial number belongs to a Stellar AP model that supports up to 14 SSIDs. Otherwise, the AP will stay in 'Waiting For First Contact' status.
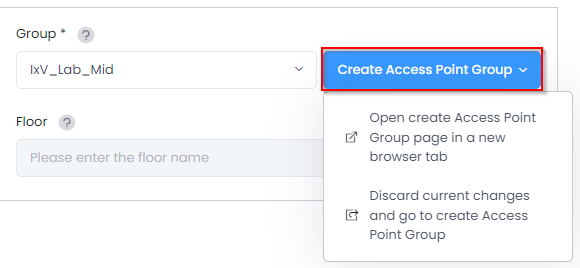
When you click on Create Access Point Group, a drop-down menu appears from which you can select how you want to access the Create Access Point Group screen. See Configure and Manage Access Point Groups for more information.
Building - The name of the building at the Organization Site where the device is physically located. When you selected a Site for the device, a list of building names associated with the Site is automatically provided in this field. Select one of the existing building names from the drop-down menu. See Configure and Manage a Building for steps on how to define a building for a Site.
Floor - The name of the floor in the building where the device is physically located. When you selected a building where the device is physically located, a list of floor names associated with that building is automatically provided in this field. Select one of the existing floor names from the drop-down menu. See Configure and Manage a Floor for steps on how to define a new floor for the building.
Assign License
Assign License
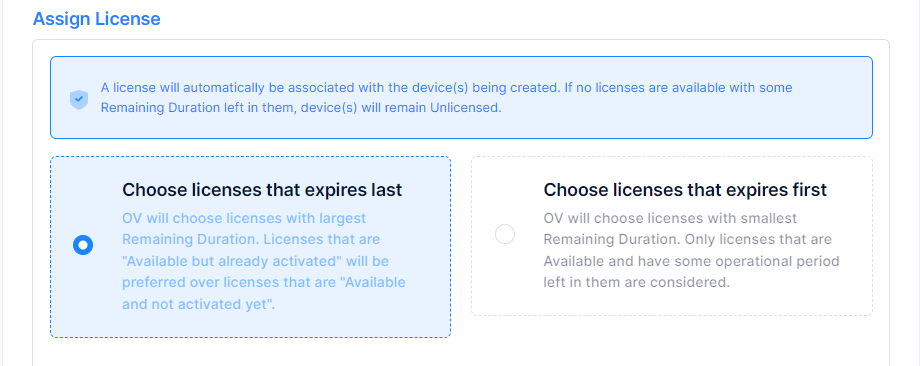
Automatically assign a license to the device. Note that if there are no licenses available that have a Remaining Duration, the device will remain unlicensed. This section does not appear if the Organization is under a Trial License, as it applies only to paid license subscriptions. Select one of the following options to specify how OmniVista Cirrus will select licenses to assign to a device:
Choose licenses that expires last - Licenses that have the most amount of Remaining Duration time are selected. Licenses that are “Available (Activated)” are preferred over licenses that are “Available (Not Activated).
Choose licenses that expires first - Licenses that have the least amount of Remaining Duration time are selected. Only licenses that are “Available” and have some amount of time left until they expire are considered.
Initial Configuration
Initial Configuration (Switch Only)
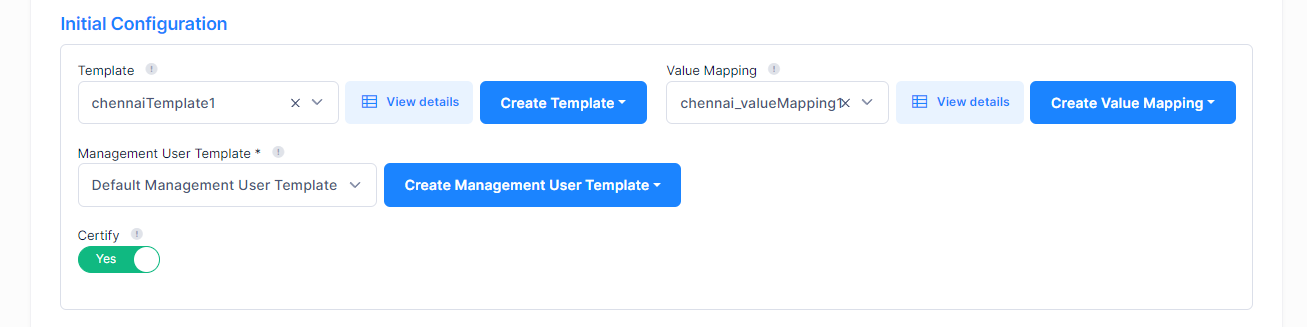
The Initial Configuration section of the Create Device form displays when you select Switches for the Device Family. This section does not appear when you select Stellar AP. The Initial Configuration is pushed to
Template - Select an existing Configuration Template that you want to push to the Switch or click on Create Template to open the Create Template screen and create a new template. You can also click on View Details to view information about the selected template. The configuration template contains CLI commands that are applied before the Switch becomes managed. Note that you do not have to select a Configuration Template. For example, you may want to onboard a switch with an existing configuration but do not want to modify that configuration. If you do select a template to apply to the Switch, the template CLI commands are appended to the Switch configuration.
Value Mapping - If you use variables to create a dynamic Configuration Template, you must create Value Mappings to define the values of the variables in the template. Select an existing Value Mapping or click on Create Value Mapping to open the Create Value Mapping screen and create a new Value Mapping. You can also click on View Details to view information about the selected mapping.
Management User Template - Select an existing Management User Template or click on Create Management User Template to open the Create Management User screen and create a new template. The Management User Template contains CLI/FTP credentials that OmniVista Cirrus will use to connect with the switch. By default, the “Default Management User Template” is pushed to the Switch unless you select a different template.
Certify - Save the configuration to the Certified Directory on the Switch. Note that this option is enabled by default. If you disable this option and the Switch reboots, the configuration is not saved. It is recommended that you leave this option enabled.
Location and Device Image

Location in the Building
Location - Enter details about where a device is located within a Floor (for example, front desk, Rack-10). This option is not available if the From LDAP option is selected.
From LLDP - When this option is selected, OmniVista will use LLDP to automatically add the location of the device.
Device Image
Upload an image file (png, jpg, or jpeg) to associate with the device.