The CLI Based Provisioning Management User Templates screen displays information about Management User Templates. OmniVista Cirrus uses SSH to log into the switch using the credentials specified in the Management User Template and configures/provisions the switch.
From the Management User Template screen, you can:
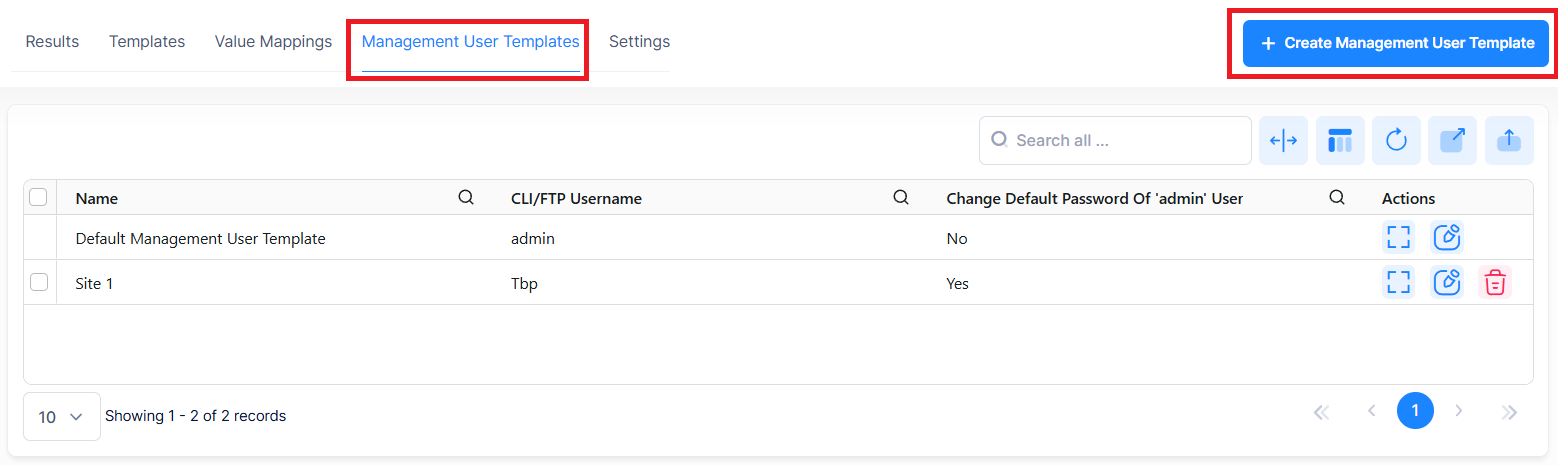
To access the Management User Templates, go to LAN > CLI Based Provisioning > Management User Templates on the OmniVista Cirrus Menu.
Configuring Management User Templates
By default, the Default Management User Template is pushed to the Switch unless you select a different template. You can edit the pre-configured default template or create and save custom Management User Templates.
Configuring the Default Management User Template
The Default Management User Template uses the “admin/switch” login credentials to connect with the Switch.
You cannot delete the Default Management User Template or change the template name. However, you can edit the credentials that OmniVista Cirrus will use to connect with a Switch.
-
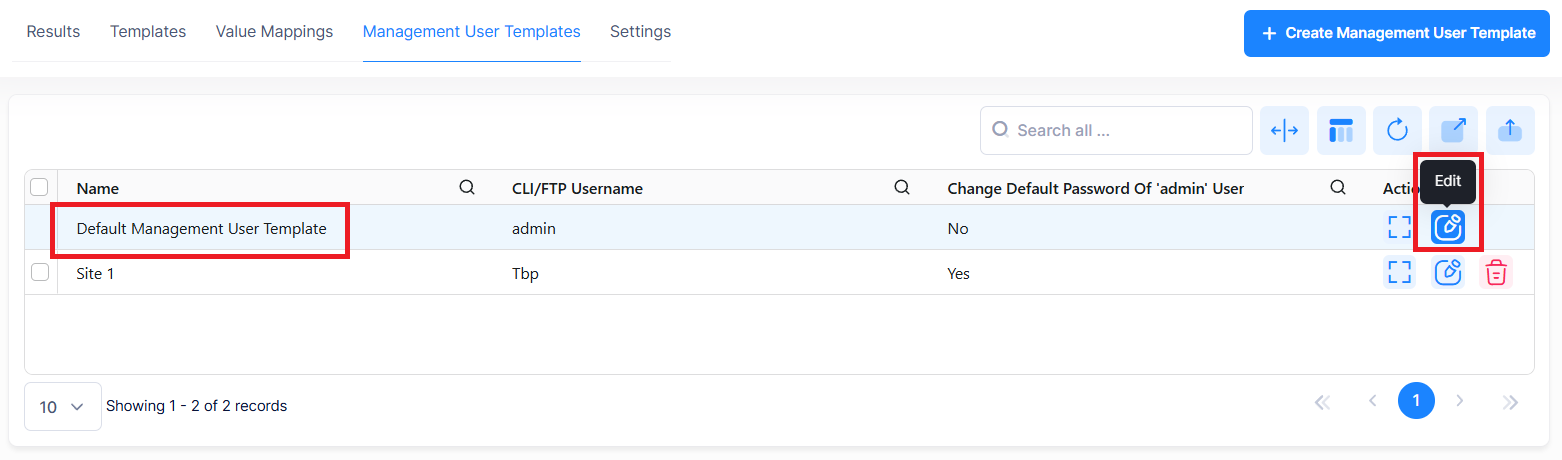
To edit the Default Management User Template, click on the “Edit” icon.
-
The “Edit Management User Template” screen is displayed.

In the “Default Management User Template”, you can configure the following credentials settings:
-
Create new credentials - Configure the CLI/FTP Username/Password for CLI/FTP access to the Switch.
-
Use existing credentials - Use the existing CLI/FTP Username/Password currently configured on the switch for CLI/FTP access. Enter the CLI/FTP Username/Password. OmniVista will expect that these credentials exist on the switch. If they do not, the switch will fail during provisioning with an error message displayed on the Results screen.
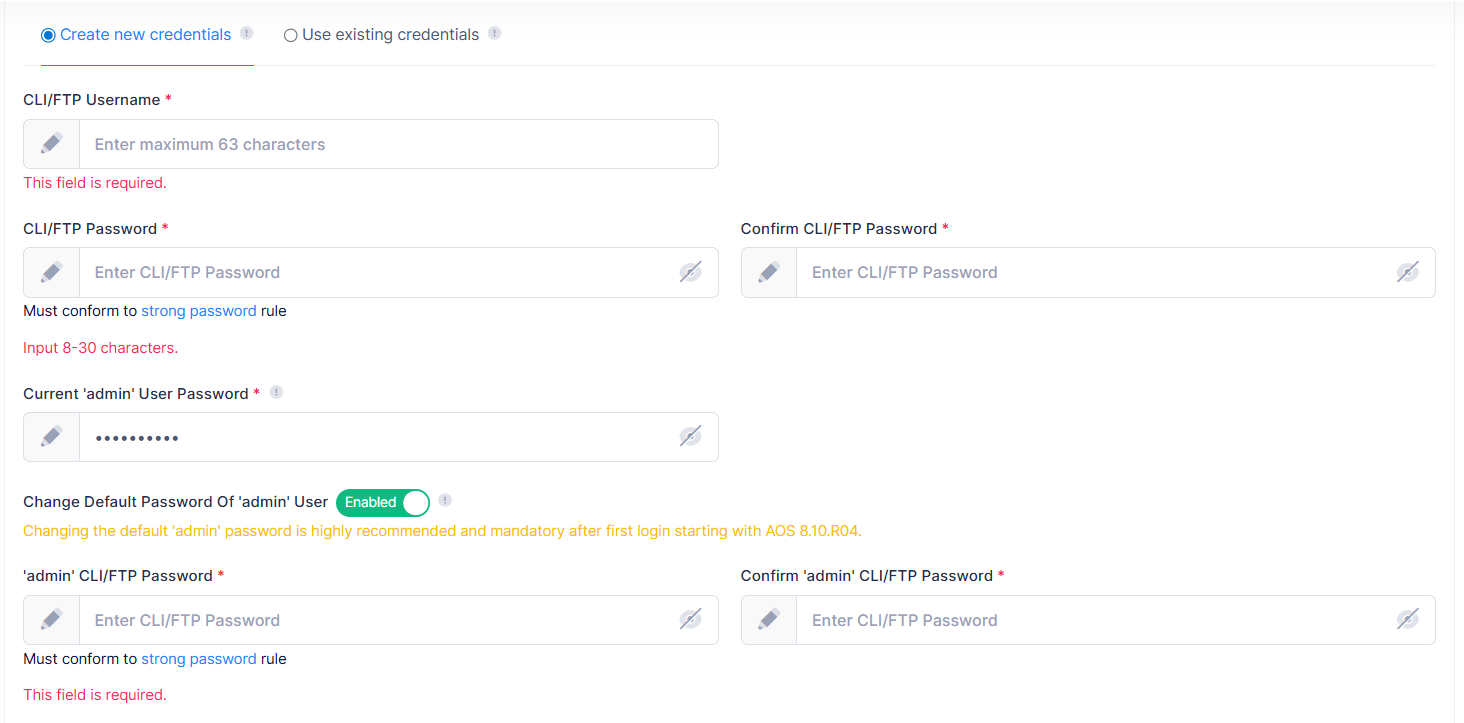
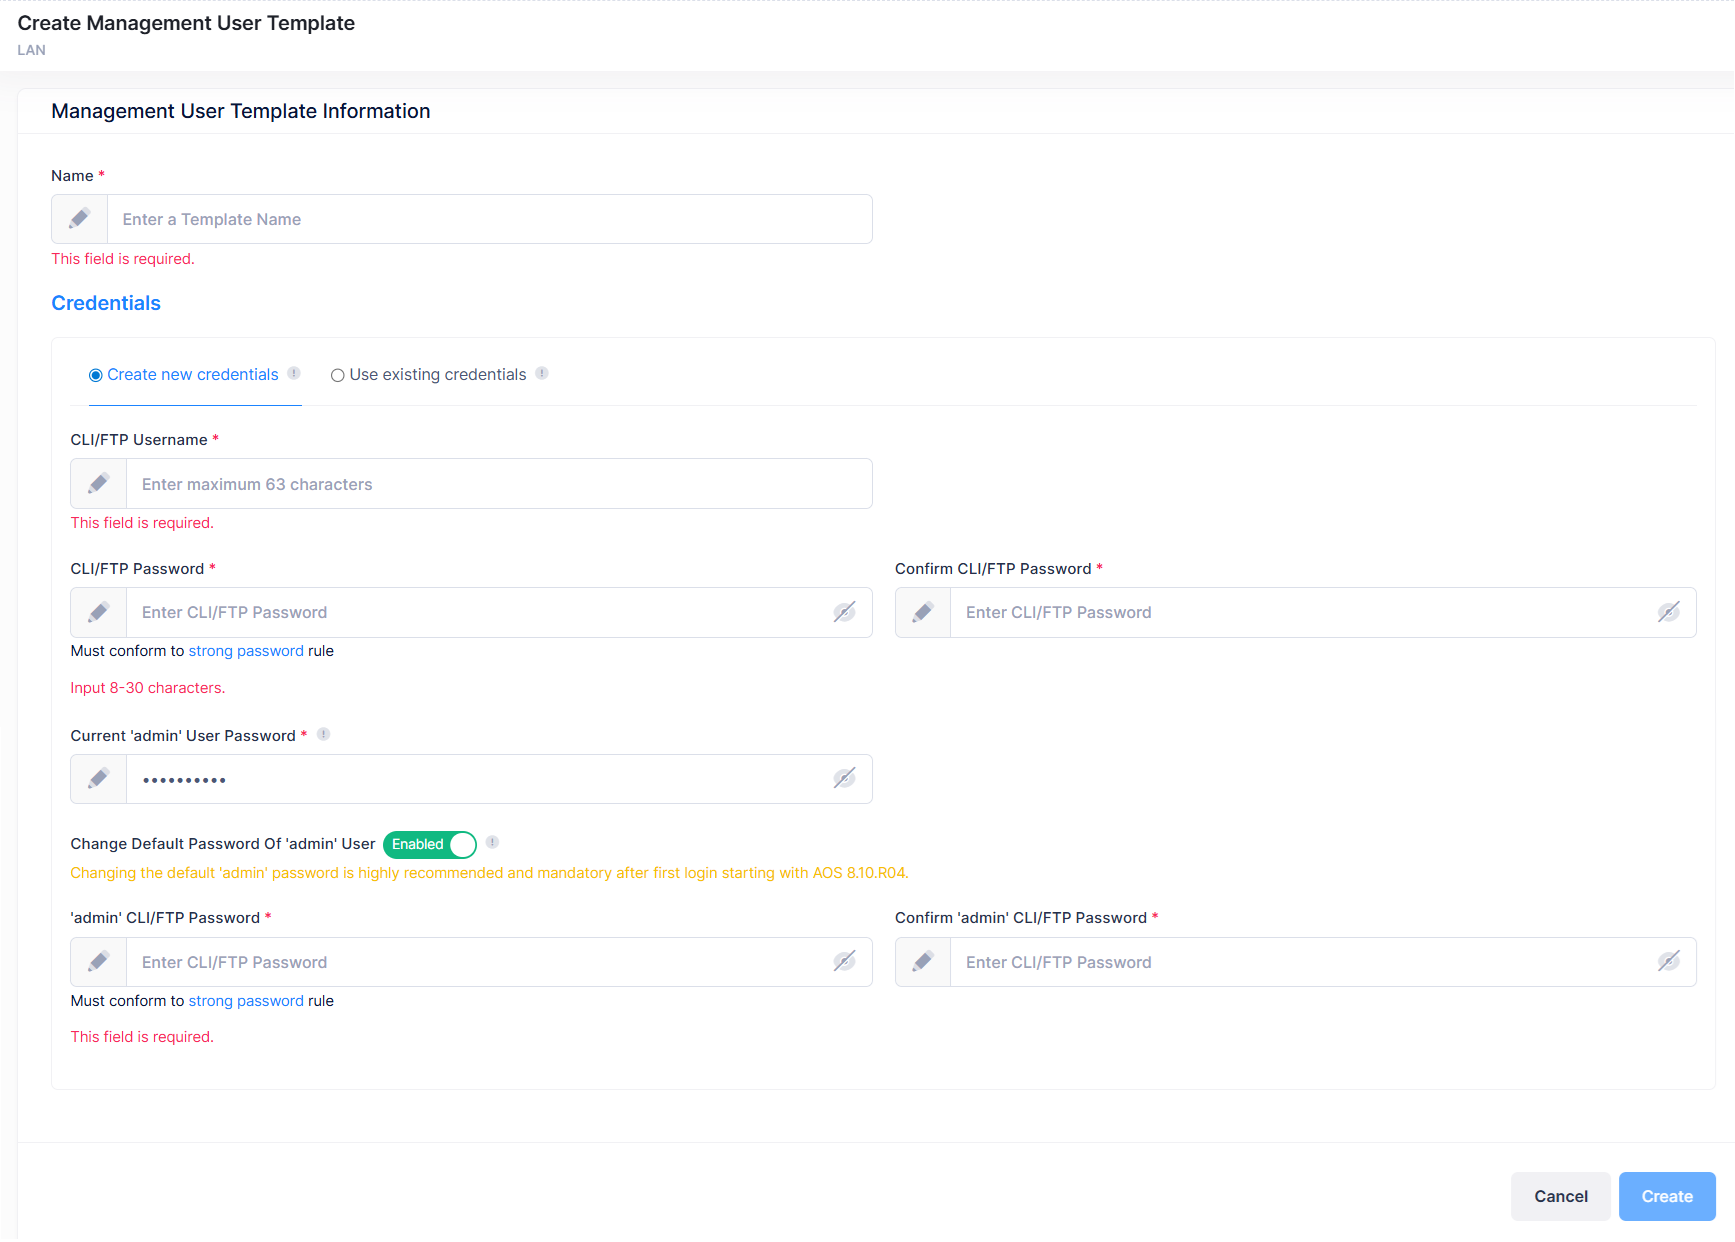
Create New Credentials
To create new credentials, select the radio button for Create new credentials.
The following configuration options are displayed for the “Create new credentials”:
-
CLI/FTP Username - The username that OmniVista Cirrus will use to establish CLI/FTP sessions with the switch. The username specified will be used to auto-login to devices when CLI sessions are established. It will also be used to perform FTP with the device when configuration files are saved and restored (see note below).
-
CLI/FTP Password - The password that OmniVista Cirrus will use to establish CLI/FTP sessions with the switch. The username specified will be used to auto-login to devices when CLI sessions are established. It will also be used to perform FTP with the switch when configuration files are saved and restored.
-
Confirm CLI/FTP Password - Confirm the CLI/FTP Password.
-
Current 'admin' User Password - Specifies the password of the “admin” user that is currently configured on the switch and was used to apply the initial device configuration.
This password is used by OmniVista during provisioning, upgrades, and force provisioning to authenticate with the device.
-
It automatically populates with the default password (switch) for fresh deployments and upgrades.
-
You can update this value if the admin password has already been changed on the device.
-
This field is not automatically updated after a successful password change.
-
-
Change Default Password Of 'admin' User - Controls whether OmniVista changes the default admin user password on the switch during provisioning or onboarding.
-
This option can be automatically enabled or disabled based on the current admin password state.
-
When enabled, OmniVista applies the new password defined in the ‘admin’ CLI/FTP Password fields.
-
Changing the default 'admin' password is highly recommended and mandatory after first login.
-
-
'admin' CLI/FTP Password - Specifies the new password to be configured for the admin user for both CLI and FTP access.
-
Used when changing the default admin password or onboarding the device with new credentials.
-
Must comply with the device password policy.
-
If the admin password is successfully changed, this password is used for the current onboarding operation.
-
-
Confirm 'admin' CLI/FTP Password - Confirms the value entered in the ‘admin’ CLI/FTP Password field to ensure accuracy.
Once the required details are entered, click Save.
Behavior of Create New Credentials
Interaction with “Change Default Password of admin user”
The availability of the “Change default password of admin user” option depends on the value entered in Current “admin” User Password field:
-
If Current “admin” User Password is
switch, then Change Default Password of ‘admin’ User option is force-disabled. -
If Current “admin” User Password is not
switch, then Change Default Password of ‘admin’ User option is optional and can be enabled or disabled by the user.
If the switch username/password is different than the one defined in the Default Management Users Template, OmniVista will be unable to connect to the switch and provisioning will fail. The switch will be displayed on the Results Screen with a Provisioning Status of "Failed". If this happens, configure the "Use existing credentials" option on the Management Users Template, and "Force Provision" the switch. See the Results screen online help for more information on "Force Provisioning".
For initial provisioning of an unmanaged switch, OmniVista connects to the switch using default admin user password to create new credentials. If the switch uses a different default admin password, use the “Use existing credentials” instead.
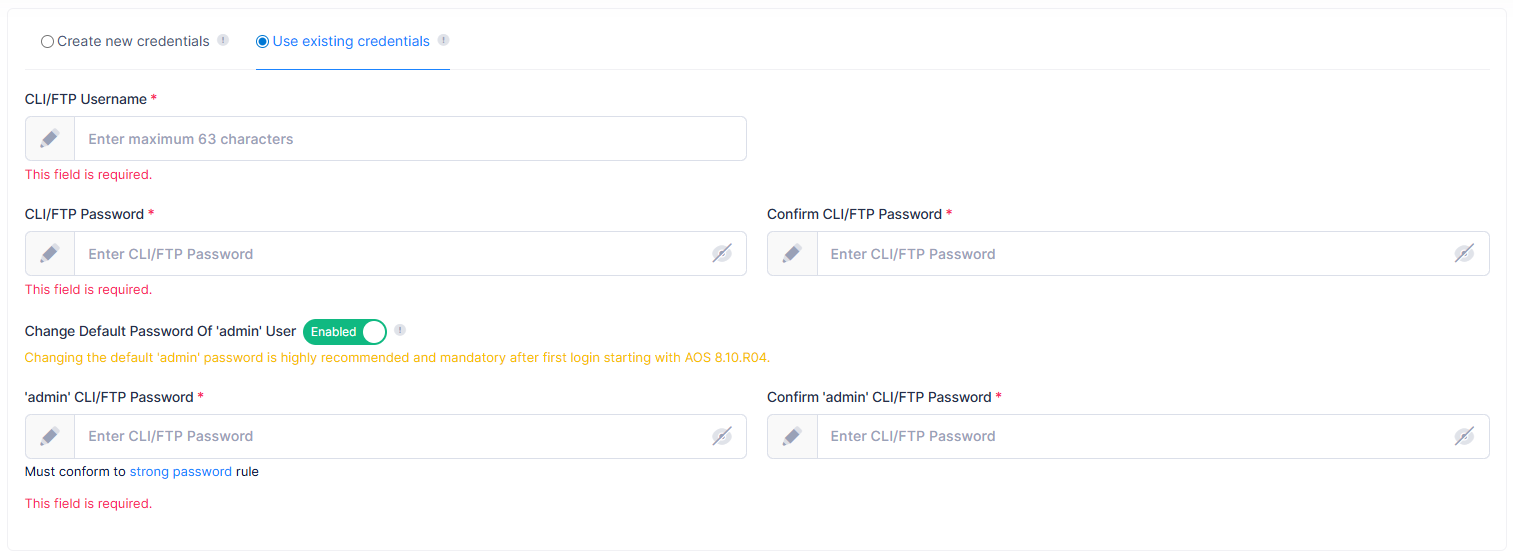
Use Existing Credentials
To use existing credentials, select the radio button for Use existing credentials.
The following configuration options are displayed for the “Use existing credentials”:
-
CLI/FTP Username - Specifies the username used by OmniVista to access the switch through CLI and FTP.
-
CLI/FTP Password - Specifies the password associated with the CLI/FTP username.
-
Confirm CLI/FTP Password - Confirms the value entered in the CLI/FTP Password field.
-
Change Default Password of ‘admin’ User - Controls whether OmniVista changes the default admin user password on the switch as part of the operation.
-
This option can be enabled, disabled, or enforced automatically based on the entered credentials.
-
Once the required details are entered, click Save.
Behavior of Use Existing Credentials
If CLI/FTP Username is admin,
-
If CLI/FTP Password is
switch(default password), then Change Default Password of ‘admin’ User is force-disabled. -
If CLI/FTP Password is not
switch, then Change Default Password of ‘admin’ User option is optional and can be enabled or disabled by the user.
If CLI/FTP Username is not admin:
-
The “Change Default Password of ‘admin’ User” is disabled by default.
-
It can be manually enabled to change the admin password during the operation.
If Current “admin” User Password and New admin password (entered when Change Default Password of ‘admin’ User is enabled) are different,
Then:
OmniVista successfully changes the admin password on the switch to the “New admin password” to onboard the switch for the current operation.
OmniVista does not automatically update the stored value of Current “admin” User Password.
The Current “admin” User Password value must be manually updated for future operations when the password is changed.
Creating a Custom Management User Template
To create a custom Management User Template to use instead of the Default Management User Template, click on Create Management User Template.
The “Create Management User Template” screen is displayed.
You can perform the following configuration:
-
Name - Enter the name of the template.
-
Create new credentials for the template. See, Create New Credentials.
-
Use existing credentials for the template. See, Use Existing Credentials.
Complete the fields as described, then click Create. The new custom Management User Template is now available to select for CLI Based Provisioning.
If the switch username/password is different than the one defined in the custom Management Users Template, OmniVista will be unable to connect to the switch and provisioning will fail. The switch will be displayed on the Results Screen with a Provisioning Status of "Failed". If this happens, configure the "Use existing credentials" option on the Management Users Template, and "Force Provision" the switch. See the Results screen online help for more information on "Force Provisioning".
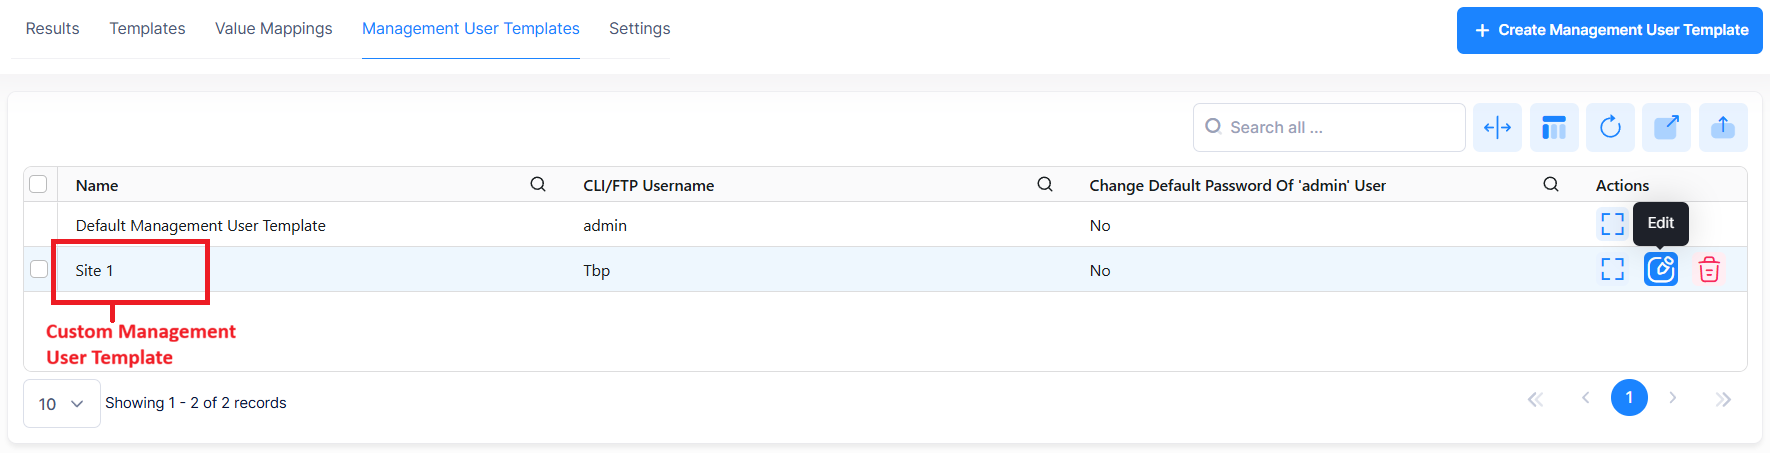
Editing a Custom Management User Template
You can edit a custom Management User Template to modify login credentials. For example, if the username/password specified in the template do not match the login credentials on the switch, you will want to change the username/password defined in the custom Management Users Template.
When you edit a Management User Template, the changes only affect new switches during onboarding. Switches already managed in your Organization will not get the updates, even if they're using this template. To change credentials for switches that are already managed, you need to update them in the Discovery Manager Entry instead.
To edit the custom Management User Template:
-
Click on the Edit icon under the “Actions” column of the custom Management User Template you want to edit.
-
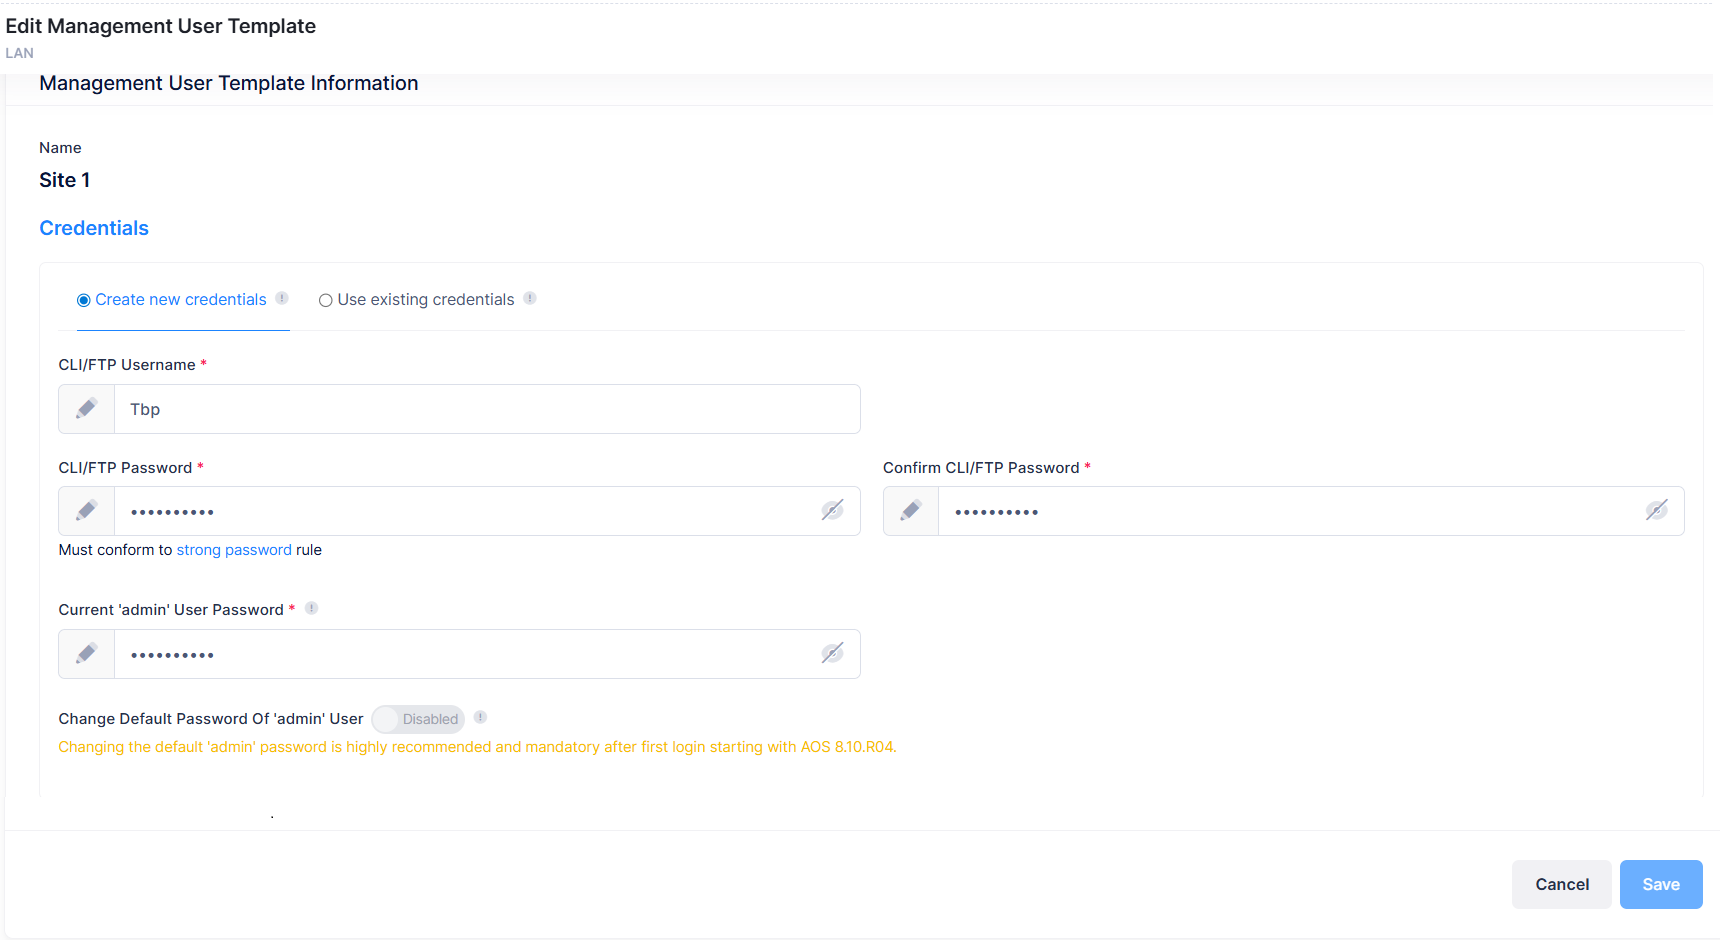
The Edit Management User Template screen is displayed.
-
Edit the login credentials as needed, then click on Save.
Deleting a Custom Management User Template
You can delete the custom Management User Templates from the templates list.
To delete a custom Management User Template:
-
Click on the Delete icon under the “Actions” column next to the template that you want to delete.

-
A warning screen to delete the template is displayed.
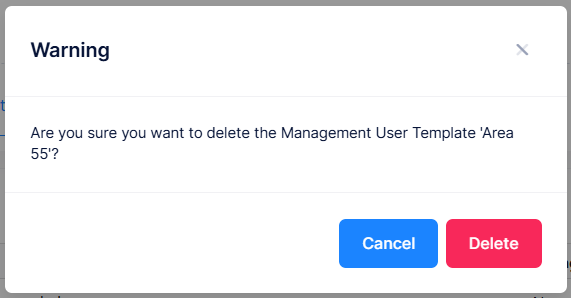
-
Click on Delete to delete the template.
You cannot delete the Default Management User Template; only custom templates can be deleted.
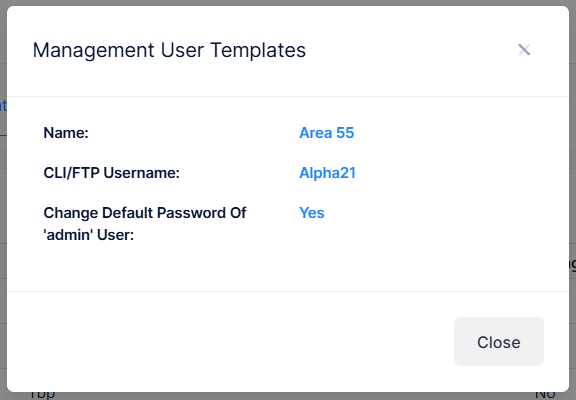
Display Management User Template Information
To view the additional information about the template:
-
Click the Additional information icon in the “Actions” column next to a Management User Template entry.
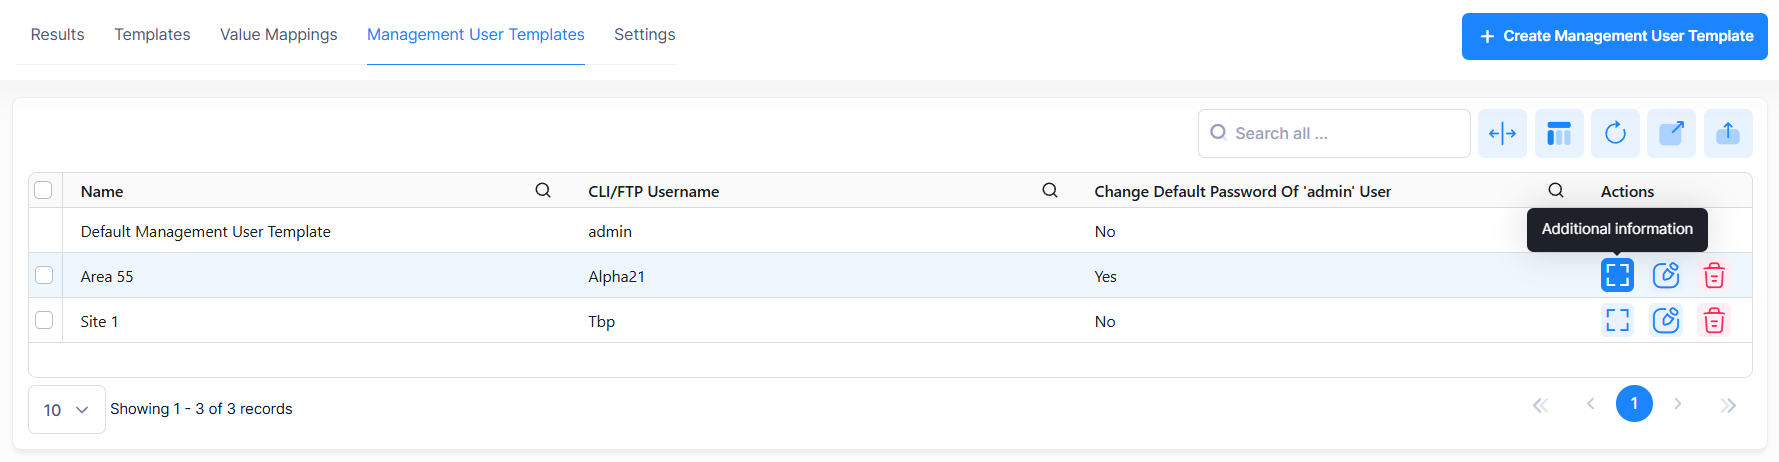
-
The additional information for the selected template is displayed.