Below procedure applicable for only the builds( 10.5.2.008.29_OVTX_OVA_.ova_hyperV.tar.gz and 10.5.2.008.29_OVTX_Build.7z)
Download Required Files
-
Download the OVTX OVA file and Build release file ( .7z file) from the MyPortal website.
-
Extract the 10.5.2.008.29_OVTX_OVA_.ova_hyperV.tar.gz.
-
After extracting, 2 files will be present as shown below.

-
Create the 3 folders in your Hyper-V servers and in each folder copy above 2 disk files.
-
For every node creation use the disk1 and disk2 from one folder for each node.
Note: Don’t use the same disk1 and disk2 files for all the 3 nodes.
Create Virtual Machine
-
Open the Hyper-V manager.
-
Click on New button and then click on New virtual machine.

-
Click on Next button.
-
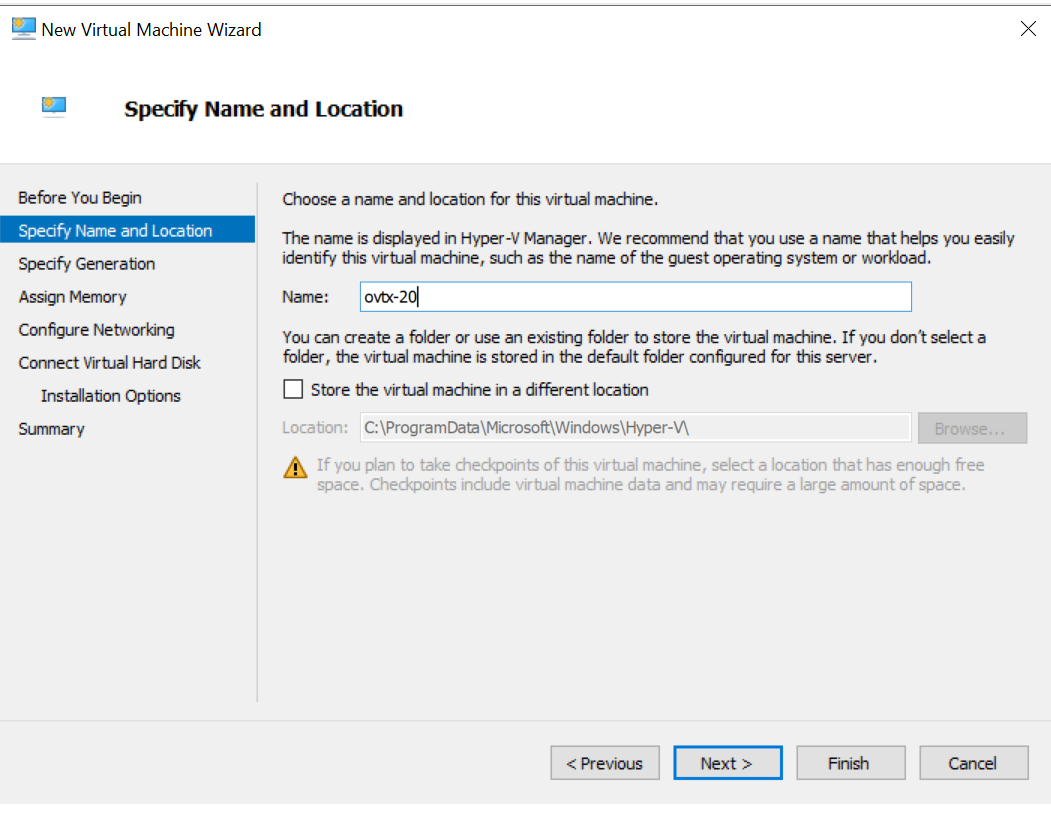
Enter the node name ex: ovtx-20 and click on Next button.
-
Click on Next button again.
-
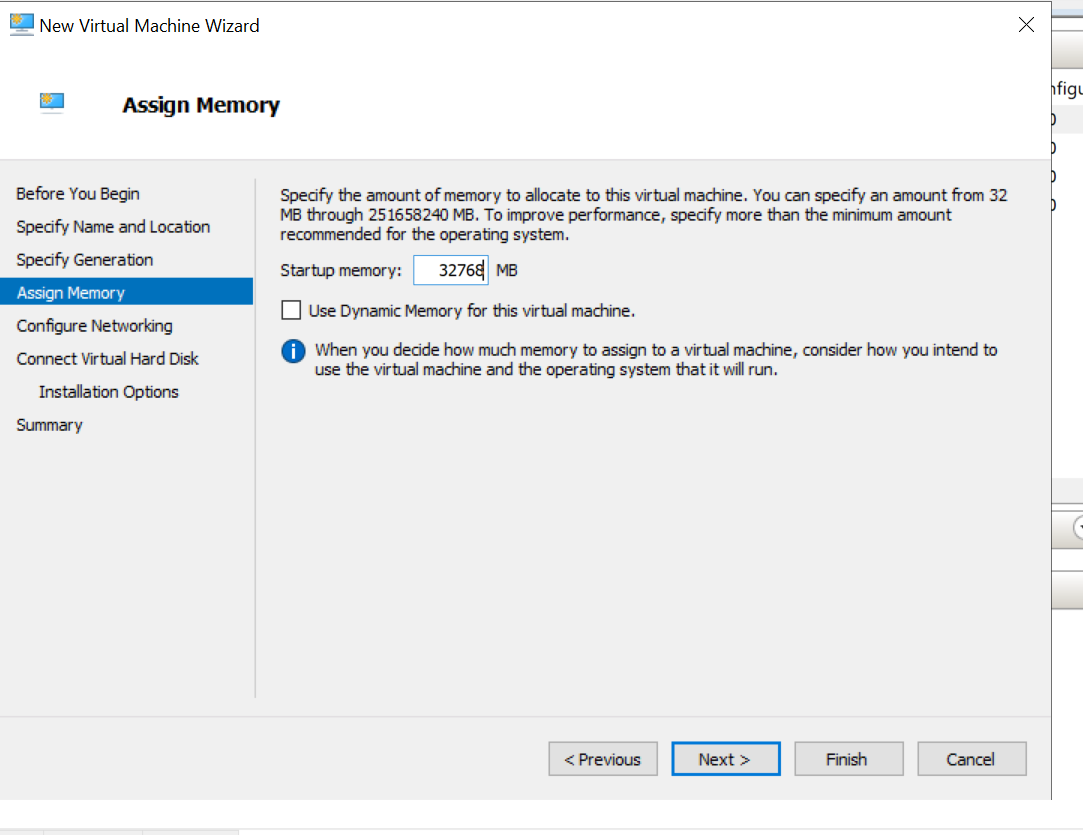
Enter the memory as 32768 MB.
-
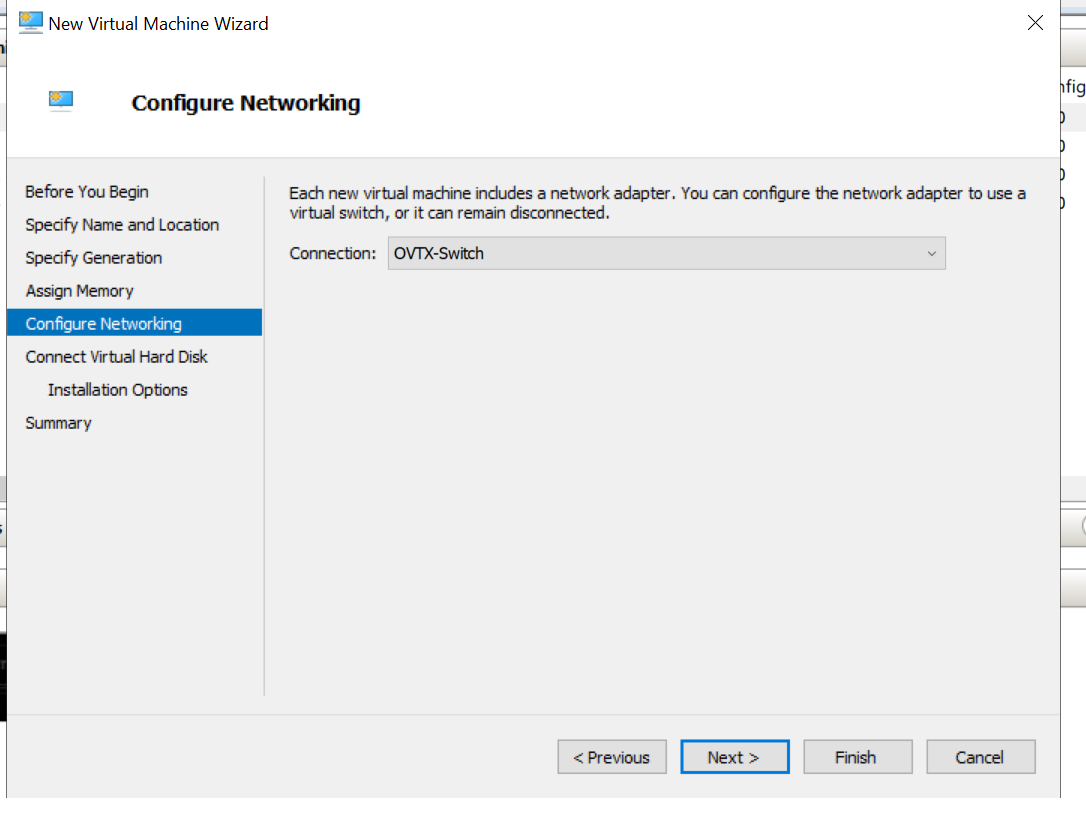
Select the virtual switch to use network adapter.
-
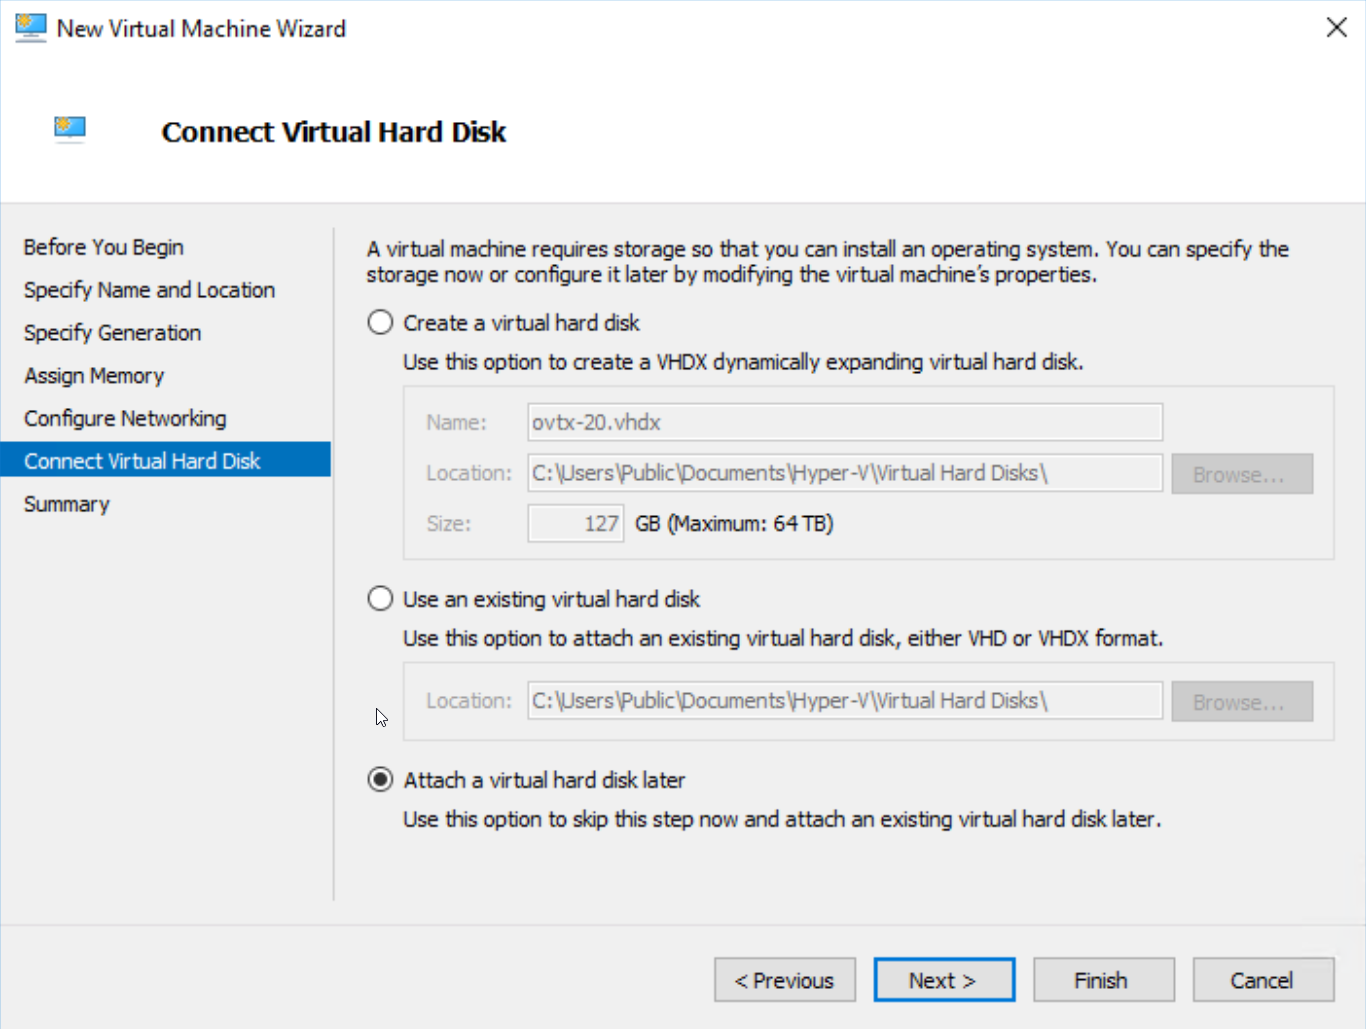
Select the option attach virtual hard disk later.
-
Click on Next button and then click on Finish.
-
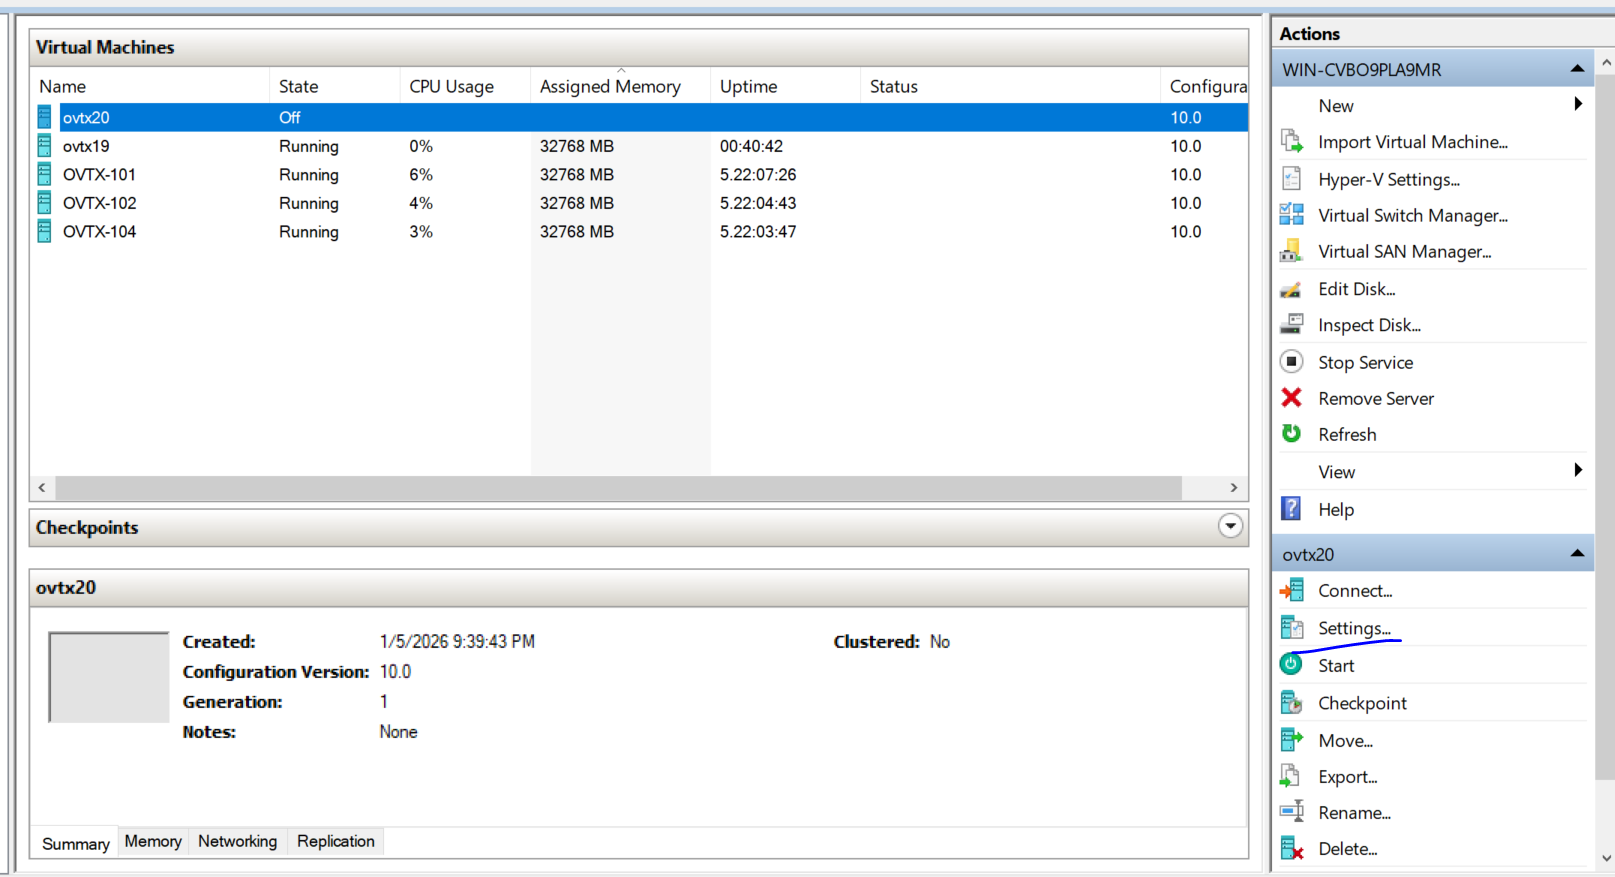
Select the node and click on Settings button.
-
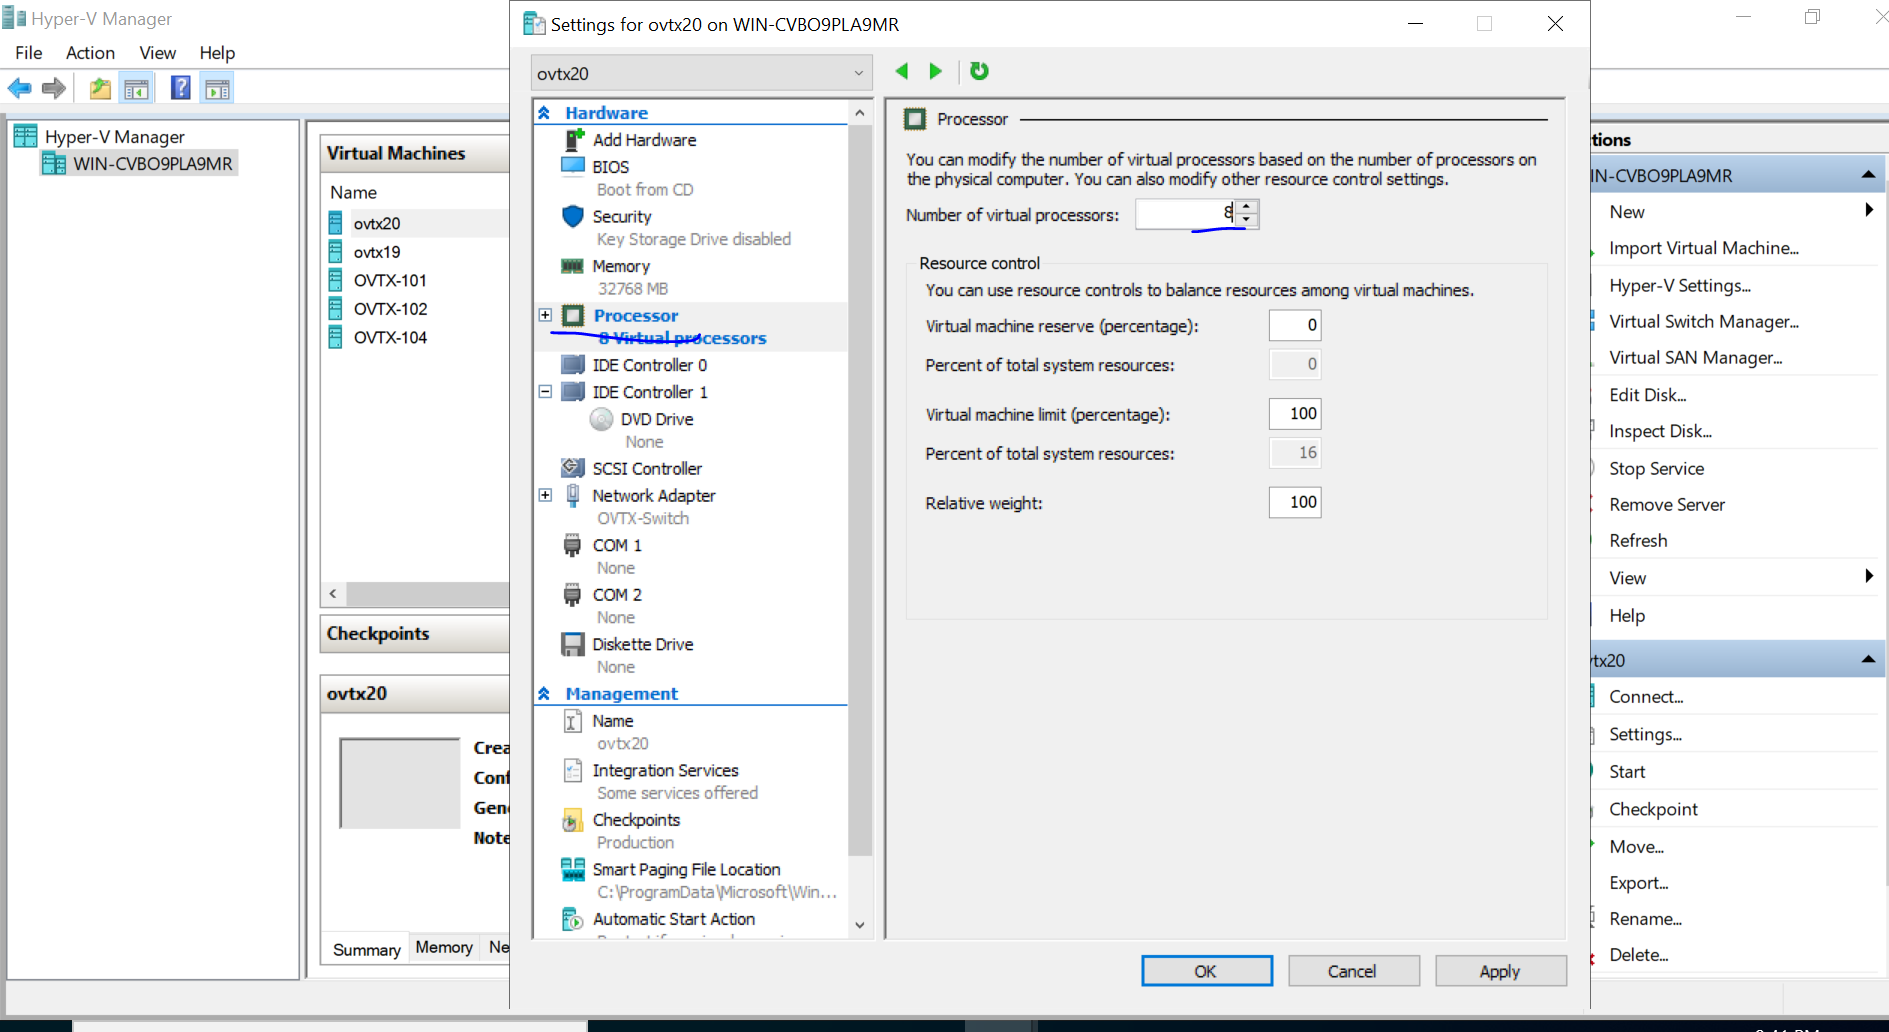
Click on processor and then enter the Number of virtual processors is 8.
-
Click on Apply.
-
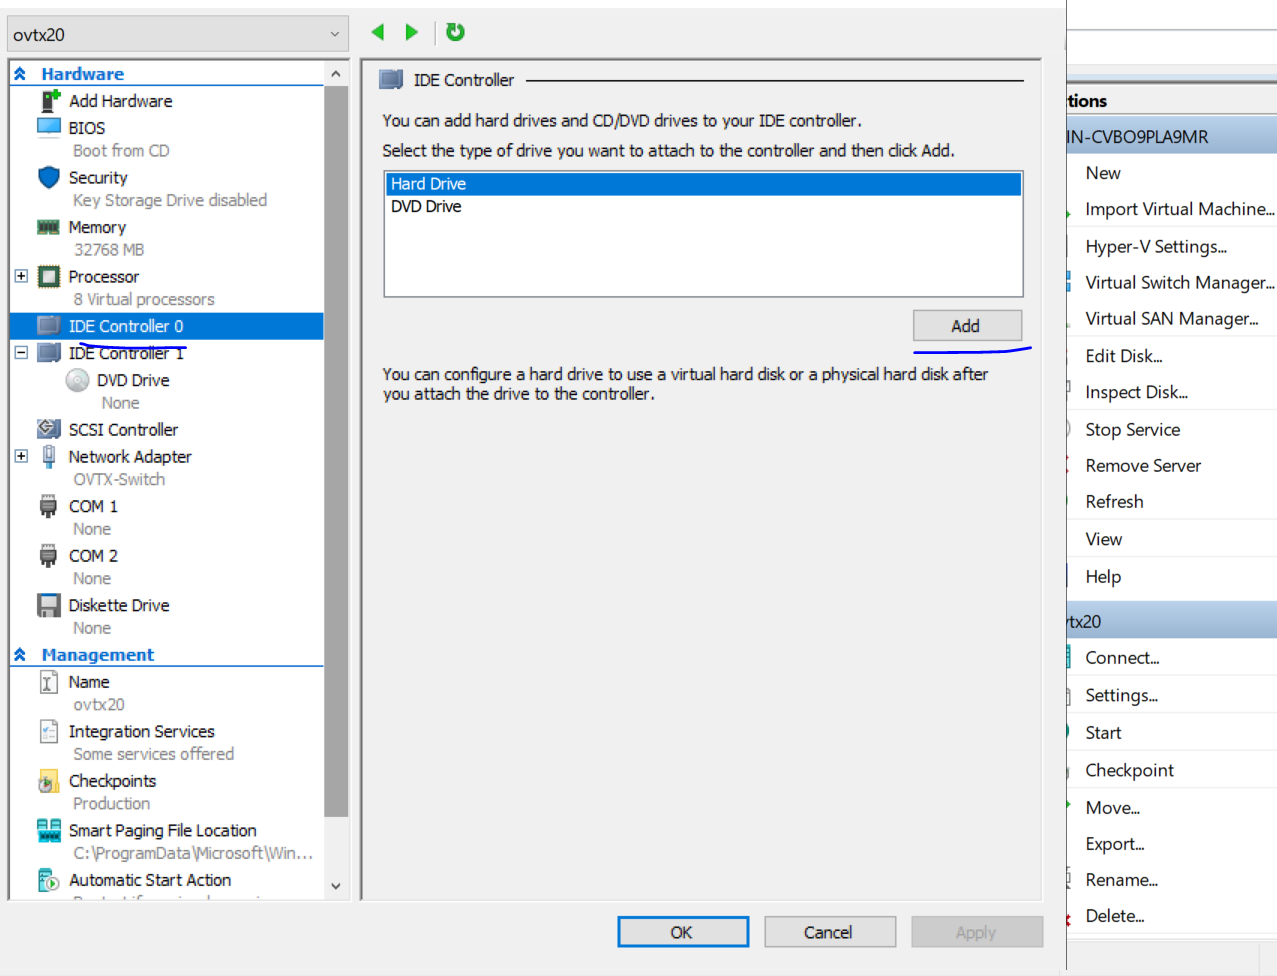
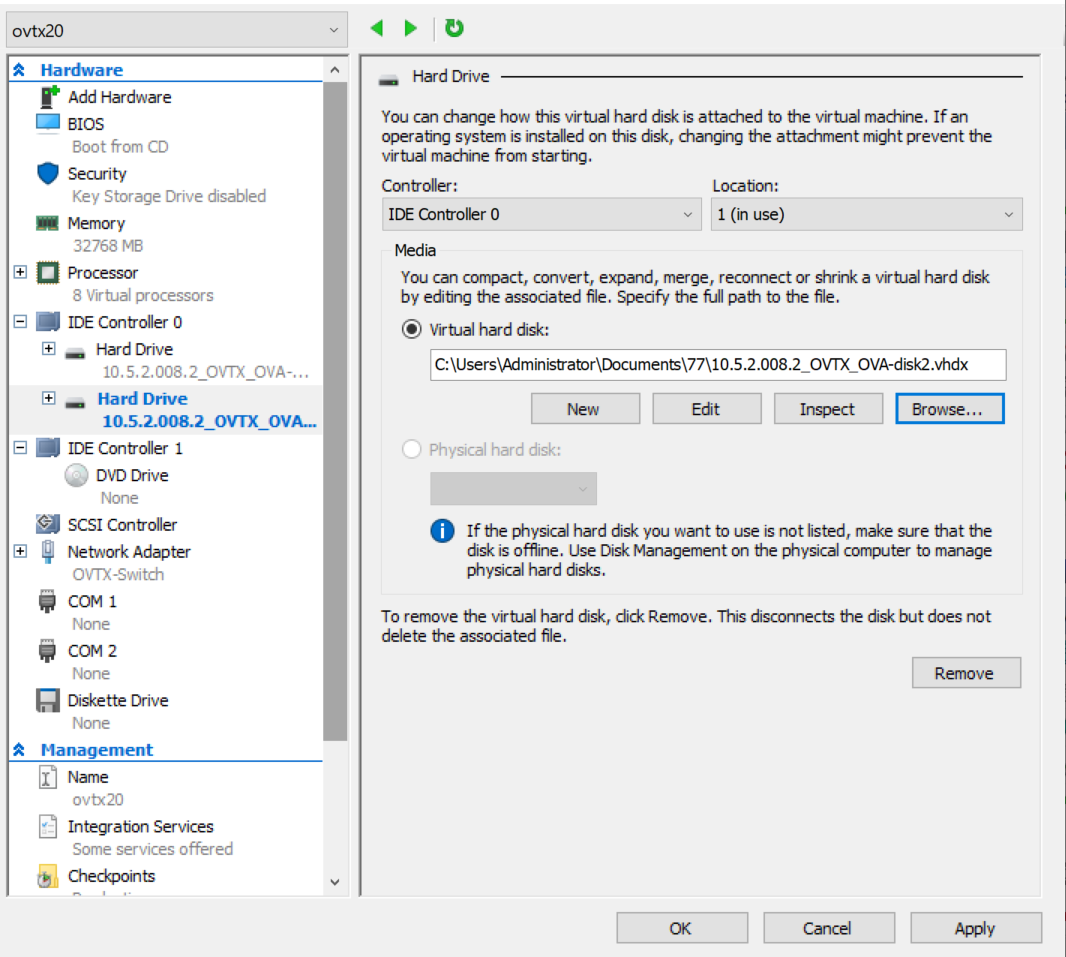
Click on IDE Controller 0 and click on Add button.
-
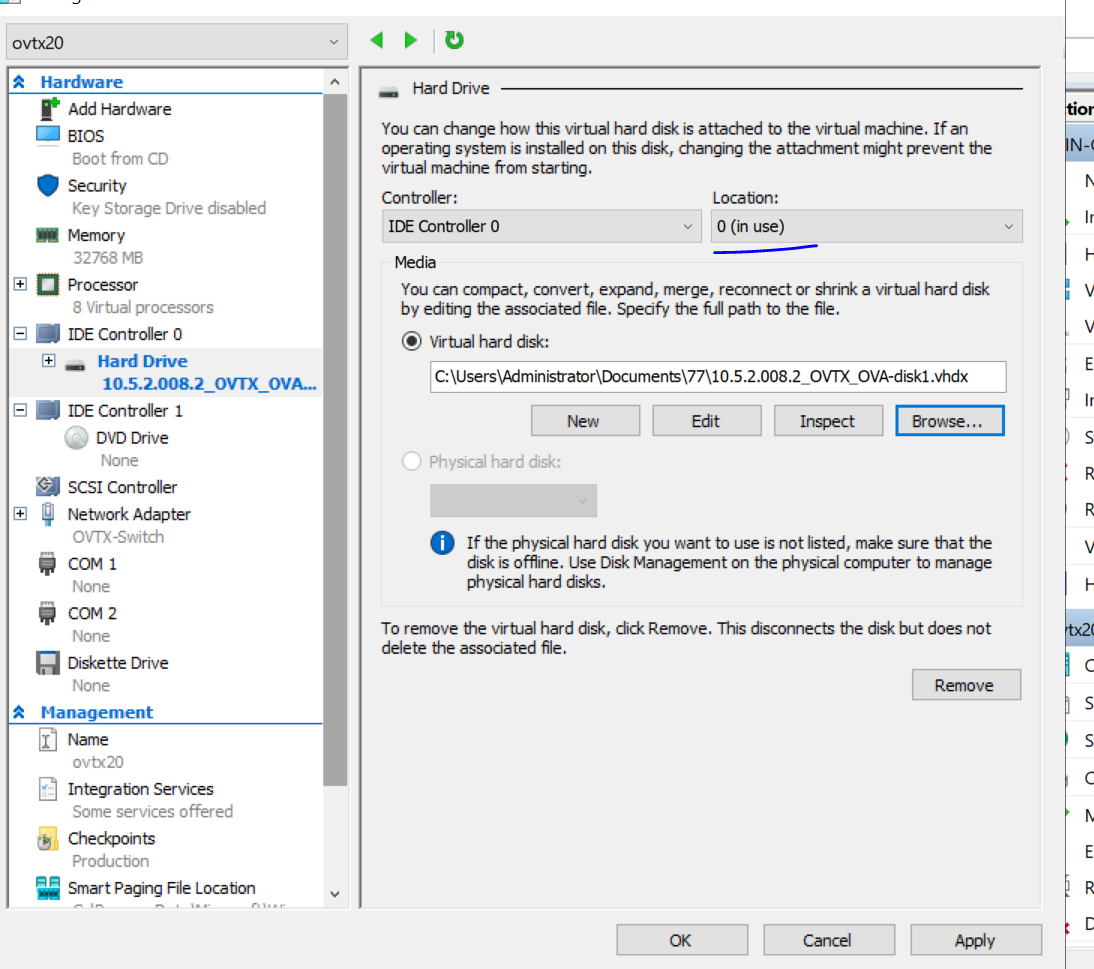
When Location is 0, click Browse and choose disk1, click the Apply button.
-
Again Click on IDE Controller 0 and click on Add button.
-
When Location is 1, click Browse and choose disk2, click the Apply button .
-
Click on OK button.
-
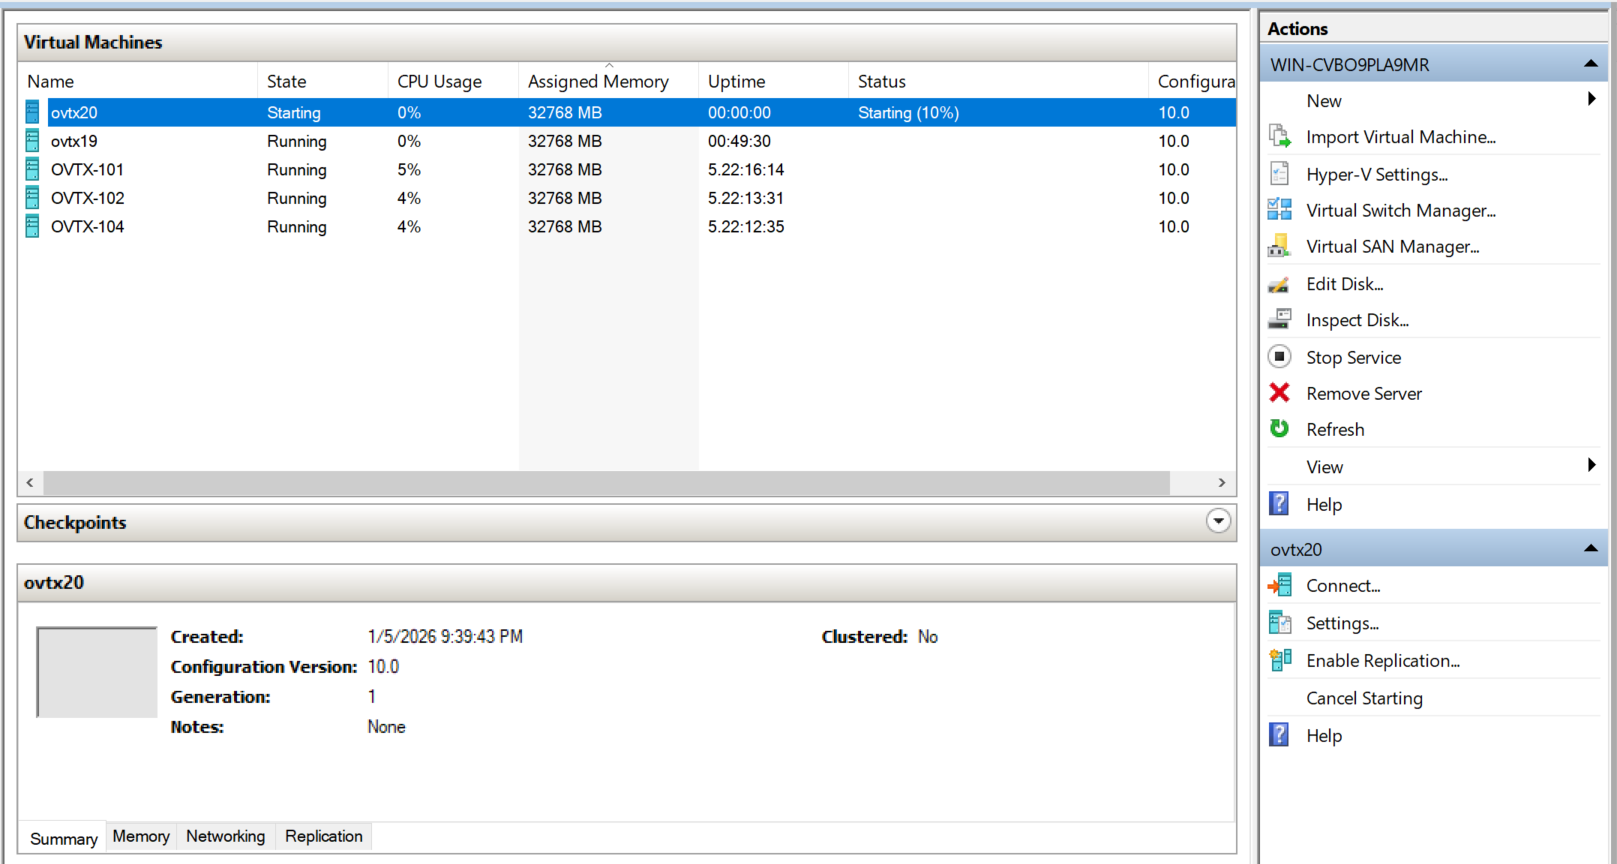
Select the vm(ovtx20) and click on Start button.
-
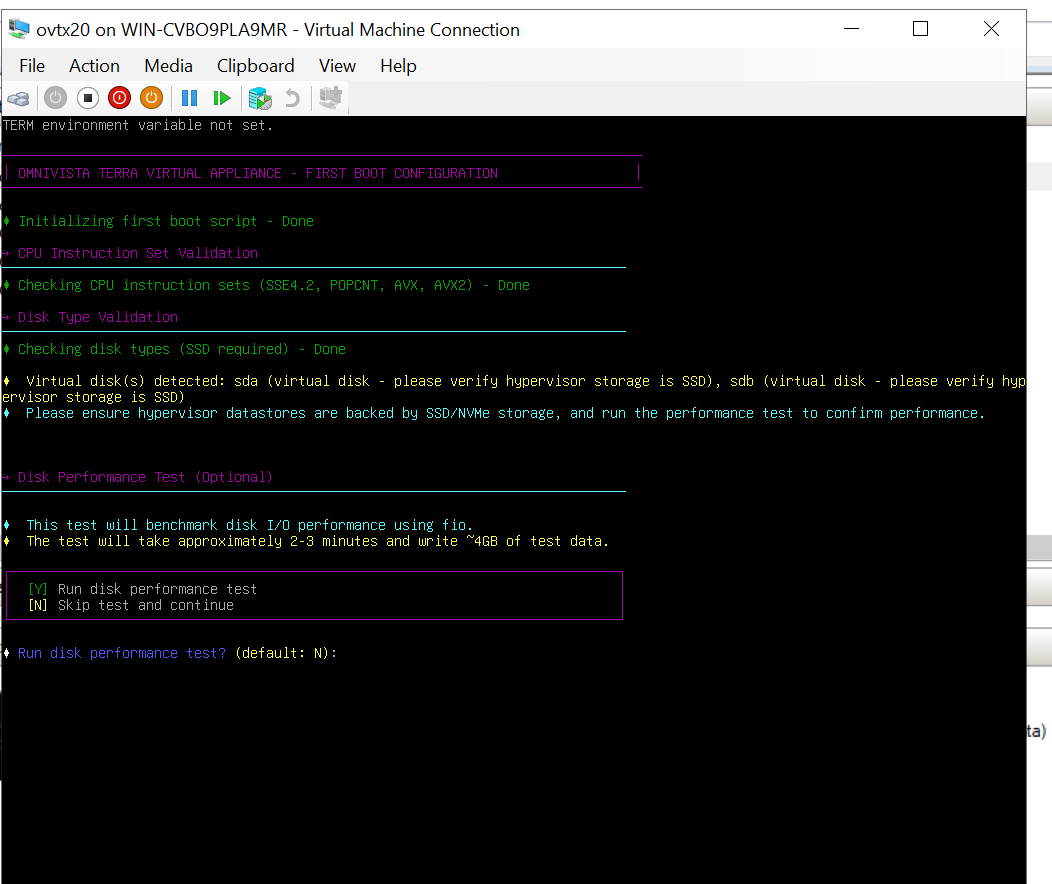
Double click on the node(ovtx20).
-
Follow the screen prompts to configure the parameters below:
-
Keyboard option
-
NIC
-
Hostname (Use a different hostname for each of the three VMs.)
-
IP stack policy: IPv4 or Dual-stack
-
IP address (Use an available IP address from your network corresponding to the NIC selected in the step above)
-
Netmask
-
Gateway IP
-
Primary and secondary DNS (Set the primary DNS and secondary DNS to the settings that will be able to resolve myovterra.myovcloud.com.
-
OVTX password
-
Apply the configuration. The system will reboot. Wait for sometime and then the ovtx login prompt will be displayed.
-
Login with username ovtx and with the configured password.
-
Create a 2nd and 3rd node following the above steps but with different IP addresses.