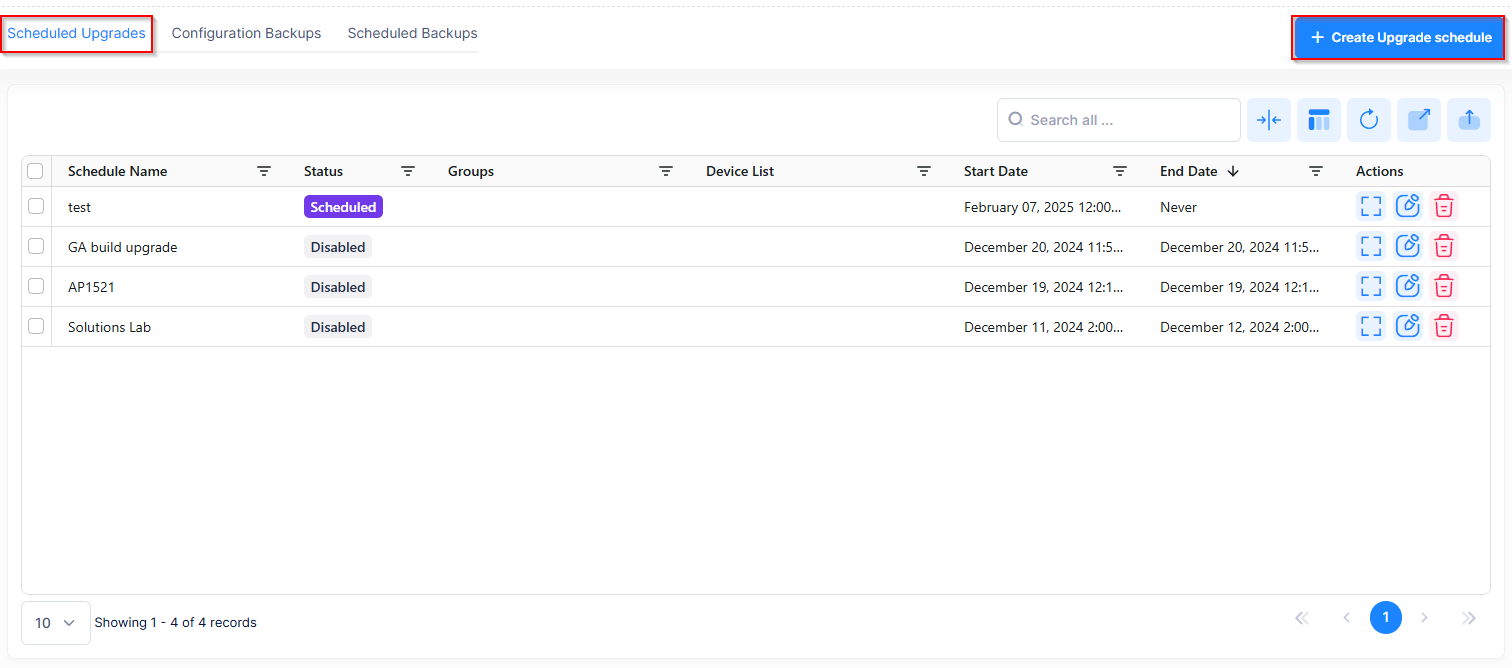
The Scheduled Upgrades tab is used to schedule automatic software updates for your network devices (Access Points and Switches). The Scheduled Upgrade feature enables you to schedule automatic updates to specific network devices during specific time windows (e.g., non-business hours) to ensure minimal network disruption. You can create, edit, execute, activate, deactivate and delete scheduled updates. Configured scheduled updates are displayed in the Scheduled Upgrades List.
To configure and manage automatic software update schedules, navigate to the Scheduled Upgrades screen by clicking on Inventory > Firmware - Scheduler and selecting the Scheduled Upgrades tab under the “Configure” section of the OmniVista Cirrus Menu.
Note that scheduled updates can also be configured from the Device Catalog screen (Inventory > Device Catalog) by selecting a device(s) in the Device Catalog List and clicking on Actions. From the Actions drop-down menu, select the Edit Device > Schedule Software Upgrade option.
Important Note: It is recommended that you schedule software updates on devices so that they do not adversely affect network performance. For example, stagger updates for different devices in different time windows during non-busy hours.
Updating the Device to the Desired Software
Use on of the following methods to create a scheduled software update or initiate a software update without waiting for a scheduled time:
-
Schedule a Device Software Update from the Scheduled Upgrades List.
-
Schedule a Device Software Update from the Device Catalog Screen.
-
Initiate a Device Software Update from the Device Catalog Screen.
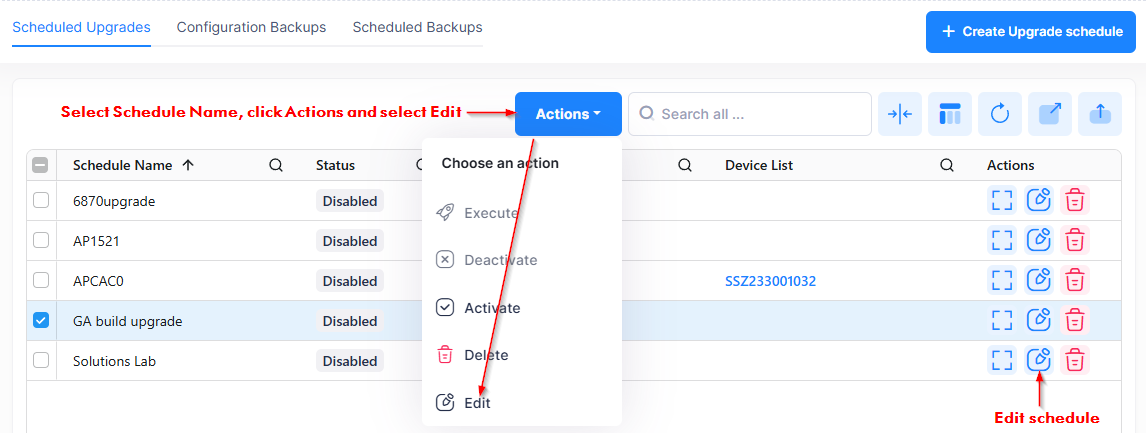
Editing a Scheduled Upgrade
Select a scheduled upgrade in the Scheduled Upgrades List, then click on Actions and select Edit from the drop-down menu. You can also click on the Edit icon under the “Actions” column for the scheduled upgrade entry. The Edit Scheduled Upgrade screen opens.
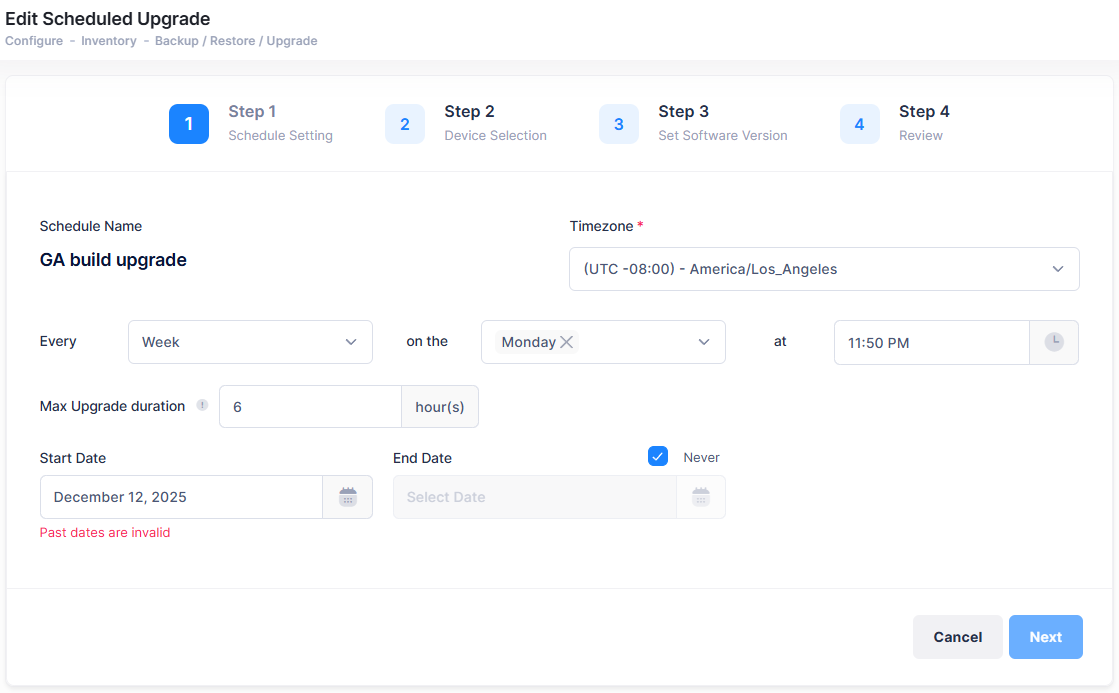
Edit the fields as described in Schedule a Device Upgrade from the Scheduled Upgrades List, then click on Save to retain changes to the scheduled upgrade.
Execute a Scheduled Upgrade
Select a Schedule Name that you want to execute in the Scheduled Upgrades List, then click on Actions and select Execute from the drop-down menu.

Click on OK to confirm that you want to execute the Scheduled Upgrade(s) from the List.
Activate a Scheduled Upgrade
Select a Schedule Name that you want to activate in the Scheduled Upgrades List, then click on Actions and select Activate from the drop-down menu.

When you select the Scheduled Upgrade that you want to activate, the following confirmation prompt appears:

Click on OK to confirm that you want to activate the Scheduled Upgrade(s) from the List .
Deactivate a Scheduled Upgrade
Select a Schedule Name that you want to deactivate in the Scheduled Upgrades List, then click on Actions and select Deactivate from the drop-down menu.
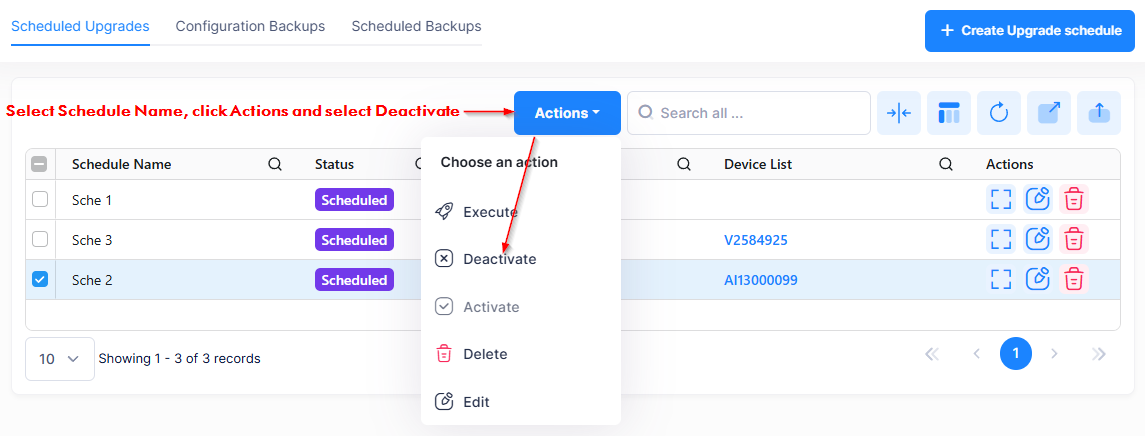
When you select the Scheduled Upgrade that you want to deactivate, the following confirmation prompt appears:
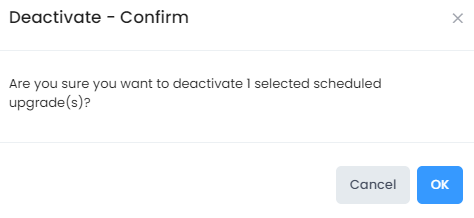
Click on OK to confirm that you want to deactivate the Scheduled Upgrade(s) from the List.
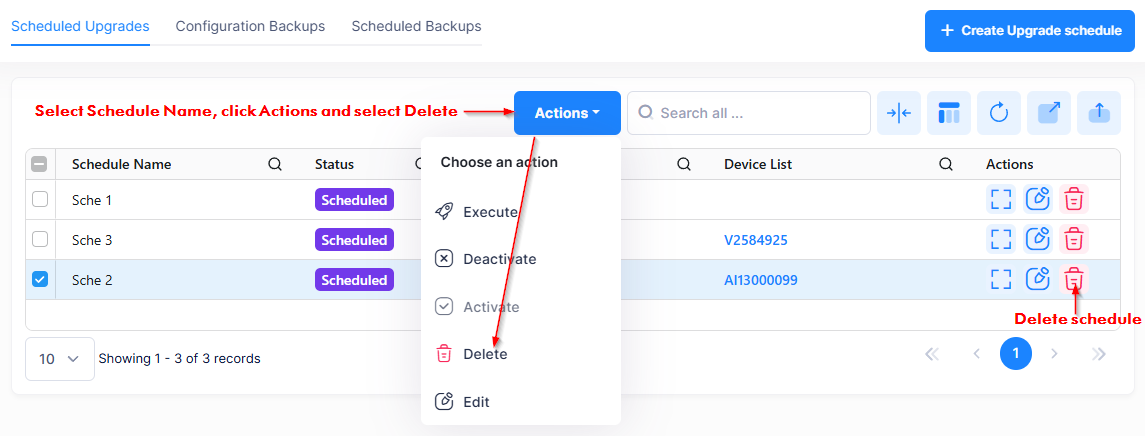
Deleting a Scheduled Upgrade
Select a Schedule Name(s) that you want to delete in the Scheduled Upgrades List, then click on Actions and select Delete from the drop-down menu. You can also click on the Delete icon under the “Actions” column for the scheduled upgrade entry.
When you select the Scheduled Upgrade you want to delete, the following confirmation prompt appears:
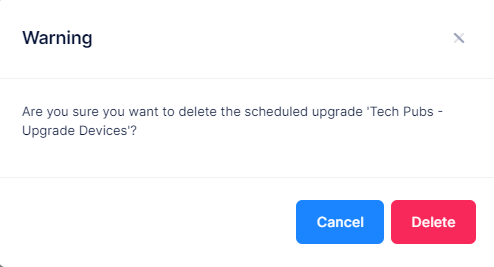
Click on Delete to remove the Scheduled Upgrade(s) from the List.
After deleting a Scheduled Upgrade, the Desired Version of scheduled devices will change to “Do Not Upgrade” in Device Catalog.
Scheduled Upgrade List
The Scheduled Upgrade List provides information on all scheduled upgrades.
-
Schedule Name - User-configured name for the scheduled upgrade.
-
Status - The status of the schedule upgrade.
-
Scheduled - The upgrade is scheduled to occur in the future (not active). Note that if some of the devices in a Scheduled Upgrade were not upgraded during the configured time window, the status will change from "Upgrading" back to "Scheduled" until the next recurrence of the upgrade.
-
Upgrading - The upgrade is taking place within the configured time window. Devices not running the desired version are checked and upgraded.
-
Disabled - The scheduled upgrade was manually disabled or automatically disabled when the time setting expired.
-
-
Groups - The Access Point Groups selected for upgrade.
-
Devices List -The devices being upgraded. Click on the devices in the column to view a full list of devices and additional information on each device, including the upgrade status of each device.
-
Start Date - The date and time the upgrade is scheduled to start.
-
End Date - The date and time the upgrade is scheduled to end.
-
Last Update Date - The date and time the scheduled upgrade took place.