The Create an Upgrade Schedule screen is used to define the schedule, the network devices, and the software version to be used for the upgrade. To access this screen, click on Create an upgrade schedule.
The Create an Upgrade Schedule screen provides the following step-by-step process for configuring a scheduled upgrade:
Step 1. Schedule Setting - Assign a name, timezone, the time to begin the upgrade, and the frequency at which the automatic upgrade is performed.
Step 2. Device Selection - Select the devices to automatically upgrade.
Step 3. Set Software Version - Specify the software version to use for the upgrade.
Step 4. Review - Review all the configured schedule parameters before creating the scheduled update.
Step 1. Schedule Setting
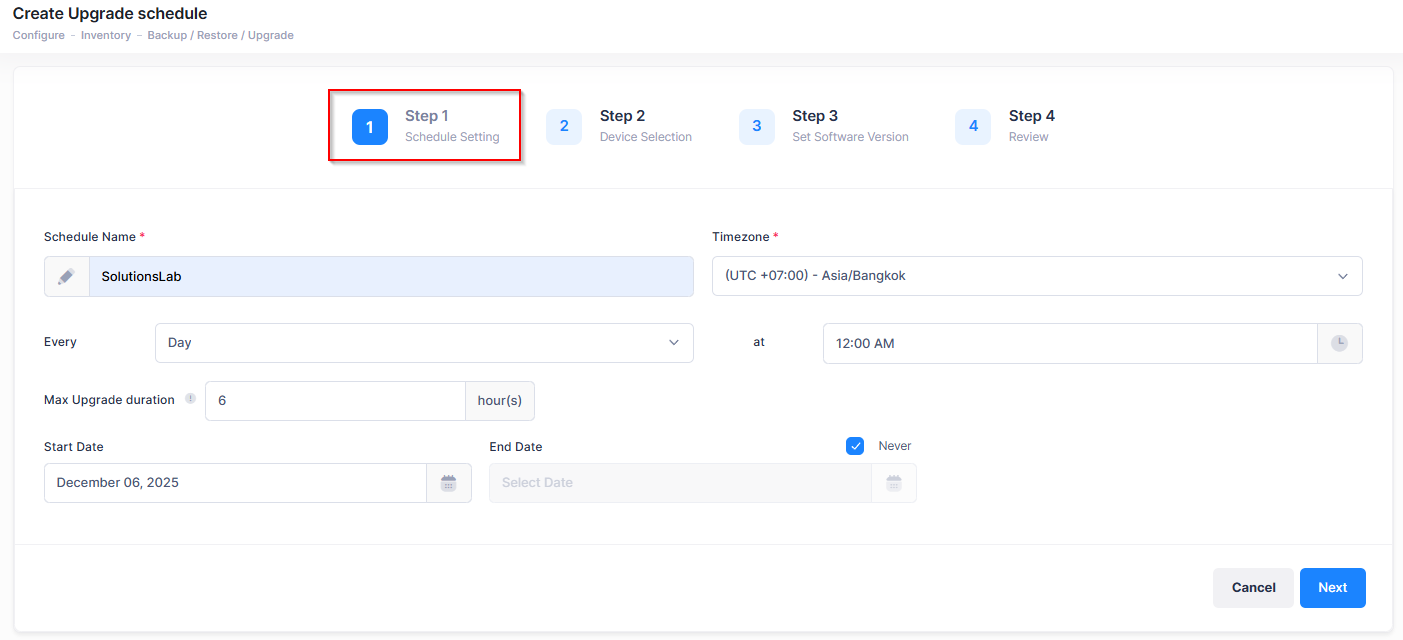
Complete the Schedule Setting fields as described below and click on Next to move to the next tab (Step 2).
-
Schedule Name - User-configured name for the schedule name.
-
Timezone - The timezone in which the device resides.
-
Every/at - Select the frequency (Day, Week, Month) and the time at which the upgrade will occur.
-
Max Upgrade Duration - The maximum time interval during which the upgrade will be performed. For example, if the upgrade is scheduled to start at 12:00 AM every day and the Max Upgrade Duration attribute is set is 6 hours, devices will start getting upgraded only between 12 AM to 6 AM. If a device in the schedule has not been updated when the time interval expires, it will not be upgraded during that scheduled upgrade, but will be upgraded during the next recurrence. Those devices that have already been upgraded will be skipped.
-
Start Date - Select the start date for the scheduled upgrade. The scheduled update will begin on the start date at the configured frequency and time.
-
End Date - Select “Never” to continue the upgrade schedule indefinitely or enter a date on which the upgrade schedule will end.
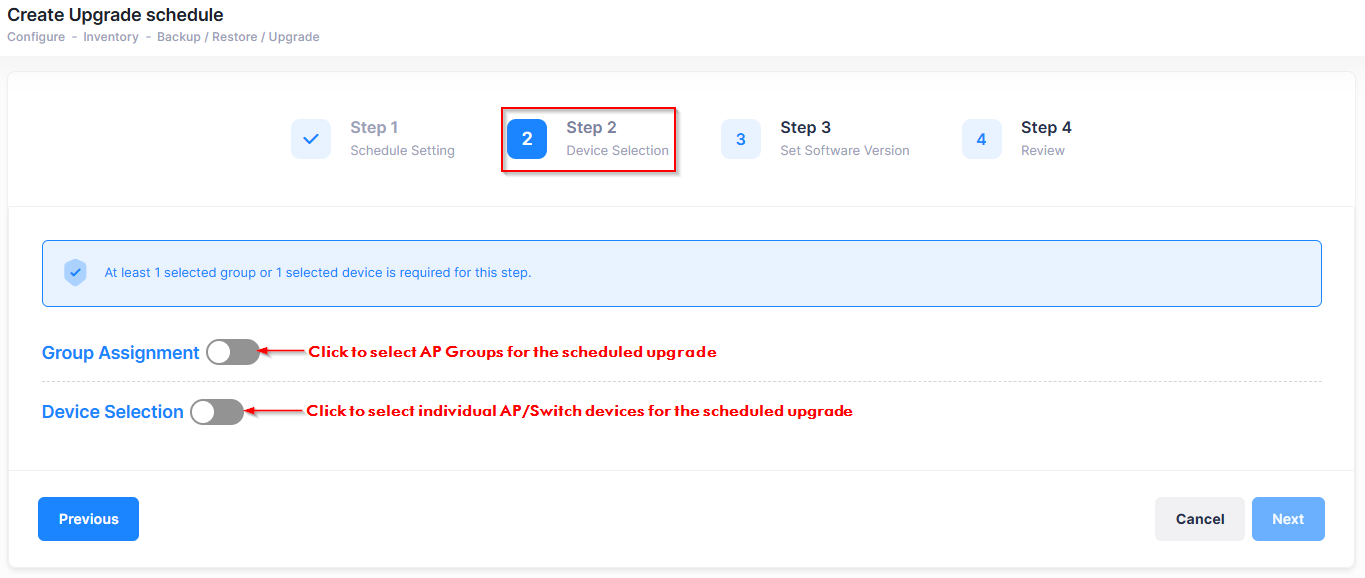
Step 2. Device Selection
-
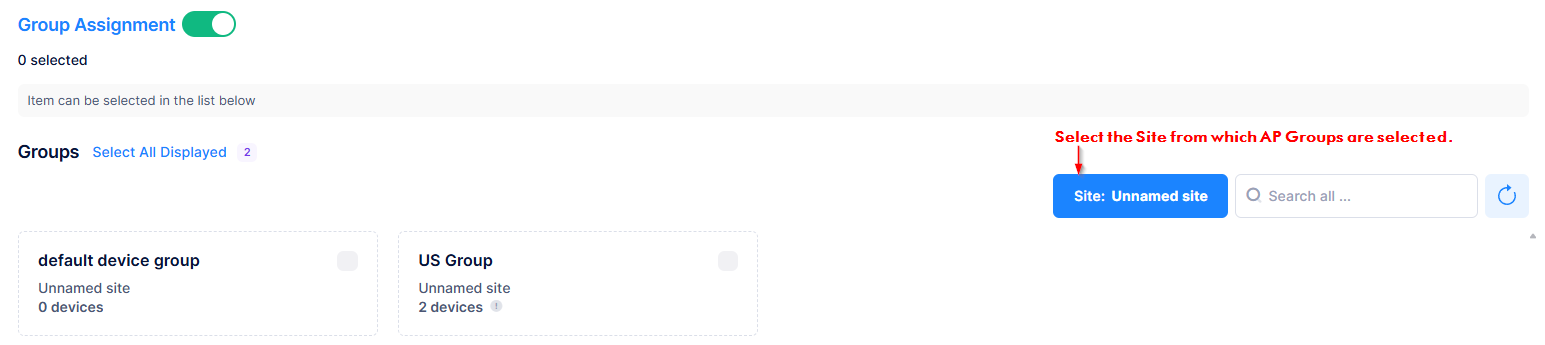
Group Assignment - Click to select AP Groups for the scheduled upgrade from the following screen:
-
Device Selection - Click to select individual AP/Switch devices for the scheduled upgrade from the following Screen:
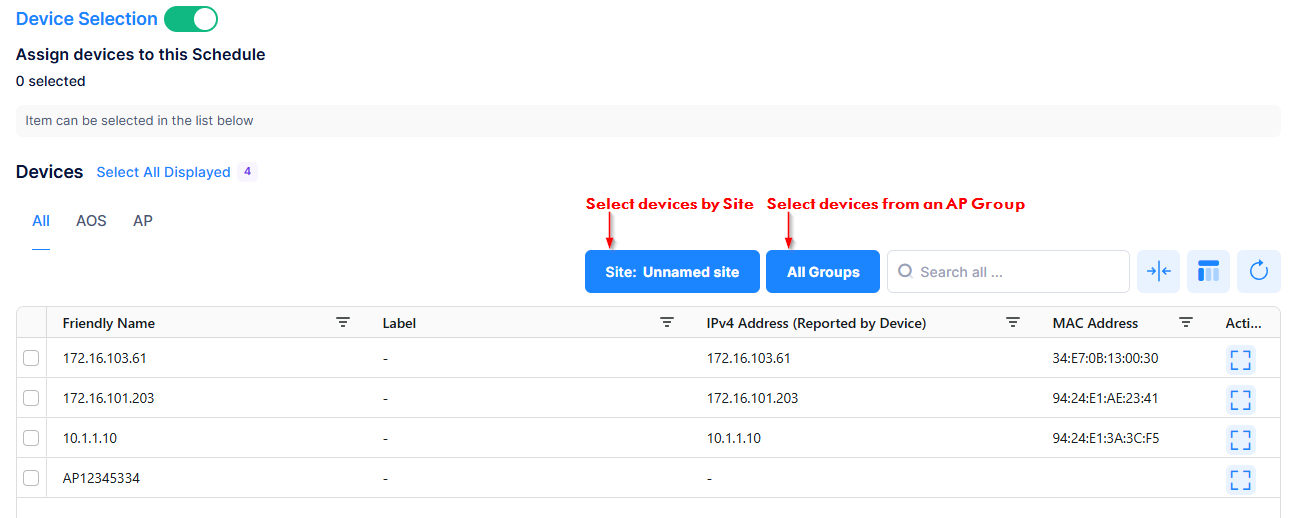
Select a Site from which AP Groups and/or devices can be selected, then select the AP Groups and/or devices to which the update schedule is applied. Once devices are selected, click on Next to move to the next tab (Step 3).
Step 3. Set Software Version
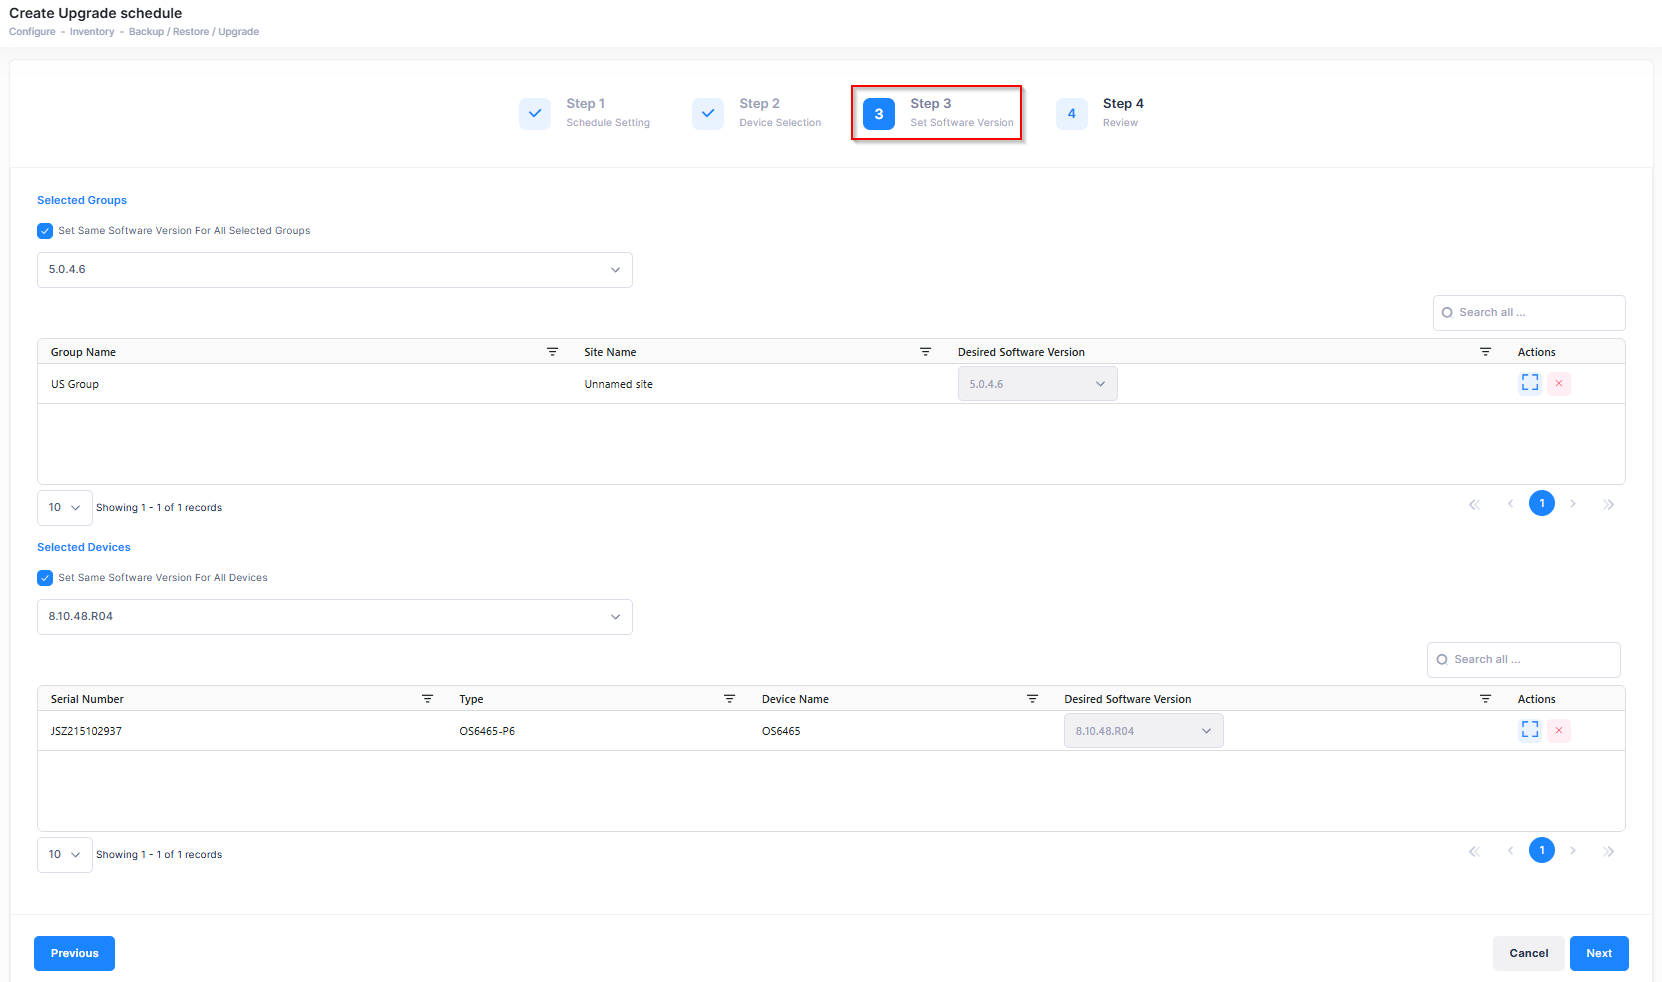
This screen displays the AP Groups and devices that were selected for the upgrade schedule. Use this screen to specify the software version to which the devices will be upgraded. To remove a device from the Selected Groups/Devices list, click on “X” under the “Actions” column.
-
Set Same Software Version for all Selected Groups (same models only) - Select an upgrade software version to upgrade all selected AP groups to that software version. The selected access points groups must use the same base software. If not, the "Do Not Upgrade" will be your only option.
-
Set Same Software Version for All Devices - Select the upgrade software version for each device.
-
When upgrading OS6360, OS6465, OS6560, and OS6570M switches to AOS 8.10R4, only 8.10.87.R04 non-secure images are offered. These images do not require a U-Boot update.
-
Modifying the default password of “admin” user is strongly recommended for all switches. Changing the password is a mandatory requirement for AOS versions 8.10.R04 and above.
-
If the default credentials have not yet been changed on the switch, you must set the new password on switches through the Management User Template by either creating a new template or editing an existing template. Otherwise, the switch will fail to onboard in OmniVista.
-
For switches running AOS 8.10.R03 or earlier, changing the default password is not mandatory but is still strongly recommended.
-
After setting the software upgrade version, click on Next to move to the next tab (Step 4).
Step 4. Review
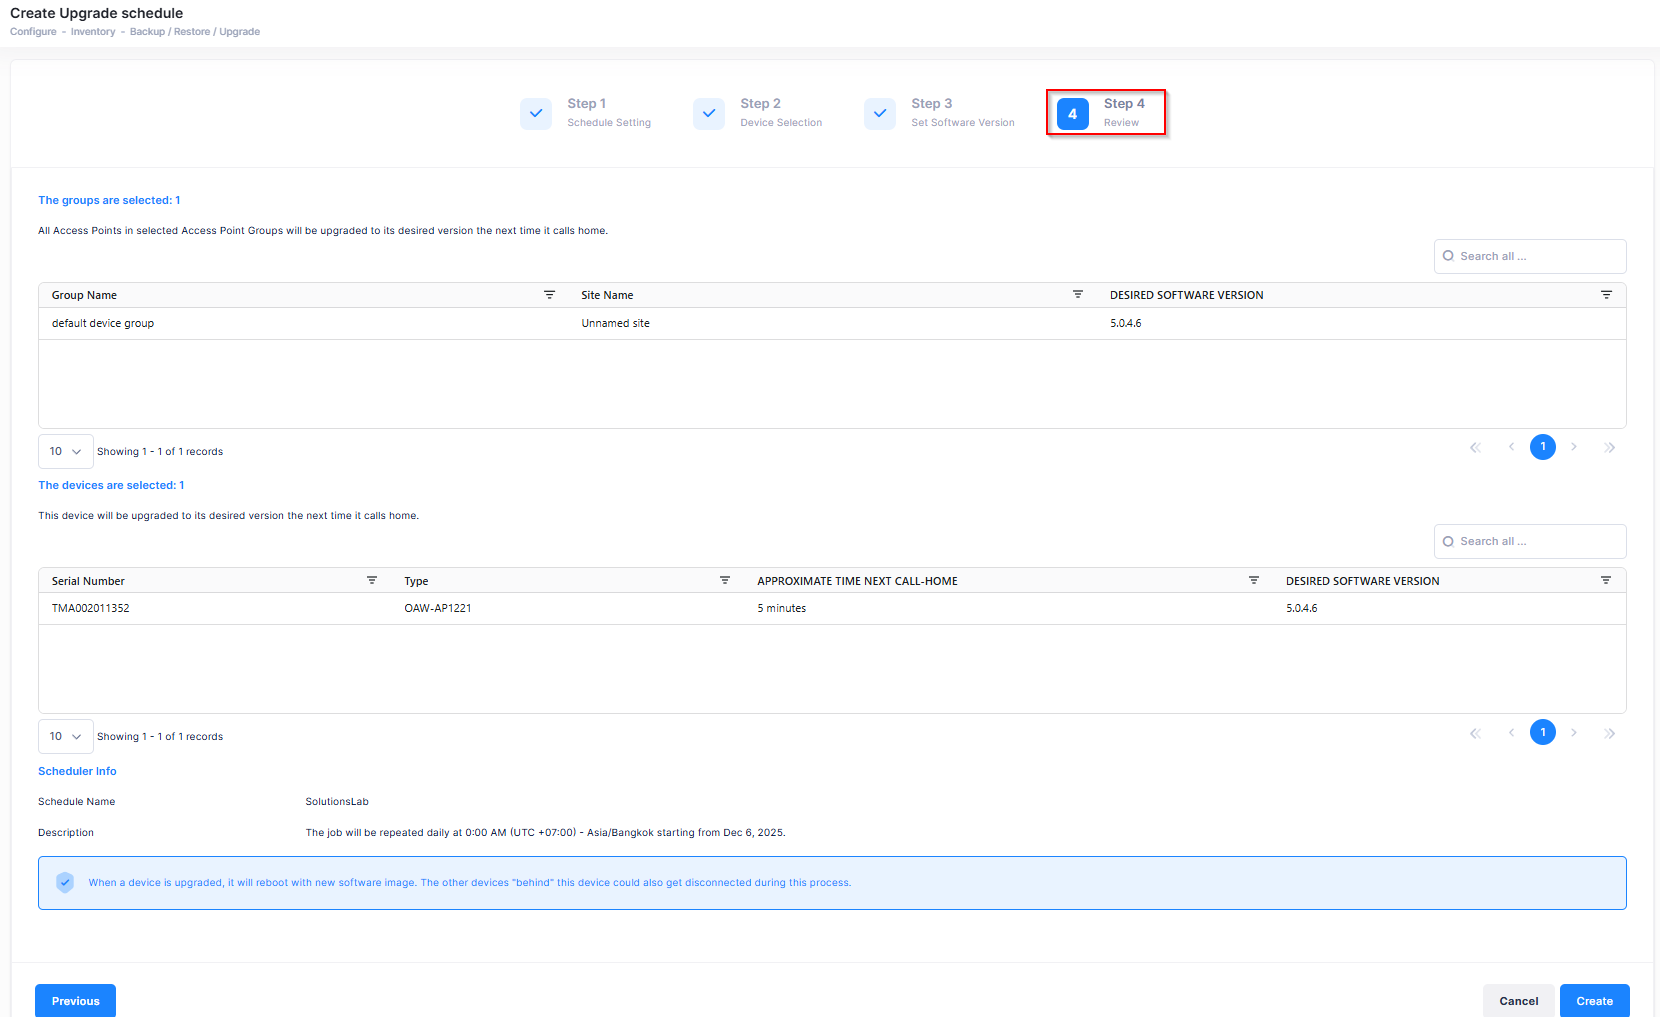
Review the selected groups/devices and schedule information that you have configured and click on Create. Devices are upgraded to the desired software version the next time the device calls home.
When a device is upgraded, it will reboot with a new software image. The other devices "behind" this device could also be disconnected during this process.