Manually Add a Device in Analytics Only Mode
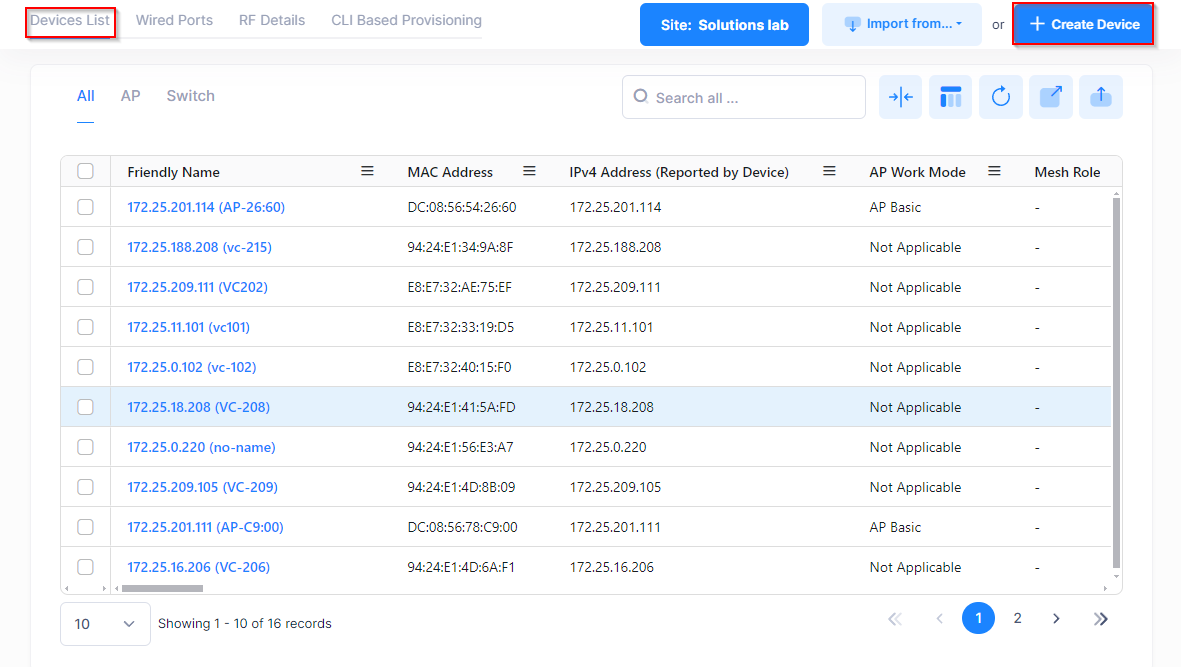
The Device List screen displays a list of devices that are known to an organization site. The list will be empty if no devices have been added to the site. There are three methods for adding a device to a site: import an OmniVista CSV file, import an Excel XLSX file, or manually add a device.
To manually add a device to a specific organization site, click Create Device on the Device List screen to bring up the Create Device form.
The Create Device form is where you specify that the device is going to be managed by OmniVista Cirrus in Analytics Only Mode, then enter information to identify and describe the device and where that device is located. Selecting the Management Mode is the first required step for adding a device to the Device Catalog.
Select Analytics Only for the Management Mode Selection option. In this mode, you can add a device to monitor and analyze from OmniVista Cirrus 10 but the device is configured from a legacy instance of OmniVista (such as OmniVista 2500 NMS or OmniVista Cirrus 4). This is different from Full Management mode where you can directly configure the device and view the device configuration from the OmniVista Cirrus 10 user interface.
Once the management mode has been selected, you can complete the rest of the Create Device form, which is divided into the following sections:
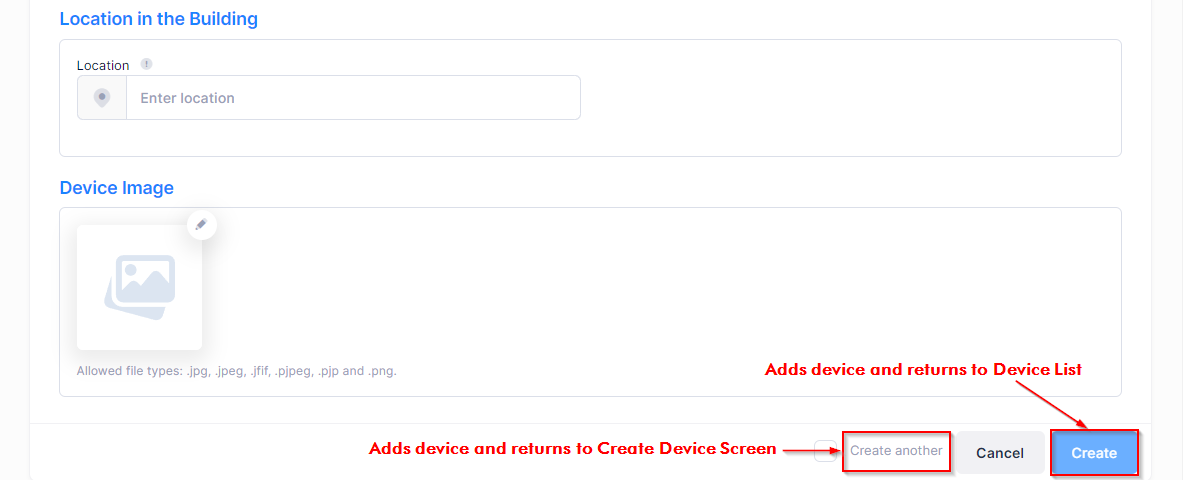
Complete the required fields and any optional fields in each section, as described below, then click on Create.
Click on Create another to return to the Create Device form to fill out for another device. If this box is not checked, the display returns to the Device Catalog screen.
Basic Information
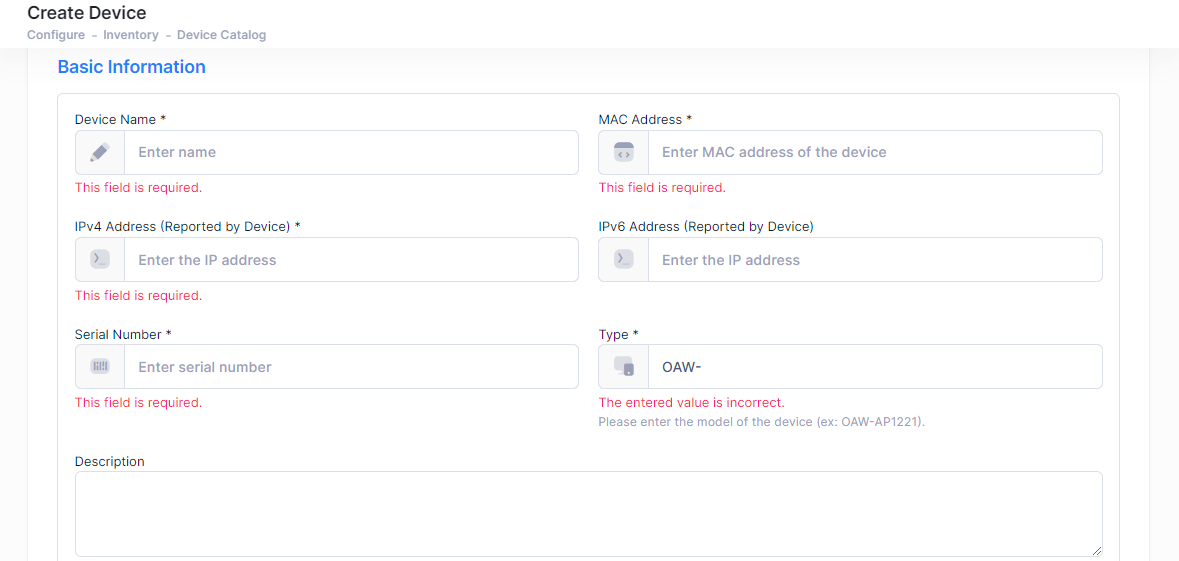
Basic Information
Device Name (Required) - The name to assign to the device.
MAC Address (Required) - The MAC address of the device. Enter the MAC address using any one of the following formats: 00:80:0f:33:33:24, 00-80-0f-33-33-24, 00800f333324, or 008.00f.333.324. The OmniVista Cirrus user interface will automatically apply the correct MAC address format.
Allowing multiple MAC address formats is a convenience provided only through the OmniVista Cirrus user interface. Multiple formats are not supported in REST API or when importing devices from an Excel sheet or CSV file.
IPv4 Address (Reported by Device) (Required) - The IPv4 address that is assigned to the device.
IPv6 address (Reported by Device) - The IPv6 address that is assigned to the device.
Serial Number (Required) - The serial number of the device.
Type (Required)- The type of device (for example, OAW-AP122).
Description - An optional description for the device.
Software Information and Assigned Site
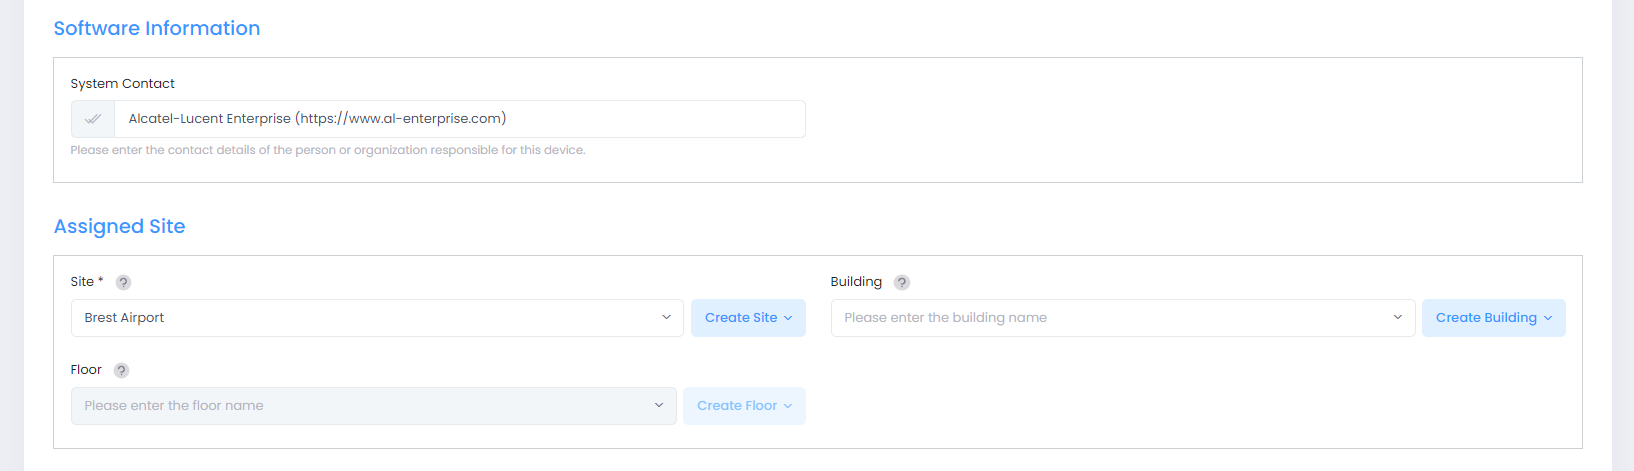
Software Information
System Contact - The contact information for the device (for example, Alcatel-Lucent Enterprise https://www.al-enterprise.com).
Assigned Site
Site (Required) - The Organization Site where the device is physically located and installed. To select an existing Site, click on the Site name in the drop-down menu or click on Create Site to create a new Site to assign to the device.
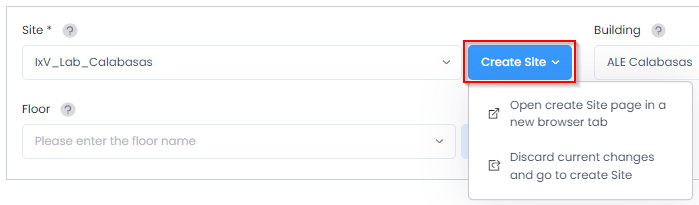
When you click on Create Site, a drop-down menu appears from which you can select how you want to access the Create Site screen. See Configure and Manage a Site for steps on how to define a Site for an Organization.
Building - The name of the building at the Organization site where the device is physically located. When you selected a Site for the device, a list of building names associates with the Site is automatically provided in this field. Select one of the existing building names from the drop-down menu. See Configure and Manage a Building for steps on how to define a building for a Site.
Floor - The name of the floor in the building where the device is physically located. When you selected a building where the device is physically located, a list of floor names associated with that building is automatically provided in this field. Select one of the existing floor names from the drop-down menu or click on Create Floor to define a new floor for the building. See Configure and Manage a Floor for steps on how to define a new floor for the building.
Location in the Building and Device Image
Location in the Building
Location - Enter details to help you easily locate where a device is on a Floor (for example, Front Reception, Rack-1).
Device Image
Upload an image file (png, jpg, or, jpeg) to associate with the device.