These release notes apply to OmniVista Terra (OVTX) 10.5.2 MR1 build (10.5.2.008.44_MR).
New in This Release
-
OVNG-23220: Update certificate for OmniVista Terra UI and UPAM Captive Portal
-
OVNG-23709 : PROD-US-Huge-CPU-usage-of-tsdb-analytics-primary-abnormal-process-on-ovng-iot-db
-
OVNG-22814 – [OV Side work] OVTX should allow configure or change DNS server to support Active Directory (AD) server authentication
-
OVNG-20598 – OVTX Scalability Extension
-
1 VM - OmniVista Terra with two supported VM configurations:
-
1 VM, 8vCPUs, 32GB RAM and 1TB Disk Capacity for 250 devices
-
1 VM, 16vCPUs, 32GB RAM and 1TB Disk Capacity for 400 devices
-
-
Installing OmniVista Terra
Below procedure is applicable only for builds (OVAFILE-10.5.2.008.32_MR.ova and 10.5.2.008.44_MR_OVTX_Build.7z)
Pre-requisites:
-
Download the OVTX OVA file and Build release file ( .7z file) from the MyPortal website.
-
Use VMware ESXi server with version 8.
Install a node for OVTx 10.5.2MR1 with the hardware requirements below, based on the number of devices. Check hardware availability on the server before installation.
2a. Option 1: For 250 devices
-
8 CPUs
-
32GB RAM
-
200GB system disk + 500 GB data disk
2b. Option 2: For 400 devices
-
16 CPUs
-
32GB RAM
-
200GB system disk + 500 GB data disk
-
Disk on the server should be SSD.
-
CPU must support AVX/AVX2 instructions.
Steps:
-
Login to ESXi server → Click on Create / Register VM.
-
Select the “Deploy a virtual machine from an OVF or OVA file” option and click on Next.
-
Enter the Name (ex: ovtx-1), click on the “Click to select files or drag/drop” option and select the downloaded OVA file.
-
Click on Next and then click on Next again.
4a. Select the NIC card from the dropdown based on your network, then click Next followed by Finish.
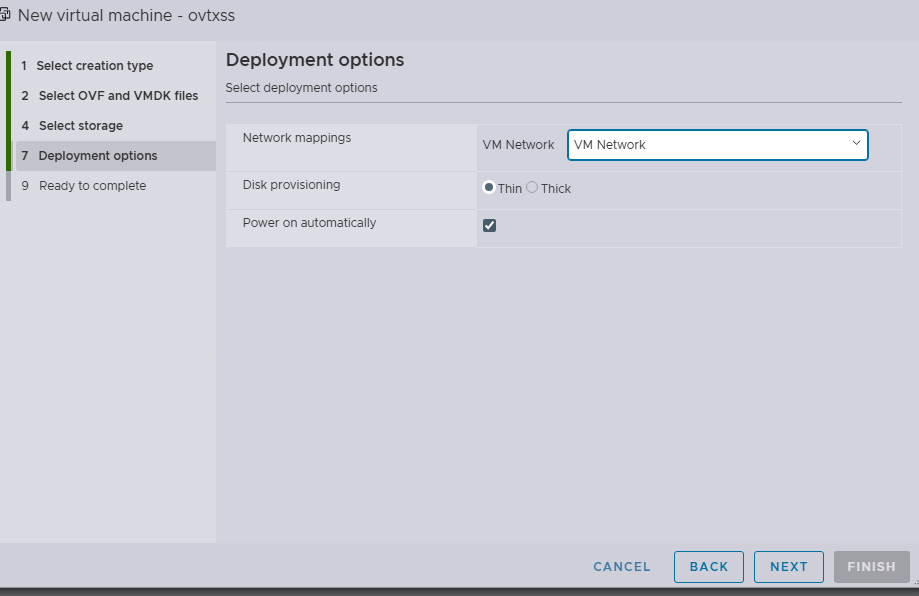
Ignore the warning message “A required disk image was missing”.
-
Wait until the process is completed.

-
Open the console of the created VM and click on Enter.
By default, the VM is configured with 8 CPUs. If you want to use Option 2 (16 CPUs) in Step 2b, please shut down the VM, reconfigure the CPU count to 16, and then start it again.
-
Enter the keyboard model: 73, keyboard layout:1, Key to function as AltGr:1, Compose key:1.
-
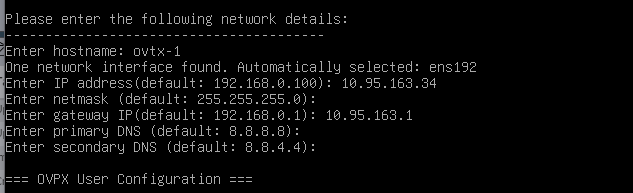
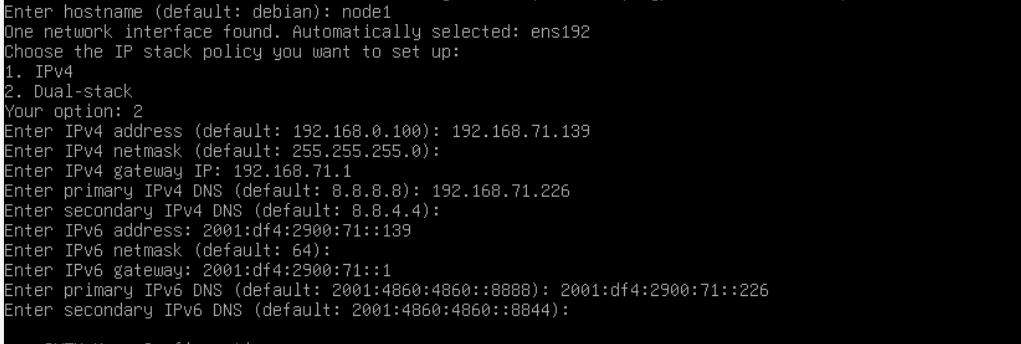
Enter the hostname: Example: ovtx-100 (give any unique name for all the 3 VMs, the hostname should be different for all the 3 VMs).
-
Choose the IP stack policy you want to set up for your node.

If you enter 1:
▪️ The system will use IPv4 only.
▪️ AP and Switch will be managed through the IPv4 network.
▪️ You only need to enter IPv4 details in the next steps.
-
Enter IP address: For example, 10.95.161.31 (give available IP from your network, corresponding to the NIC selected in step 4 above).
-
Enter netmask: 255.255.255.0.
-
Enter gateway IP: Example 10.95.161.1.
-
Primary DNS and secondary DNS can be kept blank (it takes default ones).
Please make sure your DNS server(s) are able to resolve all domains that you may use (for SMTP, external AD, etc...)
If you enter 2:
▪️ The system will use Dual-stack (IPv4 + IPv6).
▪️ AP and Switch will be managed through both IPv4 and IPv6 networks.
▪️ You must enter both IPv4 and IPv6 details in the next steps.
-
Configure the OVTX user password.
Enter ovtx user password:
Confirm ovtx user password:
Apply this configuration (y/n) : y
Wait for some time, then the OVTX login prompt will appear.
-
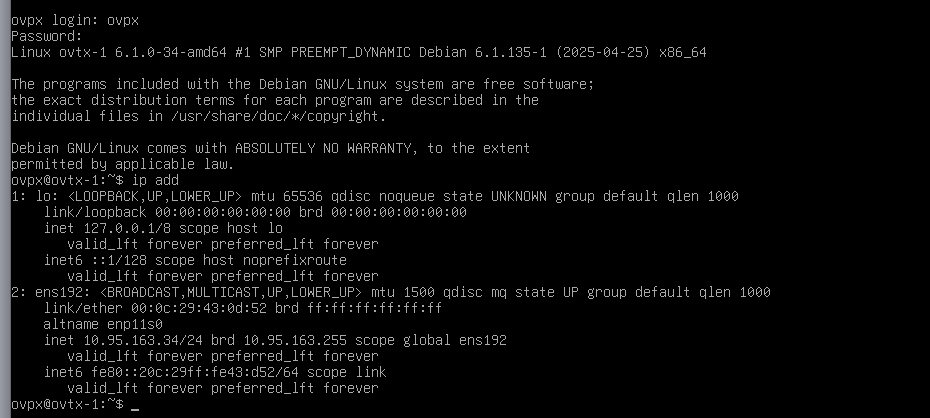
Try to login with username “ovtx” and the above configured password.
-
Run the command “ip addr” to check if the IP address is correctly configured.
-
Run the command “cat /etc/resolv.conf” to check if the DNS sever is correctly configured.

Managing More Than 500 Devices
With the OmniVista Terra 10.5.2 MR there is a VM with default 500GB of data disk. However, if you want to manage more than 500 devices, you will need to use the following procedure to increase the disk size:
-
Check Before Upgrade
Check the system disk right after deploying the OVA.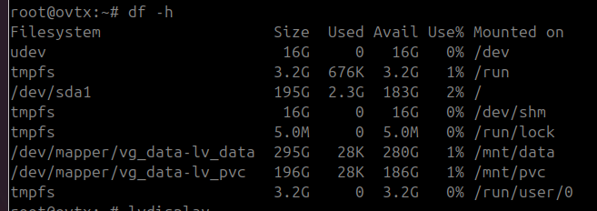
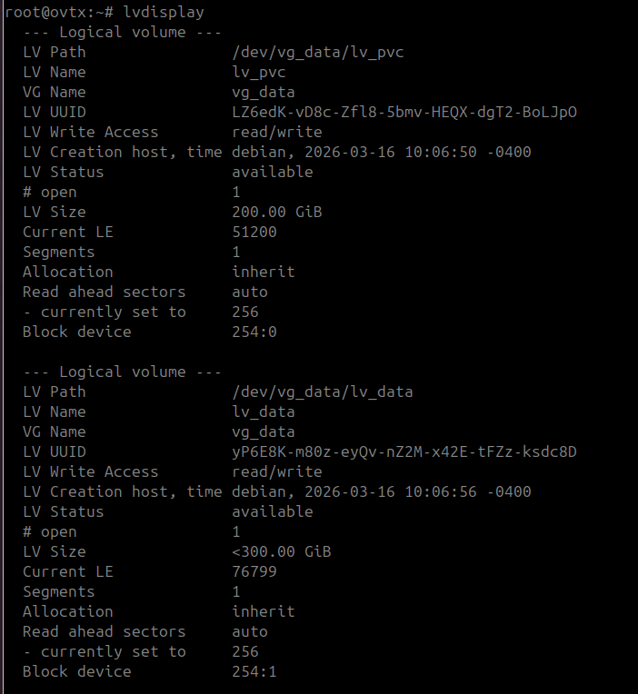
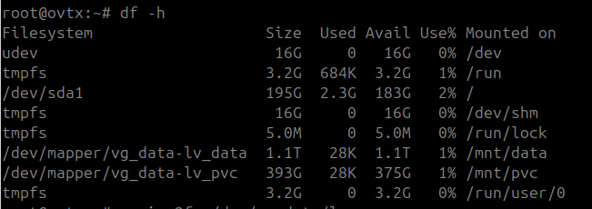
Note that there are two logical volumes: pvc = 200GB and data = 300GB
In ESXi, there are only two disks: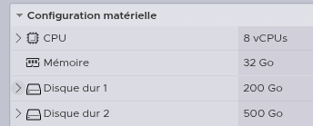
-
Add New Disk
You can keep the VM running while adding a new disk.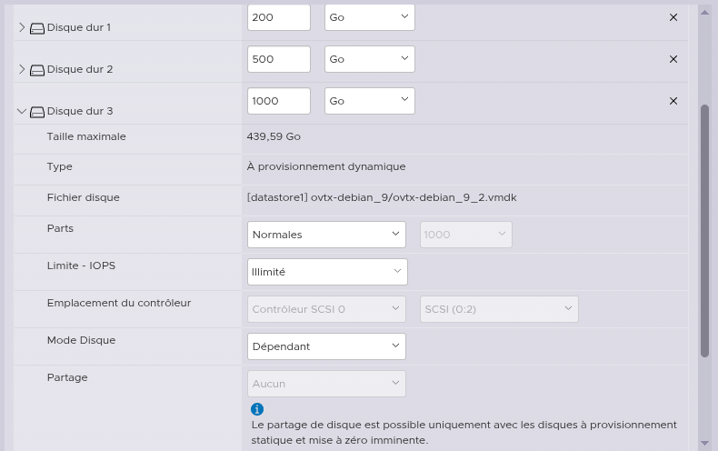
The disk is now visible in the VM.
-
Configure the New Disk to Add to OmniVista Terra
Create the physical Volume:
Show physical Volumes:
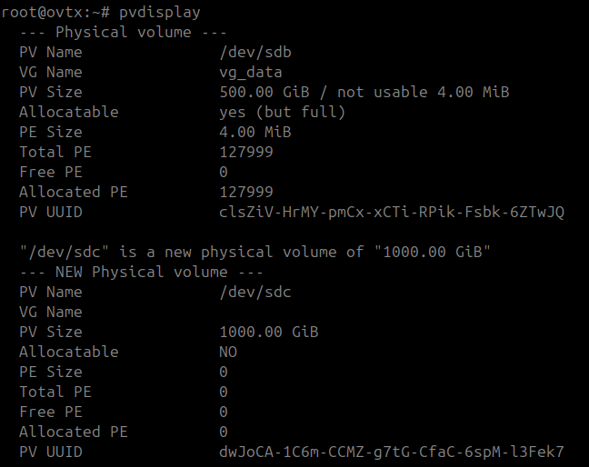
You can now extend the Volume Group:
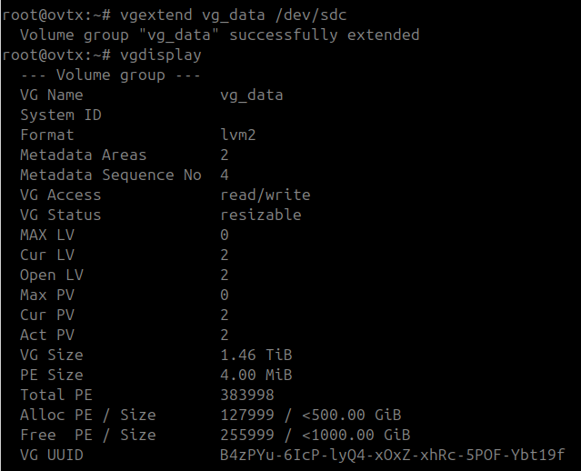
Volume group “vg_data” is now 1.5TB, which is 500GB original size + 1TB new disk.
Now you can extend each logical Volume (data and pvc):
#for PVC
2 lvextend -L +200G /dev/vg_data/lv_pvc
3 resize2fs /dev/vg_data/lv_pvc
4
5 # for Data
6 lvextend -l +100%FREE /dev/vg_data/lv_data
7 resize2fs /dev/vg_data/lv_data
8
Check the final size:
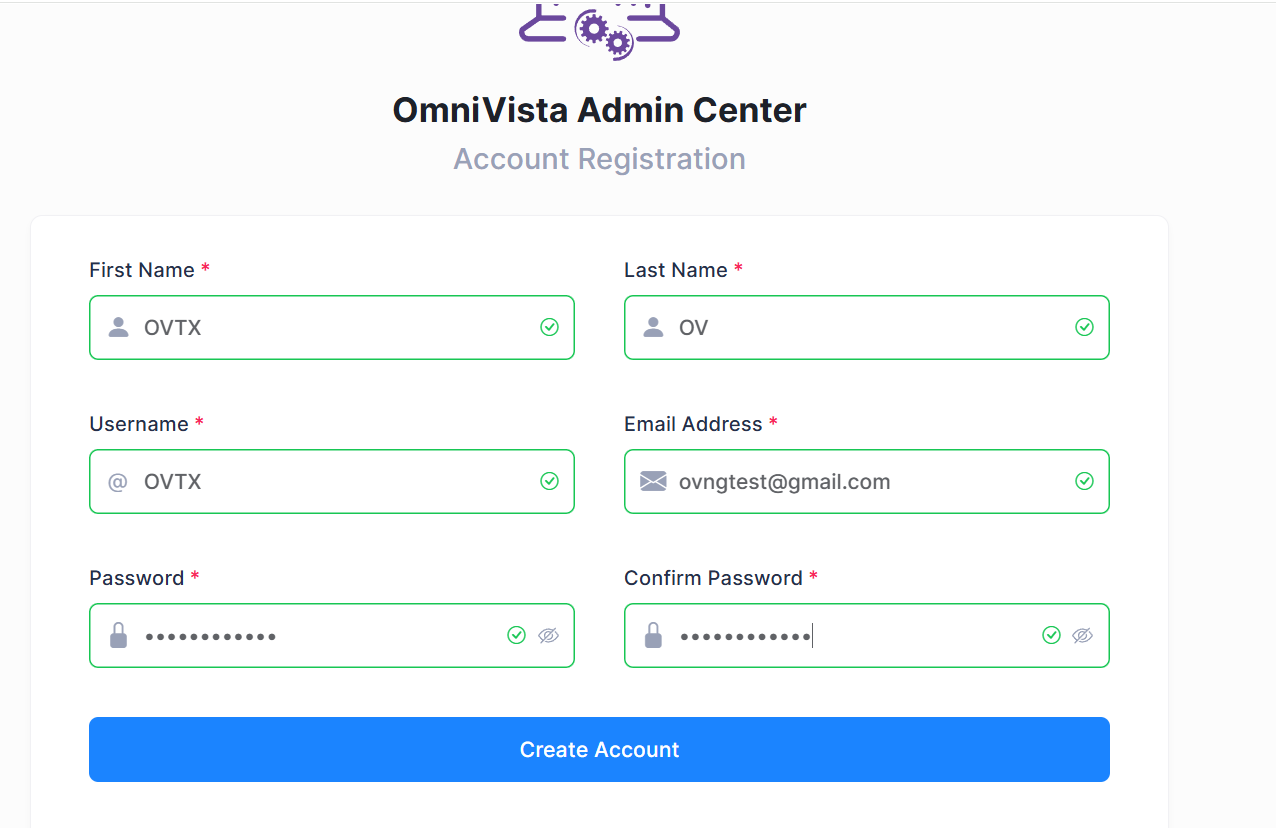
WebAdmin Center UI:
-
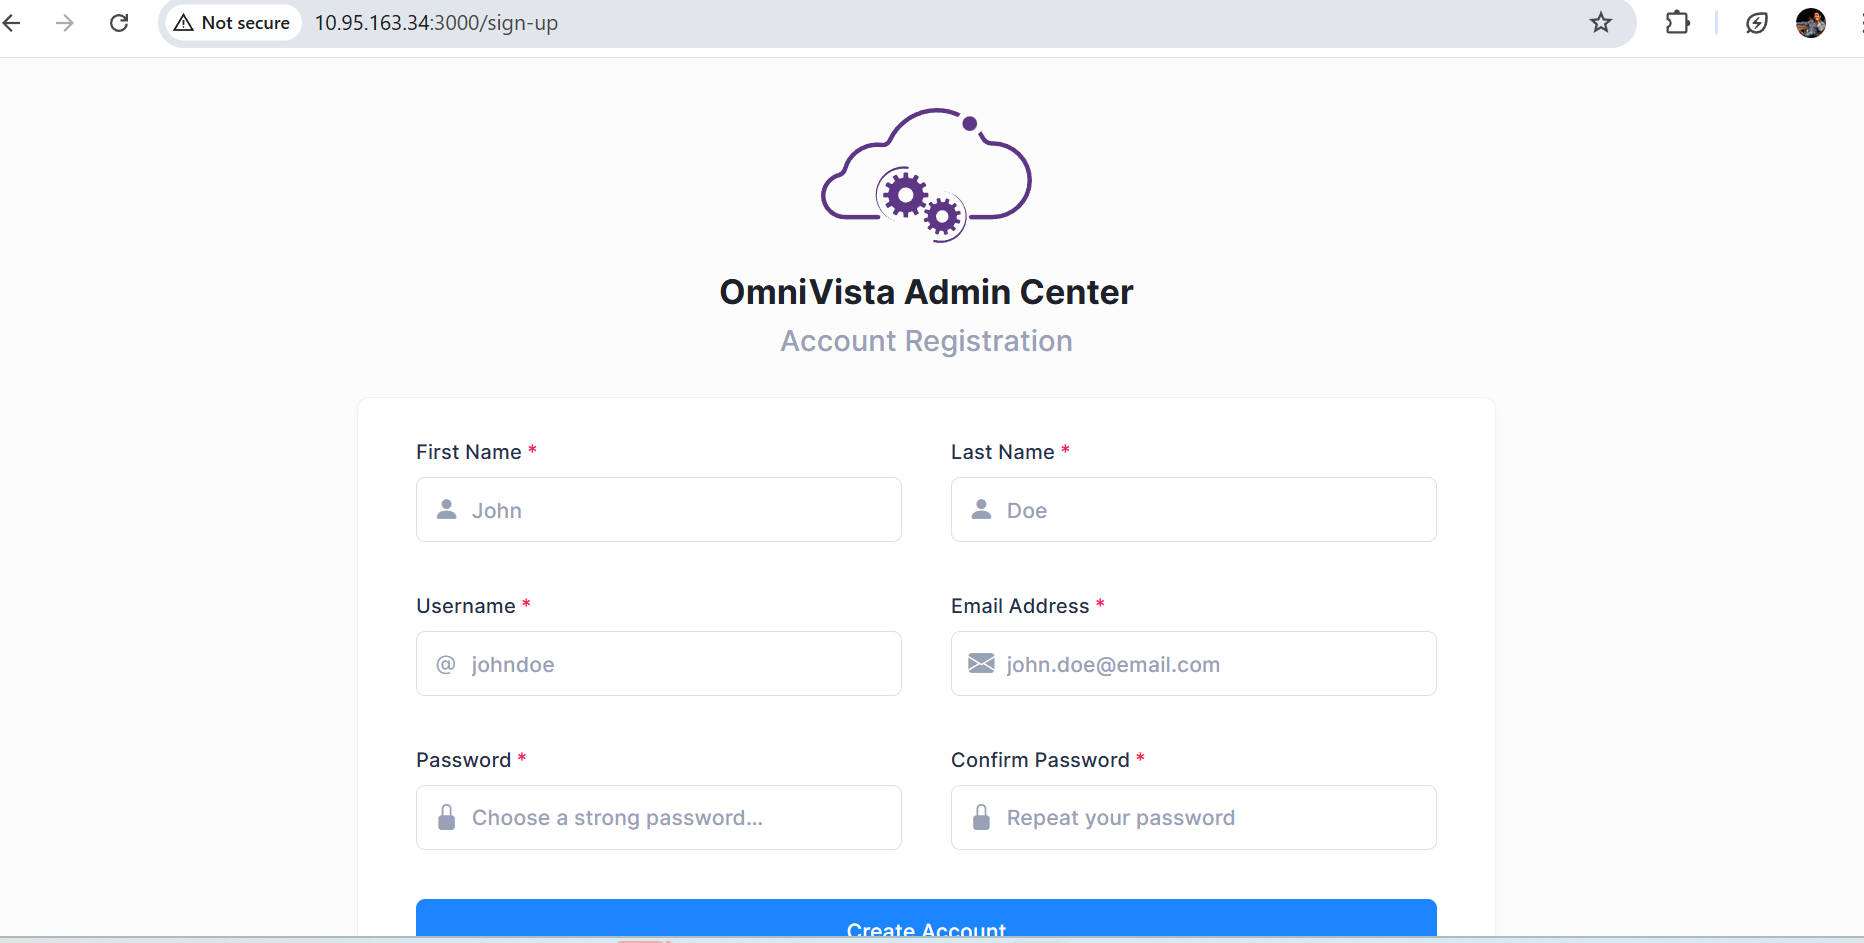
Using any one of the node IP (ex:10.35.x.y) with port 3000 to open the WebAdmin Center UI.
If you configured IPv6 interface before, you can access the WebAdmin by using IPv6 interface, for example : ”http://[2001:df4:2900:71::139]:3000”
-
Enter all the details and then click on Create Account.
-
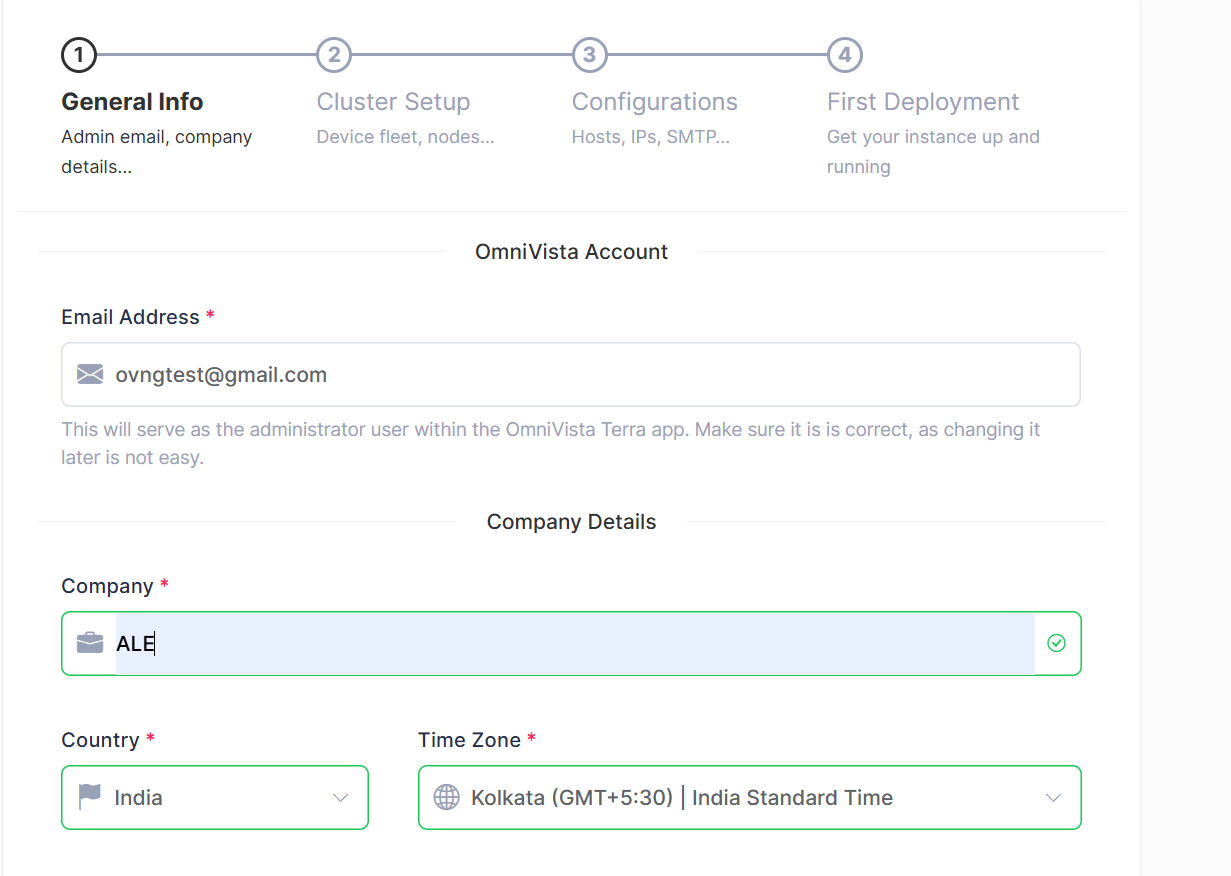
After getting success message, the Get started page opens, and click on Get started page.
-
The below page opens, enter the required details, then click on Next.
-
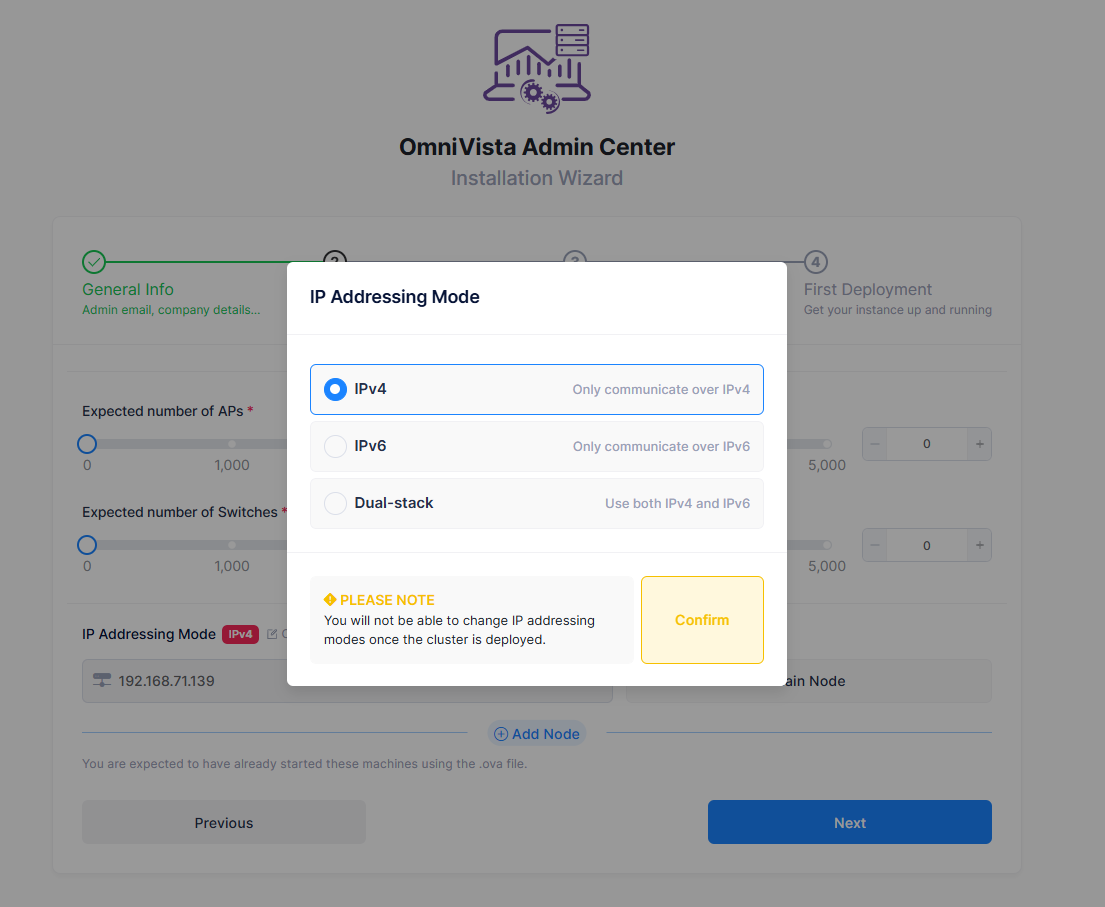
Select the IP Addressing mode,
▪️ If you previously selected IPv4 while creating the node, then you must select IPv4 again here.
▪️ If your node was configured with IPv4 and IPv6 (Dual-stack) when created, then you must select Dual-stack here.
▪️The IP Addressing Mode must match your node’s original network configuration, otherwise the deployment will fail.
-
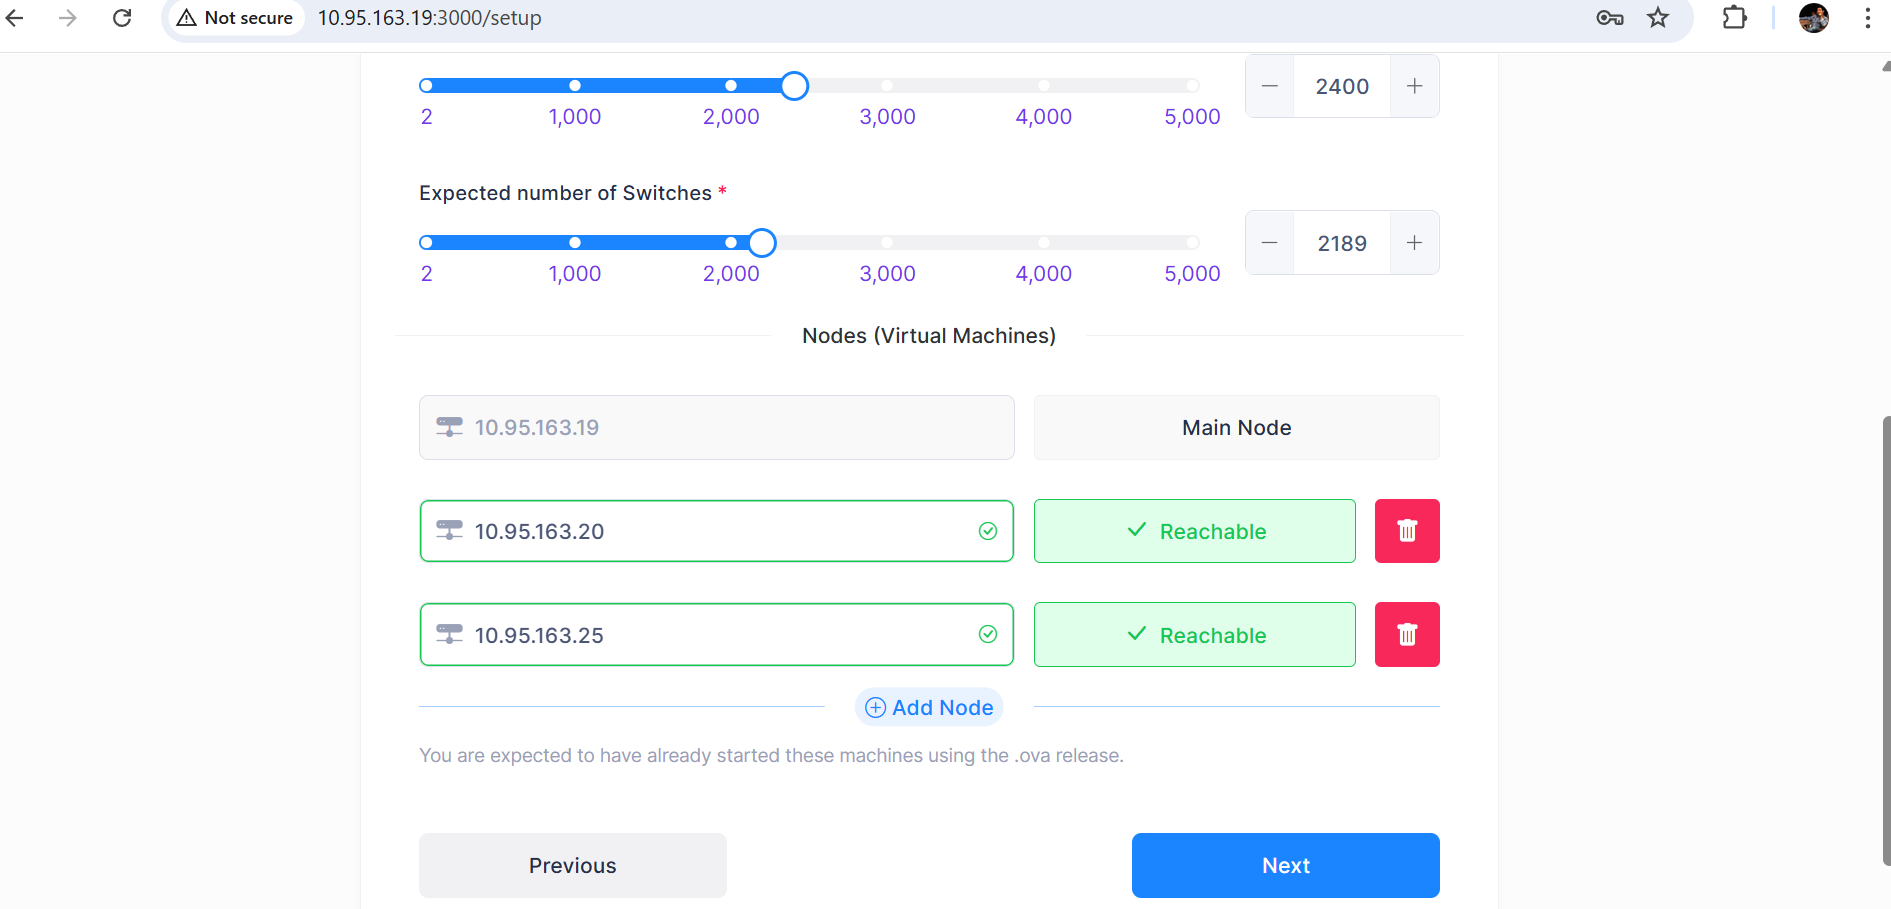
Select the expected number of APs, expected number of switches, and enter the second node IP and click on Check, enter the third node IP and click on Check (nodes should be reachable), then click on Next.
-
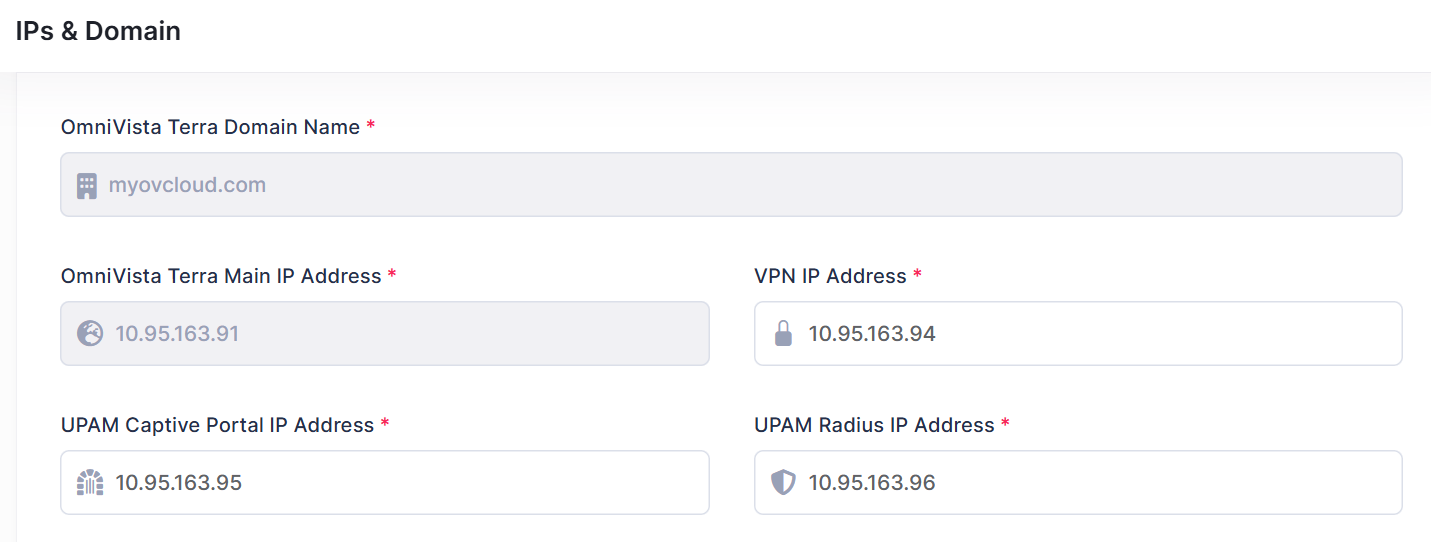
Enter below details (both mandatory and optional fields) and click on Next.
Enter your respective IP address in the fields below.
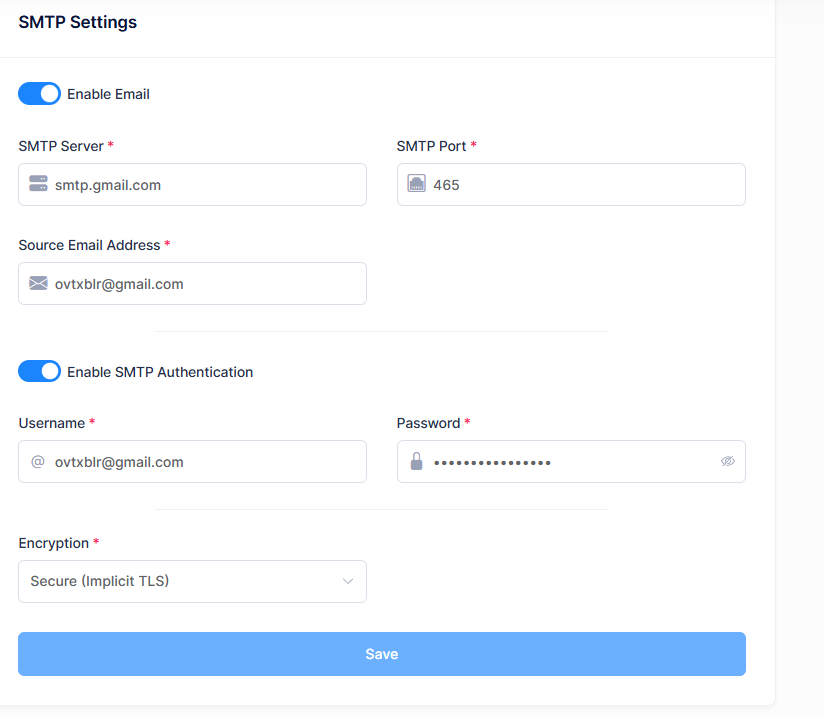
Fill in the SMTP server details as shown below.
SMTP Settings:
SMTP Server: smtp.gmail.com
SMTP Port: 465
Source Email address: ovtxblr@gmail.com
Enable SMTP authentication:
User Name: ovtxblr@gmail.com
Password: ***************
Encryption: Secure (Implicit TLS)
-
Select the build release file by clicking on click to Browse and wait until the release file is uploaded, then click on Done.
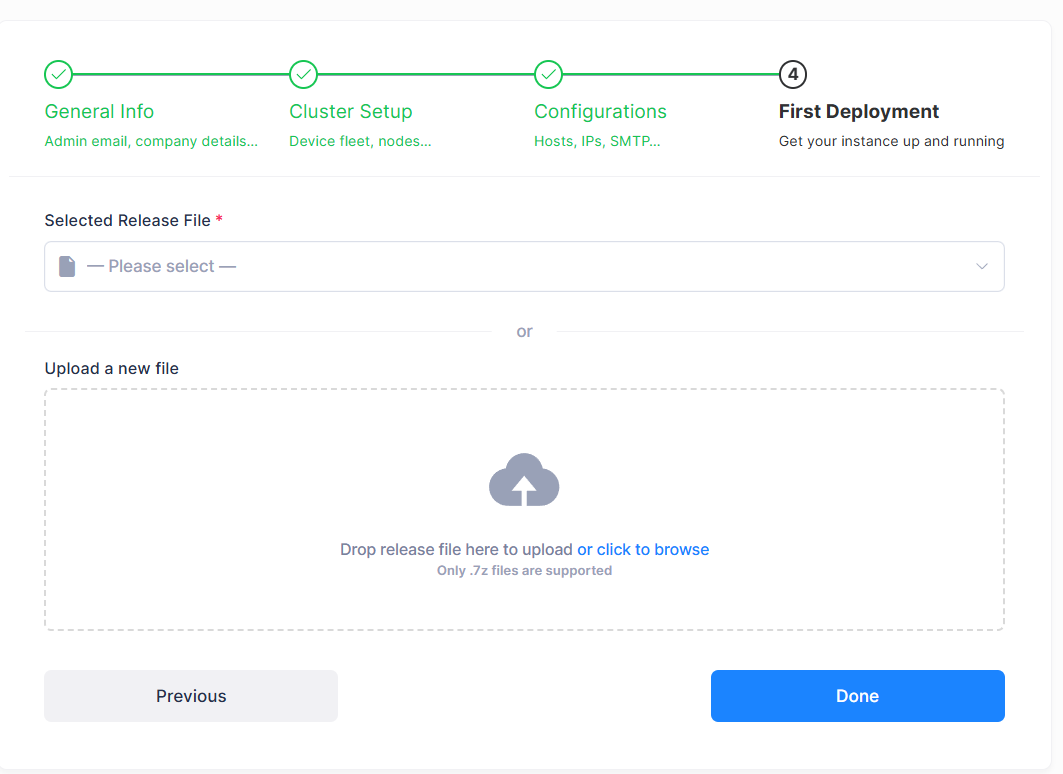
-
Click Yes on Confirm Deployment Page.
-
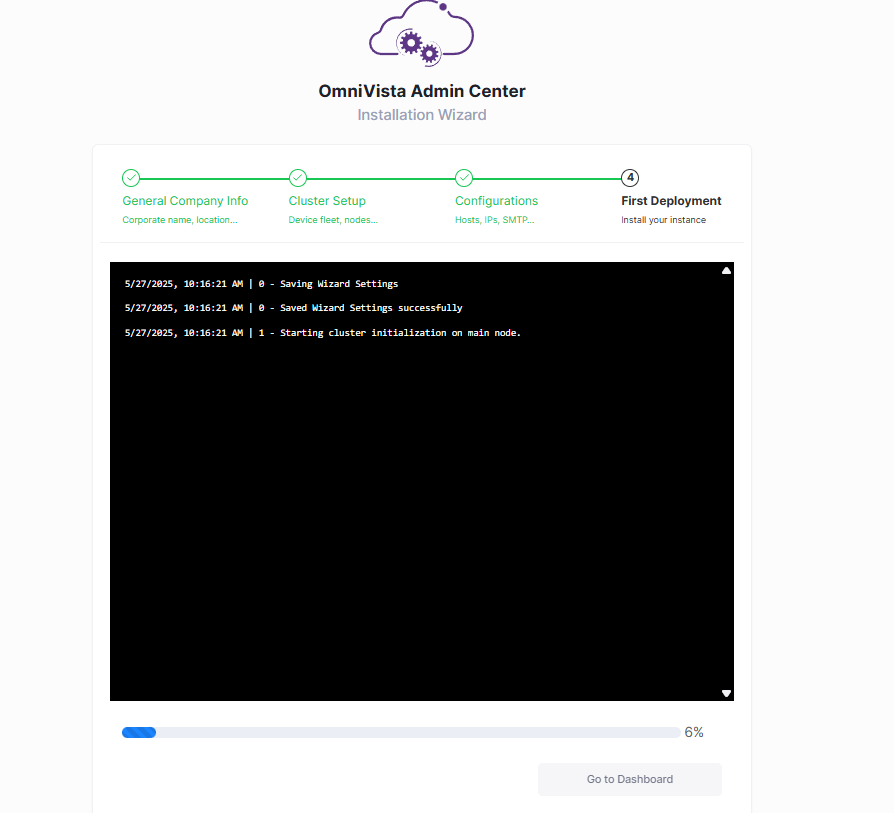
Wait until the deployment is finished then refresh the same Webadmin URL after sometime, it will prompt to dashboard page (if it opens login page, enter the username/password).
-
Click install on left side of the page.
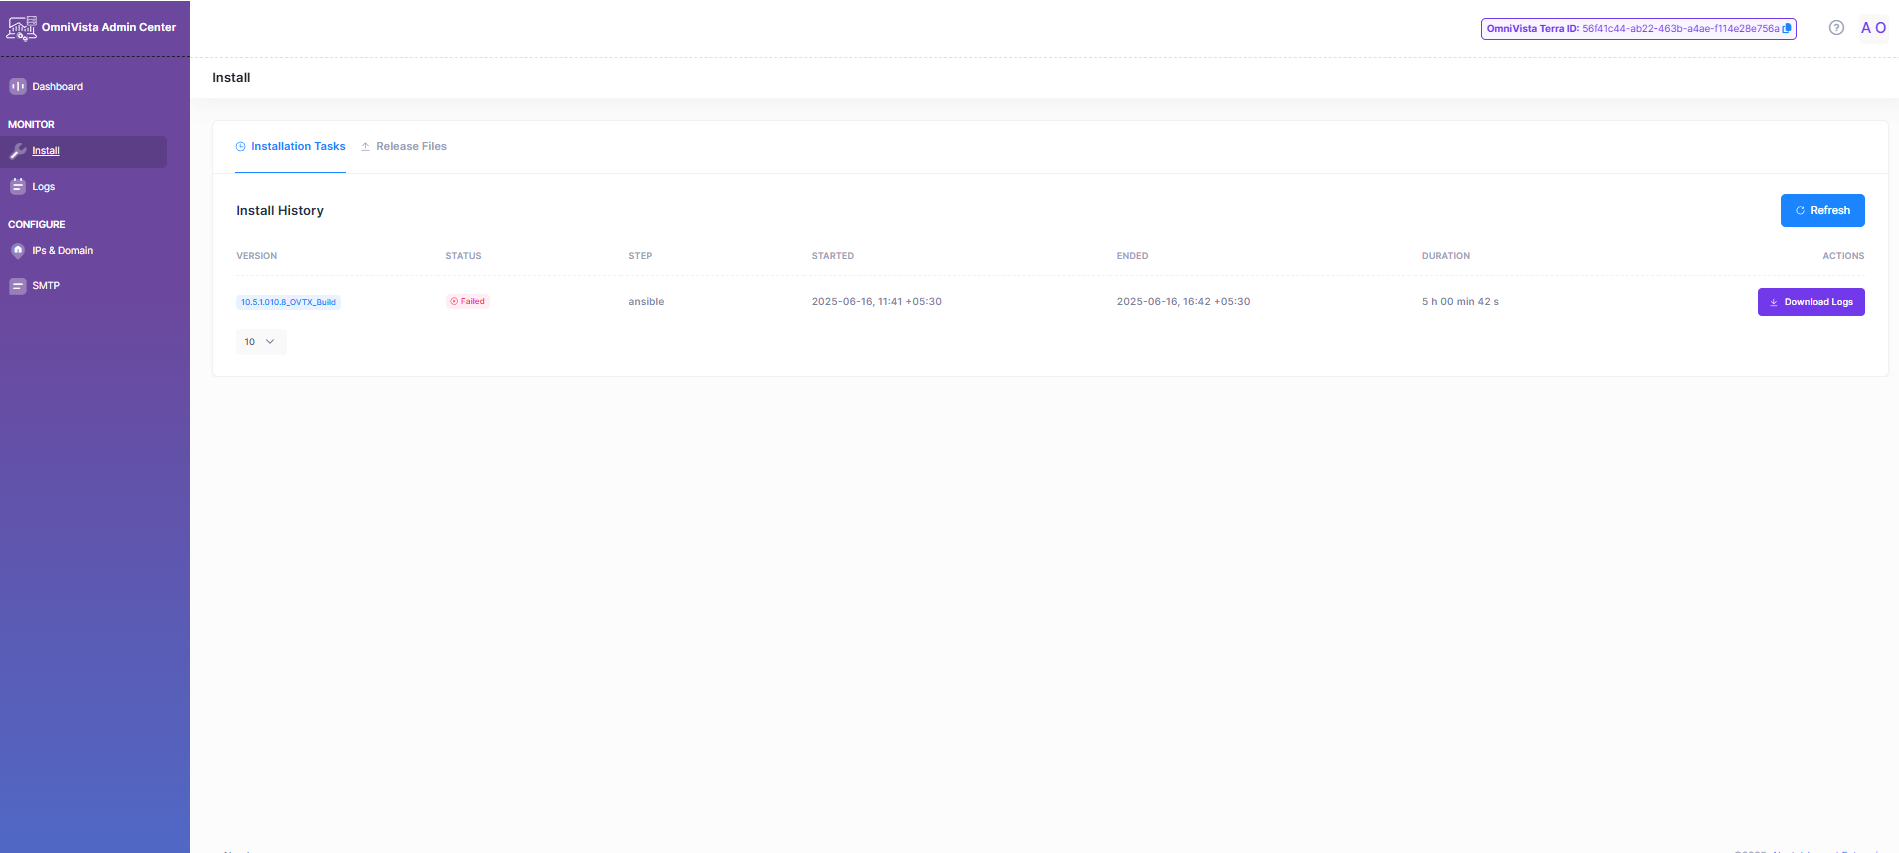
-
Check the Status of the deployment is success/failure/inprogress.
-
If the deployment fails, click on Download logs button, it will download the upgrade logs. Open those logs and view the OVTX upgrade process logs to confirm whether there are any errors in the upgrade process.
-
Check the pods status from the dashboard page.

32. Update the hosts file(C:\Windows\System32\drivers\etc) in our computer/pc with the myovterra.myovcloud.com and Omnivista Terra Main IP address like below.
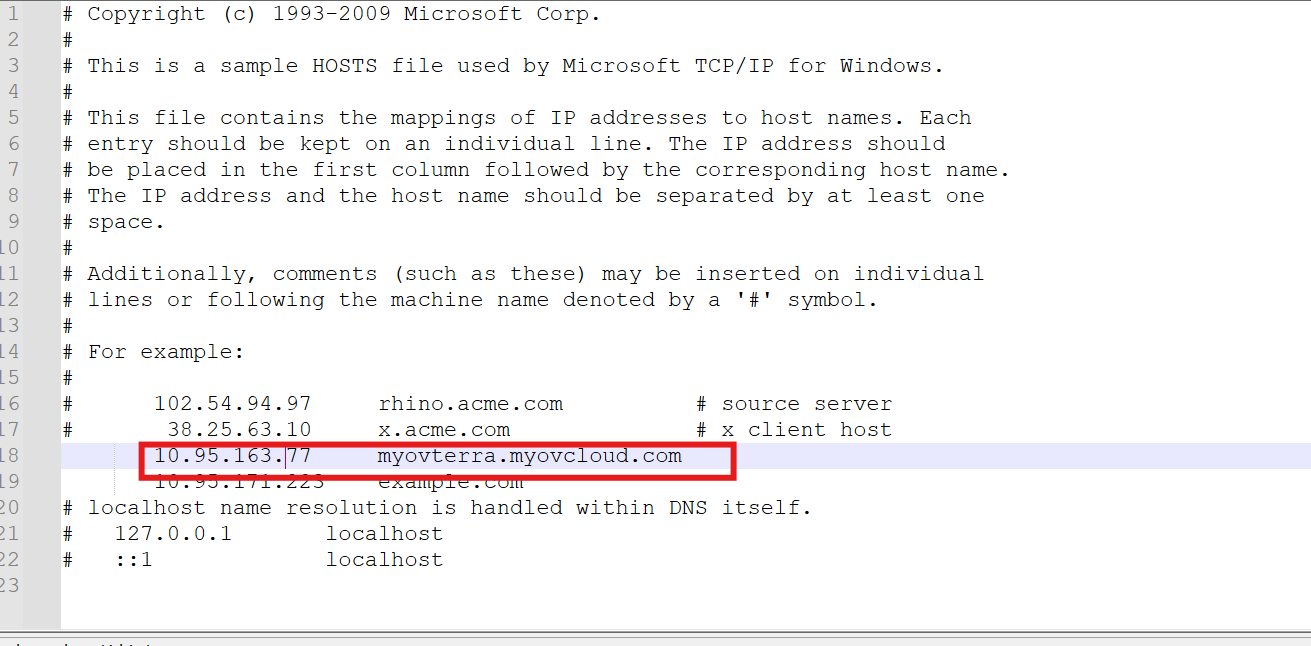
-
You can now login to OVTX with ovngtest@gmail.com (configured at step-18) and password is changeme.
How to Configure DNS for OmniVista Terra:
1. Install the windows DNS server and configure the below domains (refer to the details entered in step 22)
activation.myovterra.com - Omnivista Terra Main IP Address
vpn.myovterra.com - VPN IP Address
as.myovterra.com - Omnivista Terra Main IP Address
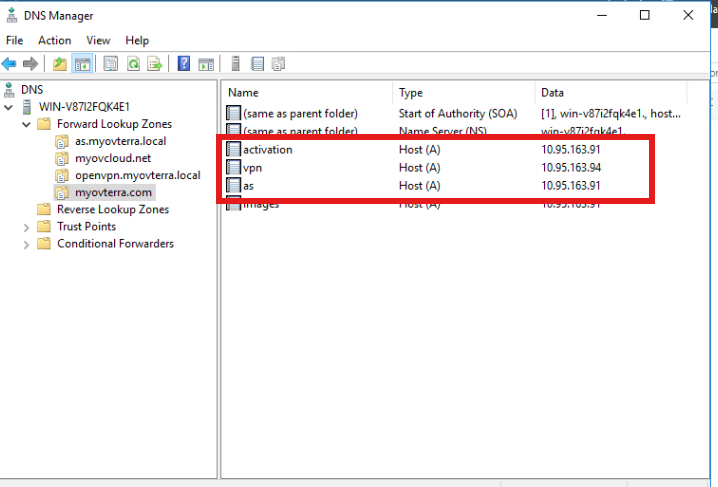
You can add more AAAA host records if you used the IP addressing mode Dual-stack
How to Onboard AP and Switch Devices
AP onboard steps:
1. If the APs were previously managed in OVNG/OVC, remove the certs from those APs before adding in OVTX.
Run the below command to remove certs
rm -rf /.ocloud/callhome_hash.json /.ocloud/certificateFile.cert /.ocloud/privateKey.key /.ocloud/csr.csr /.ocloud/publicKey.key ./privateKey.key.dec
If the AP is factory default AP, no need to remove any certs.
2. Configure the option 43 for the AP in the dhcpd.conf file in the core switch to which the AP is connected
Modify this file in 10.95.171.117 switch for 171.x APs
Modify this file in 10.95.163.80 switch for 163.x APs
manual-dhcp dc:08:56:3c:2f:20 10.95.171.178 {
option subnet-mask 255.255.255.0;
option routers 10.95.171.1;
option domain-name "http://myovterra.com ";
option domain-name-servers 10.95.163.213;
option ntp-servers 112.111.111.108;
option 43 [010C616C656E7465727072697365801F687474703A2F2F61637469766174696F6E2E6D796F7674657272612E636F6D];
option 43 activation.myovterra.com;
}
For https://myovterra.myovcloud.com/(10.95.163.91)
option domain-name-servers 10.95.163.243;
option 43 [010C616C656E7465727072697365801F687474703A2F2F61637469766174696F6E2E6D796F7674657272612E636F6D];
option 43 activation.myovterra.com ;
-
Give ‘dhcp-server restart’ command in the Switch
-
Give firstboot and reboot commands in the AP
-
Add the AP in OVTX, status should be “OV Managed” and Management Connectivity is “ON”
Switch onboard steps:
-
Edit the Activation server URL: activation.myovterra.com in the file /flash/working/cloudagent.cfg in AOS Switch.
-
Add the switch in OVTX.
-
If the Switches were previously managed in OVNG/OVC, remove the certs from switch before adding in OVTX.
Remove the below red color highlighted certs from the switch and then restart callhome.
cd switch/cloud
rm -f client.crt csr.crt private.key public.key

For factory default switch, no need to remove any certs from the switch.
-
Verify that Switch status should be moved to “OV Managed” and Management Connectivity is “ON”
Upgrading from 10.5.2 GA to 10.5.2 MR1
Below procedure applies only to upgrading an existing OmniVista Terra 10.5.2 GA installation to OmniVista Terra 10.5.2 MR1 (10.5.2.008.44_MR_OVTx_Build.7z).
Pre-requisites:
-
Download the OVTX OVA file and Build release file ( .7z file) from the MyPortal website.
Steps:
-
Login into the Web Admin Center UI via the node IP(ex:10.35.x.y) with port 3000.
Note:-
You must select the node IP that was used to initiate the GA installation.
-
If you configured IPv6 interface before, you can access the WebAdmin by using IPv6 interface, for example : ”http://[2001:df4:2900:71::139]:3000”
-
-
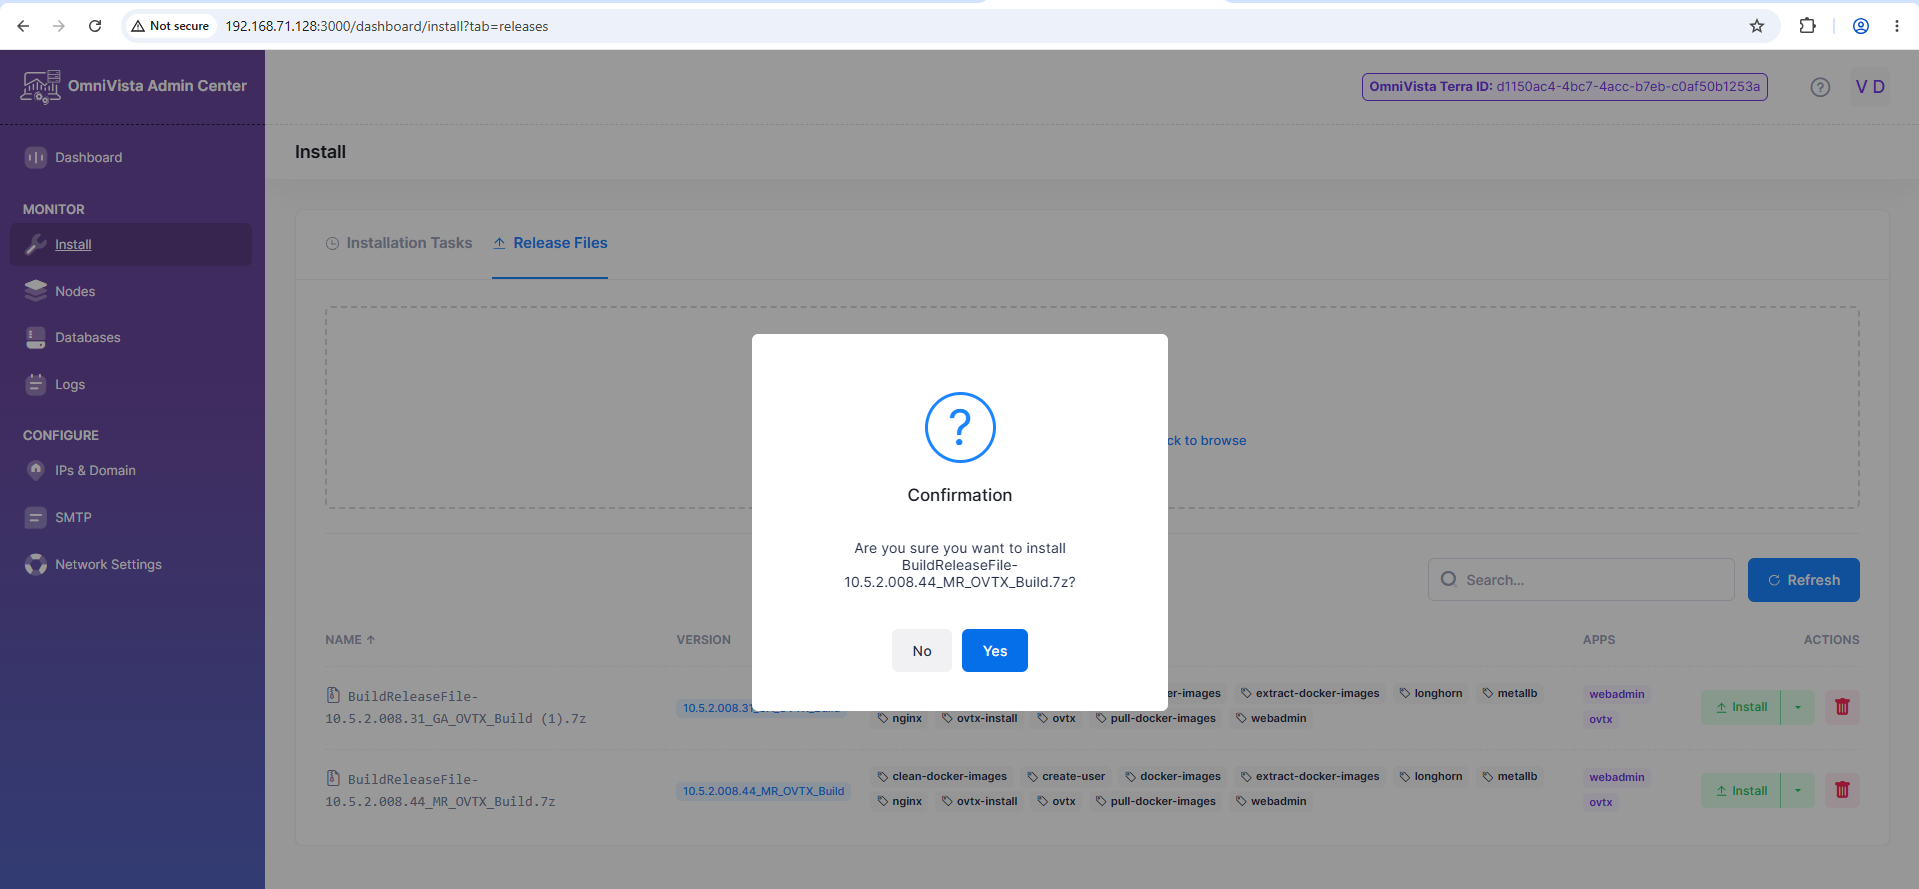
Navigate to the Install menu and access the Release File tab. Upload the release file and wait for the upload process to complete successfully.
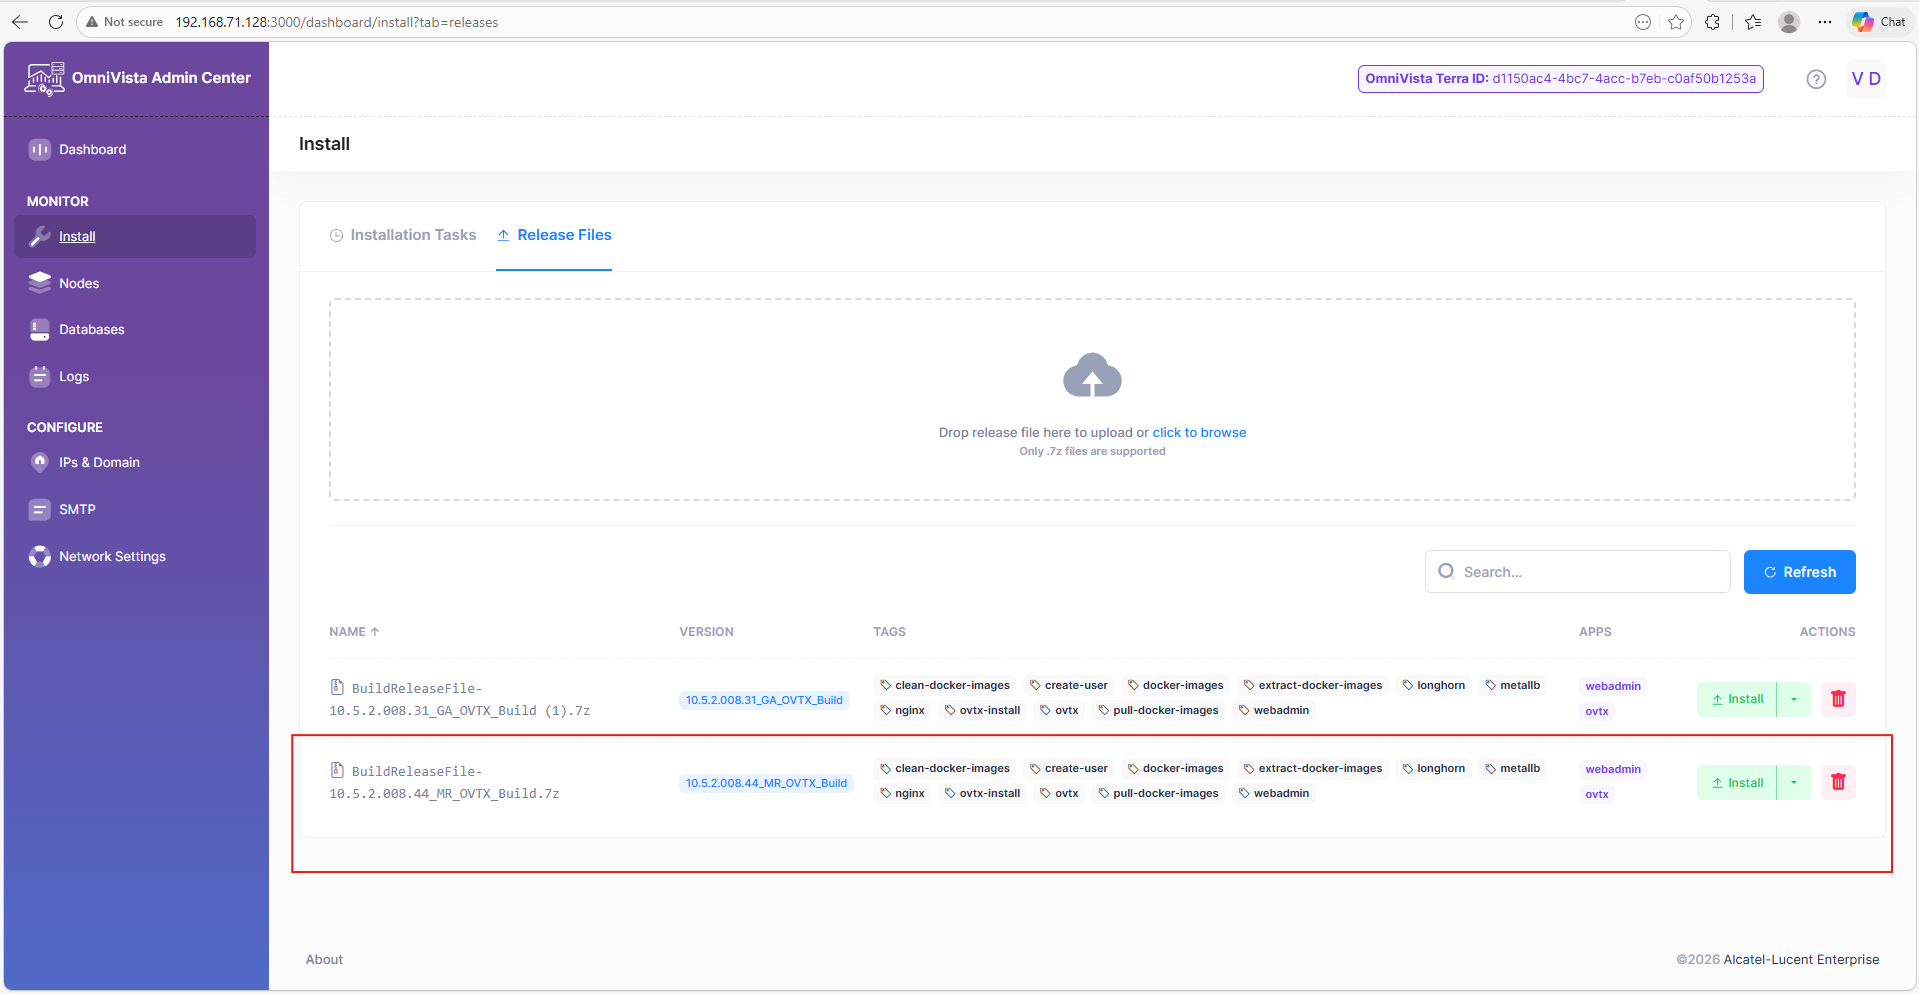
-
Click the Install button, confirm Yes to start the upgrade process now.
-
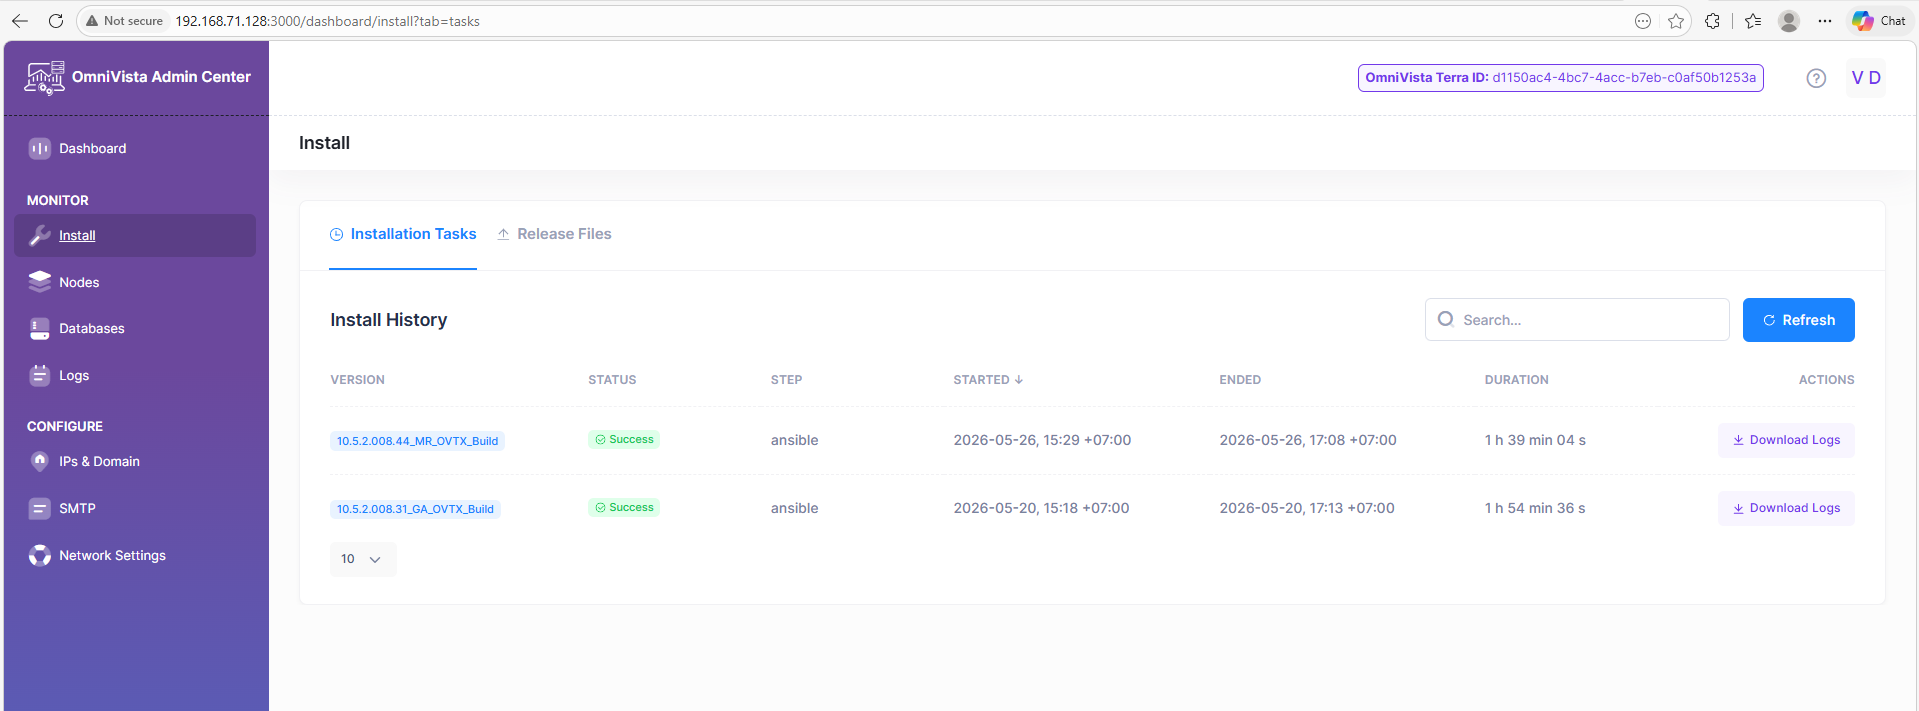
Wait for the upgrade process to complete. Please access Installation Tasks to monitor the upgrade status.
-
The upgrade process is complete. You can navigate to the Dashboard page to view the pod status.
Known Issues/Workarounds
UPAM Not Available After Restarting the VM (OVNG-25288)
Summary: After the VM was restarted, dependent pods came back up out of order. The “sampservice-0” started before Redis Sentinel on “redis-node-0” was ready, so its startup failed when trying to connect to “redis-headless:26379”.
Workaround: Recreate ovng-upam-0 pod via the Web Admin Center.
Upgrade Process Takes Too Much Time
Summary: The upgrade from OmniVista Terra 10.5.2 GA to OmniVista Terra 10.5.2 MR1 may take too much time (more than an hour). This is a known issue based on some temporary failure that is specific to this upgrade process; production or OmniVista are not impacted.
Workaround: At step "[ovtx : Restart Kafka brokers one by one (OnDelete strategy)]" manually restart kafka pods from the Dashboard page in Web Admin. First recreate kafka-0, then kafka-1 and finally kafka-2.