Event Responder Profiles
An Event Responder Profile enables you to specify a response (if any) that you want OmniVista Cirrus to take when specified events are received by OmniVista Cirrus. You can specify the events to which OmniVista Cirrus will respond by severity level or with a custom filter. OmniVista Cirrus can make the following responses to receipt of a specified event:
OmniVista can send an e-mail to any address you specify. The e-mail can include the information you want in the email through the use of variables. Variables exist for information such as the event name, synopsis, description, etc..
Automatically acknowledge the traps.
To access the Event Responder profiles screen, click on Diagnostic Tools > Network Events and select Profiles > Responder profiles tab under the “Monitor” section of the OmniVista Cirrus Menu.
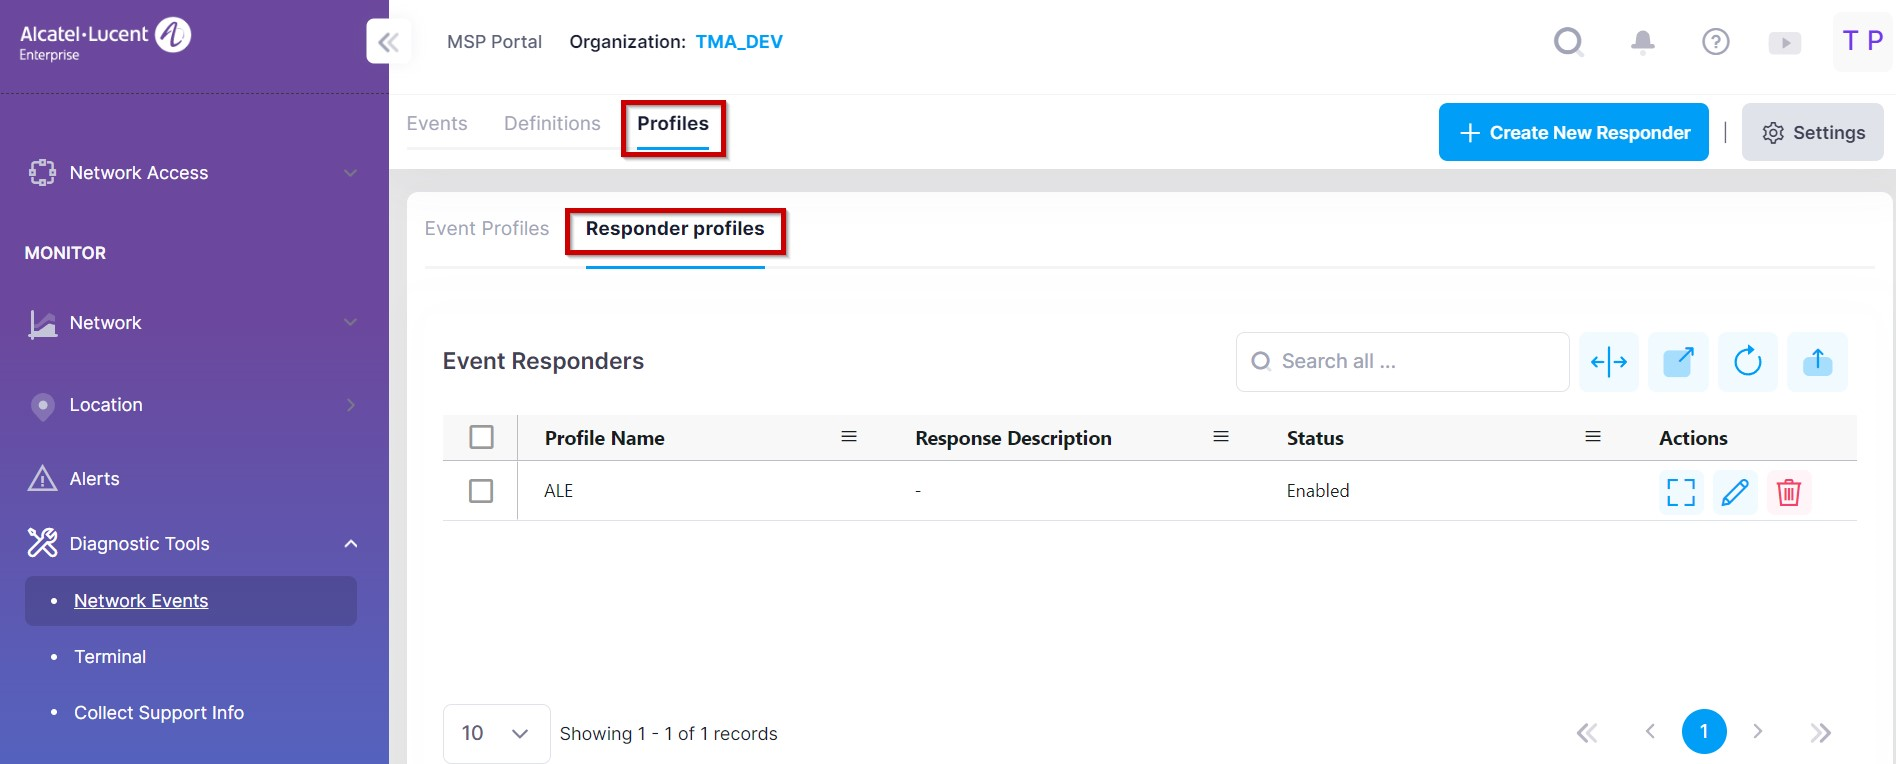
The Event Responders screen displays all configured event responders, and is used to create, edit, or delete Event Responder.
Creating an Event Responder
To configure an Event Responder, click Create Event Responder on the Event Responder screen. An Event Responder Wizard opens to walk you through the following configuration steps:
Basic Information - Enter a name, an optional description, and enable/disable the Responder.
Device Selection - Select the devices (AP or Switch) for the Responder configuration. The Responder will respond only if events are received from these devices.
Event Type - Specify the events to which OmniVista Cirrus will respond by severity level or by selected custom filters.
Response - Select one or both of the following actions that the Responder will take when an event matching the Responder criteria is received:
Send an e-mail response to a specified recipient.
Automatically acknowledge the events.
1. Basic Information
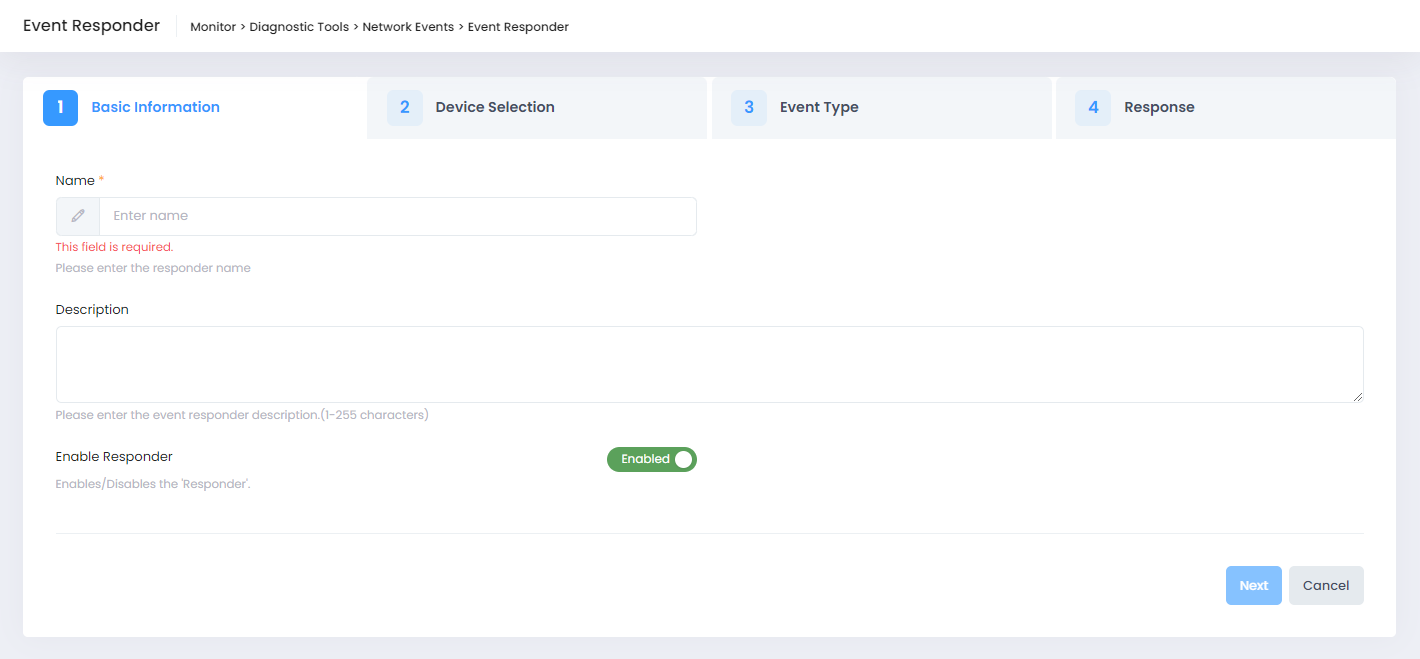
Complete the fields as described below, then click Next to move to Step 2:
Name - The name to assign to the Responder.
Description - An optional description.
Event Responder - Enable (the default) or disable the Responder action. If Responder is disabled, no response action is taken.
Note: Only 8 responders can be enabled for an Organization.
2. Device Selection

Select the Switch or Access Point Groups to which a response is sent. If the user want to cover all the Access Points or Devices, then select the sites from the drop-down menu list. The Responder will only send a response to device events sent from the selected devices. To pick devices from a list of devices, click on “Launch device selection dialog”. A Device Selection window opens from which you can select the devices for upgrade. Once devices are selected, click on Next to move to the Step 3.
3. Event Type
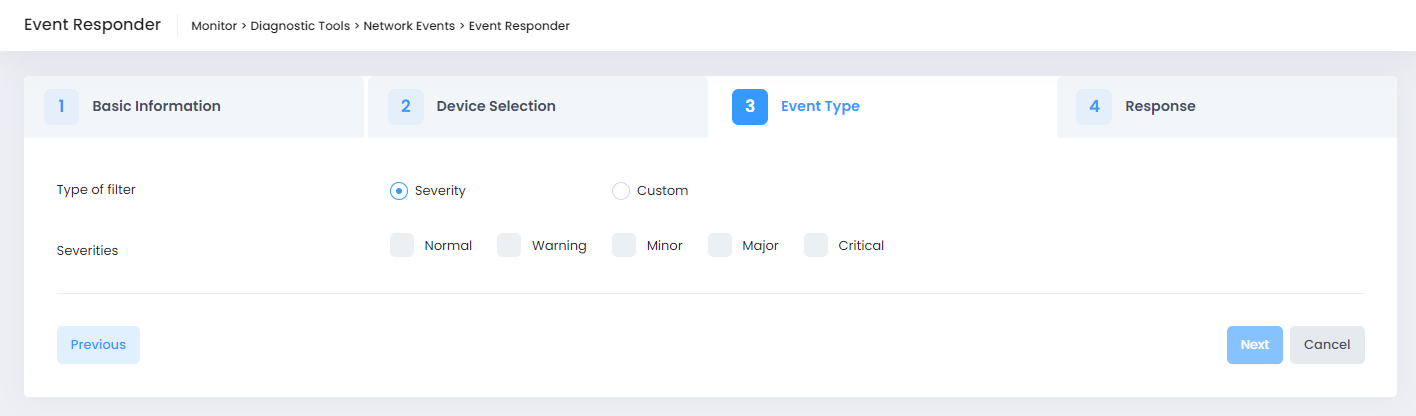
Specify the type of events to respond to by selecting one of the following two filter options:
Severity - Respond only to events that match the selected severity levels.
Custom - Define a custom filter to specify the event criteria that will trigger a response.
Creating a Custom Filter
When you select Custom for the Type of Filter, the Event Type screen prompts you to select the scope of the filter and provides an Add Filter button to define a custom filter.
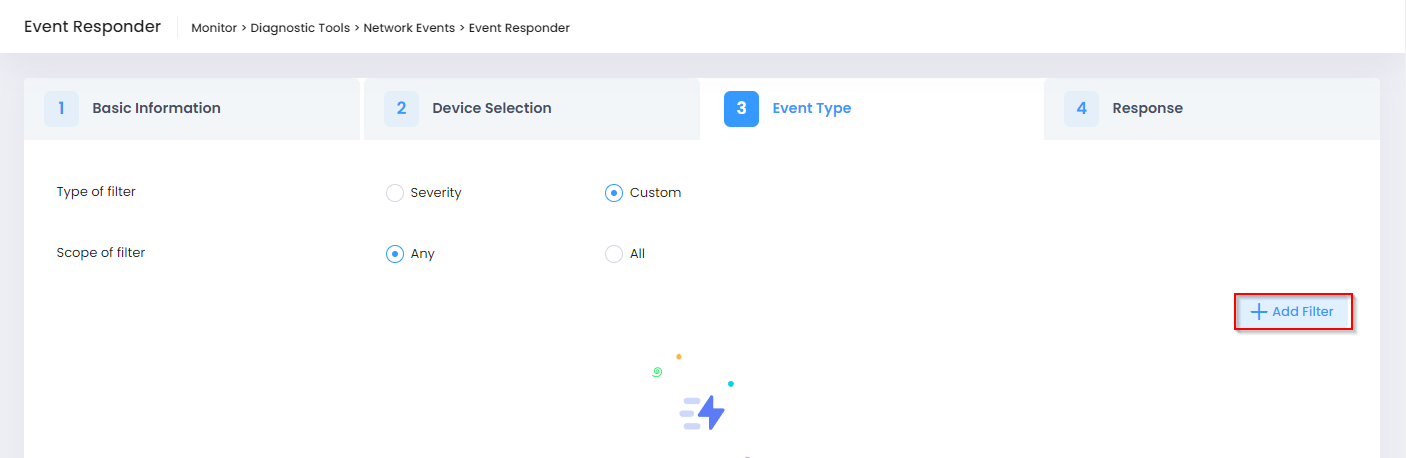
Select the filter scope by clicking on Any or All:
Any - Respond to any event received from the specified devices that matches any of the custom filters.
All - Respond to any event received from the specified devices that matches all of the custom filters.
Click on Add Filter to open the Add Filter form, which consists of a Basic Information section and a Filter Condition(s) section.
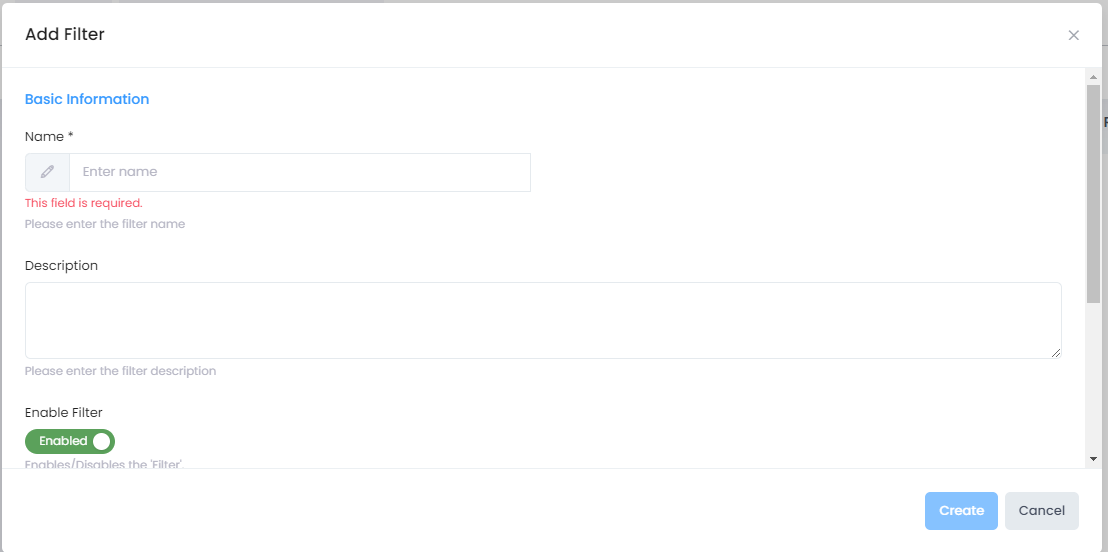
In the Basic Information section, enter a name for the custom filter and an optional description. You can also change the status of the filter (enabled by default) by clicking on the Enable Filter slider.
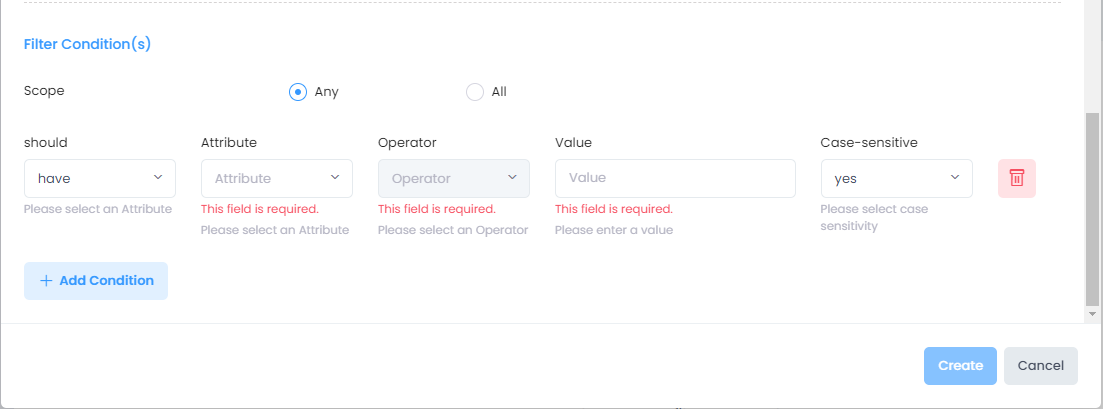
In the Filter Condition(S) section, complete the following tasks:
Select the Scope (Any or All) then click on Add Condition.
Define the condition using the fields provided. If you want to define another condition, click on Add Condition again.
When you are done defining all the filter conditions that you want, click Create. The Add Filter form closes and your custom filters are displayed on the Event Type tab. Click Next to move to Step 4.
4. Response
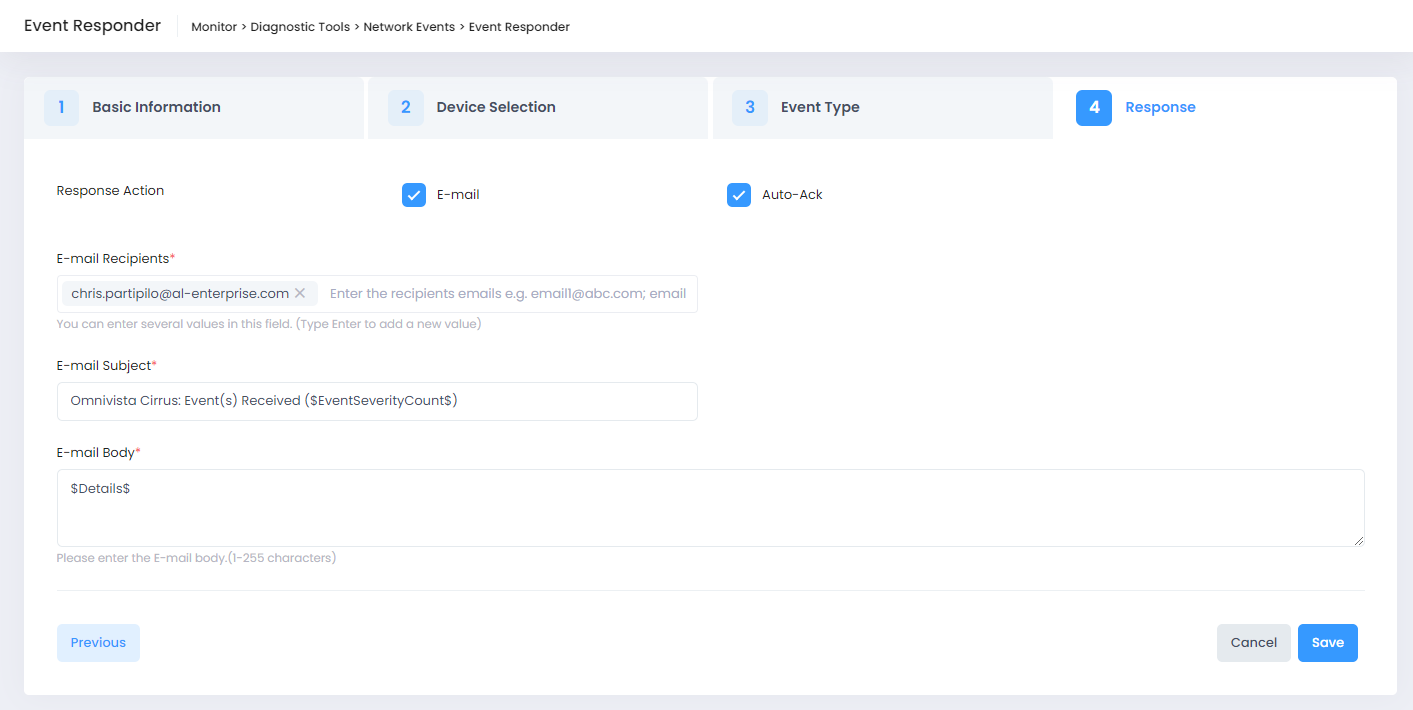
Response Action - Select one or both of the following options to configure the response to events matching the specified criteria:
E-mail - The Event Responder will automatically send an e-mail. The configurable Responder Settings determine when the email response is sent. When this option is selected, you are prompted to complete the following e-mail parameters:
E-mail Recipients - Enter an e-mail address(es). Multiple e-mail addresses must be separated by a semi-colon (e.g., john.smith@al-enterprise.com; jane.sullivan@al-enterprise.com).
E-mail Subject - By default, the following is included in the E-Mail Subject Line: "OmniVista: Trap(s) Received $TrapSeverityCount$" (explained in the Event Variables section). You can also enter any additional information you want to include in the subject line.
E-mail Body - By default the variable $Details$ (explained in the Event Variables section) is included in the body of the e-mail. The variable automatically includes event details in the body of the e-mail. You can also enter any additional information you want to include in the e-mail.
Auto-Ack - The Event Responder will automatically acknowledge the events.
When you are finished, click Save to return to the Event Responder screen. The Event Responder you just created will appear in the Event Responder List.
Responder Settings
If you want to adjust when an email response is sent, click on Settings on the Event Responder screen to open the Responder Settings screen.
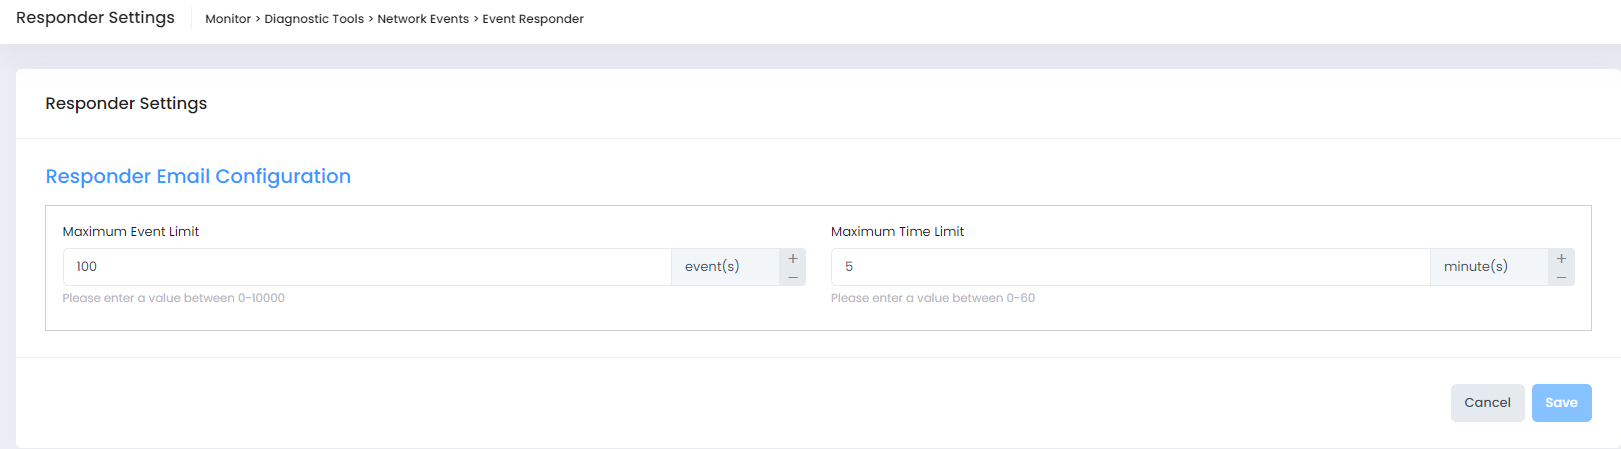
By default, the maximum event limit is set to 100 events and the maximum time limit is set to 5 minutes. This means that 5 minutes after the first event is sent, OmniVista Cirrus will send an email response if no other response was sent during that time or 100 events were received before the 5 minutes is up.
Change the Maximum Event Limit and/or the Maximum Time Limit, if necessary, then click Save to retain the changes. Note that the event and time limit values are maintained at the Organization level.
Event Variables
You can use the following variables when you configure an automatic event responder. There are two types of variables: generic variables and event-specific variables
Generic Variables
$Details$
For events, this variable is equivalent to the following combination of text and event-specific variables (event-specific variables are described in the following section):
Event Received: $EventName$
Type: $EventType$
Severity: $Event Severity$
Synopsis: $EventSynopsis$
Output Example:
Event Received: wireduser report
Type: QoE-Analytics
Severity: Normal
Synopsis: Wired User Report
Type
The value of type will be based on events type.
For QoE events, Type = QoE-Analytics.
For traps, Type = traps.
$Synopsis$
For events, this variable is equivalent to the event-specific variable $EventSynopsis$ which is a brief description of the event.
Event Specific Variables
$EventCount$
Total count of events that match the responder conditions/filters.
Output Example: 75
$EventSeverityCount$
A summary of the trap severity counts.
Output Example: 3 Major, 1 Minor, 8 Warnings.
$EventName$
The name of the Event (as defined in the Event definition).
Output Example: apAddStationToBlacklist
$EventSynopsis$
A brief description of the event.
Output Example: A station (apStaMAC: XX:XX:XX:XX:XX:XX) has been added to Blacklist.
$EventSeverity$
The severity level assigned to the event in the Network Events application's Event Definitions page. The severity level can be Normal, Warning, Minor, Major, or Critical.
Output Example: Minor
$EventType$
It is based on type of event. Type can be QoE-Analytics, Traps.
Output Example: QoE Analytics
$EventDeviceSiteName$
The name of the site that device configured.
Output Example: Calabases
$EventDeviceMacAddress$
The Mac Address of the device that generated the event
Output Example: XX:XX:XX:XX:XX:XX
$EventDeviceIP$
The IP address of the device that generated the event.
Output Example: 127.0.0.1
$EventDeviceIPV6$
The v6 address of the device that generated event.
Output Example: 2001:db8:3333:4444:5555:6666:7777:8888
$EventDeviceUploadTime$
The time of the event that generated by the device.
Output Example: 2023-02-28T07:39:26.597Z