An External Active Directory (AD) Server is a centralized directory service used to authenticate and manage users, groups, and devices within an organization’s network. When integrated as an authentication source, it enables users to log in using their corporate domain credentials instead of maintaining separate local accounts. This screen is also used to create, edit, and delete an External AD Server.
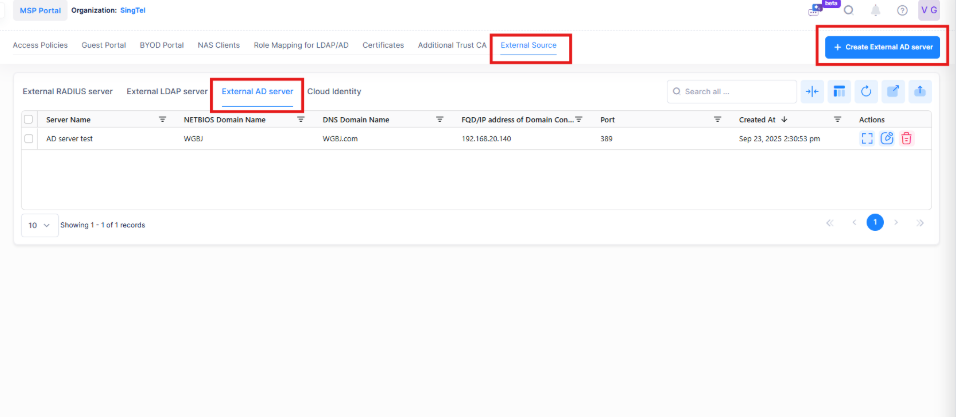
To access the External AD Server screen, click on Network Access > UPAM NAC > External Source under the “Configure” section of the OmniVista Terra Menu.
Creating an External AD Server
You can create an External AD server by specifying required details. This enables establishing a secure connection between the system and the AD Server for user authentication.
To add an External AD Server to UPAM, click on Create External AD Server to open the Create External AD server screen. Complete the following fields as described below and test the connection with the server. Successful test connection is mandatory to create a new External AD server.
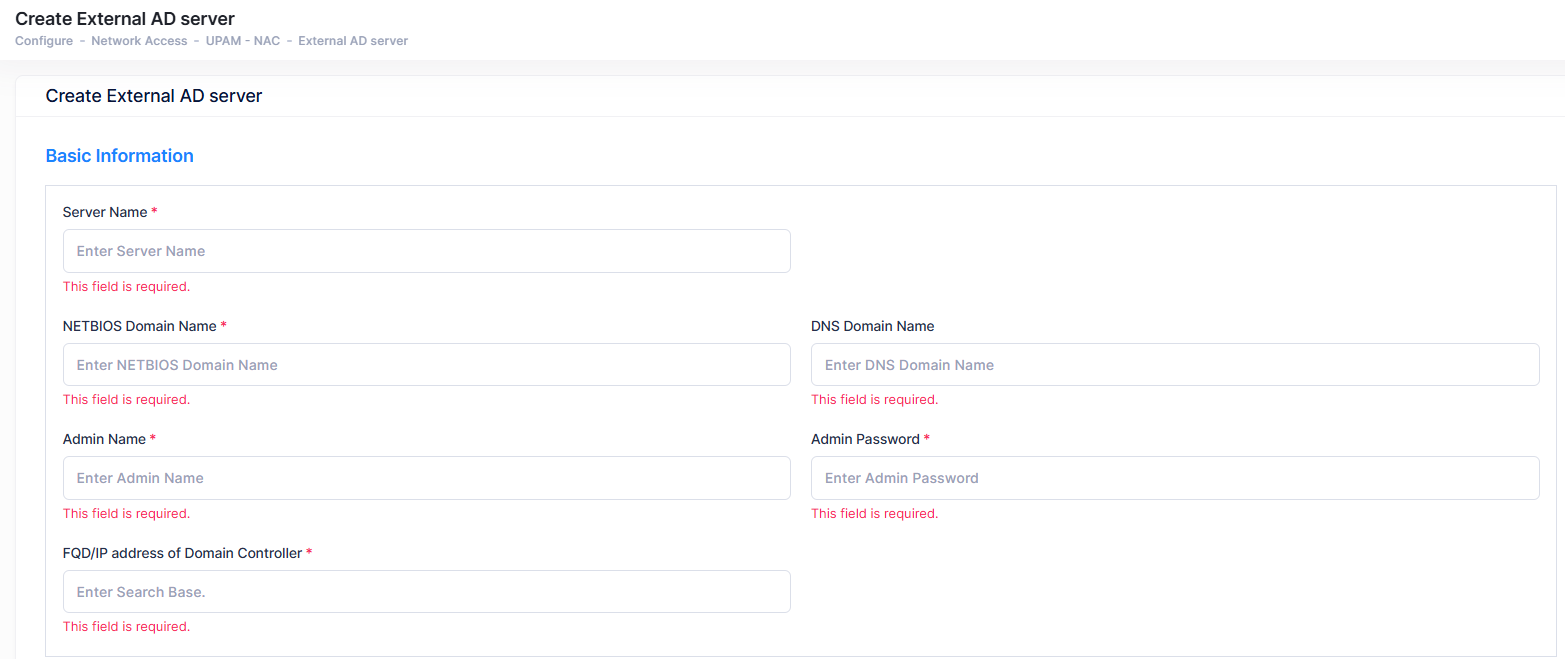
Complete the field as described below:
-
Server Name - Enter the Server Name.
-
NETBIOS Domain Name - Enter the NETBIOS Domain Name of the Domain controller which is used to perform authentication.
-
DNS Domain Name - Enter the DNS Domain Name of the Domain controller which is used to perform authentication.
-
Admin Name - Enter the Administrator account name used to login into the AD server.
-
Admin Password - Enter the Administrator password used to login into the AD server.
-
FQD/IP address of Domain Controller - Enter the IP address of the Domain controller.
-
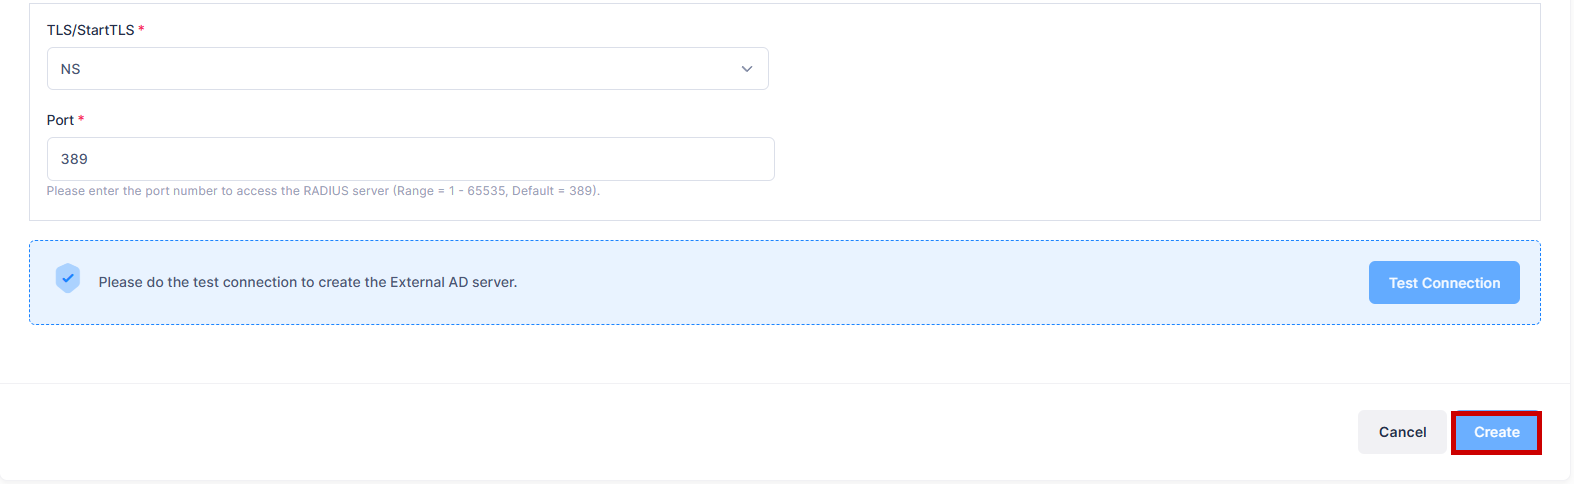
TLS/StartTLS - Select a TLS encryption type from the drop-down list.
-
NS - Non-secure encryption between UPAM and the AD Server.
-
StartTLS Extension - The secure communication method between UPAM and the AD Server.
-
-
Port - Enter the port used by UPAM to communicate with the AD server. (Range= 1 – 65535, Default - 389).
Click on Test Connection to create the External AD Server and then click on Create to save the configuration.
Editing an External AD Server
Select a server in the External AD Server List and click on the Edit icon. The Edit External AD Server screen opens on which you can edit the fields as described above, When you are done making changes to the Server attributes, click on Save to return to the External AD Server List.
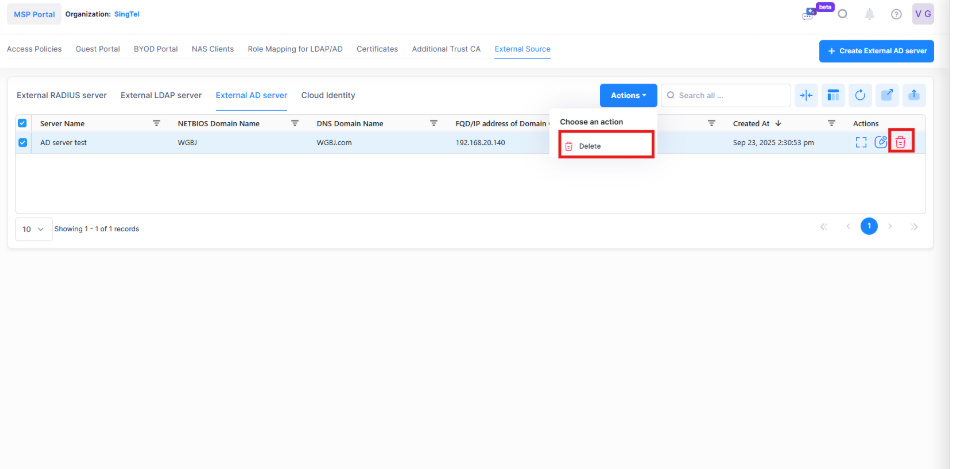
Deleting an External AD Server
Select a server in the External AD Server List and click on the trash icon under the “Actions” column or click on the Actions button and select Delete from the drop-down menu. When the following confirmation prompt appears, click on Delete to delete the profile.
The following confirmation prompt will appear:
You can delete one or multiple external AD server profiles. Deleting a profile disconnects the integration and stops authentication and synchronization with that AD source.
Display External AD Server List
The following information is displayed for each Server in the External AD Server List:
-
Server Name - The name assigned to the Server configuration.
-
NETBIOS Domain Name - Specifies the NETBIOS Domain Name of the Domain controller which is used to perform authentication.
-
DNS Domain Name - Specifies the DNS Domain Name of the Domain controller which is used to perform authentication.
-
Admin Name - Specifies the Administrator account name used to login into the AD server.
-
Admin Password - Specifies the Administrator password used to login into the AD server.
-
FQD/IP address of Domain Controller - Specifies the IP address of the Domain controller.
-
TLS/StartTLS - The TLS encryption type.
-
Port - The port used by UPAM to communicate with the AD server. (Range= 1 – 65535, Default - 389).
-
Created At - The date and time when the External AD Server configuration is done.