The SSID is the main domain object used by Stellar Access Point (AP) devices to broadcast Wi-Fi to clients and provide multiple levels of security for the client connection to the network. An SSID configuration is applied to an AP Group; all APs belonging to the assigned group will use the same SSID configuration.
An SSID is an Organization-level entity, meaning that two SSIDs for the same Organization cannot have the same name. However, two different Organizations can each have an SSID with the same name.
The OmniVista Cirrus SSID application simplifies wireless network configuration with one-step provisioning, including SSID setup as well as authentication and policy configuration. When you create an SSID, relevant default configurations (Access Role Profile, Access Policy, Authentication Strategy, Guest Access Strategy, BYOD Access Strategy, AAA Server Profile, Tunnel Profile, and Global Configuration) are automatically created and linked to the SSID using a name derived from the SSID. As you go through the process of creating/editing an SSID, you can customize these default SSID configurations to fit your network requirements.
To manage the SSID configuration, navigate to the SSIDs screen by clicking on Wireless > SSIDs under the “Configure” section of the OmniVista Cirrus Menu. The SSIDs List screen displays.
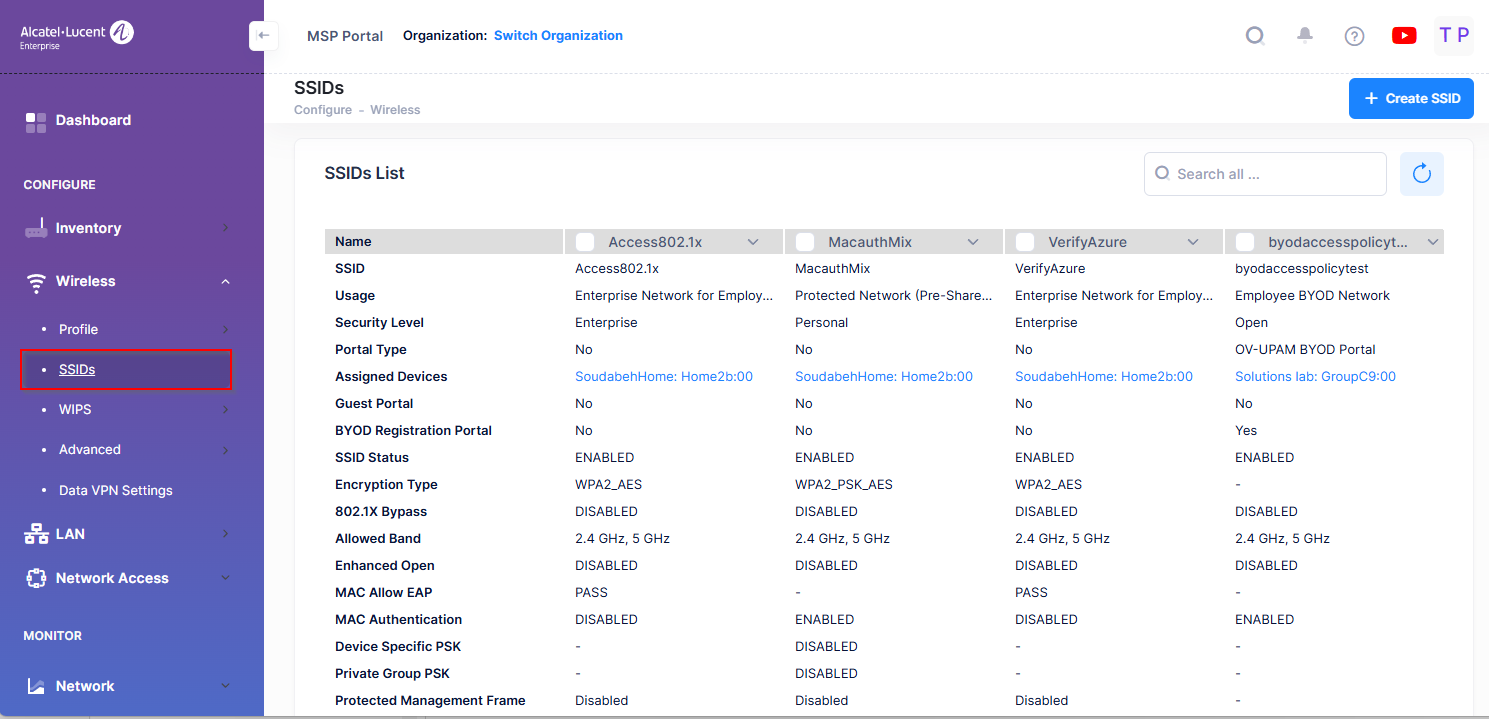
The SSIDs List screen displays information about all of the configured SSIDs. If a specific parameter has not been configured for an SSID, the field is blank. Scroll to view additional SSIDs. The SSIDs List screen is used to complete the following tasks:
-
Customize the SSID List Display - You can customize the order in which SSIDs are displayed on the screen, prioritizing them so that specific SSIDs are shown in the first columns. This is particularly useful if the number of SSIDs requires scrolling to view additional SSIDs.
-
Edit Related SSID Configurations - Quickly edit relevant related SSID configurations (for example, Access Role Profile, Access Policy, Authentication Strategy).
-
Enable/Disable SSIDs - Enable or disable the broadcasting of the SSID(s).
-
Create an SSID - Create a new SSID and apply the SSID to an Access Point (AP) group.
-
Edit an SSID - Customize SSID settings to satisfy your network requirements.
-
Delete an SSID - Delete an SSID configuration.
-
Search an SSID Attribute Value - You can search any of the fields or attribute value from the SSIDs List by using the search box.
Customizing the SSIDs List Display
You can customize the order in which SSIDs are displayed on the screen, prioritizing them so that specific SSIDs are shown in the first columns. Click on the drop-down arrow at the top of a column to display a list of all configured SSIDs and select an SSID. The selected SSID will be displayed in that column.
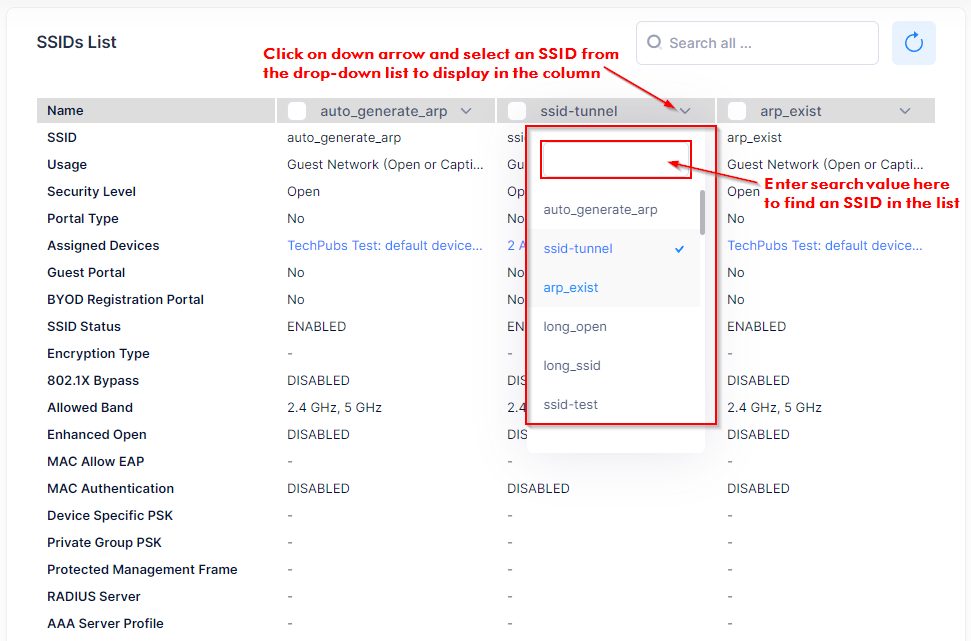
The SSID that was previously displayed will not be "moved" to another location. To re-display that SSID, go to another column and repeat the procedure to re-display that SSID in that column. However, If the selected SSID is already shown in another column, the two columns will swap positions.
If you have fewer than 30 SSIDs configured and create a new SSID, the new SSID will be displayed in the last column. However, if you have reached the maximum display of 30 SSIDs and create a new SSID, the SSID will not replace an existing SSID in the display. To display the SSID, you must click on the drop-down at the top of one of the columns and select the new SSID.
Editing Related SSID Configurations
You can quickly view or edit relevant related SSID configurations (for example, Access Role Profile, Access Policy, Authentication Strategy, Assigned Devices) from the SSIDs List screen. The names of these configurations are displayed as a hyperlink.
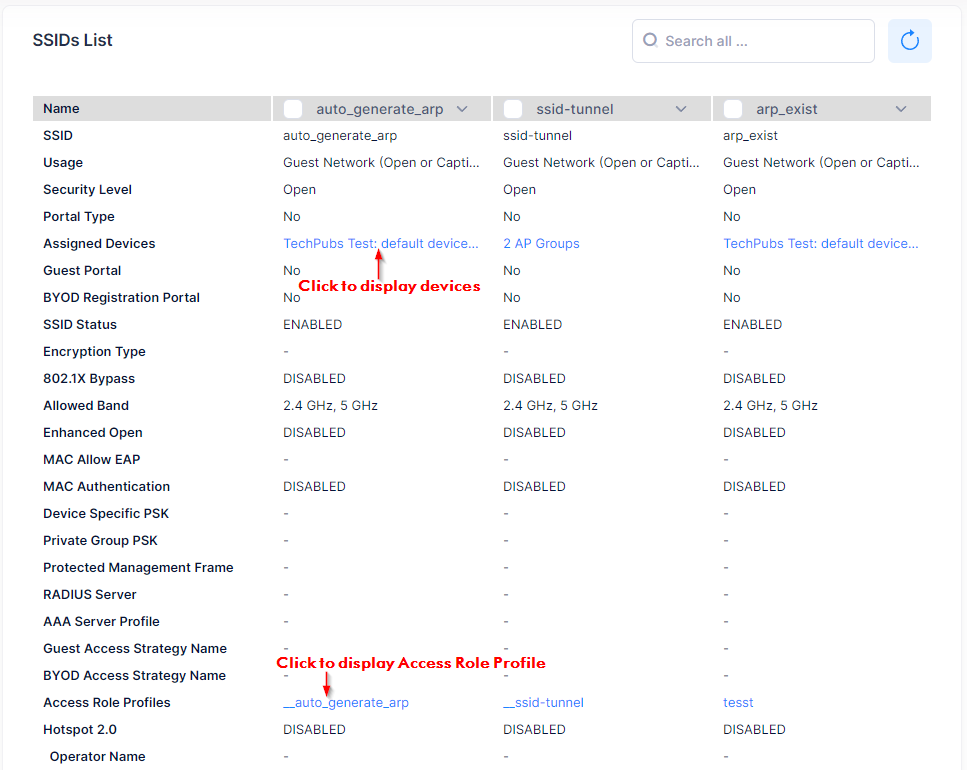
Click on the link to open a configuration window. The configuration will be pre-selected with the detailed configuration information displayed. Edit the configuration and click on the Save button to apply the update and return to the SSIDs List screen.
Related configuration names that begin with “_ _” were generated during SSID configuration and are attached to the SSID. For example, when creating SSID “Guest6GHz”, if you select to create an Access Role Profile for the SSID, the name automatically entered for the profile is “_ _Guest6GHz”. See Creating an SSID online help for more information.
Enabling/Disabling an SSID
Click on the checkbox next to the SSID(s), then click on the Enable or Disable button to change the broadcasting status of the SSID(s).
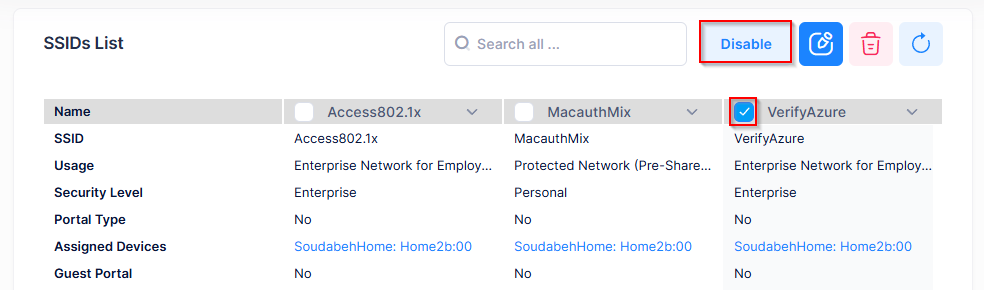
When you disable an SSID, the AP stops broadcasting the SSID; the configuration remains on the AP. When you enable an SSID, the AP begins broadcasting again.
Editing an SSID Configuration
Select an SSID by clicking on the checkbox in the upper-left corner of the SSID column, then click on the Edit icon.
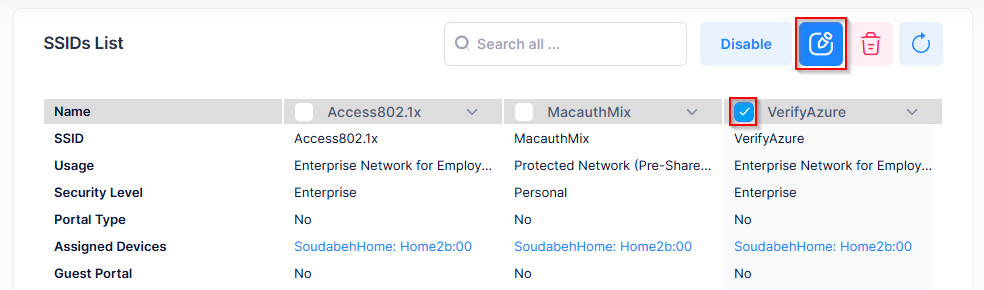
The Customize SSID Screen opens.
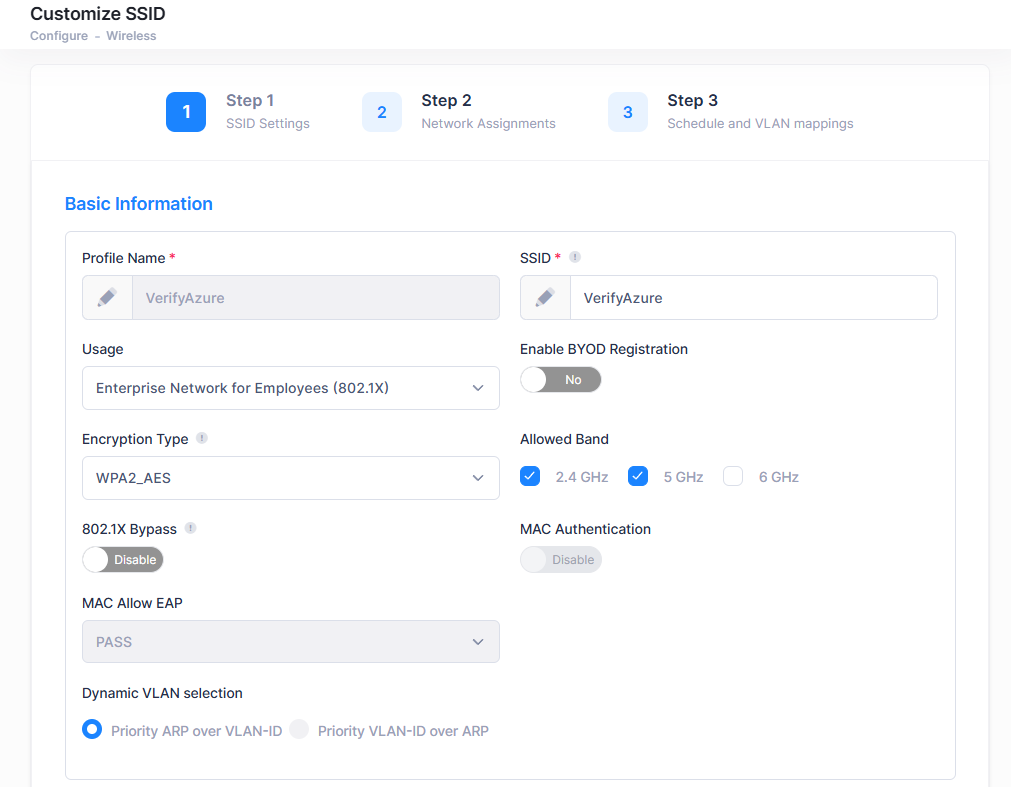
Edit the configuration as described here and click on the Save button. The new configuration will be saved and applied to the specified AP Groups.
You can only edit one SSID at a time. You cannot edit the SSID Name.
Deleting an SSID
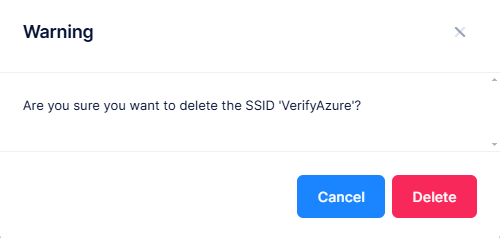
Select an SSID(s) by clicking on the checkbox in the upper-left corner of the SSID column, click on the Delete icon, then click Delete at the Confirmation Prompt.
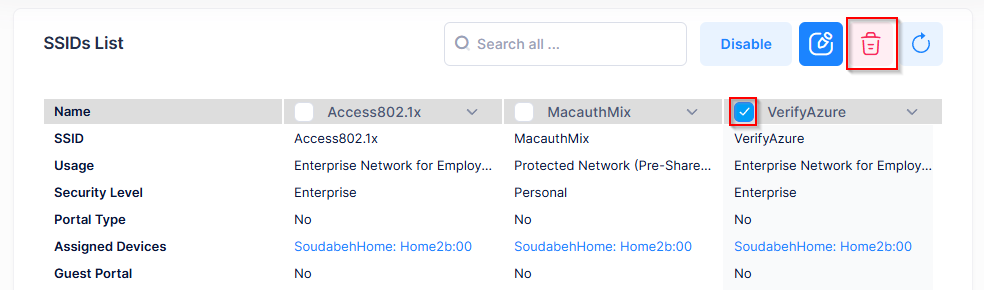
When you delete an SSID you delete the relevant related configurations created for the SSID (for example, Access Role Profile, Access Policy, Authentication Strategy), unless those configurations are in use outside of this SSID.
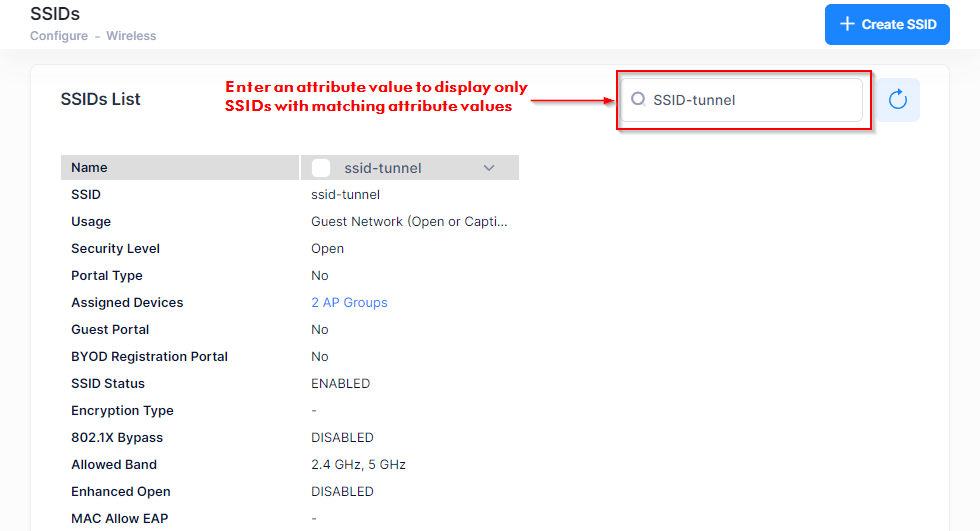
Search an SSID Attribute Value
You can search for any of the possible field values or attribute values that exist in the SSIDs List by using the Search box option. The search results are refined based on the attribute value entered in the Search box. Only SSIDs that contain the matching search attribute are displayed in the search results.