The Registration Profile determines Data and Time Quota limits for user access, Device and Account Validity attributes, and Exhaustion Handling (when Quota limits are reached).
A Registration Profile is specified during Guest Access Strategy configuration as follows:
-
When the Username & Password login method is selected and Self-Registration is enabled, there is a Registration Profile/Service Level option for Self-Registration. By default, the “Default Registration Profile” is used (if a Service Level is not specified) or you can select another existing Registration Profile.
-
If a Registration Profile is assigned to a Service Level and the Service Level is specified for Self-Registration, then the Service Level Registration Profile is used.
-
When Terms & Conditions or Simple Persona is the selected login method. there is a Registration Profile option for Post Portal Authentication Enforcement. By default, the “Default Registration Profile” is used or you can select another existing Registration Profile.
When a Guest Account is created or edited, a Registration Profile (or optional Service Level linked to a Registration Profile) from the Registration Profiles List can be assigned to the account. To access the Registration Profiles screen, click Registration Profile on the Guest Portal screen or click Guest Accounts > Settings > Registration Profile on the Accounts screen. The Registration Profile screen displays a list of configured Registration Profiles.
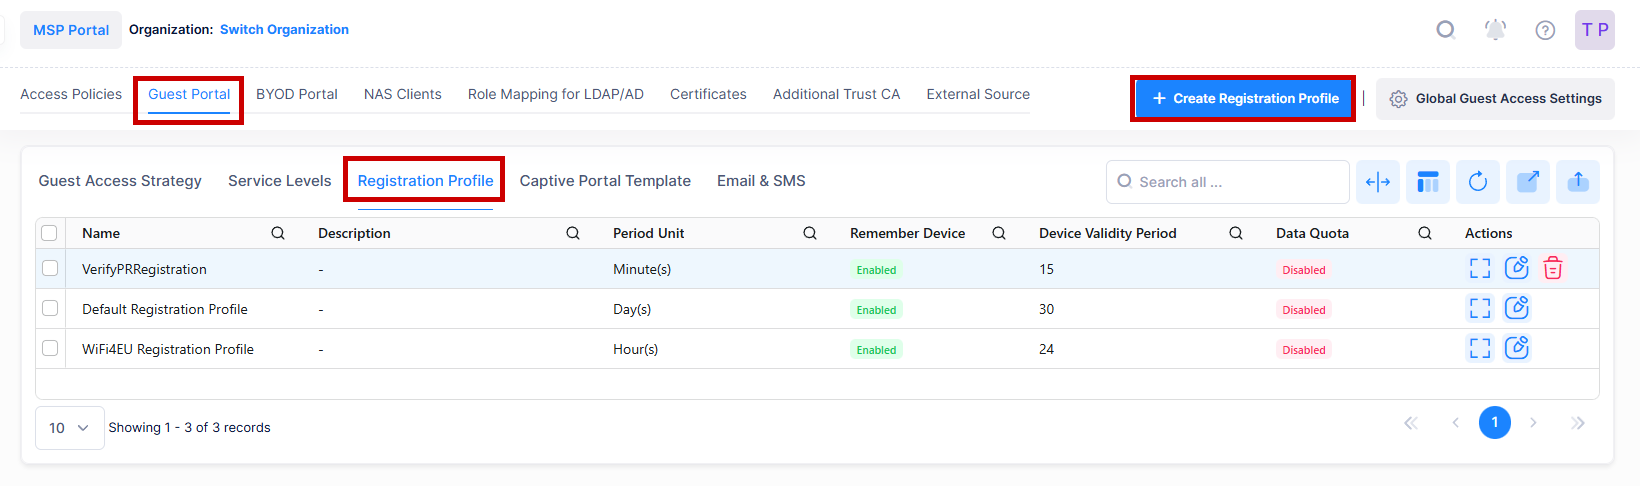
Use the Registration Profile screen to display information about configured Registration Profiles. This screen is also used to create, edit, and delete Registration Profiles.
Creating a Registration Profile
To create a new Registration profile, click on Create Registration Profile to open the Create Registration Profile screen. Complete the following sections, as described below.
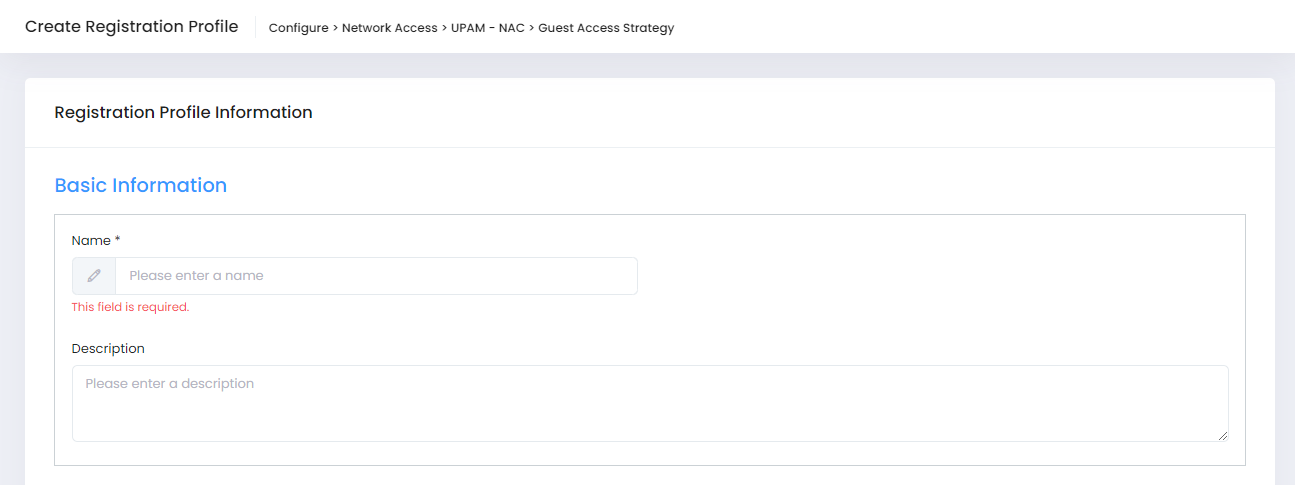
Basic Information
-
Name - Enter a unique name to identify the Registration Profile.
-
Description - Enter an optional description for the Registration Profile.
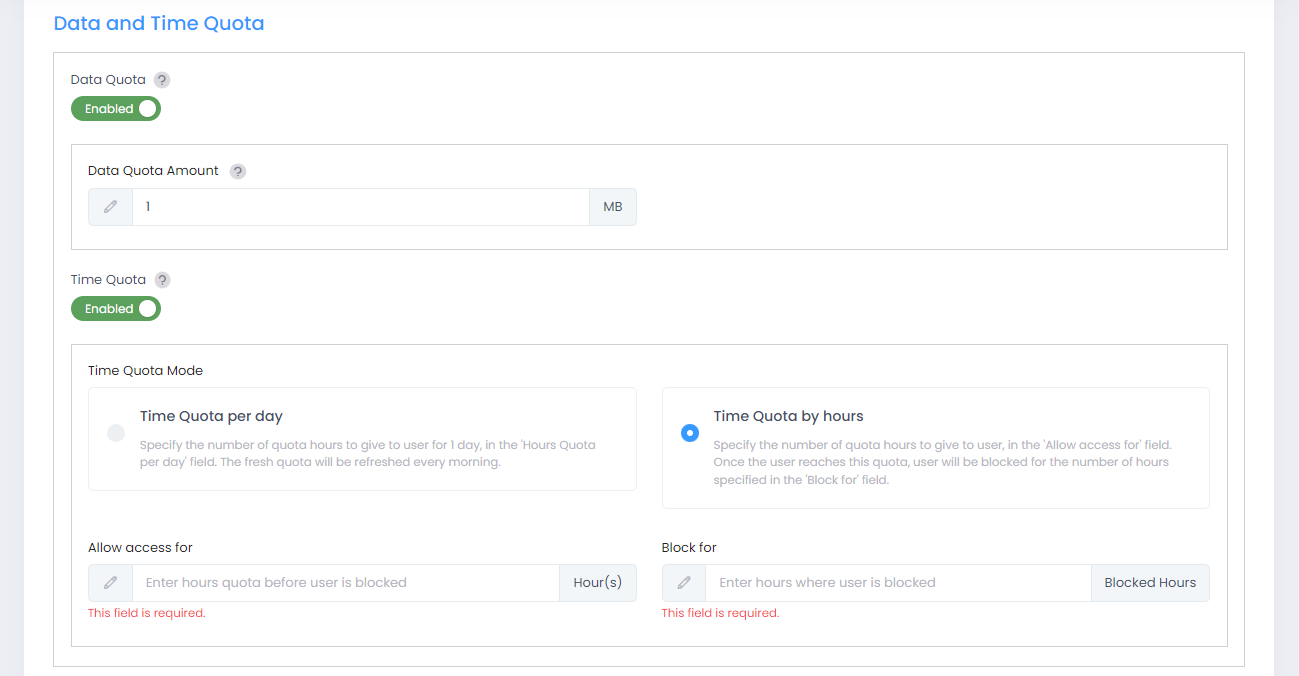
Data and Time Quota
Specify whether to control guest access based on user data quota and/or time quota. The Data Quota limit is applied only to a user who logs in with username and password credentials. It will not be applied to a user who logs in with an access code or a user who just accepts the terms and conditions.
You can have a data quota limit and a time quota limit enabled at the same time. If both limits are active, the data quota is reset whenever the time quota is reset. For example, When the Time Quota is set to 10 hours per-day and the Data Quota is specified as 5MB:
-
If the user reaches the 5MB Data Quota before the Time Quota is reached, Exhaustion Handling is triggered for the user. The next day, the Time Quota of 10 hours and Data Quota of 5MB resets.
-
If the user reaches the 10 hour Time Quota before the Data Quota is reached, Exhaustion Handling is triggered for the user. The next day, the Time Quota of 10 hours and Data Quota of 5MB resets.
The enforcement of Time and Data Quotas depends on the timing of when OmniVista Cirrus receives accounting packets from the Access Point. You can adjust the interval at which the Access Point sends the accounting packets by configuring the “Acct-Interim-Interval” attribute in the Guest Access Strategy for the user. The accounting interval attribute is set to 10 minutes by default.
-
Data Quota - Enable or disable a data quota for guest traffic. When enabled:
-
Data Quota Amount - Specify the guest traffic quota, in MB, for the Guest Access Strategy.
-
-
Time Quota - Enable or disable a time quota for guest traffic. When enabled:
-
Time Quota Mode - Select whether the time quota is applied on a per-day basis or for specific hours for the Guest Access Strategy.
-
Time Quota per day - When this mode is selected, specify the number of hours each day that the time quota is applied to guest traffic. The quota is reset at the beginning of each day.
-
Time Quota by hours - When this mode is selected:
-
Allow access for - Specify the number of hours that guest traffic is allowed.
-
Block for - Specify the number of hours to block guest traffic once the number of hours allowed is reached. After the number of hours to block is reached, the number of hours to allow guest traffic starts up again.
-
-
-
You can customize the data quota and/or time quota for different guests when creating accounts on the Guest Accounts screen.
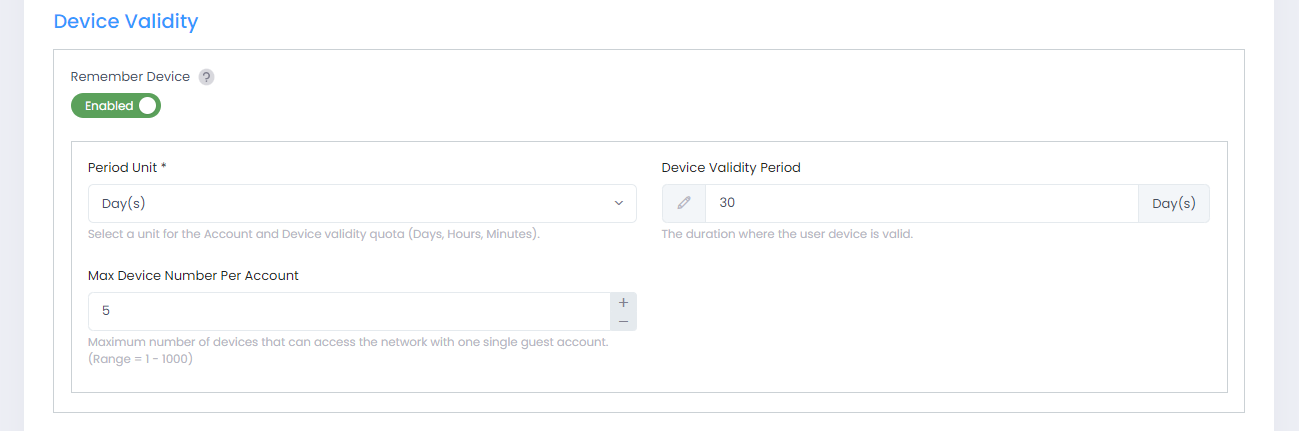
Device Validity
-
Remember Device - Enable or disable whether to remember the device MAC address and make it valid after successful authentication. If the remembered device is valid, the MAC address check will be performed first and the device allowed access without re-authentication.
-
Period Unit - Select whether the validity period will be applied in days, hours, or minutes.
-
Device Validity Period - The length of time that the user device is valid. (Range = 1 – 365 Days, Default = 30 Days).
-
Max Device Number Per Account - The maximum number of devices that can access the network with one single account. (Range = 1 – 500,000, Default = 5).
-
Exhaustion Handling
Exhaustion Handling is active only if Data Quota and/or Time Quota is enabled.
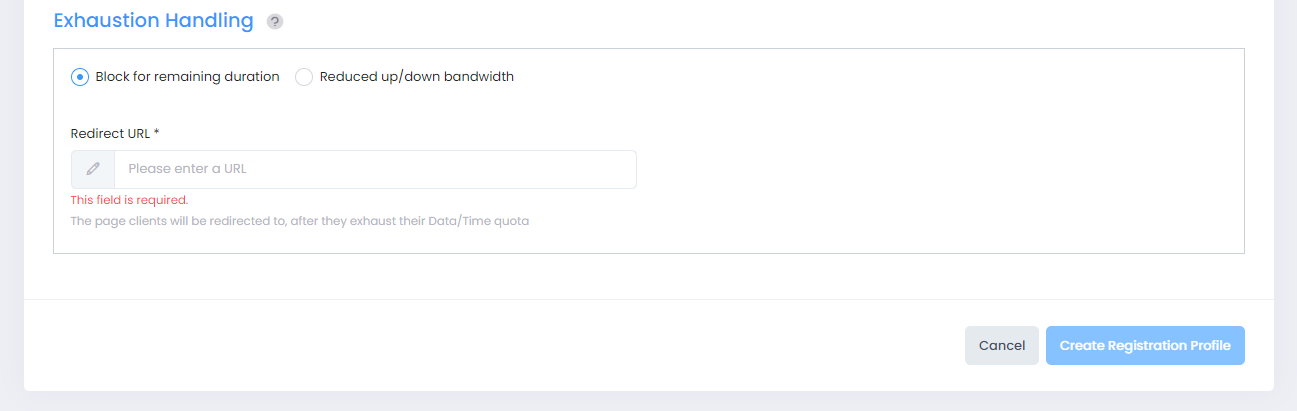
Select one of the following options to specify the Exhaustion Handling method applied when a user reaches the Data Quota or Time Quota limit:
-
Block for remaining duration - Block the user access for the remaining duration. If this option is selected, specify the following:
-
Redirect URL - The URL of the page users are redirected to notifying them that they have exhausted the Data or Time Quota. Make sure that the specified URL is included as an allowed domain in the Access Role Profile associated with the SSID that the client has joined.
-
-
Reduced Up/Down Bandwidth - Change the up/down bandwidth for the remaining duration.
-
Up Bandwidth - Reduce the AP-to-Client bandwidth. (Default = 100)
-
Down Bandwidth - Reduce the Client-to-AP bandwidth. (Default = 1000)
-
Editing a Registration Profile
You can edit the values for an existing Registration Profile by accessing the Edit Registration Profile screen. Select the Registration Profile that you want to edit, then click on the pencil icon under the “Actions” column next to the profile entry. The following Edit Registration Profile screen displays. Edit the fields as described above, then click on Save.

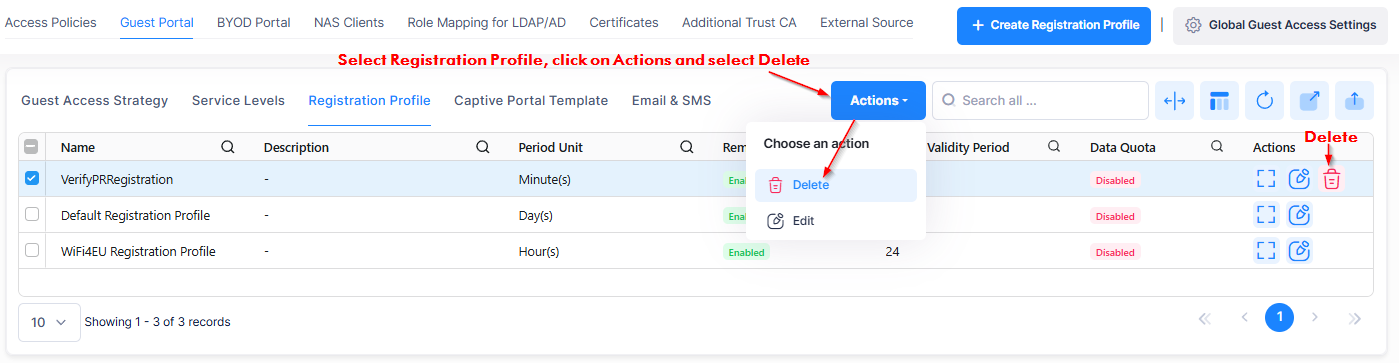
Deleting a Registration Profile
To delete a global Registration Profile, use one of the following methods to select the profile that you want to delete:
-
Select the Registration Profile entry to delete by clicking on the checkbox next to the entry, click on Actions, then select Delete from the drop-down menu.
-
Click on the trash can icon under the “Actions” column next to the Service Level entry that you want to delete.
When you select the Registration Profile that you want to delete, the following confirmation prompt appears:
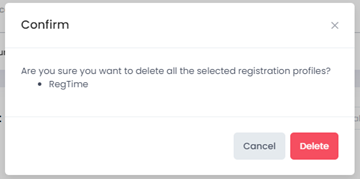
Click on Delete to confirm that you want to delete the selected profile.
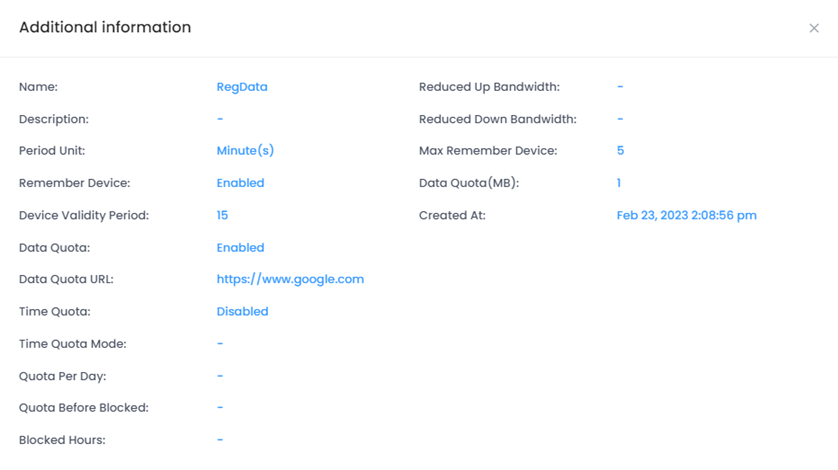
Display Registration Profile Information
The Registration Profiles List displays information for the configured Registration Profiles. To display information about a specific profile, click on the Additional Information icon under the “Actions” column. The information displayed on this screen is shown below.