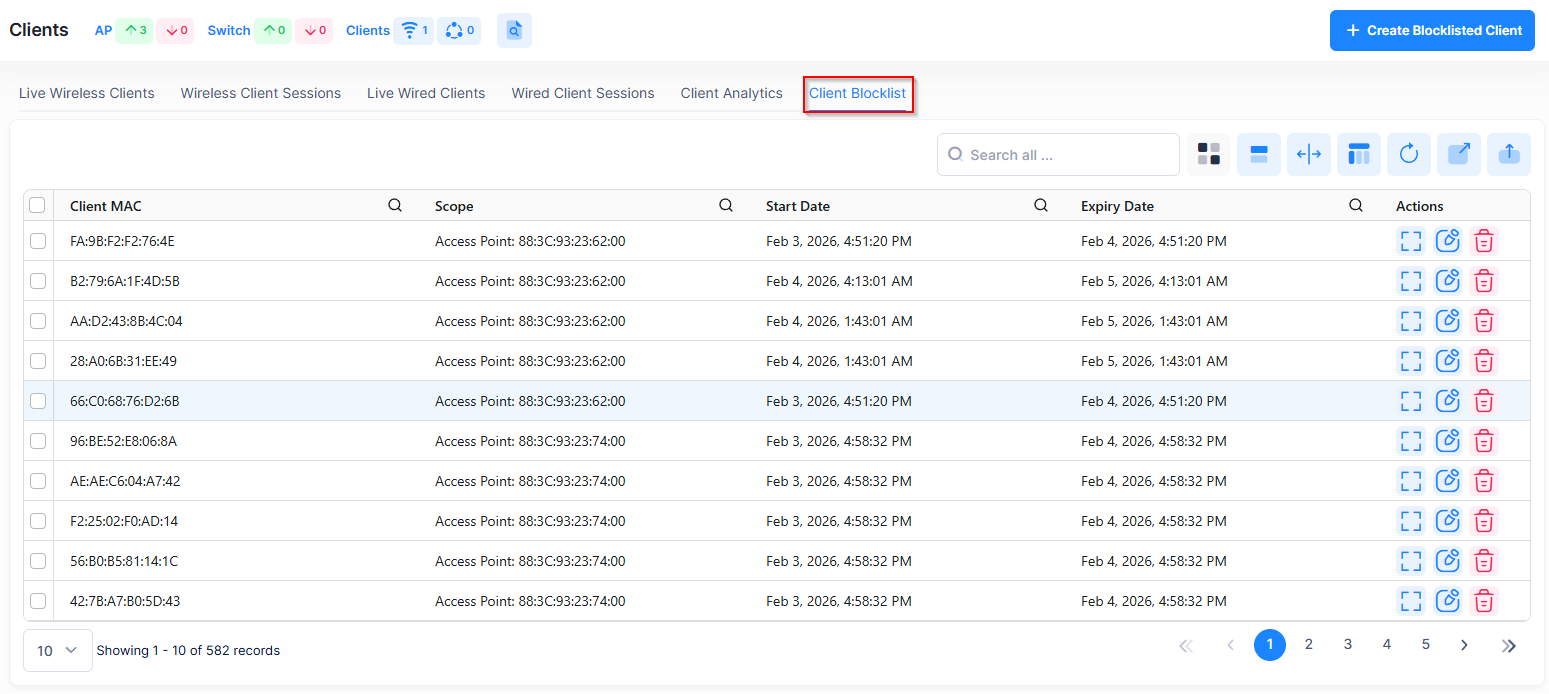
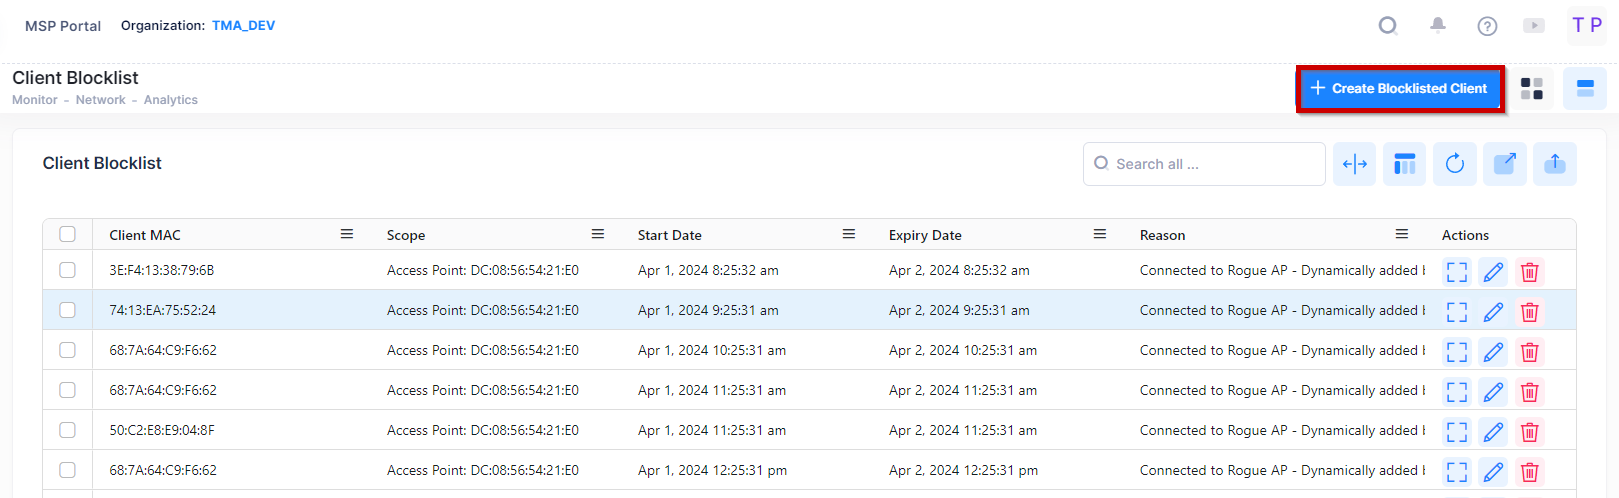
The Client Blocklist screen displays information about all clients that have been added to the Blocklist (either manually or as a result of a WIPS policy). This screen is also used to manually add clients to the Blocklist, edit clients on the Blocklist, and delete clients from the Blocklist.
The Client Blocklist screen is accessed by clicking on Analytics > Clients > Client Blocklist under the “Monitor” section of the OmniVista Cirrus Menu.
Client Blocklist
-
Client MAC - MAC address of the client in the Blocklist.
-
Scope - Client MAC address is blocked from access to the entire Organization or blocked from acccess to a specific Site within the Organization.
-
Start Date - The starting date for the blocklisting. During the duration, the client is not allowed to access to the wireless network.
-
Expiry Date - The expiration date for the blocklisting. The client can access the wireless network after the expiration date.
-
Reason - The reason why the client was added to the Blocklist.
-
Manually Add - Added into the Blocklist by the user. The “Reason” field is optional when manually adding a client to the Blocklist.
-
Garbing Legal Accessing Client - Dynamically added by the WIPS policy.
-
Signal Strength is Too Strong, Reducing Network Performance - Dynamically added by the WIPS policy.
-
Channel Switching Too Often - Dynamically added by the WIPS policy.
-
Broadcasting Conflicted SSID, Misleading User Connection - Dynamically added by the WIPS policy.
-
Matching the Keyword of Suspected SSID - Dynamically added by the WIPS policy.
-
Matching the Suspected MAC OUI - Dynamically added by the WIPS policy.
-
Have Attacking Behavior - Dynamically added by the WIPS policy.
-
Manually Adding a Client to the Blocklist
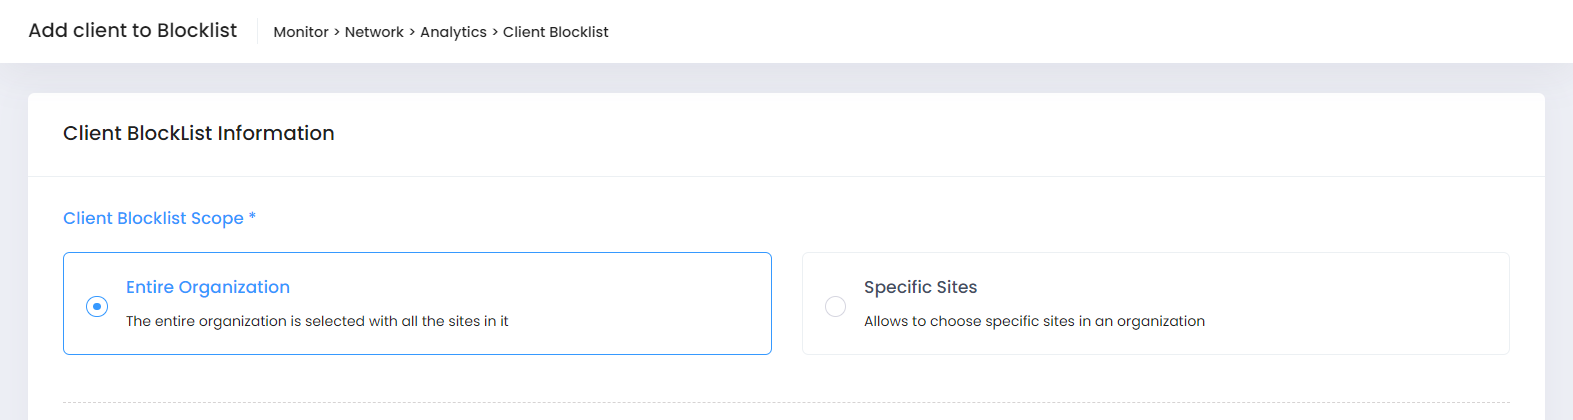
Click on Create Blocklisted Client to access the Add Client to Blocklist form. Complete the fields as described below, then click on the Create Blocklisted Client button. Repeat to add additional clients.
Client Blocklist Scope
The first section of the Add Client to Blocklist form is where you select the scope of the blocklist action:
-
Entire Organization (Default) - Blocks client MAC address from all Sites within the Organization.
-
Specific Sites - Blocks client MAC address from selected Sites within the Organization.
If you select the Specific Sites option, an additional “Sites” field is displayed, where you select the specific Sites for the blocklist action.
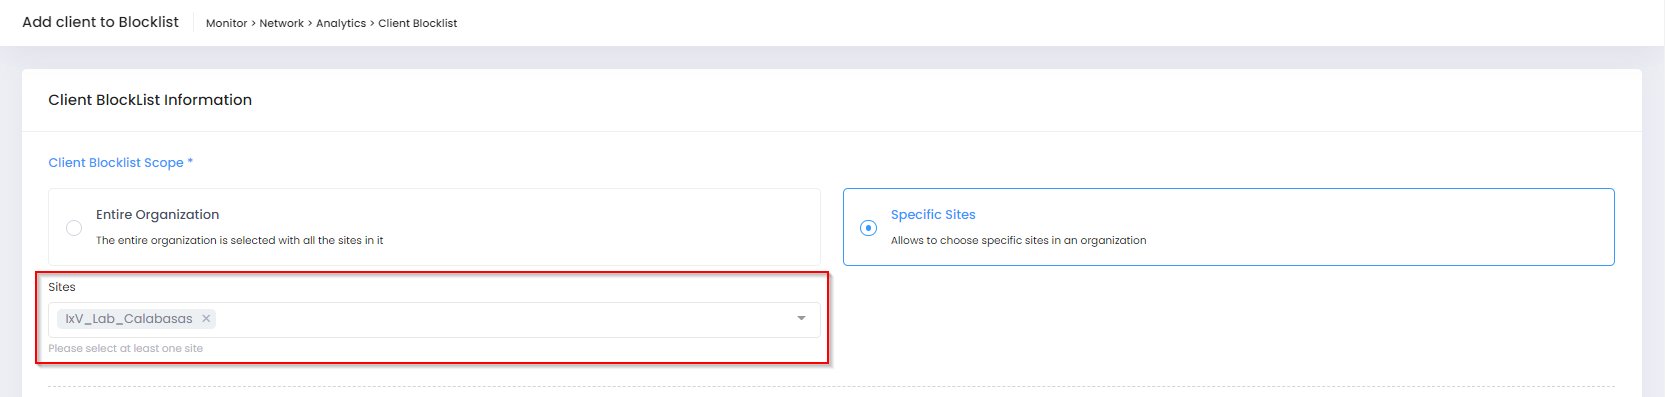
Click on the drop-down list and select Sites from the Organization. To remove a selected Site, click on the “x” next to the Site name.
Information
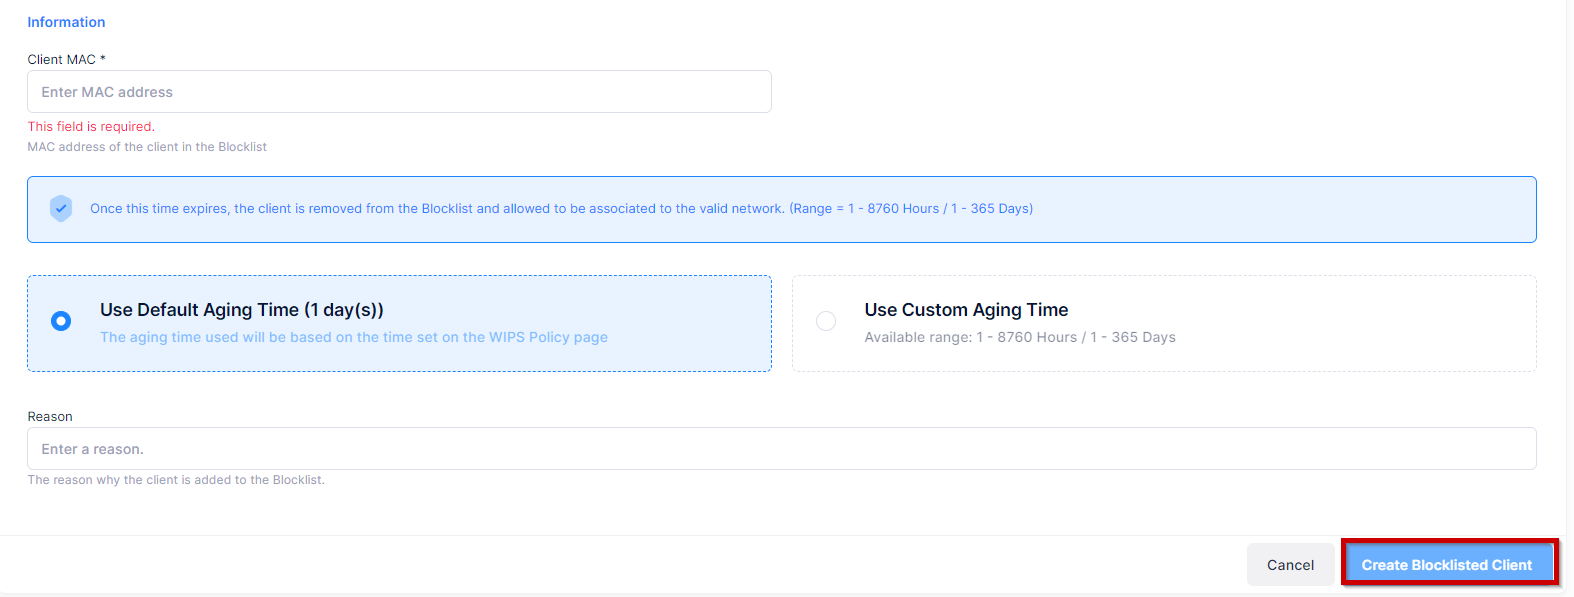
The next section of the Add Client to Blocklist screen is where you enter information about the client that you want to blocklist.
-
Client MAC - The MAC Address of the client.
-
Aging Time - The amount of time the client will remain on the Blocklist. Once this time expires, the client is removed from the Blocklist and allowed to be associated to the valid network. You can select one of two options to define the aging time:
-
Use Default Aging Time - The aging time is based on the time set for the WIPS Policy.
-
Use Custom Aging Time - Define a custom time range for the aging time (Range = 1 - 8760 Hours/1 - 365 Days).
-
-
Reason (Optional)- The reason the client was added to the Blocklist.
Editing a Client on the Blocklist
You can edit the Client Block List Scope, a client's Aging Time, or the Reason a client was blocklisted. Select a client in the Blocklist and click on the Edit icon. Edit the field(s) as described above and click on the Save button.
Deleting a Client from the Blocklist
Select the client in the Blocklist and click on the Delete icon. The following prompt appears on the screen.
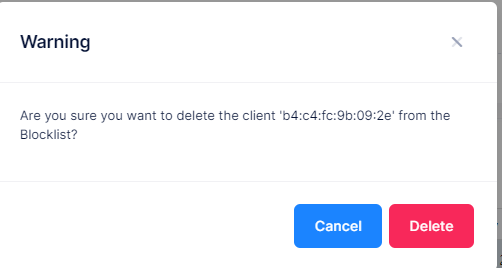
Click on Delete at the confirmation prompt.