Unified Policies List
A Unified Policy List is a set of Unified Policies that are grouped together and assigned to devices as a group. You can also assign a Unified Policy List to an Access Policy. The policies in the list are applied to devices that are assigned to the Access Policy.
Use the Unified Policies List screen to display information about all of the configured Unified Policies Lists. This screen also allows you to create, edit, and delete Unified Policies Lists on the network. To access the Unified Policies List screen, click on Network Access > Unified Access > Unified Policies List under the “Configure” section of the OmniVista Cirrus Menu.
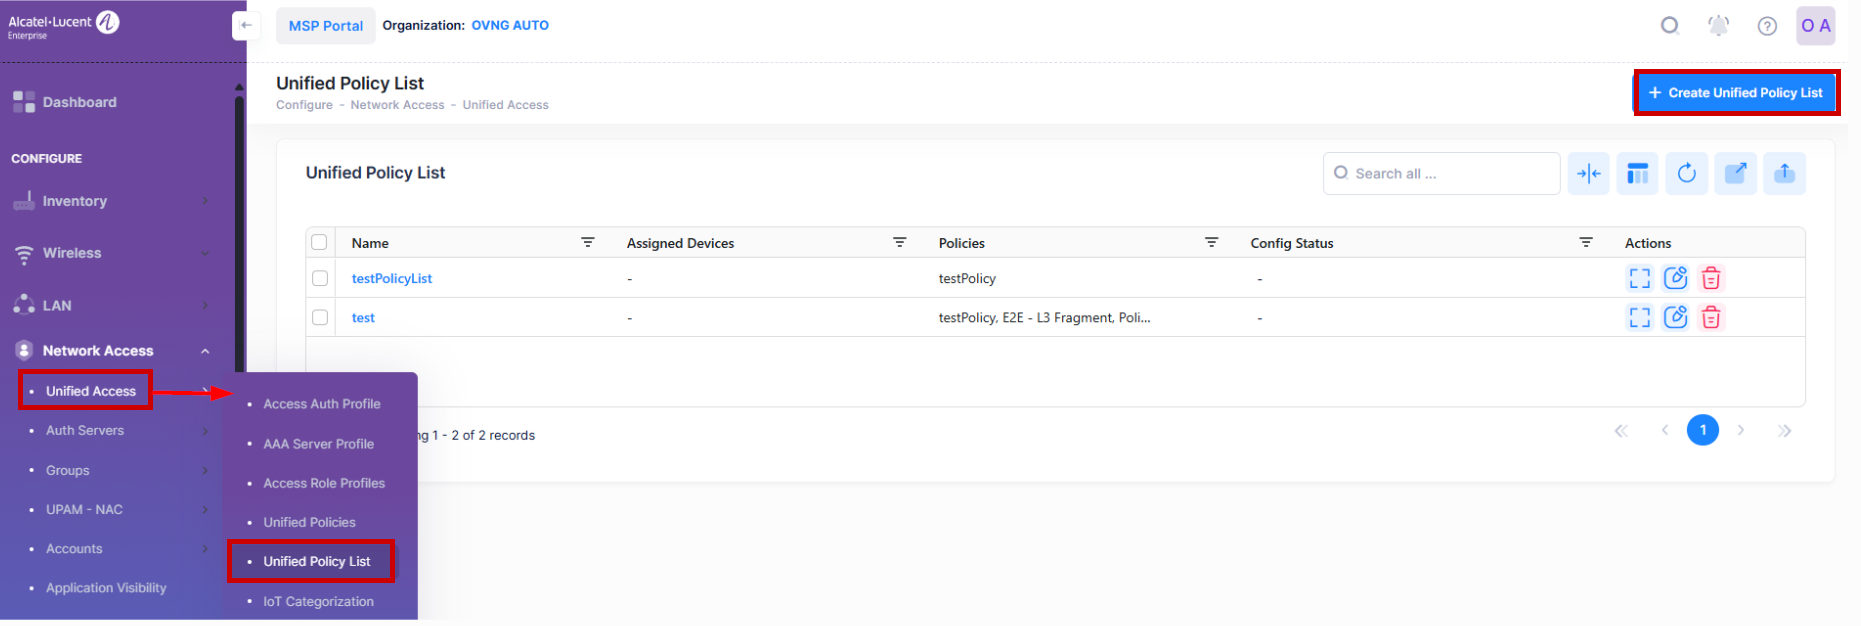
Create Unified Policy List
The Create Unified Policy List screen is used to select policies for the list and assign network devices to which the policy list is applied. To access this screen, click on Create Unified Policy List.
Consider the following use cases when configuring Unified Policies List:
OmniVista Cirrus 10 does not use LDAP, so any Unified Policies created on a Switch via LDAP are not discovered; only policies configured through the Switch CLI are discovered. As a result, the Unified Policies List screen displays only policies configured through the Switch CLI. In case, you want to "restore" the set of policies that they had previously configured on the Switch via LDAP or any other interface, you should use the mechanism of Golden Configuration from OmniVista Cirrus 10 to restore all the configuration on the switch (and not just Policies).
OmniVista Cirrus 10 only supports polling policy lists created from type UNP. When receiving profiles not created from type UNP, it will ignore these profiles and will not save them to the OVNG database, so you will not be able to view them in the User Interface screen.
If there are two policy list with the same name but different child profiles between two Switch devices, there will be a mismatch between the profile template and device configuration.
The Create Unified Policy List Screen appears and provides the following step-by-step process for creating a Unified Policy List:
Name - Configures the name for the Unified Policy List. The field must have at most 22 characters. The use of two special characters(/ or \) is not allowed for the Policy name.
Select Unified Policies to lists - Configures the Unified Policies you want to include in the list. You must have at least one Unified Policies selected from the list.
Select Sites and Groups - Select Access Point Groups or Switch devices from the available list of devices for one or more Sites. The Unified Policy List is applied to the devices in the selected Sites/AP groups.
1. Policy List Configuration
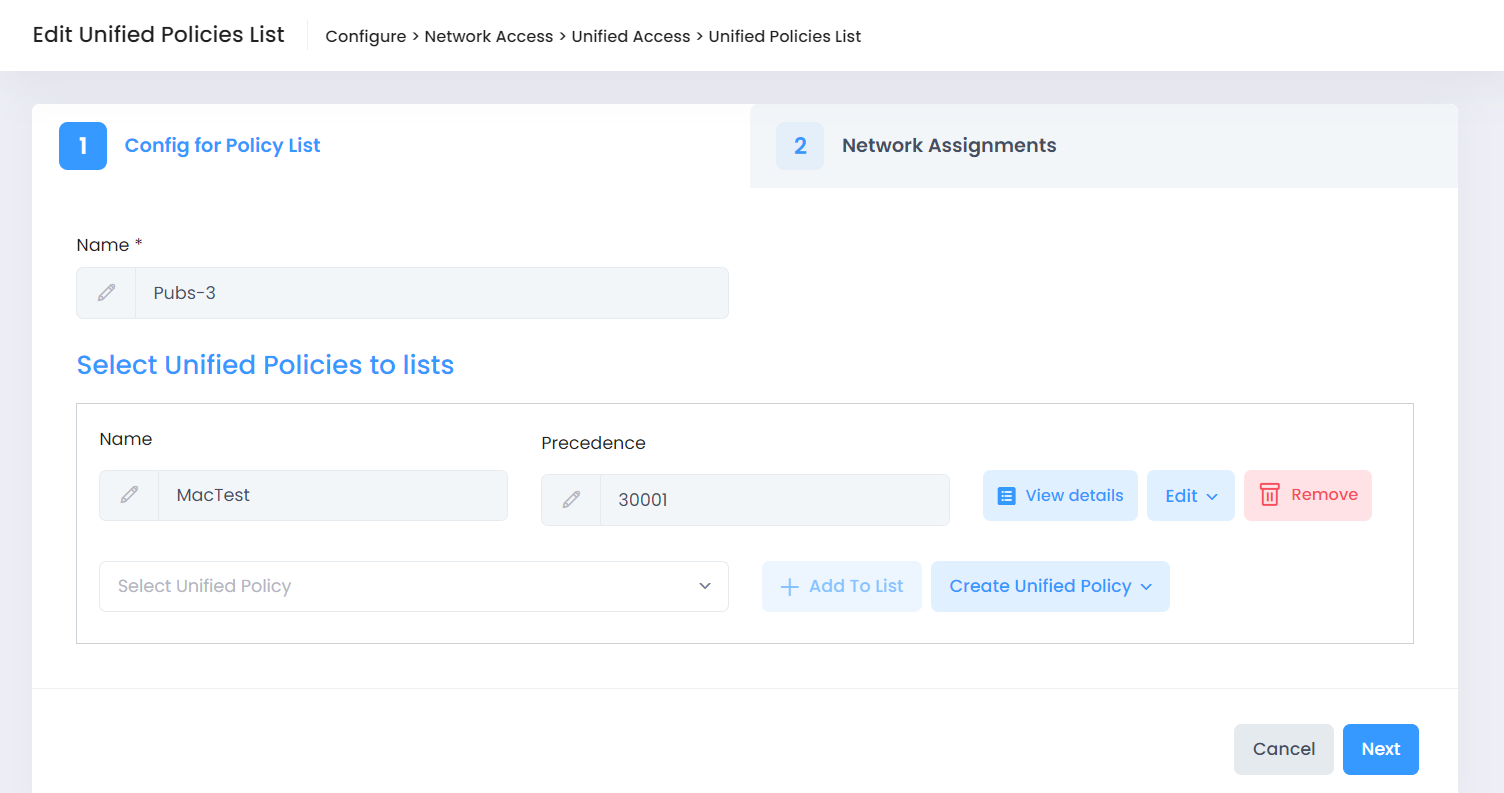
Complete the fields on the following Config for Policy List tab, as described below.
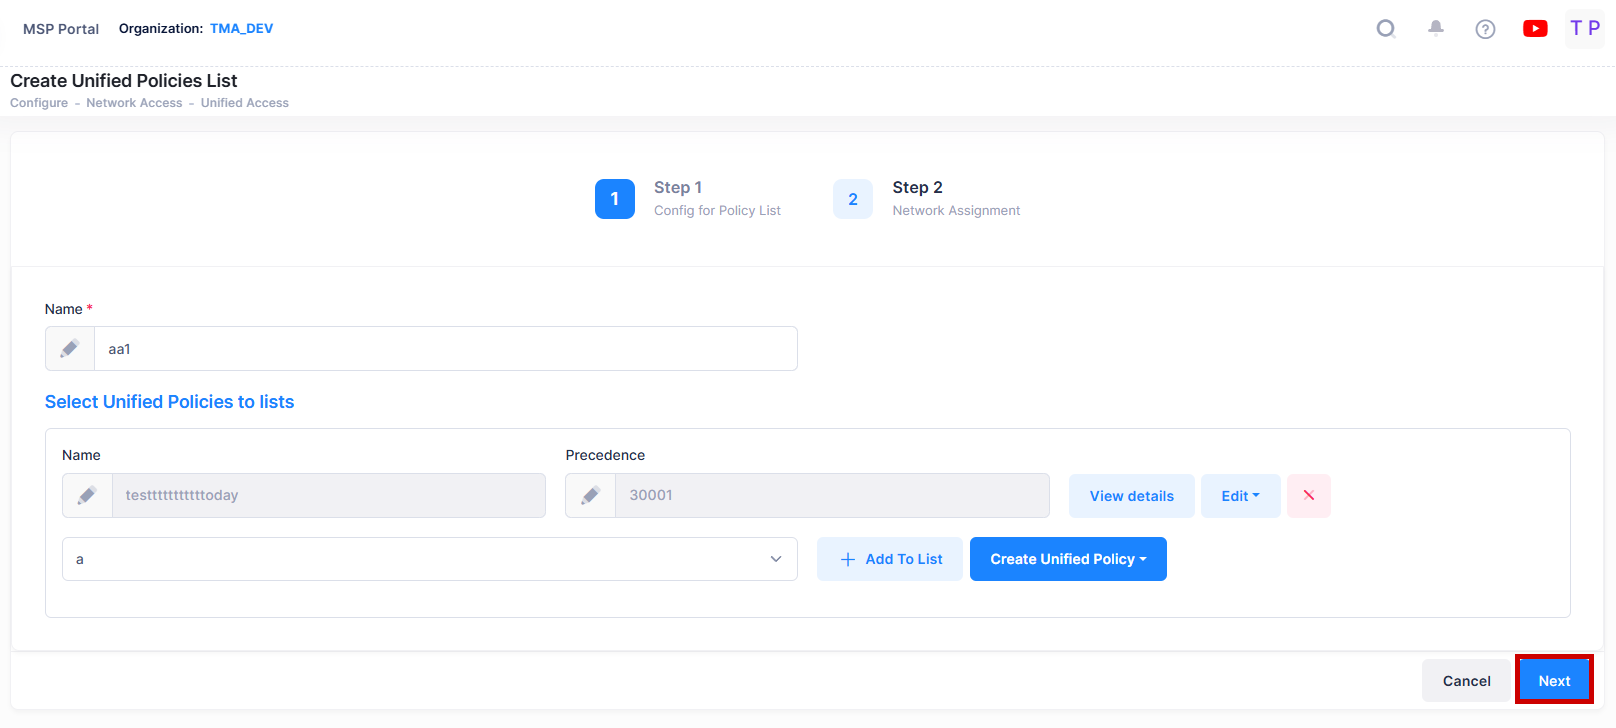
Name - The name of the policy. The field must have at most 22 characters. The use of two special characters(/ or \) is not allowed for the Policy name.
Select Unified Policies to list - Select an existing Unified Policy from the drop-down menu or click on Create Unified Policy to open the Create Unified Policy screen and create a new policy to select. After you have selected a policy, click on Add to List. The policy that you just added appears in this section with the following options:
View Details - Click on this option view additional details about the selected policy.
Precedence - The Policy precedence. By default, the precedence field is pre-filled with the lowest unused precedence value. A higher number indicates higher precedence. (Range = 0 - 65535)
Edit - Click on this option to open the Edit Unified Policy screen and make any changes to the policy.
Remove - Remove the selected policy; it will not be added to the Unified Policy List.
Continue to select and add more policies, as necessary. Once you have selected all of the policies that you want to add to the Unified Policy List, click on Next to go to the next tab (Step 2).
2. Network Assignments
The Network Assignments tab is used to select the AP Group(s) within a Site(s) or Switch devices to which the Unified Policy List will be applied to devices within those groups. Complete the network assignments as described below, then click on Create.
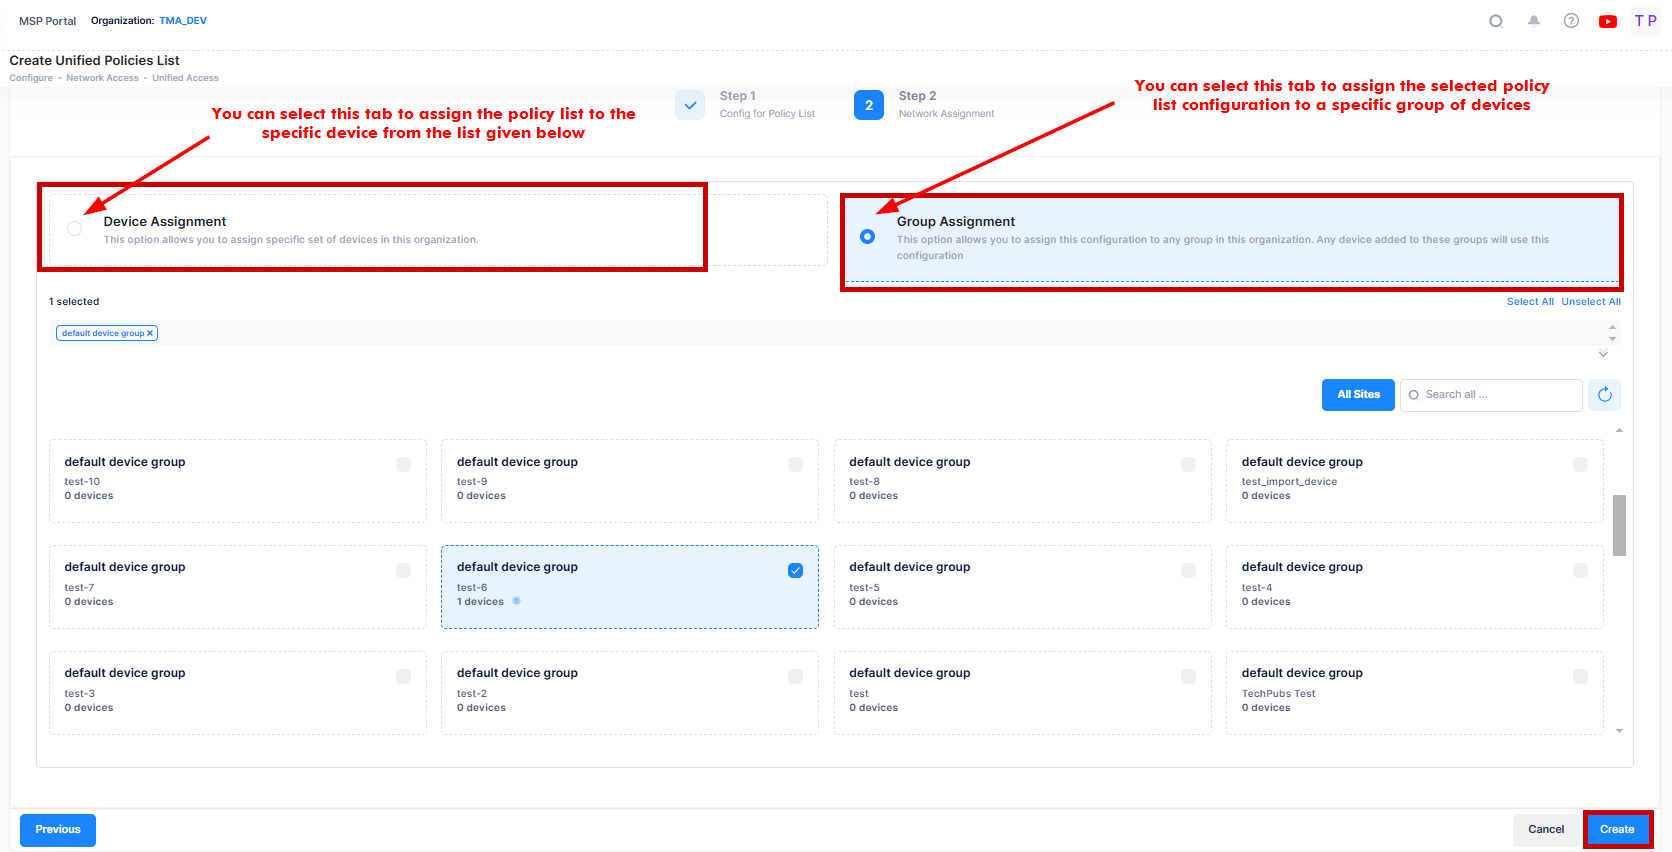
Device Assignment - Select the specific set of Devices from the available list to assign the policy list.
Group Assignment - Select the specific group of Devices from the available list to assign the policy list. The Unified Policy will be applied to the selected group of devices from the list.
Note: In case of failing to apply an Unified Policy List to devices, if you wants to re-apply the policy with no change in the configuration, you needs to edit the profile (or the profile that links to it and supports device assignment) to remove the devices then edit to re-add the devices into the device assignment tab.
Note: For the selection of an AP Group or Device, follow the below criteria:
You can define a Unified Policy List without selecting an AP Group or Device.
You can select only AP Groups to apply the Unified Policy List.
You can select only Switch devices to apply the Unified Policy List.
You can select both AP Groups and Switch devices to apply the Unified Policy List.
You can filter the Switch devices based on labels.
When you type characters in the device list field, the list of devices matching the typed characters will be displayed.
Editing a Unified Policy List
You can edit a Unified Policy List by accessing the Edit Unified Policy List screen. Use one of the following methods to access the Edit Edit Unified Policy List screen:
Select the list to edit by clicking on the checkbox next to the list, click on Actions, then select Edit from the drop-down menu.
Click on the pencil icon under the “Actions” column next to the list that you want to edit.

The following Edit Unified Policy List screen displays. Edit the fields as described above then click on Save to save the changes.
Deleting a Unified Policy List
To delete a Unified Policy List, use one of the following methods to select the list you want to delete:
Select the List to delete by clicking on the checkbox next to the list, click on Actions, then select Delete from the drop-down menu.
Click on the trash can icon under the “Actions” column next to the list that you want to delete.

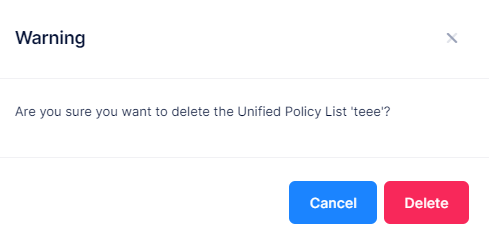
Click Delete on the confirmation prompt.
Display Assigned Switch Configuration Details
The Unified Policy list displays information for the configured Unified Policies. You can click on the Policy List Name to view the assigned Switch configuration details of a specific Policy as shown below.

The following screen appears:

This screen also allows you to export, search and filter the data. You can click the back icon on the top right to navigate to the Unified Policy List page.
The following Device Configuration of the selected Policy List is displayed.
IPv4 Address - The IPv4 address of the device.
Device Friendly Name - The name assigned to the device is derived from the Preferred Device Naming convention specified in the user preference settings. By default, the Friendly Name is set to IP Address (System Name).
Config Status - The configuration status of the device. (Successful or Failed or Pending).
Pending - The configuration is being pushed to the device and is still not receiving a response from the device.
Failed - The configuration failed to apply to the device. Possible reasons include a timeout while applying the configuration due to the device being unreachable or a network issue, or the configuration being invalid and rejected by the device. Check alerts to identify the specific reason.
Successful - The configuration is pushed to the device successfully.
Policies - The assigned Unified policy to device.
Note: You can now view the current profile configuration for each switch assigned to an Unified Policy List. You can edit the configuration on one or more assigned devices directly. If a device's configuration differs from the Policy List, the mismatched attributes will be highlighted, and you will have the option to synchronize them.
Display Unified Policy List Additional Information
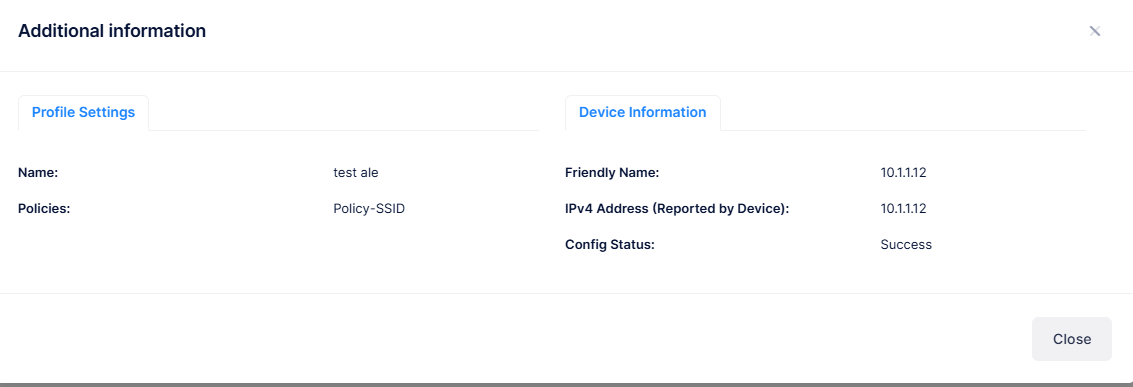
You can click on the Additional Information icon to view additional information of a Unified Policy List.

