Schedule a Configuration Backup
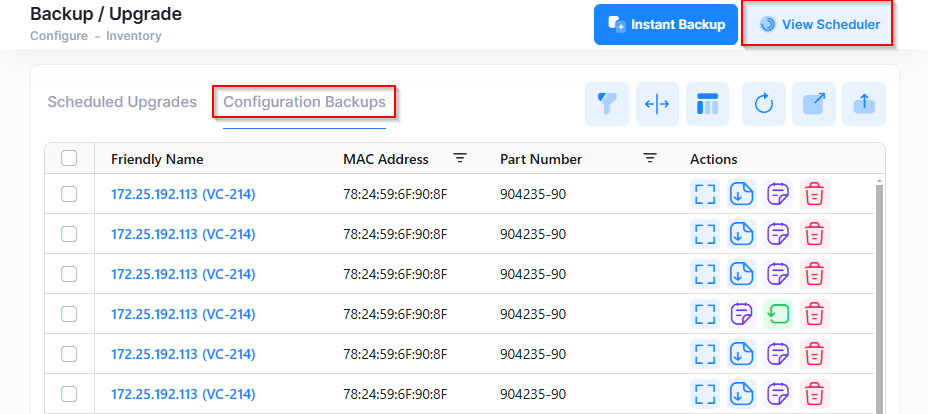
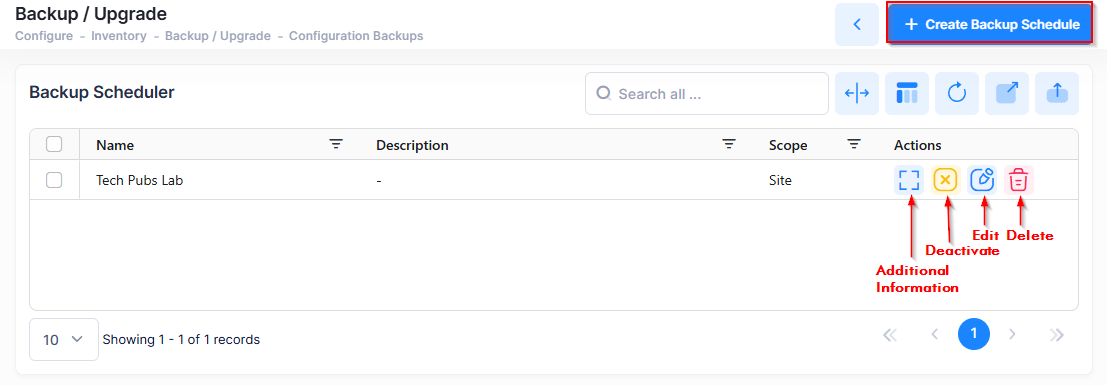
The Backup Scheduler screen displays information about configuration backup schedules, and is used to create, edit, activate, deactivate, and delete scheduled backups. This screen is accessible from the Configuration Backups tab by clicking on View Scheduler, as shown below.
Creating a Backup Schedule
The Create Backup Schedule screen is used to configure regular backup schedules for switch device(s). To access this screen, click Create Backup Schedule on the Backup Schedular screen.
Complete the fields as described below to create a scheduled backup, then click Create. The new scheduled backup will appear in the Backup Scheduler list.
Basic Information
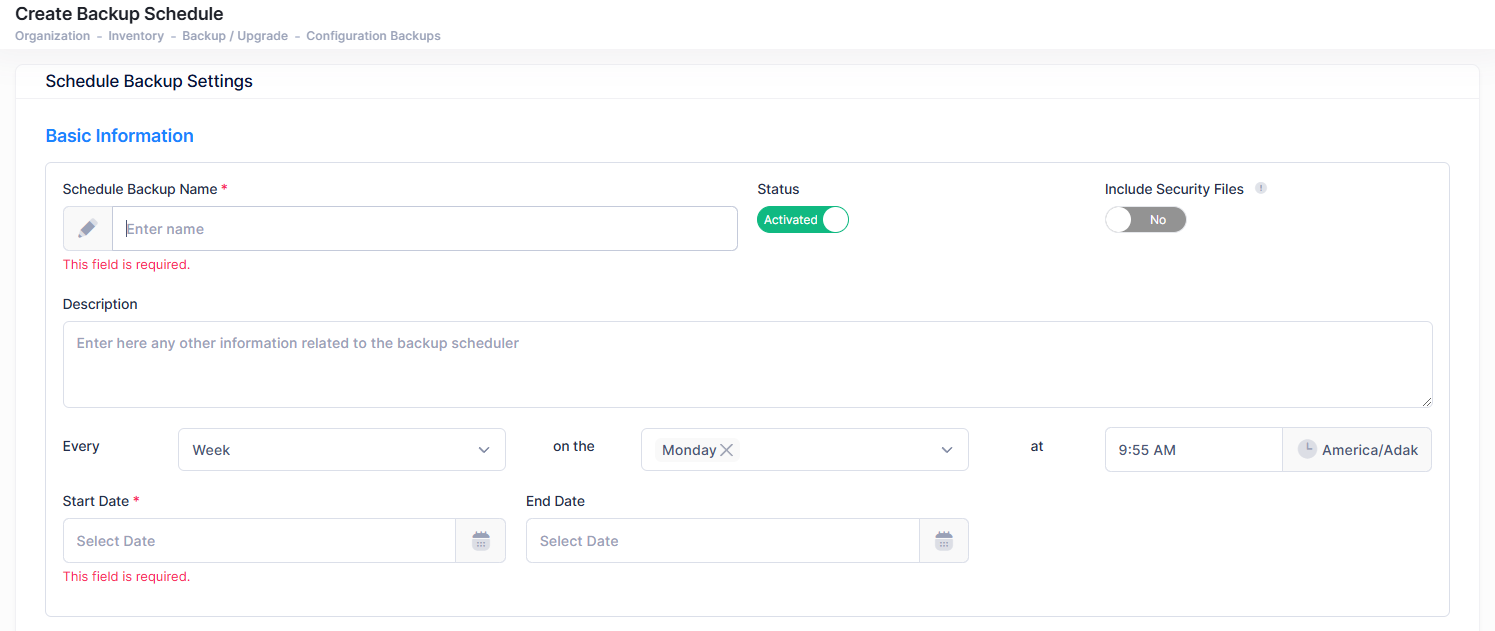
Scheduled Backup Name - Enter the name to assign to the scheduled backup.
Status - Activate (the default) or Deactivate the scheduled backup.
Include Security Files - Include (Yes) or exclude (No) switch security files in the backup. You do not have the option to select directories for a configuration backup since all configuration-related files in all directories are backed up. However, you can exclude security files from the backup for security reasons. By default, security files are excluded from the backup. If you want to include security files in the backup, set the Security Files slider to “Yes”.
Description - Enter an optional description for the scheduled backup.
Every/at - Select the frequency (Day, Week, Month) and the time at which the backup will occur. (Note: The scheduler uses the Organization time zone therefore, changing the time zone in Organization Settings will affect the backup trigger time.)
Start Date - Select the start date for the scheduled backup. The backup will begin on the start date at the configured frequency and time.
End Date - Select a date on which the backup will end.
Scope Selection
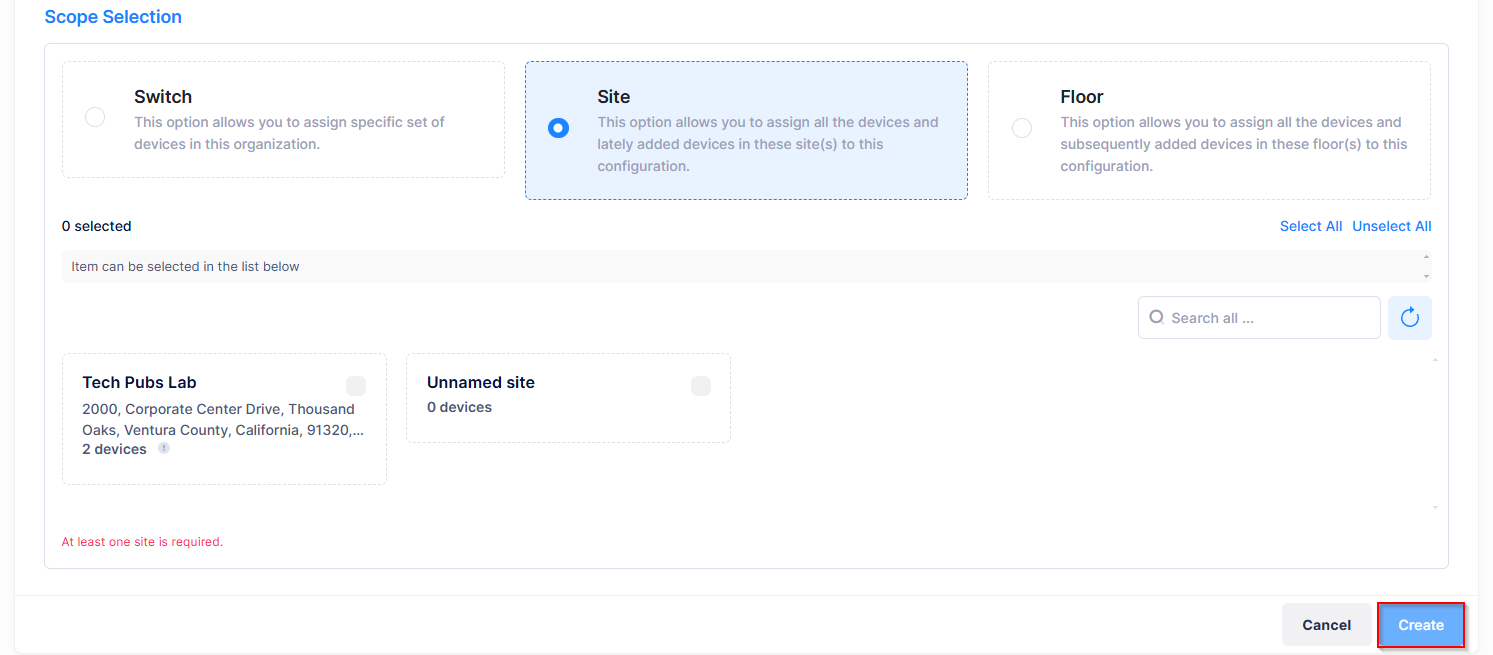
The Scope Selection section is where you can designate the devices to backup by selecting one of the following options:
Switch - Assign specific switch devices in the Organization to the scheduled backup. The selected switches are backed up according to the backup schedule.
Site - Assign an Organization Site to the scheduled backup. All switch devices associated with the Site are backed up according to the backup schedule. Any devices that are added to the Site are also included in the backup schedule assigned to the Site.
Floor - Assign Organization Floors to the scheduled backup. All switch devices associated with the selected Floors are backed up according to the backup schedule. Any devices that are added to any of the selected Floor are also included in the backup schedule assigned to the Site.
Editing a Backup Schedule
Select a backup schedule in the Backup Scheduler list, then click on Actions and select Edit from the drop-down menu. You can also click on the Edit icon under the “Actions” column for the backup schedule entry. The Edit Backup Scheduler screen opens.
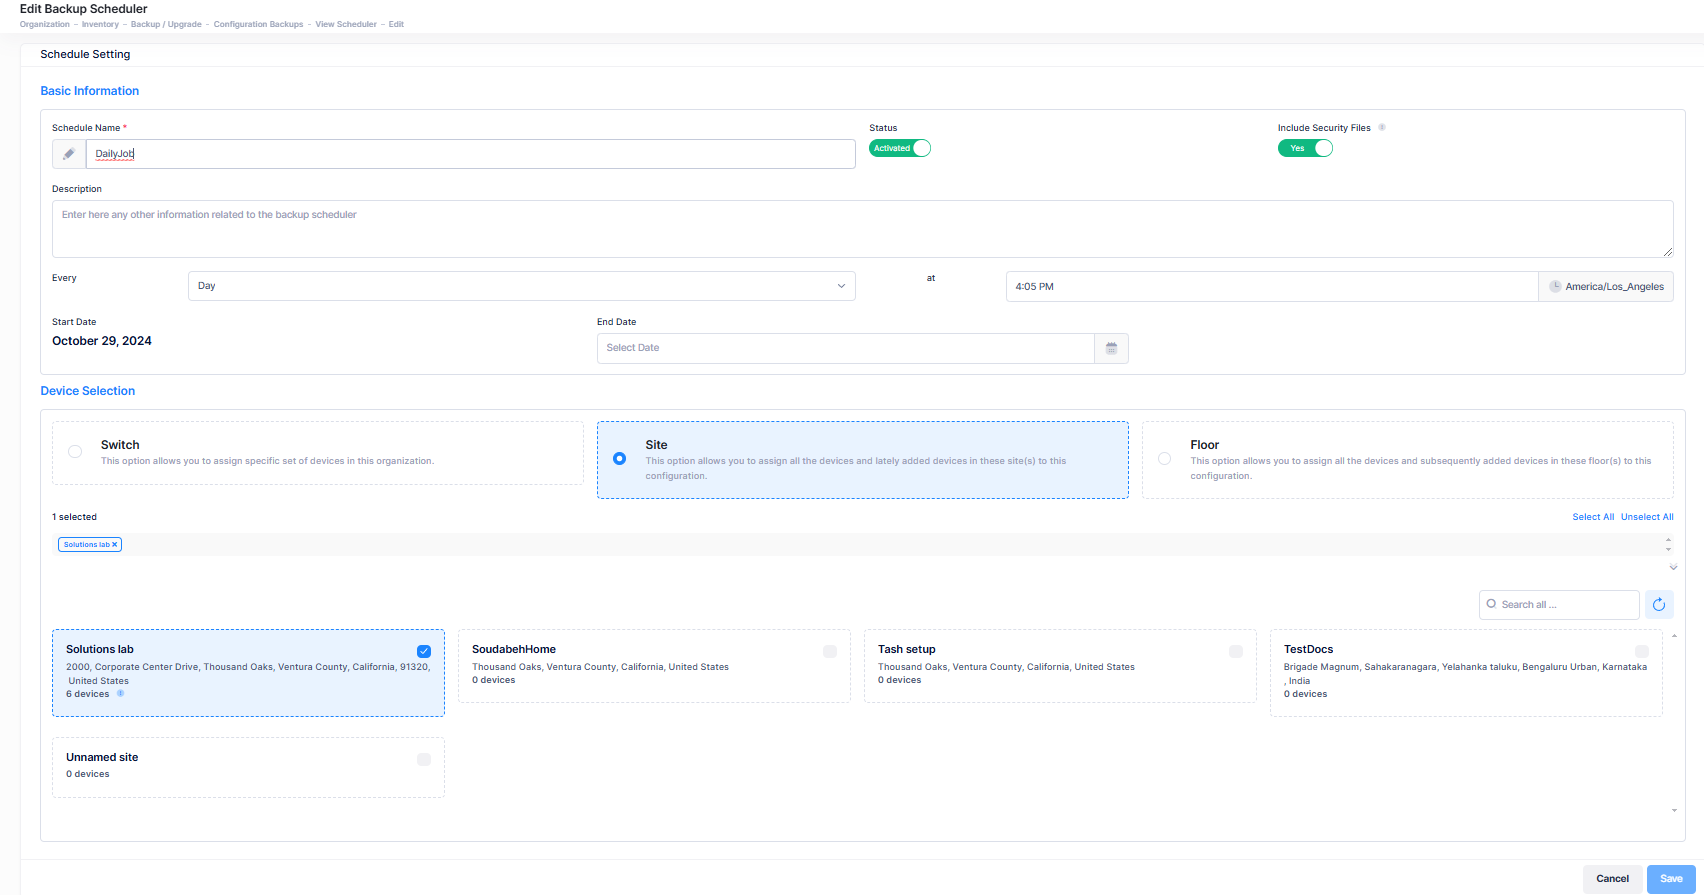
Edit the fields as described in Creating a Backup Schedule, then click on Save to retain changes to the scheduled upgrade.
Deactivating a Backup Schedule
Select a backup schedule in the Backup Scheduler list, then click on Actions and select Deactivate from the drop-down menu. You can also click on the Deactivate icon under the “Actions” column for the backup schedule entry.

When you deactivate a backup schedule, there is no warning message and the “Deactivate” option and icon change to “Activate”.
Activating a Backup Schedule
Select a backup schedule in the Backup Scheduler list, then click on Actions and select Activate from the drop-down menu. You can also click on the Activate icon under the “Actions” column for the backup schedule entry.
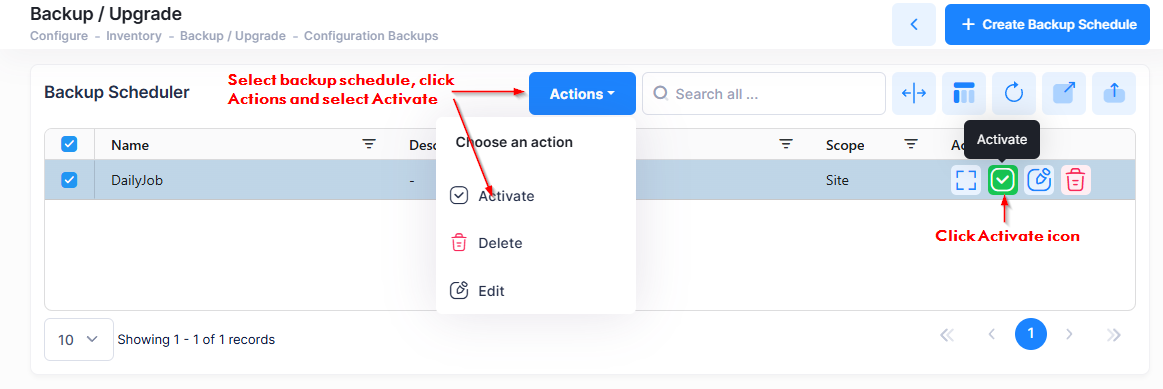
When you activate a backup schedule, the “Activate” option and icon change to “Deactivate”, as shown here.
Deleting a Backup Schedule
Select a backup schedule in the Backup Scheduler list, then click on Actions and select Delete from the drop-down menu. You can also click on the Delete icon under the “Actions” column for the backup schedule entry.

When you select the backup schedule that you want to delete, the following confirmation popup appears.
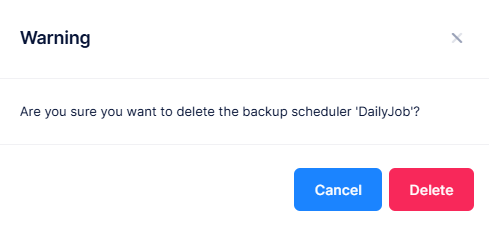
Click on Delete to remove the backup schedule from the Backup Scheduler list.
If all sites or devices in the Backup Scheduler are deleted, the scheduler is deleted immediately.
If all floors in the Backup Scheduler are deleted, the scheduler will be deleted the next day.
