The IoT Inventory Devices Screen provides detailed information for all endpoint devices that are connected to the network (e.g., PCs, Tablets, Smartphones).
Use the IoT Devices screen to display information about all of the connected IoT Devices. To access the IoT Devices screen, click on Network > Access Records > IoT Devices under the “Monitor” section of the OmniVista Cirrus Menu.

-
Starting with AOS 8.10R04, switches report both UNP and non-UNP clients on IoT enabled switches. To check if it is enabled, look at the IoT Status column in the Device Catalog. If the status is Disabled, select the switches and enable the feature from the Actions menu. Enforcement action, however, is supported only for UNP ports. To view connected clients immediately, disconnect and reconnect the client.
The new endpoint association or disassociation (Endpoint Status) is updated in real-time (click on the Refresh button to display the latest information from the OmniVista Cirrus database). Once an endpoint is Active, any changes to the endpoint (e.g., profile change, IP address change) are updated in every 5 minutes for devices connected to Stellar Access Points.
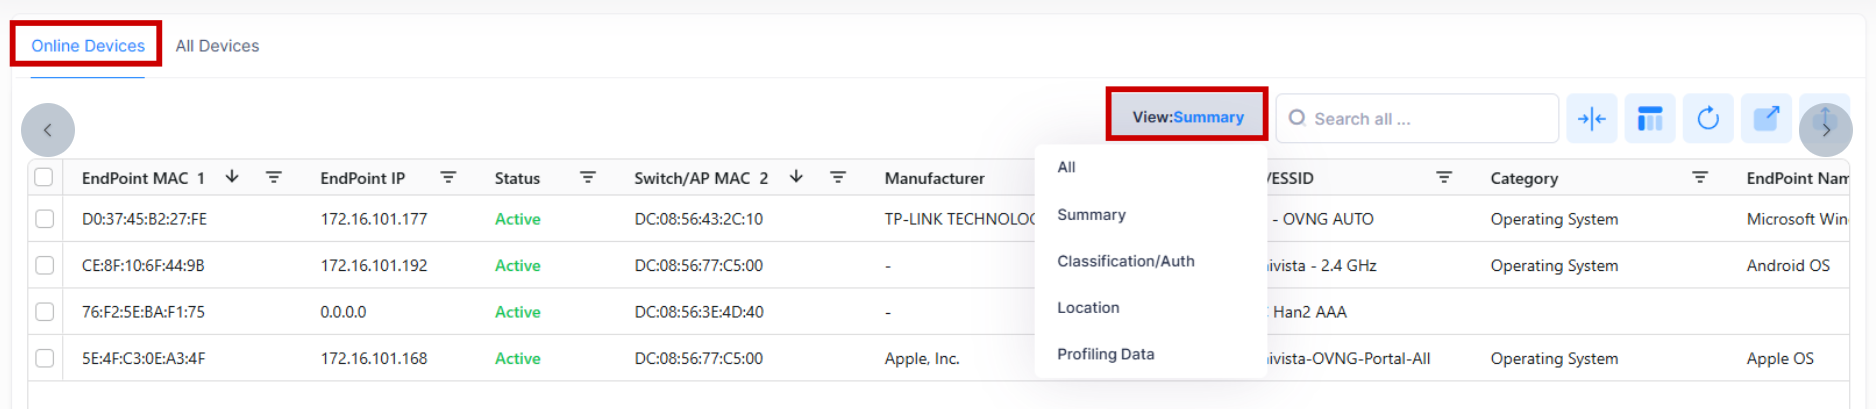
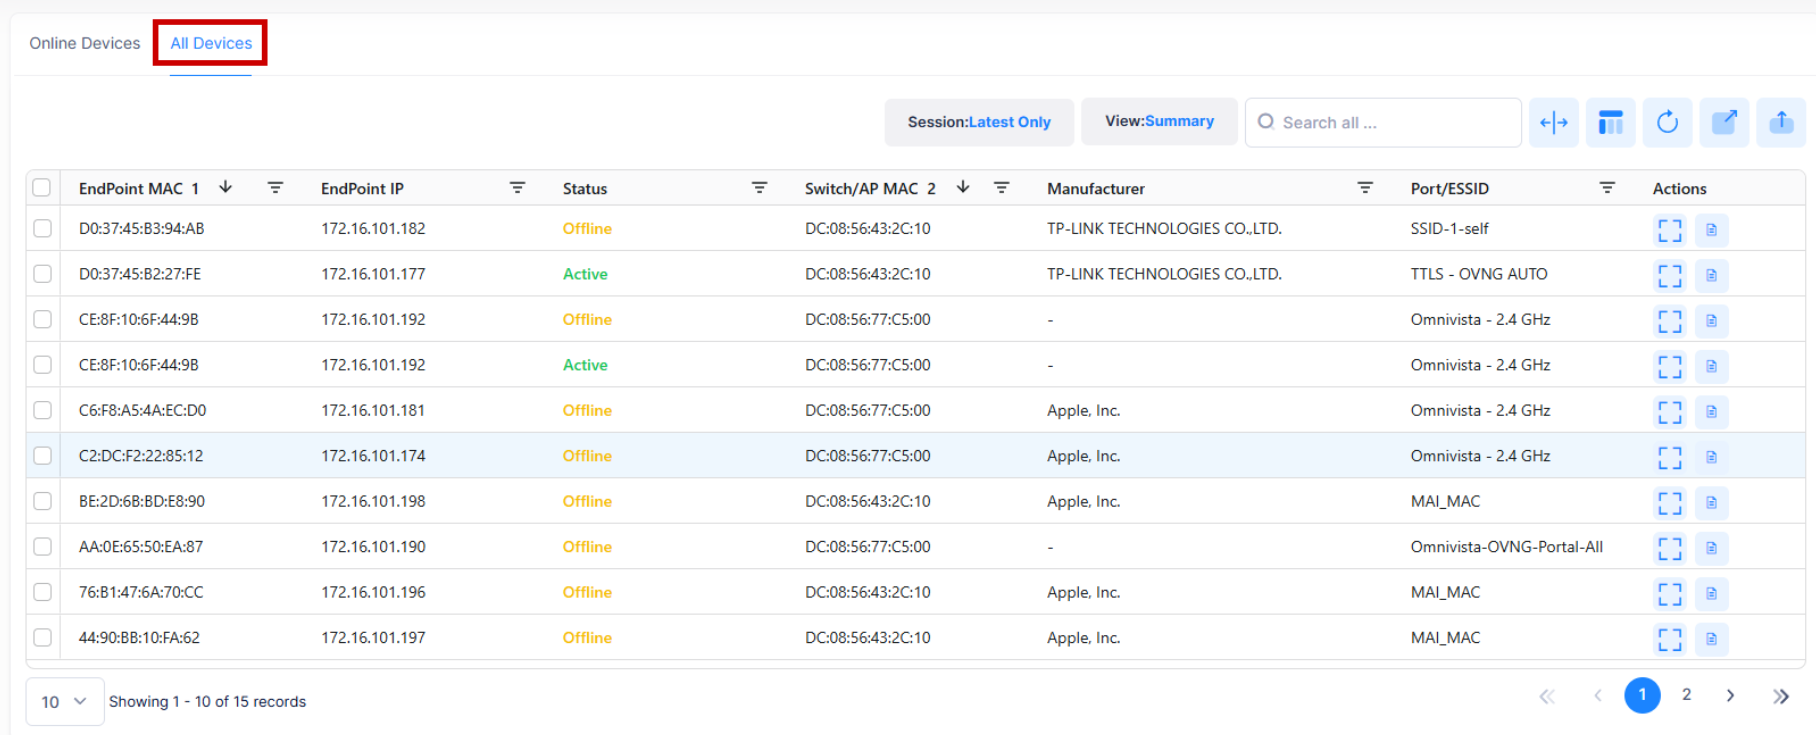
By default, the Online Devices List is displayed on the IoT Devices screen. This is a list of clients currently online. Click on the All Devices tab to view all available devices list. By default, only the Summary view is displayed in the IoT Online Devices List for each device; however, you can display all available information by selecting the “All” option on the filter window. For example:
IoT All Devices List
The IoT Devices List displays information for all IoT Devices. By default, the "Summary" view of the IoT Devices List is displayed, which gives an overview of device inventory. To display detailed information about a specific Device, click on the Additional Information icon under the “Actions” column.
Data displayed in each widget can be exported into a CSV, PDF or Excel sheet format. You can also switch the widgets to full-screen mode for a better display.
For each of the IoT Devices, the following field values are displayed:
-
Endpoint MAC - The MAC Address of the device.
-
Endpoint IP - The IP Address of the device.
-
Status - The operational status of the device on the network.
-
Active - The device was active on the network when it was last known by OmniVista. Note that if a Access Point is deleted from OmniVista or IoT is disabled on a Access Point, OmniVista will display all devices connected to that Access Point as "Offline" regardless of the device's actual status. This is because OmniVista receives no updates regarding these devices in these scenarios. If a Access Point goes down, OmniVista will not automatically change the status of the devices connected to it.
-
Offline - The device is not currently active on the network. Note that if IoT is disabled on a device or a device is removed from the Managed Devices List, the device remains in the Inventory List with device information "grayed out" and the last know information displayed.
-
Error - The device was unable to connect to the network (e.g., MAC Authentication fails).
-
-
Category - The device category (e.g., Datacenter Appliance, Phone/Table/Wearable). Note that that initial Category value is not likely to be very specific. As more activity happens on the endpoint device, Access points send additional details about the endpoint, and the category description will be more specific. Also note that for some devices, this field may be empty. This generally happens when insufficient fingerprint information about the device is available. (e.g., Access Points receives only the MAC address of the endpoint and the MAC is unknown or unpopular).
-
Manufacturer - The device manufacturer. This is derived from the MAC address of the device. The field may be empty if the device uses randomized MAC addresses.
-
Endpoint Name - The name of the endpoint device as determined by the Device Fingerprinting Service.
-
Endpoint Version - The endpoint device Operating system version.
-
Category Hierarchy - The Category, Manufacturer, and Endpoint name used to categorize the device.
-
Switch/AP Name - The IP address of the Switch/Access Point through which the device is connected to the network.
-
Switch/AP MAC - The MAC address of the Switch/Access Point through which the device is connected to the network.
-
Port/ESSID - The switch port or ESSID through which the device is connected to the network.
-
Port Type - The port type through which the device is connected to the network (Wireless/Wired/UNP).
-
Port Description - A description of the port through which the device is connected to the network, as received from the device.
-
VLAN - The VLAN through which the device is connected to the network.
-
AOS Devices - The untagged VLAN, or the tagged VLAN if traffic is tagged.
-
Stellar APs - The VLAN mapped to the Access Role Profile.
-
-
Tunnel Type - If the endpoint is set up on tunnel, the tunnel type is displayed:
-
SPB
-
VXLAN
-
L2GRE
-
Guest Tunnel.
-
-
Far End IP - The IP address of the far end tunnel termination (displayed for wireless clients only).
-
VPN ID - The Tunnel ID that identifies a GRE Tunnel VPN (displayed for wireless clients only).
-
UNP - The Access Role Profile assigned to the device, if applicable.
-
UNP Type - The UNP type, if enforcement is applied:
-
Default UNP
-
Pass-Alternate UNP
-
Authetication-Server Down UNP
-
UNP from Classification
-
UNP from RADIUS
-
UNP from OmniVista Enforcement.
-
-
Policy List - The Policy List applied to the device, if applicable.
-
Authentication Type - The type of authentication used for the device (e.g., MAC, 802.1X)
-
Authentication Status - The status of device authentication, if applicable (e.g., Passed, Failed).
-
Connection Error - The connection error if the device was unable to connect to the network, if applicable.
-
Enforcement Status - The status of profile enforcement, if applicable:
-
Initial - Initial status.
-
Excluded - Matching by Exclusion Rules, no mapping.
-
Enforced - Successfully mapped to category.
-
Failed - SNMP enforcement failed.
-
Pending - Enforcement request was send to device/Access Point. One reason may be that ARP is not configured on the device.
-
Disabled - OmniVista is working in manual mode.
-
-
Start Time - The time the device first accessed the network.
-
End Time - The time the device disconnected from the network.
-
Last Updated - The last time OmniVista received message from the device and the message was successfully processed.
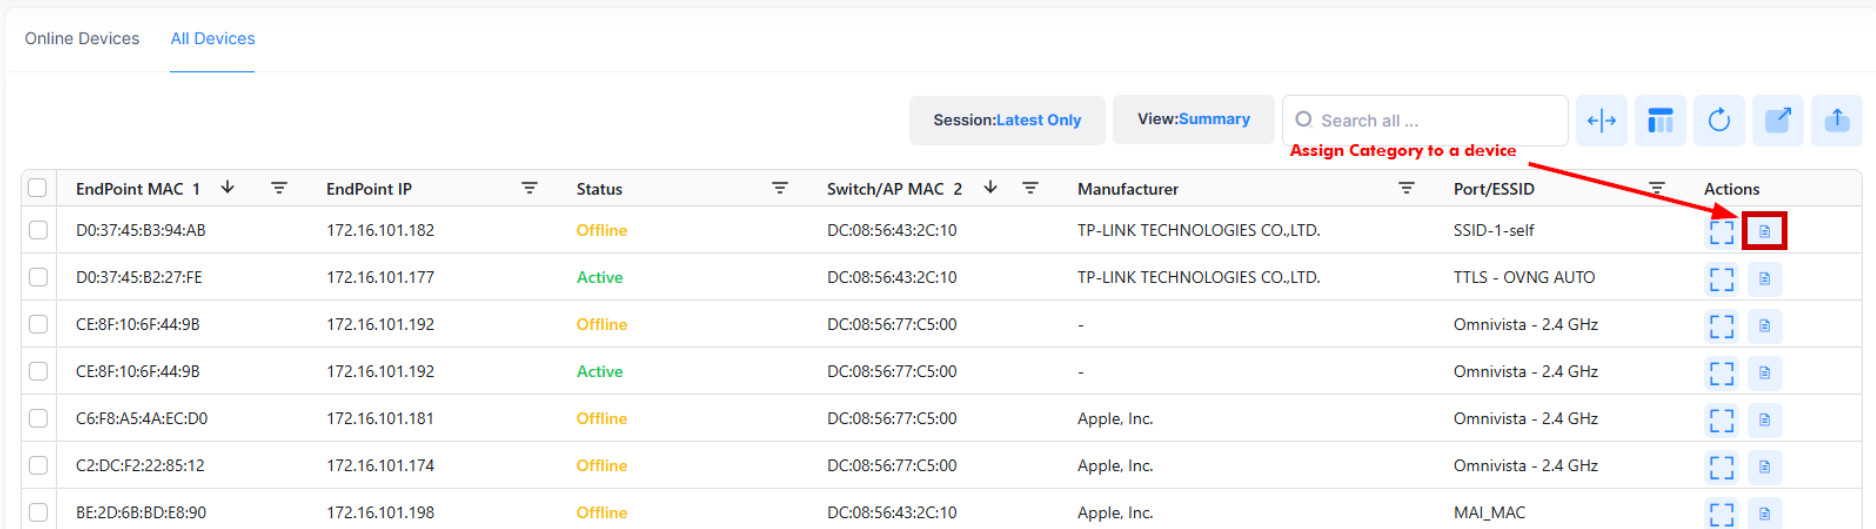
Assigning a Custom Category to a Device
The user can override the Default Category assigned to a device through Fingerprinting and manually assign a Custom Category to a device. Select the device(s) in the Inventory List and click on the Assign Category button as shown below:
Then the Assign Category Confirmation window appears. Select a New Category from the Choose Category drop-down list and click on the Save button as shown below:
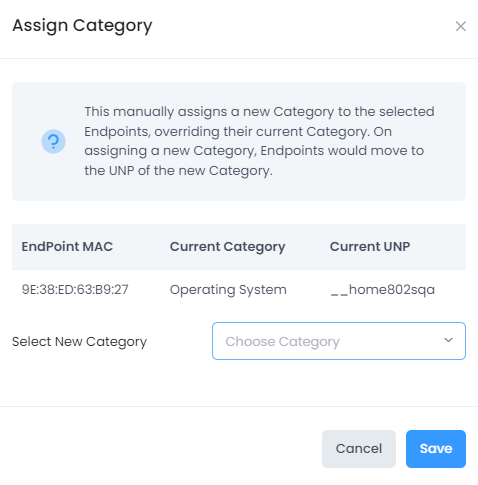
Now, the selected device(s) will appear in the IoT Device List with the new Custom Category device name.
If Enforcement was configured for the assigned Category, endpoints might change their UNP mapping to the UNP that mapped with new category, or to no enforcement if the new category has no UNP mapping.
Customizing the Display
The user can customize the “View” of the IoT Devices list screen. By default, the “Summary” view of IoT Devices list is displayed on the screen. The display can be changed by clicking on the “View” button at the top right of the List as shown below:
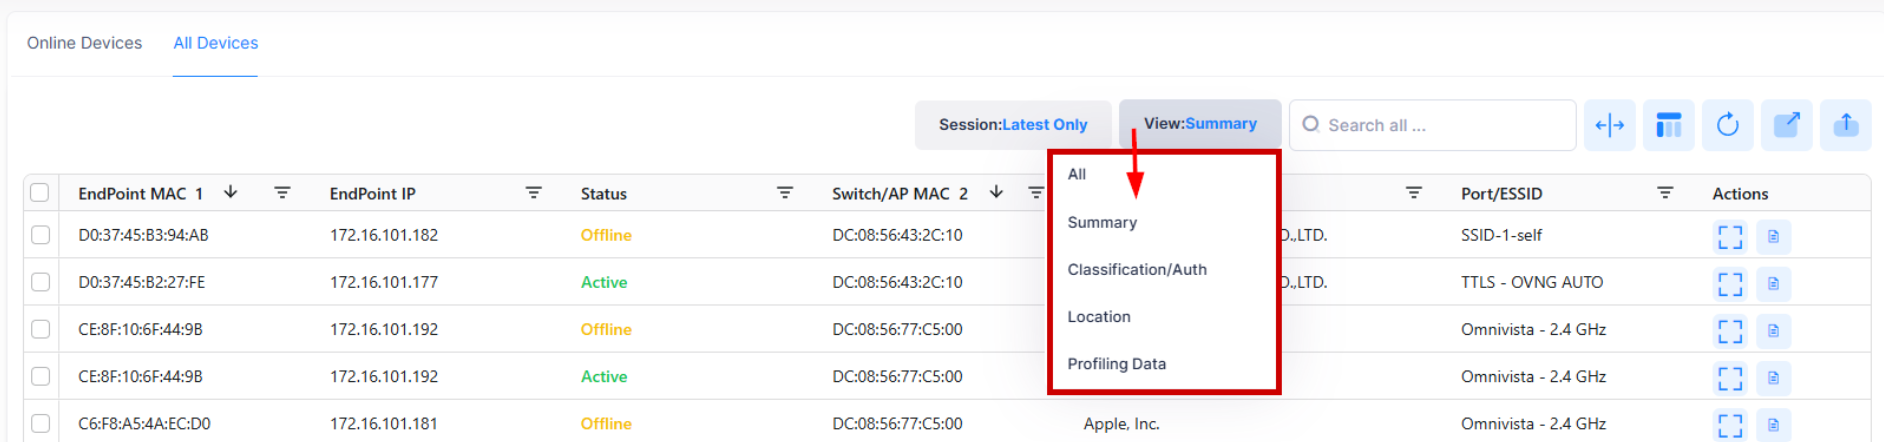
The display can be changed by clicking on any of the options available in the drop-down list. (e.g. All, Classification/Auth, Location or profiling Data). For example, if the user select the “Classification/Auth” option from the menu list, the below revised IoT Devices List will appear on the screen.