SMS Provider
SMS notifications are sent through SMS service providers to inform the users with short messages about the services which they have configured in OmniVista Cirrus 10.
For each organization, Organization Admin users can configure which SMS Service will be used to send SMS notifications. In OmniVista Cirrus 10, the SMS service configuration is available for two services.
To configure SMS provider settings, click on Notifications under “Organization” to view the SMS Provider page.
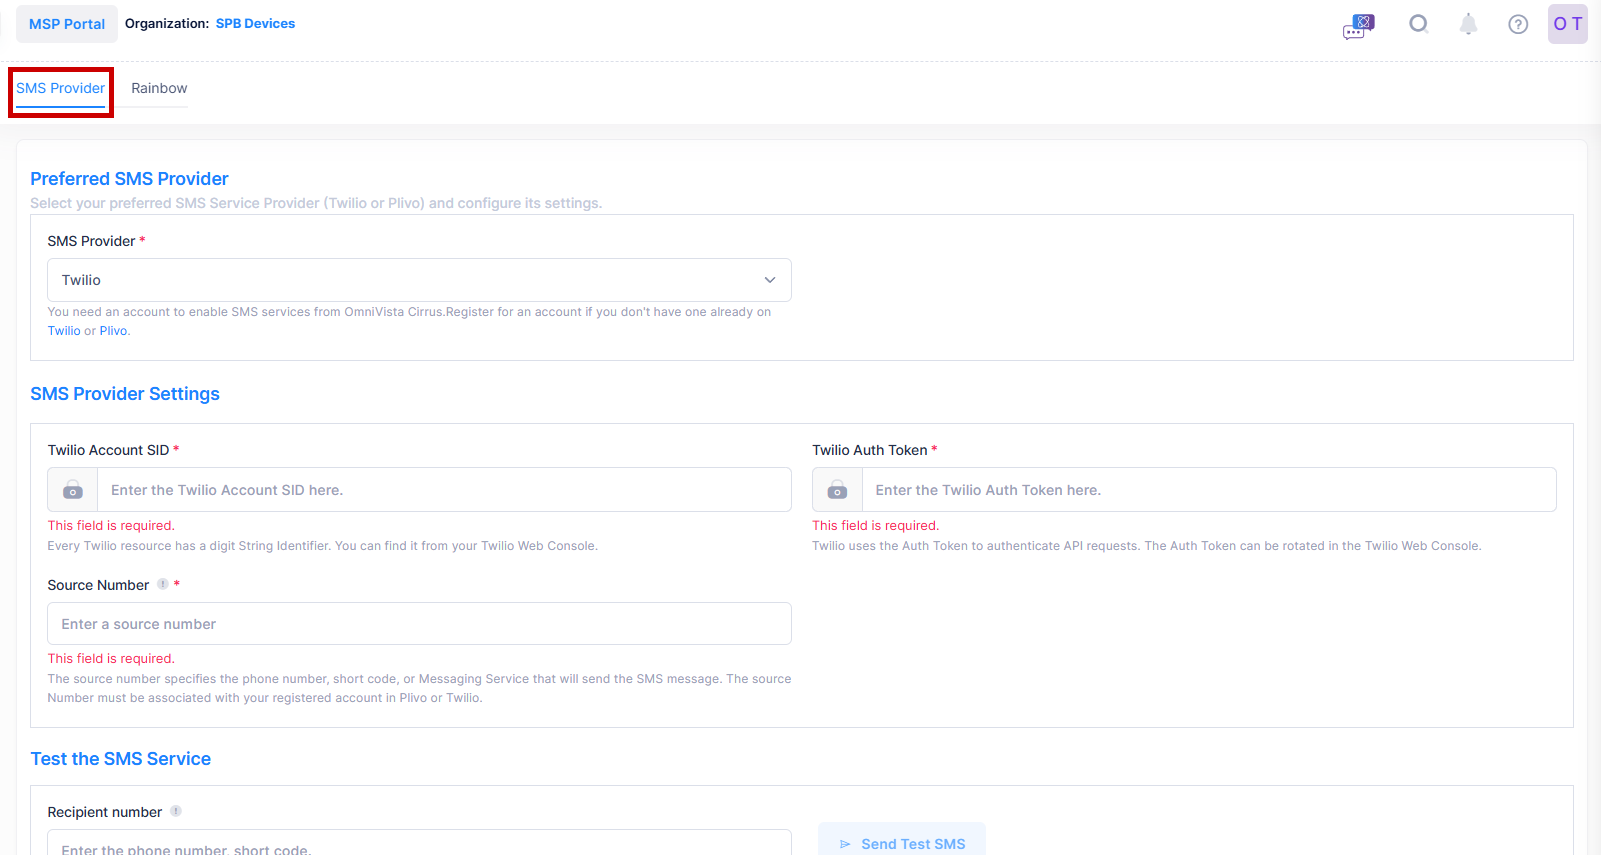
Select your preferred SMS Service Provider (Twilio or Plivo) and configure its settings.
Preferred SMS Provider
You need an account to enable SMS services from OmniVista Cirrus. Register for an account if you don't have one already on Twilio or Plivo.
Plivo SMS Provider Settings
-
Plivo Auth ID - Every Plivo resource has an authentication Id. You can find it from your Plivo Web Console.
-
Plivo Auth Token - Plivo uses the Auth Token to authenticate API requests. The Auth Token can be located in the Plivo Web Console.
Twilio SMS Provider Settings
-
Twilio Account SID - Every Twilio resource has a digit String Identifier. You can find it from your Twilio Web Console.
-
Twilio Auth Token - Twilio uses the Auth Token to authenticate API requests. The Auth Token can be rotated in the Twilio Web Console.
Source Number
The source number specifies the phone number, short code, or Messaging Service that will send the SMS message. The source Number must be associated with your registered account in Plivo or Twilio.
After configuring SMS Provider Settings, you can test the SMS Service by sending a test SMS.
Testing the SMS Service
SMS Service settings of Trillo or Pilvo can be tested by providing a recipient number and send a test message to that number.
A Recipient number should be in the form of:
-
A Short Code is a 5 or 6 digits number (e.g.12345, 123456).
-
A Long Code includes:
-
Country code: from 1 to 3 digit number.
-
Area Code: 1 to 5 digit number
-
(eg. +1-425-555-0100, +1 425 555 0100, +14255550100 or mixed type +1-425 5550100).
Note that you need to have a registered SMS service account (Twilio or Plivo) for testing the SMS Service.
Rainbow
Use the Rainbow configuration to send notifications from OmniVista Cirrus to an existing and/or new Rainbow Bubble. For each Organization, Admin users can enable the sending of alerts to the specified Rainbow Bubble.
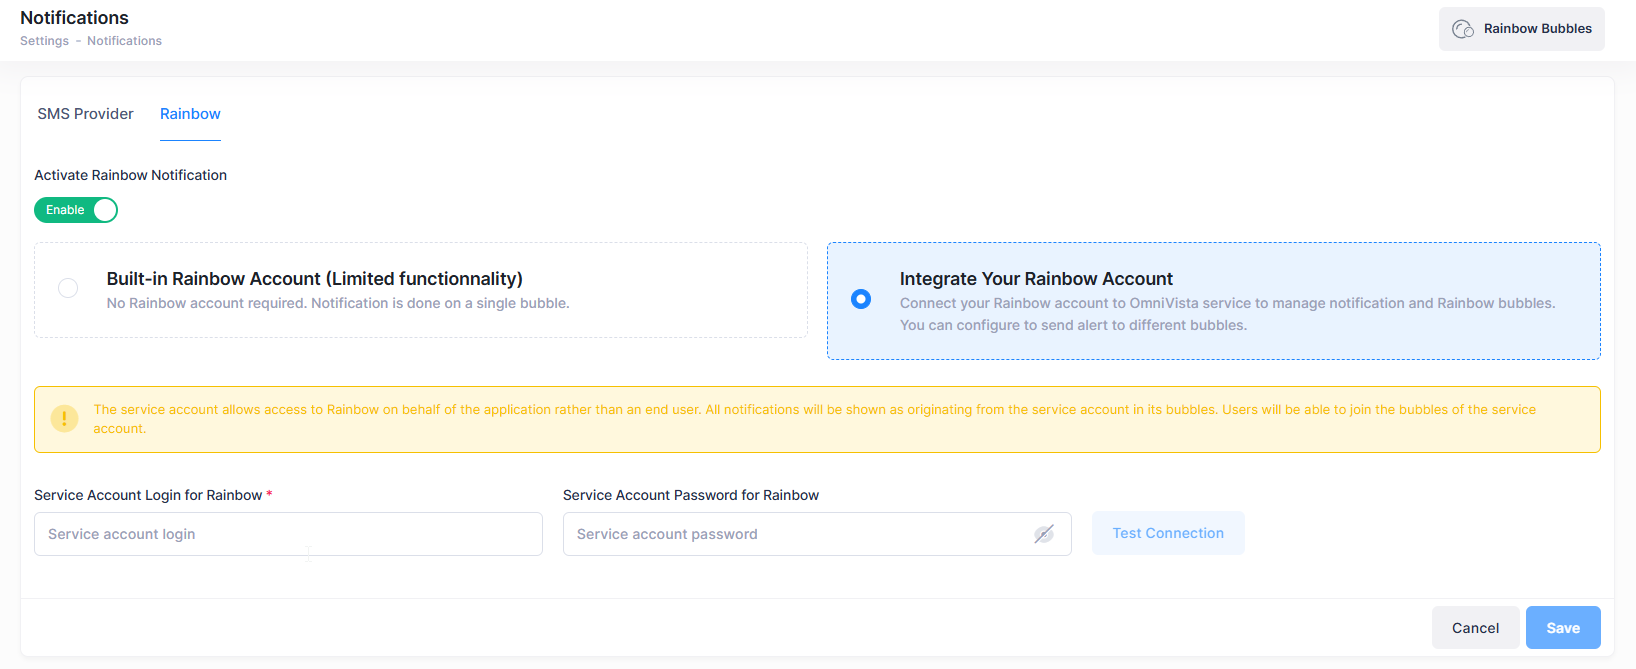
To configure Rainbow settings, click on Settings > Notifications > Rainbow under “Organization” to view the Rainbow page. Toggle Activate Rainbow Notification to enable.
-
Built-in Rainbow Account - No Rainbow account is required. All notifications are done on a single bubble.
-
Integrate Your Rainbow Account
-
Enter the Rainbow Service Account Login and Password.
-
Test Connection and Save.
-
Note: The service account allows access to Rainbow on behalf of the application rather than an end user. Thus, the ‘Rainbow Account’ is a service account, not a personal account.
Create a Rainbow Bubble
Click on + Create Bubble to open the New Rainbow Bubble screen.
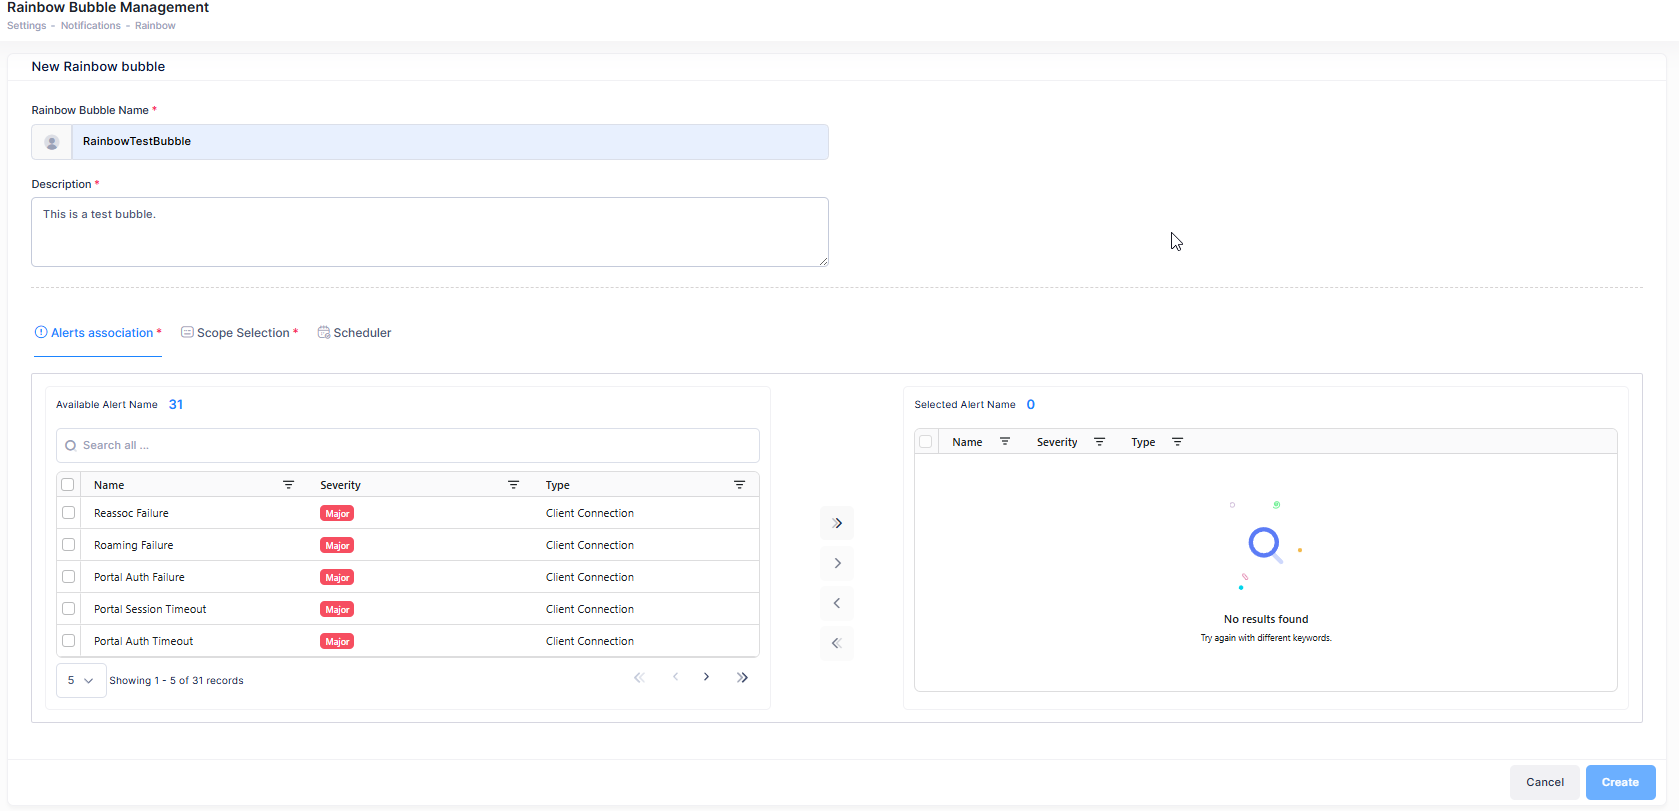
Complete the fields as described below, then click Create.
-
Rainbow Bubble Name - The name of the Rainbow bubble to send notifications to.
-
Description - The bubble description.
-
Alerts Association - Choose the alerts to be associated with the Rainbow bubble.
-
Scope Selection - Choose the scope of devices to associate with the alerts.
-
Device - This option allows you to assign a specific set of devices in the organization.
-
Site - This option allows you to assign all the devices in a site to the configuration.
-
Floor - This option allows you to assign all the devices in a floor to the configuration.
-
-
Scheduler - The Scheduler can be used to setup days and times when alerts will be sent. By default alerts are always enabled.
Note: OmniVista Cirrus 10 users must have an active Rainbow account. A dedicated service account is required for the setup of OmniVista Cirrus. If you don’t have an account, go to the following URL to sign up:
https://web.openrainbow.com
Import Rainbow Bubbles
When Integrate Your Rainbow Account is enabled there is an option to import existing Rainbow Bubbles by clicking on Import Bubbles.

-
To access the Rainbow bubble, click on Link to bubble under the URL column.
-
To view more information about the Rainbow Bubble, click on Additional Information Details icon.
-
To edit the existing Rainbow Bubble information, click on the Edit icon.
-
To delete the Rainbow Bubble information, click on the Delete icon.
-
To disable the Rainbow Bubble, click on the Disable icon.