Period Policies
The Unified Access Period Policy screen displays all configured Period Policies and is used to create, edit, and delete Period Policies. A Period Policy specifies the days and times during which a device can access the network. The policy is associated with an Access Role Profile and applied to devices classified into the Access Role Profile.
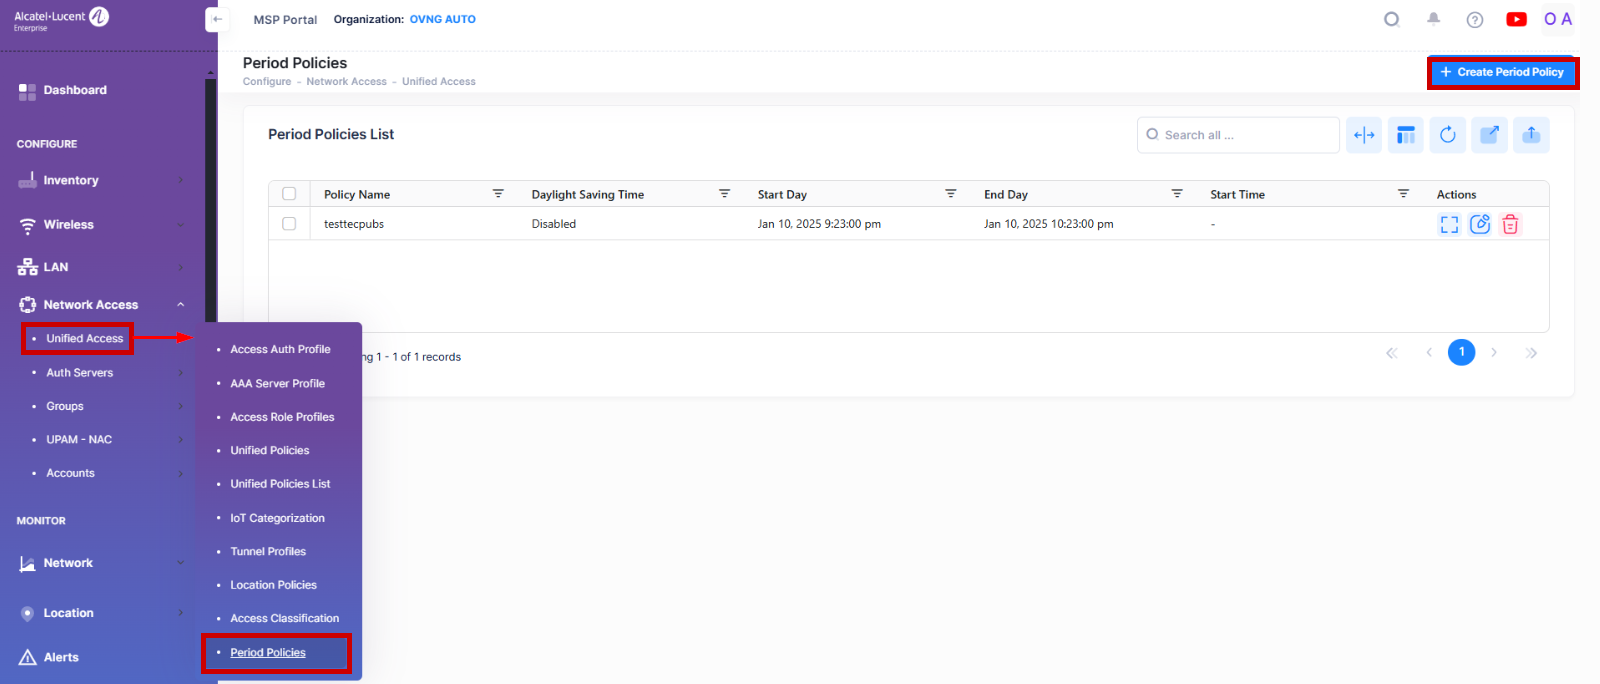
To create a Period Policy, navigate to the Period Policy screen by clicking on Network Access > Unified Access > Period Policies under the “Configure” section of the OmniVista Cirrus Menu. The Period Policies Information screen displays.

Creating a Period Policy
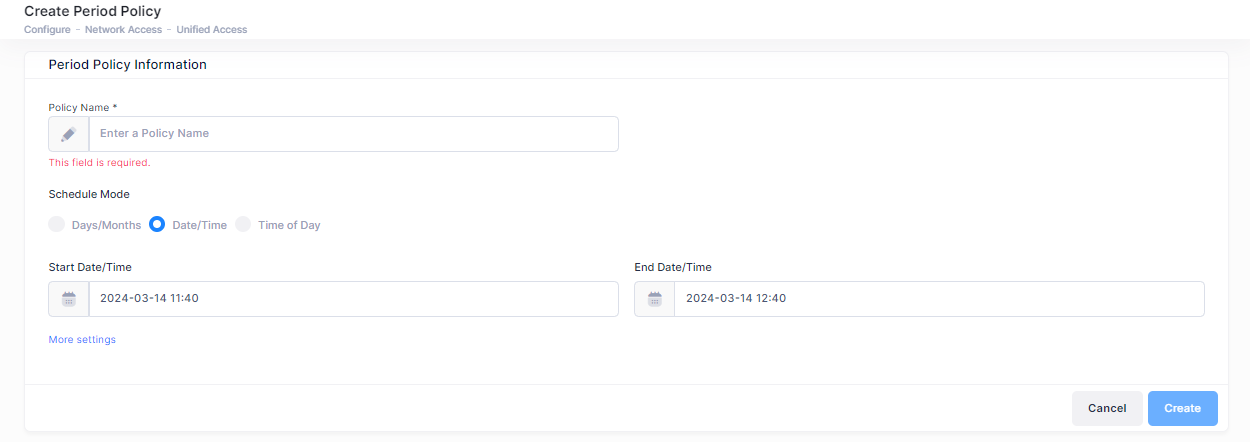
Click on Create Period Policy and complete the fields as described below. When you are finished, click on Create.

Policy Name - User-configured Period Policy Name.
Scheduled Mode - Configure the time schedule for the policy period. The time schedule determines when devices can access the network.
Days/Months - Select the days and months for the policy period.
Date/Time - Specify a start date/time and an end date/time during for the policy period.
Time of Day - Specify a start and end date/time and the days/months for the policy period.
Timezone - Select the timezone in which the Period Policy is active.
Daylight Saving Time - Select to enable or disable daylight saving time.
Editing/Deleting a Period Policy
You can edit or delete a Period Policy from the Period Policy List as shown below.

Editing a Period Policy
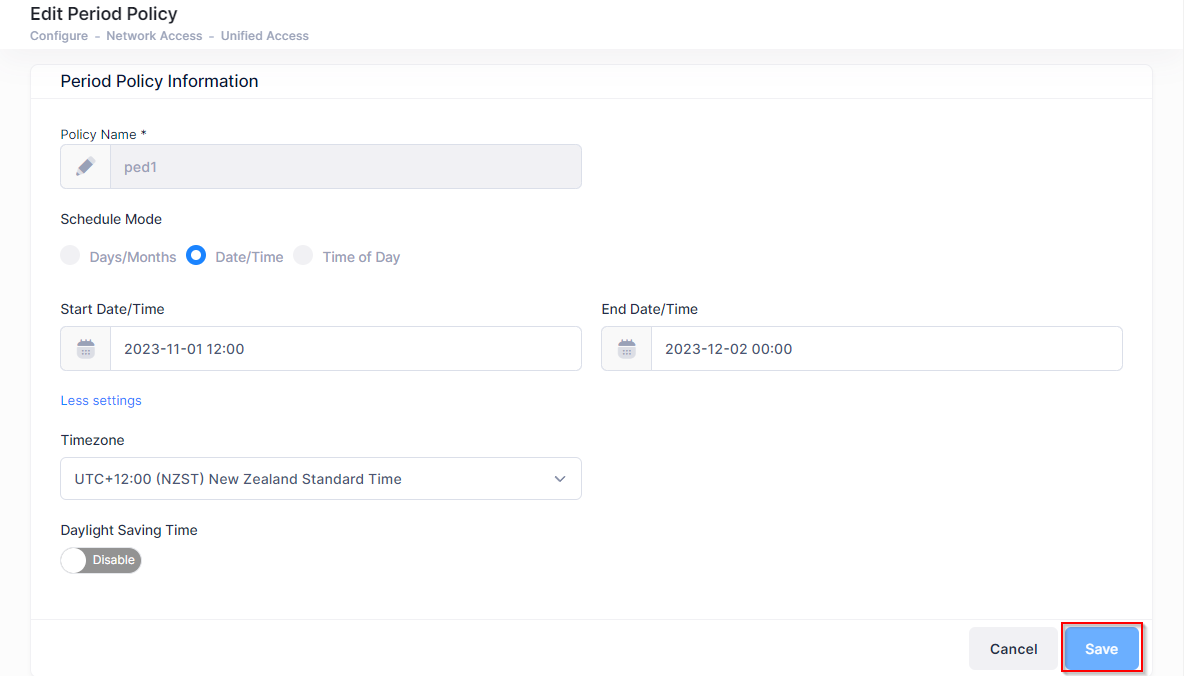
To modify a Period Policy, select an existing policy and click on the Edit icon under the “Actions” column or select Edit from the Actions drop-down menu to bring up the Edit Period Policy screen. Edit the fields as described above then click on Save to save the changes. Note that you cannot change the Period Policy name.

Deleting a Period Policy
To delete a Period Policy, select an existing policy and click on the Delete icon under the “Actions” column or select Delete from the Actions drop-down menu. You are then prompted with a Warning message to confirm your delete request. Click on Delete to confirm that you want to delete the Period Policy(s) listed in the Warning message.
View Additional Period Policy Information
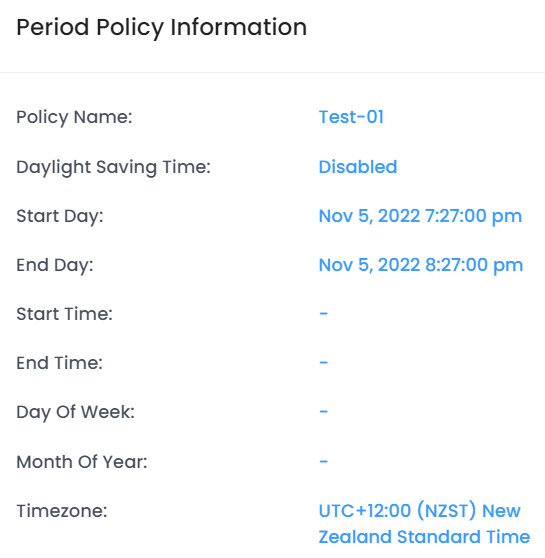
Select the policy in the Period Policy List and click on the Additional Information icon to view additional information about the period policy.

