OmniVista Cirrus monitors network packets to determine the types of client devices connected to an IoT-enabled Access Point and interfaces with a Device Fingerprinting Service to categorize them. Categories are hierarchical. Default Categories are the top-level categories and are provided and listed by default. When a device is initially categorized, it will be assigned one of these top-level categories (e.g., Phone, Tablet or Wearable). As OmniVista monitors packets and learns more about a device, the category assigned to the device will become more specific. For example, a device may initially be categorized as "Phone, Tablet or Wearable". As OmniVista learns more about the device, the device may be categorized as an "Apple Mobile Device", and then an "Apple iPhone". As OmniVista Cirrus learns these new categories, they are added to the List of Categories.
-
The Default Categories provided cannot be deleted, but can be edited to assign an Access Role Profile to the category.
-
In addition to the default set of hierarchical categories, you can create custom categories that you can edit and delete. There are two types of custom categories: hierarchy and MAC-based.
-
A custom hierarchy category specifies the hierarchy categorization a device must match to be associated with the custom category.
-
A custom MAC-based category specifies the MAC address a device must have to be associated with the custom category.
-
-
Category-based device authentication is configurable by assigning an Access Role Profile to a category (default or custom) with the option of Automatic Enforcement.
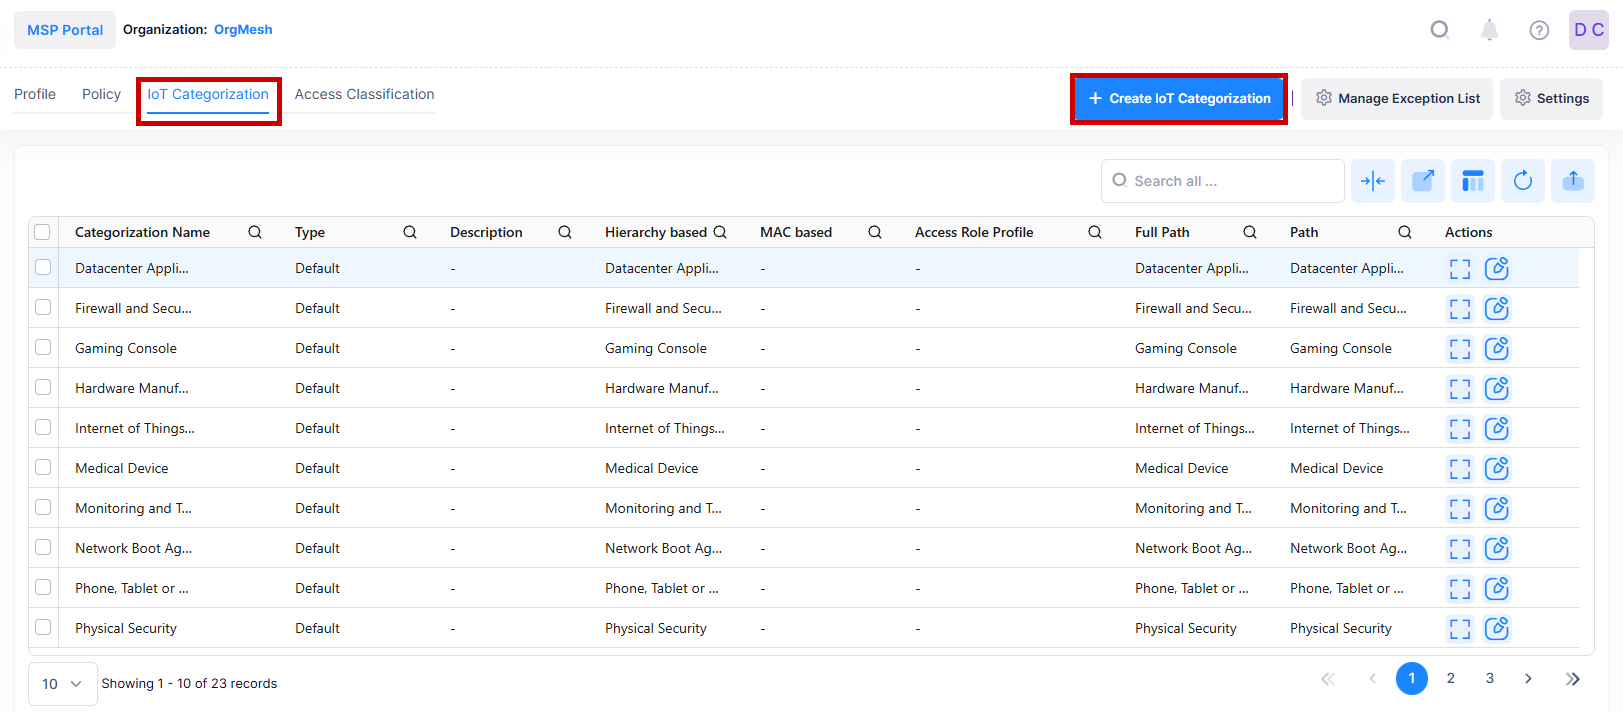
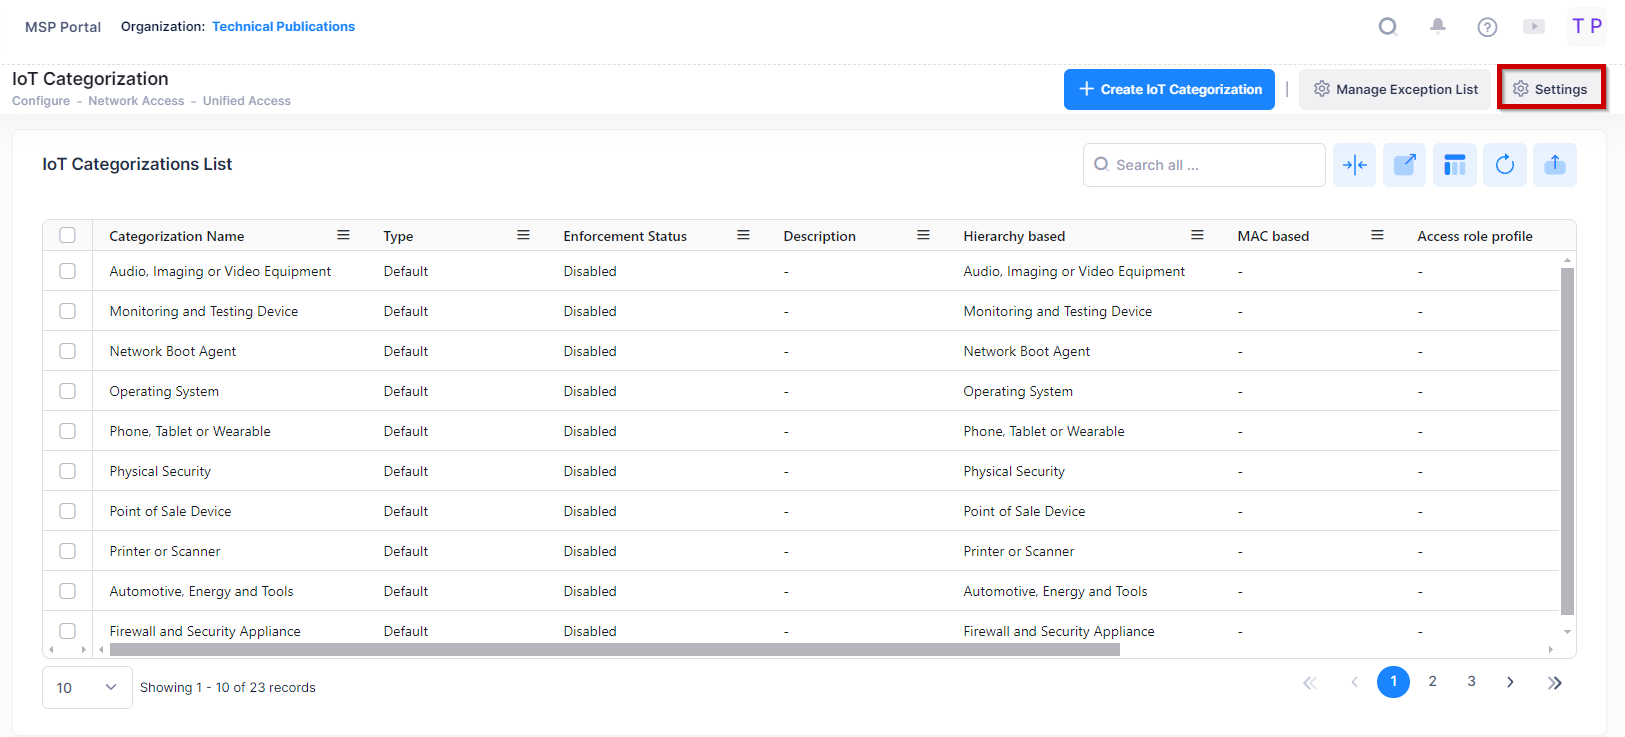
The IoT Categorization screen displays information about device categories and is used to create, edit, and delete an IoT Categorization list entry. This screen is also used to configure category-based authentication using IoT Enforcement.
To access the IoT Categorization screen, click on Network Access > Unified Access > IoT Categorization under the “Configure” section of the OmniVista Cirrus Menu.
Creating an IoT Category
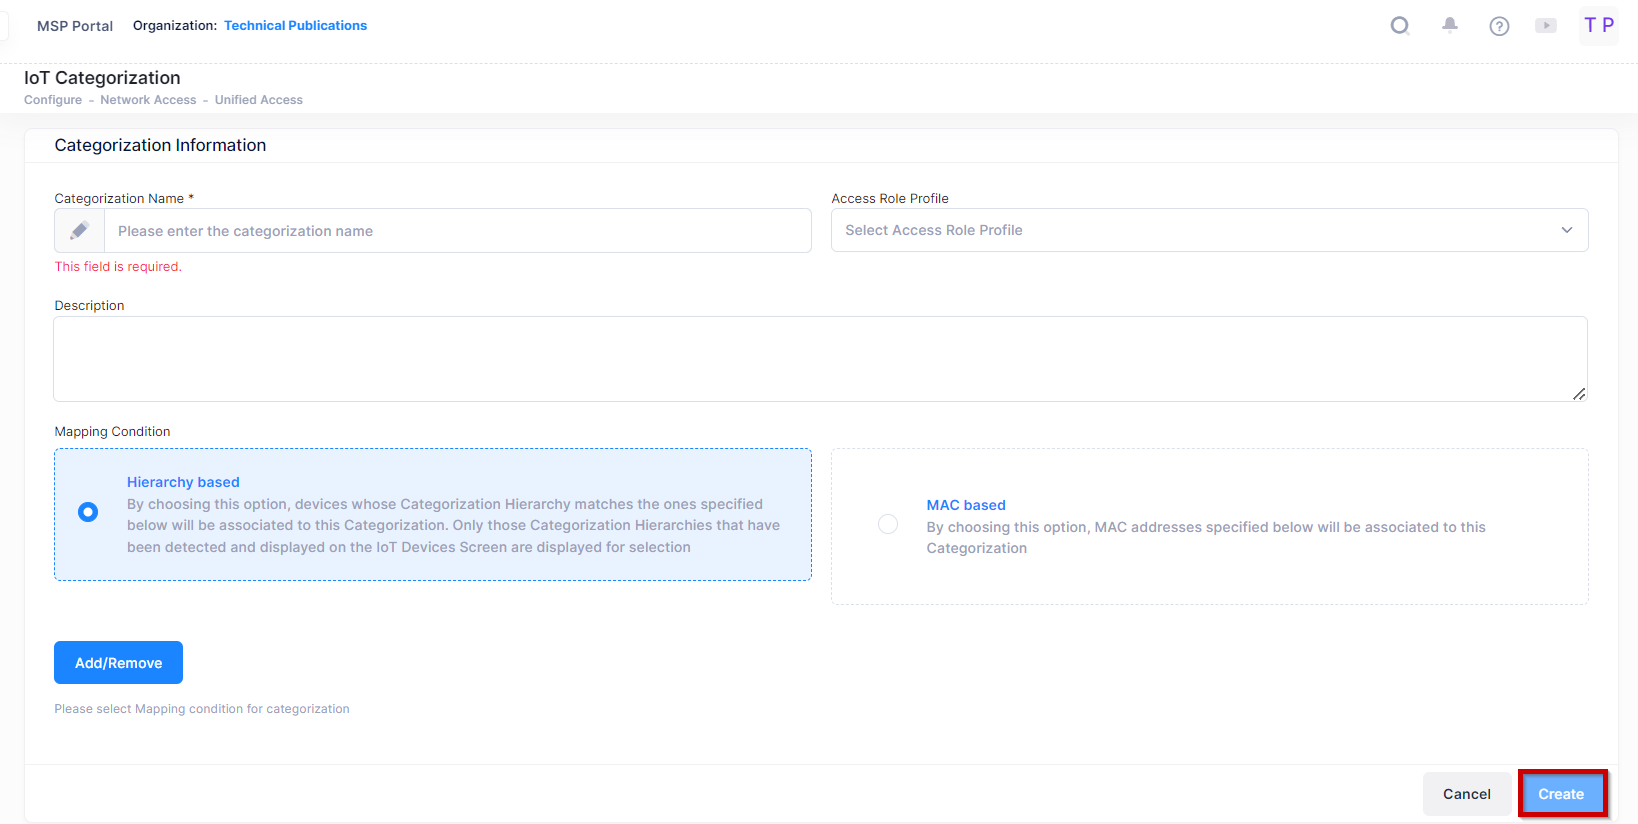
Click on the Create IoT Categorization icon and complete the fields as described below.
-
Categorization Name - A name for the Custom Category.
-
Description - An optional description for the category.
-
Access Role Profile - Select the required Access Role Profile.
-
Mapping Conditions - You can create a Custom Category based on an existing category (Hierarchy Based) or create a Custom Category based on MAC Address (MAC Based).
-
Hierarchy Based - Click on the Add/Remove button to bring up a list of categories. Only those category hierarchies that have been detected and displayed on the Inventory Screen are displayed for selection. Add/Remove categories to create the Custom Category.
-
MAC Based - Enter a MAC Address of the categorization and click on the Add icon (+). Repeat to add additional MAC Addresses. Click on the Delete icon (x) to remove a MAC Address from the Custom Category.
-
The new Custom Category will appear at the bottom of the Category List. The Custom Category will be displayed for any online devices in the Inventory List matching the new category.
When you are finished, click on the Create button.
-
DHCP should be enabled on Client for IoT Categorization.
-
Device Categorization depends on the Fingerbank API, which requires Internet connectivity. In the absence of Internet access, client devices may not be categorized.
Editing an IoT Category
Select an IoT Category name in the list and click on the Edit icon to bring up the Edit IoT categorization Screen . Edit the field(s) as described above, and click on the Save button.
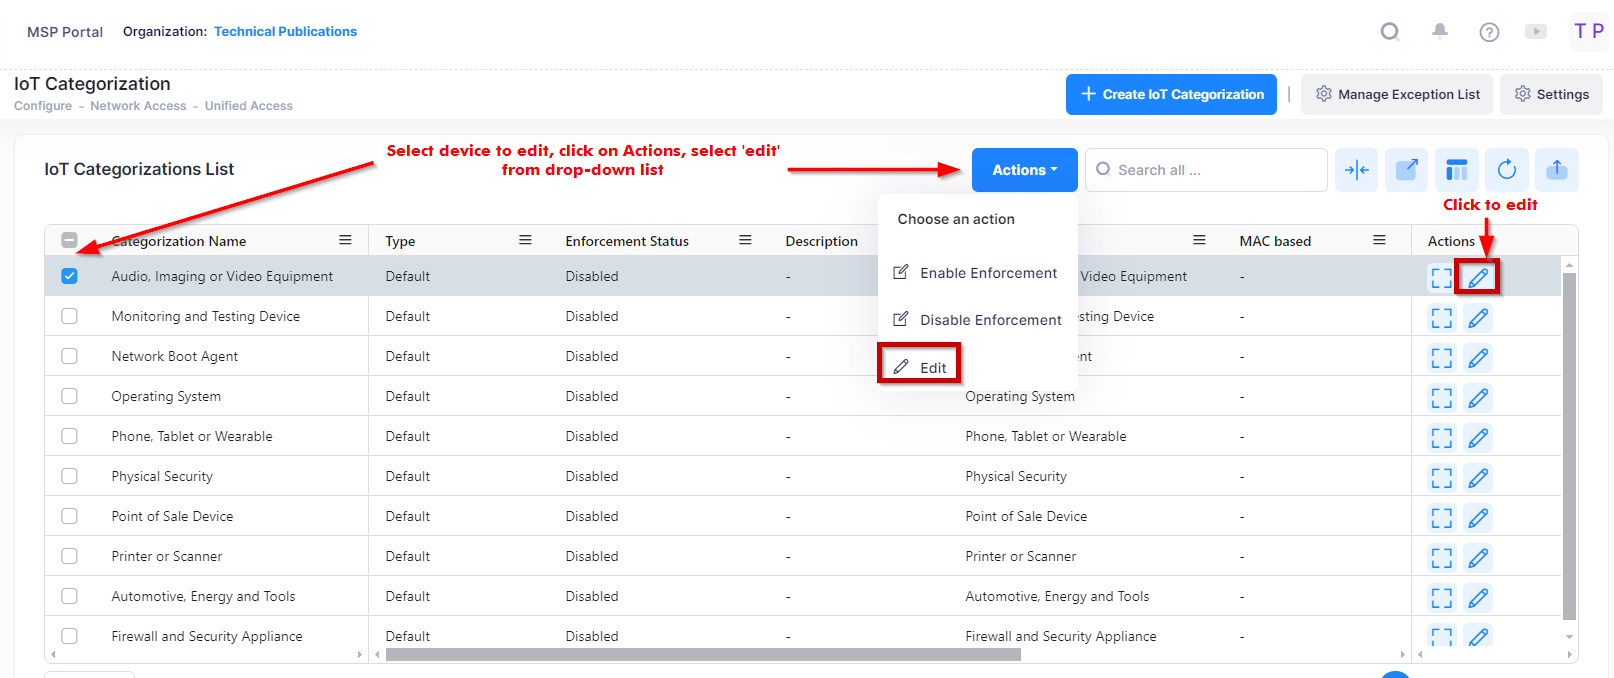
Use one of the following methods to access the Edit IoT categorization screen (as shown above):
-
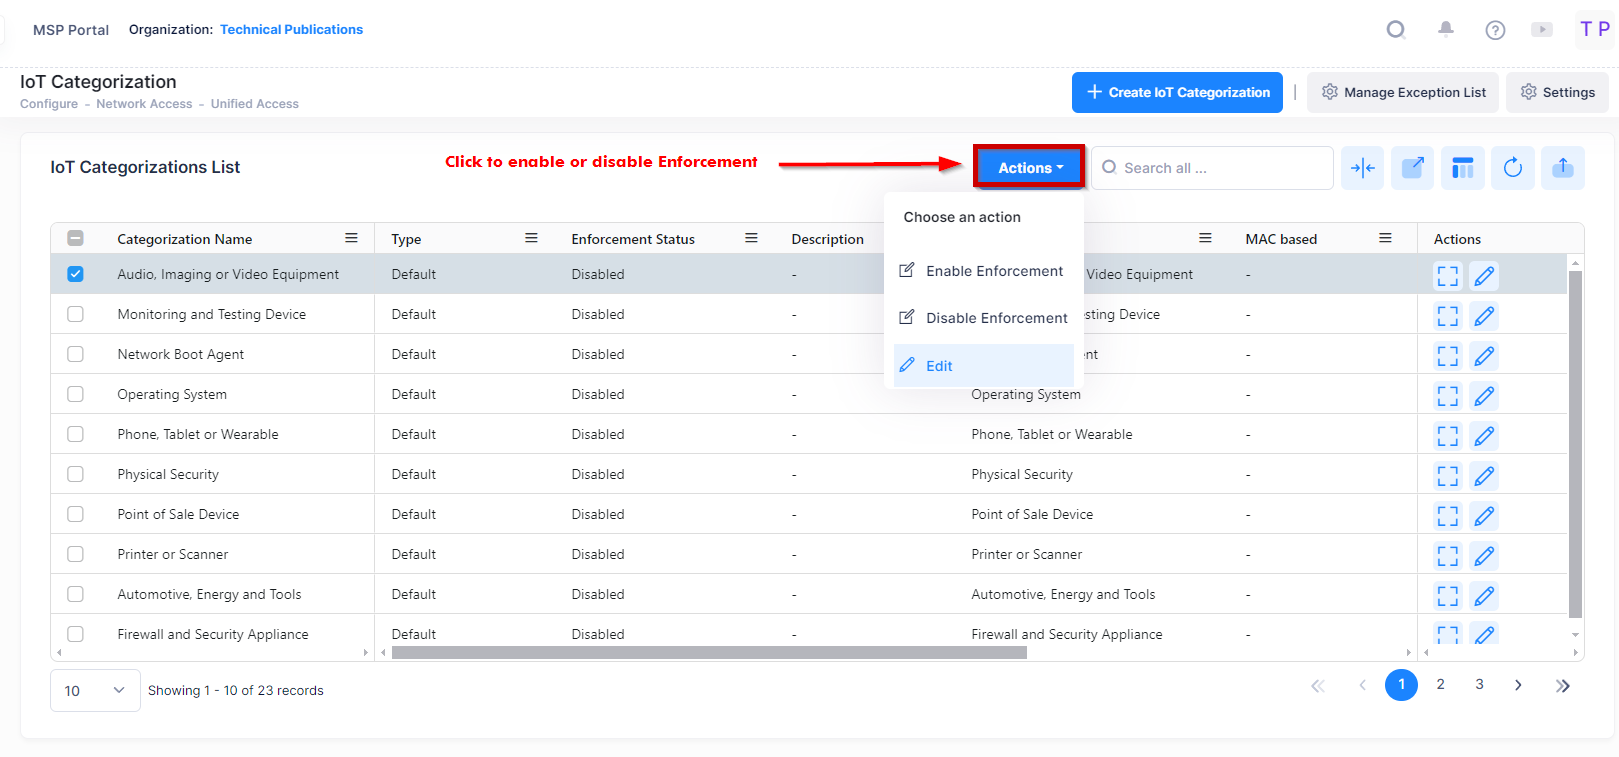
Select the name to edit by clicking on the checkbox next to the profile, click on Actions, then select Edit from the drop-down menu.
-
Click on the pencil icon under the “Actions” column next to the name that you want to edit.
Edit the fields as described above, then click on Save.
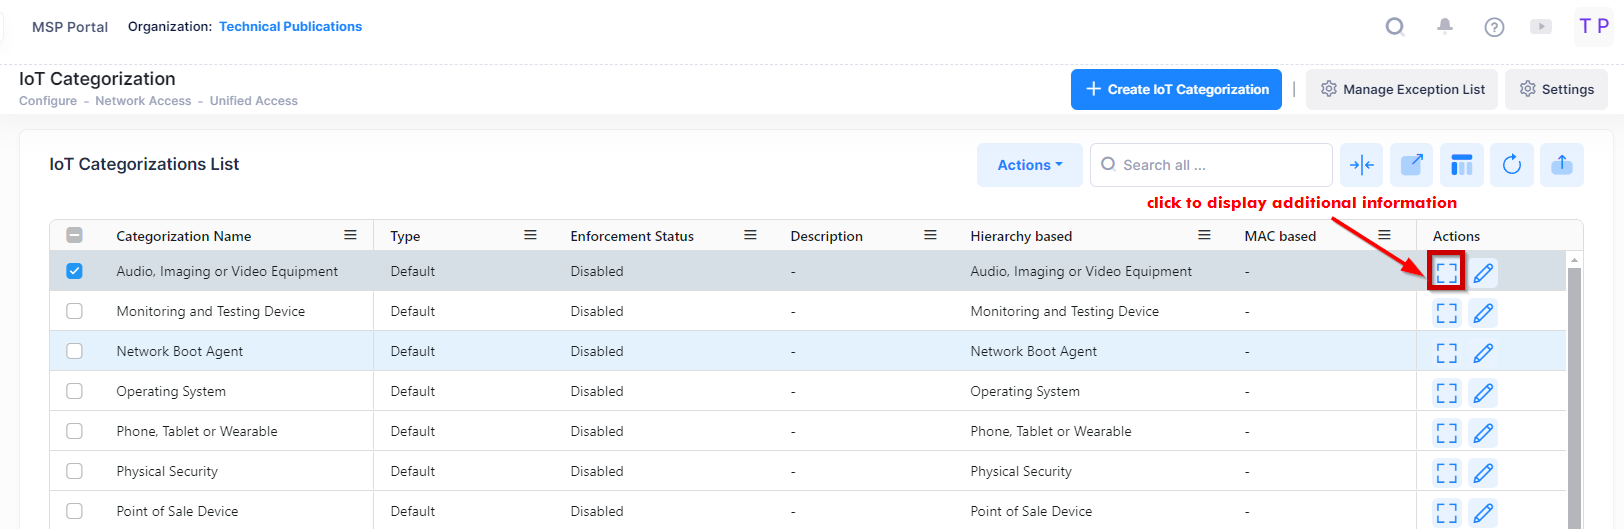
View Additional Information of an IoT Category
Select the IoT Category name in the list and click on the Additional Information icon to view additional information of the IoT Category data.

Deleting an IoT Category
Select an IoT Category name and click on the Delete icon. Click Delete at the Confirmation Prompt. Any devices matching the deleted Custom Category in the Inventory List will revert to the applicable default category.
Configuring IoT Enforcement
The IoT Enforcement feature enables you to authenticate devices by associating a Category with an Access Role Profile. Once a device accesses the network and is categorized, the assigned Access Role Profile is applied to the device. You can associate different Access Role Profiles with different categories; and you can enable automatic or manual enforcement Categories.
You can also specify exceptions for specific devices by SSID, MAC address, AP Group, or IP address. When a device matching one of these exceptions is categorized, it will not be subject to IoT enforcement configured for its category.
Consider the following while configuring the IoT Enforcement:
-
For MAC and 802.1X Authentication, Omni Vista Cirrus will apply IoT Enforcement only if the authentication is successful.
-
The IoT based profile will not be applied if authentication fails.
-
The above two criteria do not apply to Captive Portal authentication.
Automatic IoT Enforcement
Automatic Enforcement can be set from the Settings button at the top of the IoT Categorizations List screen.
Enable Automatic Enforcement and click on Save button to enable automatic enforcement.
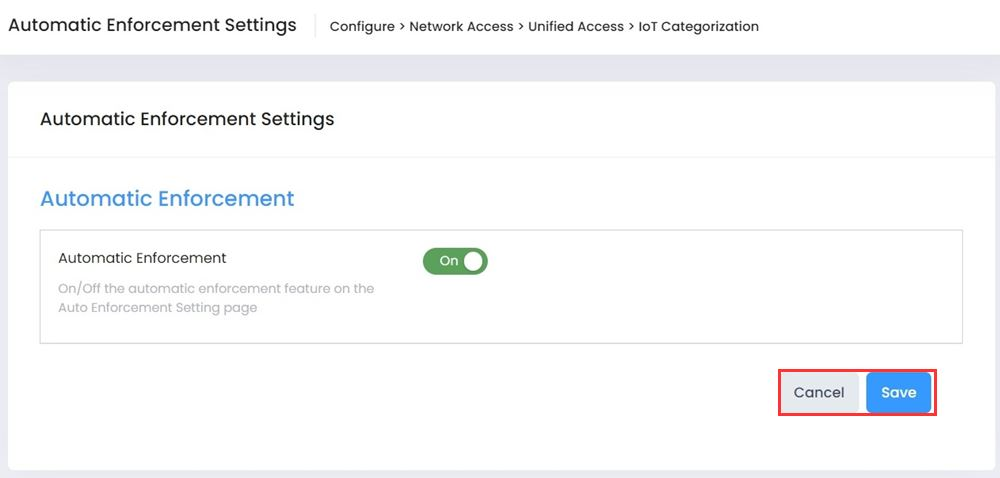
If you change Automatic Enforcement from "On" to "Off", enforcement will continue for any device on which enforcement was previously enabled, unless you manually disable enforcement for the Category used for the device, or if the device re-initializes or roams to another AP. If you change Automatic Enforcement from "Off" to "On", Automatic Enforcement will only be applied to devices that connect to the network and match a configured Enforcement Category after you enable Automatic Enforcement. If you delete a Category/ARP mapping, the new mapping configuration will be applied the next time an endpoint reconnects to an AP.
Manual IoT Enforcement
If Automatic Enforcement is disabled (Off), Access Role Profiles assigned to Categories are not applied to devices. However, you can manually enable IoT Enforcement for specific Categories. With the Automatic Enforcement button at the top of the screen set to "Off", select a Category(ies) and click on the Action button at the top of the Category List and select Enable Enforcement. The Enable Enforcement window will appear. Click on OK to Enable Enforcement.
-
Manual Enforcement is applied to currently-connected clients only. If Automatic Enforcement is "Off", you must apply enforcement manually whenever IoT-based enforcement is desired.
-
After enabling manual enforcement for a Category(ies), if an endpoint roams to another AP or re-initializes, there will be no IoT Enforcement for that Category. You must disable Enforcement of the Category and enable it again to apply IoT enforcement manually to currently-connected endpoints.
Configuring IoT Enforcement Exceptions
You can specify exceptions for specific devices by SSID, MAC address, AP Group, or Device. When a device matching one of these exceptions is categorized, it will not be subject to IoT enforcement configured for its category. To create IoT Enforcement exceptions, click on the Manage Exception List button at the top of the screen to bring up the Exception List Screen. Add SSID(s), MAC address(es), AP Group(s), or Device(s) to the exception list as described below and click on the Save button.
If an endpoint is initially configured for Enforcement and later added to the Exception List, the endpoint can remain assigned to the Enforcement Access Role Profile because the AP will cache the Enforcement Access Role Profile and reapply it to the endpoint if it reconnects. To add a device that was assigned to an Enforcement Access Role Profile to the Exception List, first remove Enforcement from the endpoint, then add it to the Exception List.
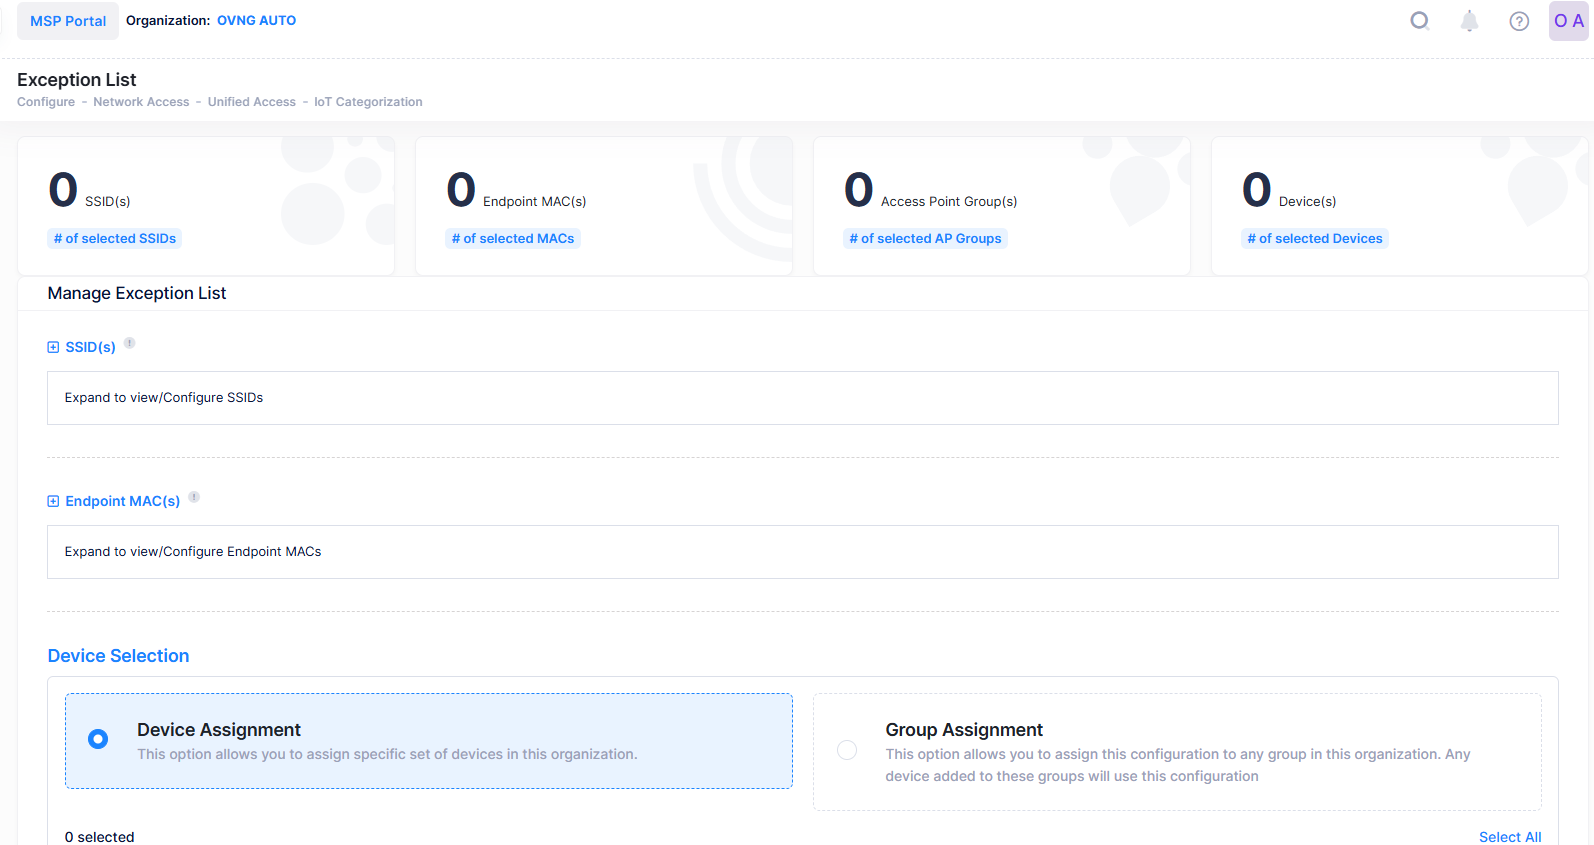
The Summary at the top of the Exception List displays the number of SSID(s), Endpoint MAC(s), AP Group(s), and Device(s) that have been added to the Exception List. Click on one of the items or scroll down to add/remove devices from the Exception List.
SSID(s)
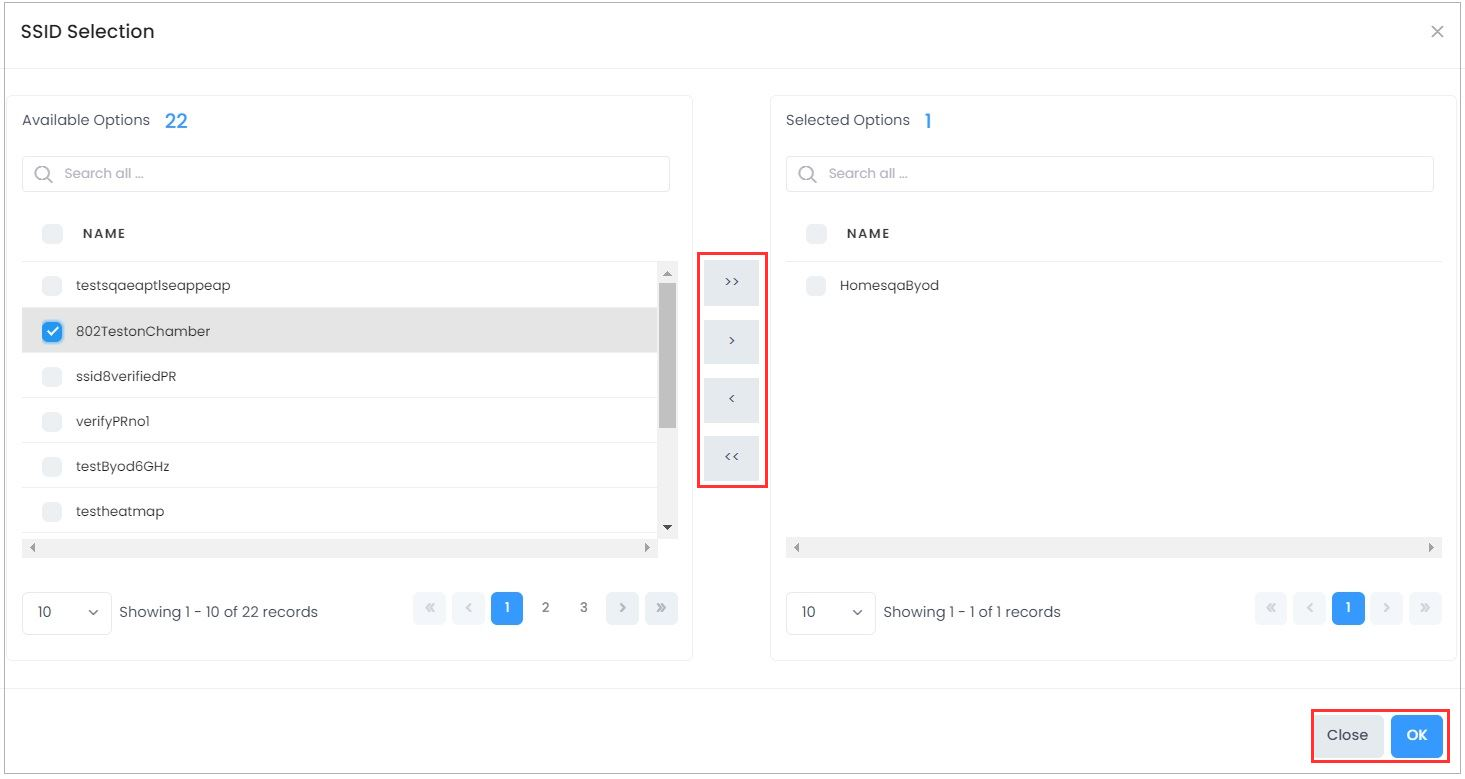
To add devices associated with an SSID to the Exception List, click on the Change Selection button to bring up the SSID Selection window. Select an SSID(s) and click on the Arrow button, then click on OK to add the SSID(s) to the Exception List. To remove an SSID(s) click on the Change Selection button to bring up the SSID Selection window. Select an SSID(s) and click on the Arrow button, then click on OK to remove the SSID(s) from the Exception List.
Endpoint MAC(s)
To add devices by MAC address to the Exception List, click on the Change Selection button to bring up the MAC address Selection window. Select an MAC address and click on the Arrow button, then click on OK to add the MAC address to the Exception List. To remove a MAC address click on the Change Selection button to bring up the MAC address Selection window. Select an MAC address and click on the Arrow button, then click on OK to remove the MAC address from the Exception List.
AP Group(s)
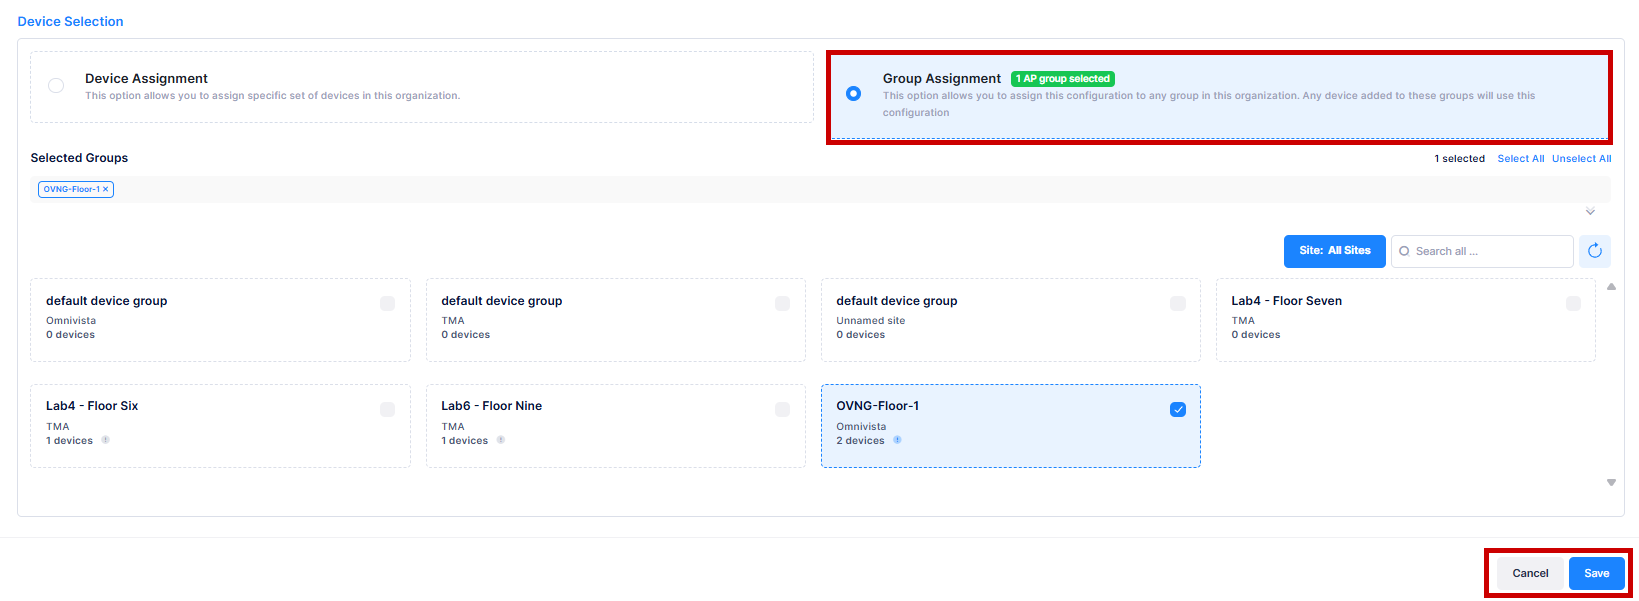
To add devices associated with APs in an AP Group to the Exception List, click on the Group Assignment tab and select AP Group from the available list to assign this configuration to the group associated with the Organization.
Device Selection
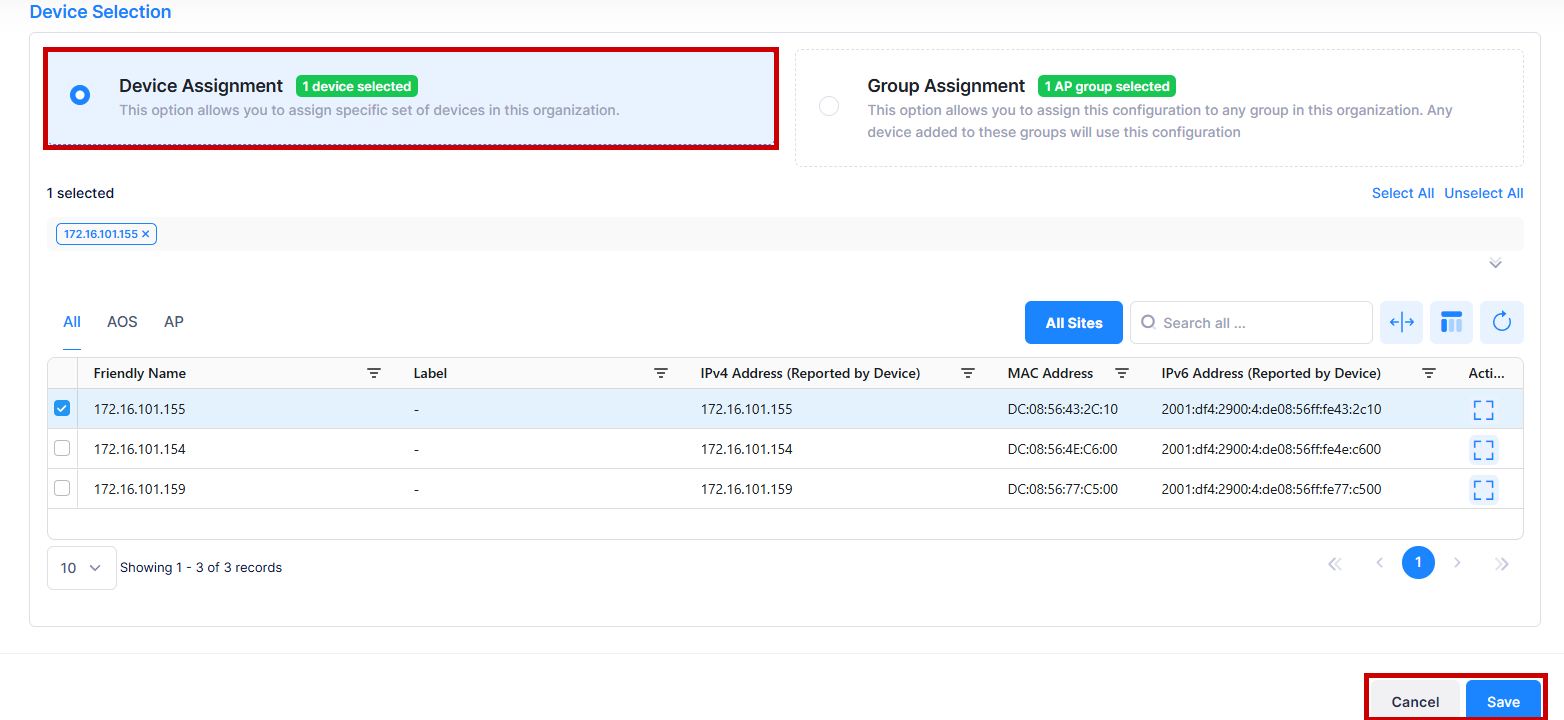
To add a specific device or set of devices to the Exception List, click on the Device Assignment tab and select device(s) from the available list to assign the specific device(s) to this Organization.