The Walls Definition screen is where new walls are declared by drawing the wall on the selected floor.
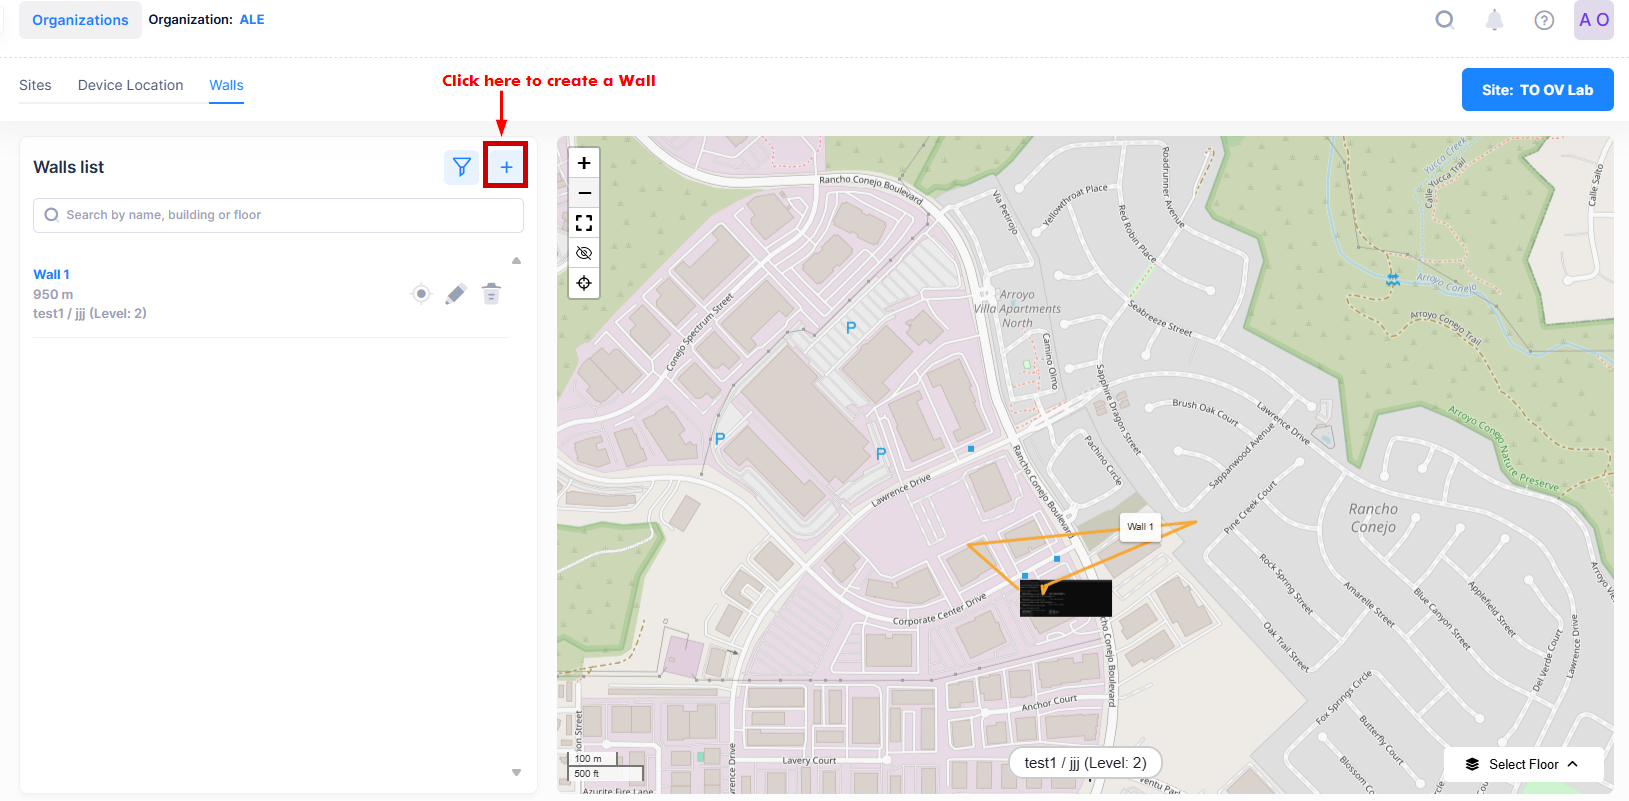
To draw a wall, click on “+” on the Walls list panel.
After you click on “+”, move your mouse to the floorplan on the right. You will see that the pointer of the cursor has changed. Simply click somewhere on the map to start drawing the wall.
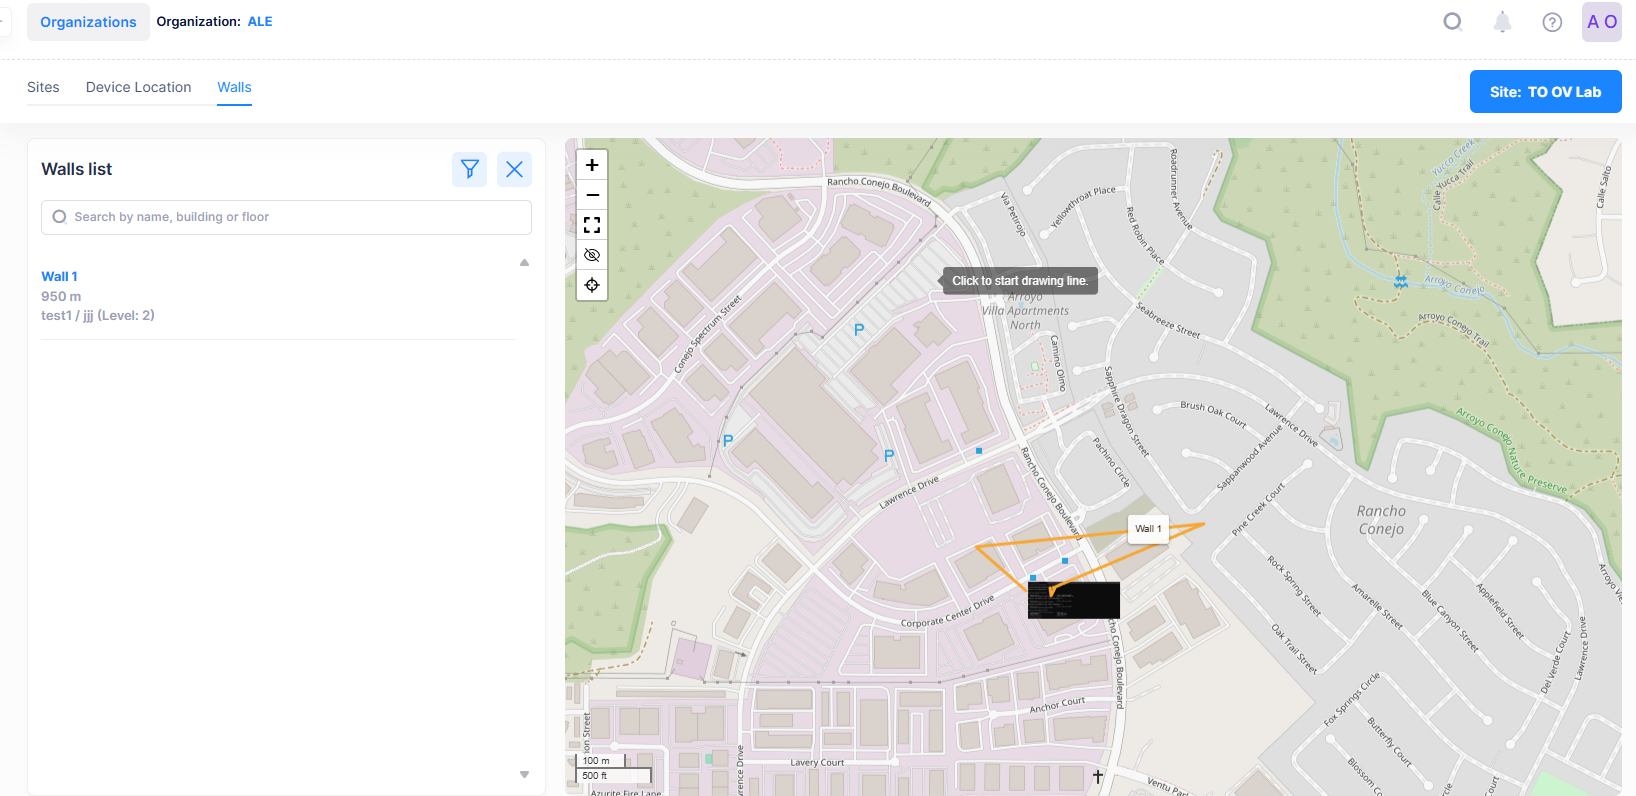
Continue to draw your wall by clicking along the wall on the floorplan. When finished, click a second time on the last point to terminate the drawing:
The Wall attributes modal is automatically displayed.
-
Name - The wall name (a default name is shown, but is configurable).
-
Wall Type - The type of the wall. Select the wall type from a list of types in the drop-down menu. There is a specific color could be assigned to a wall type.
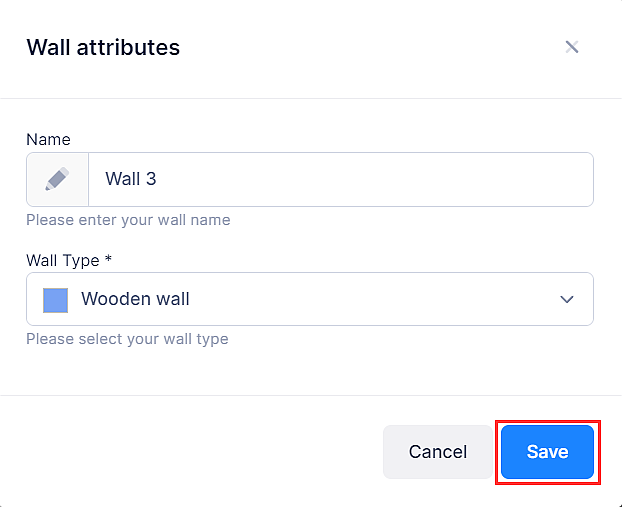
After defining the wall attributes, click on Save to add the wall to the Walls list panel.

From the Walls list panel, three actions are available for each wall:
-
Highlight wall - Click here to automatically locate this wall on the floorplan.
-
Edit wall - Click here if you want to change the wall attributes or redraw the wall. More information on this page.
-
Delete wall - Click here to delete the wall. More information on this page.