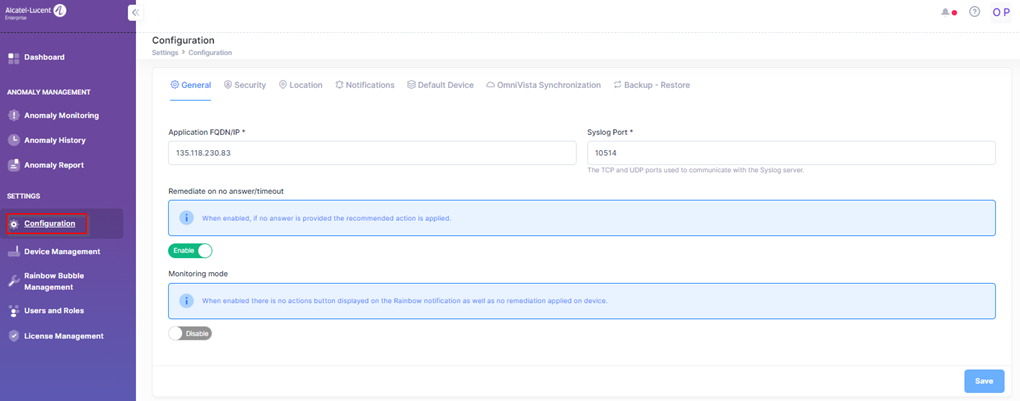
The Configuration screen is where you can view, configure, and backup the application settings for Network Advisor. To access this screen, click on Configuration under the “Settings” section of the Network Advisor Dashboard.
This screen is divided into multiple sections:
-
General – Configure general application settings for Network Advisor (Application FQDN/IP, syslog Port, automatic remediation, monitoring mode).
-
Security – Configure Two-Factor Authentication (2FA) settings.
-
Location – Configure application settings to define the location of your Network Advisor application.
-
Notifications – Specify Rainbow and SMTP settings that are used for Network Advisor notifications.
-
Default Device – Define the connection and login information that is used by default for monitored devices.
-
OmniVista Synchronization – Activate the synchronization of data between Network Advisor and OmniVista.
-
Backup - Restore – Manage Network Advisor configuration backup files.
Note: The first time you start the Network Advisor application, you are prompted to enter information about your Network Advisor configuration. The information you enter during startup will be used as default values for some of the fields in the various configuration sections. For example, the time zone and first day of the week that you entered during installation, appear as the default values in the Location section.
General Configuration
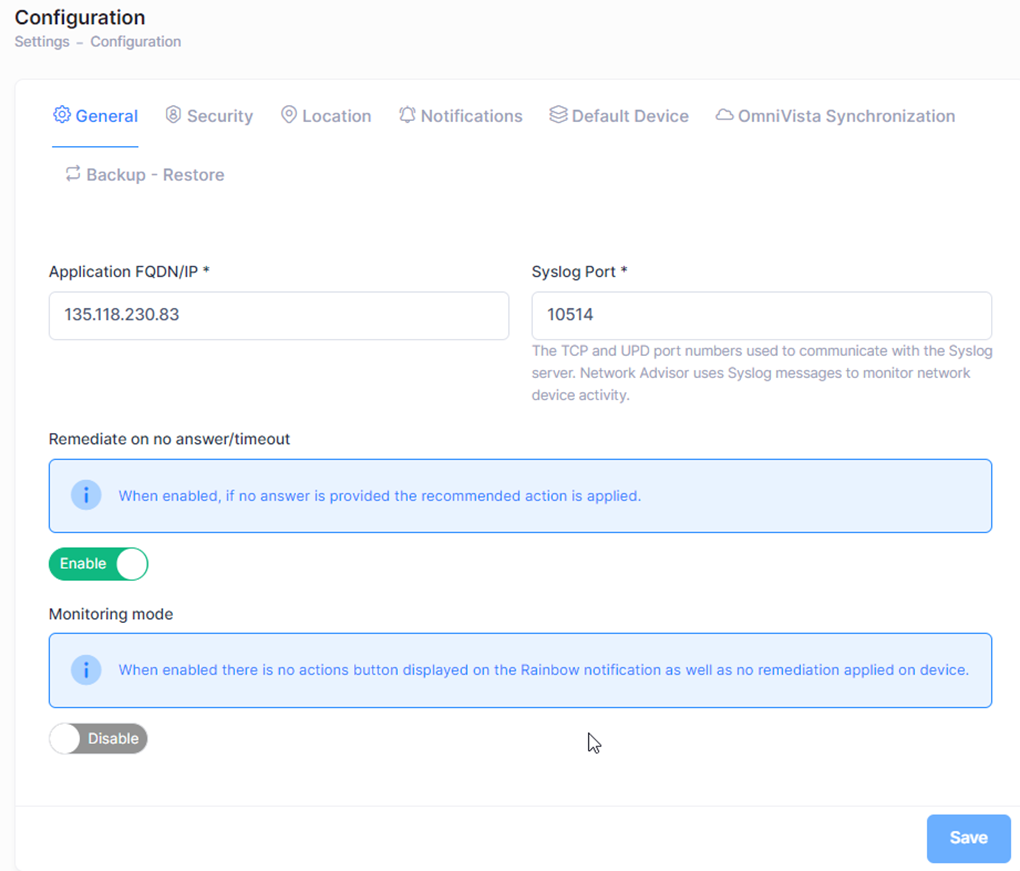
The Configuration section is displayed by default and allows you to configure the following general application settings for Network Advisor:
-
Application FQDN/IP – The IP address of your Network Advisor installation.
-
Syslog Port – The port number used to communicate with the syslog server. Network Advisor uses syslog messages to monitor network device activity.
-
Remediate on no answer/timeout – When enabled, if no answer is provided the recommended action is applied. (Default = Disabled)
-
Monitoring Mode – When enabled, there is no actions button displayed on the Rainbow notification as well as no remediation applied on device. (Default = Disabled)
Click Save to retain any changes that you have made.
Security
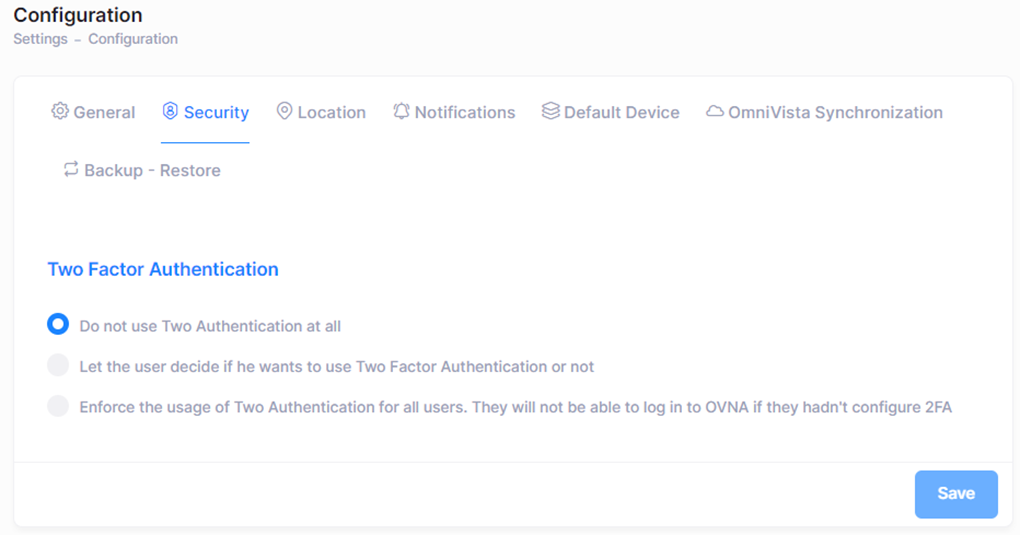
The Security section allows for configuring Two-Factor Authentication (2FA).
-
Do not use Two-Factor Authentication at all – Do not use 2FA for any users.
-
Let the user decide – Allow individual users to choose whether to use 2FA.
-
Enforce the usage of Two-Factor Authentication – Force all users to use 2FA.
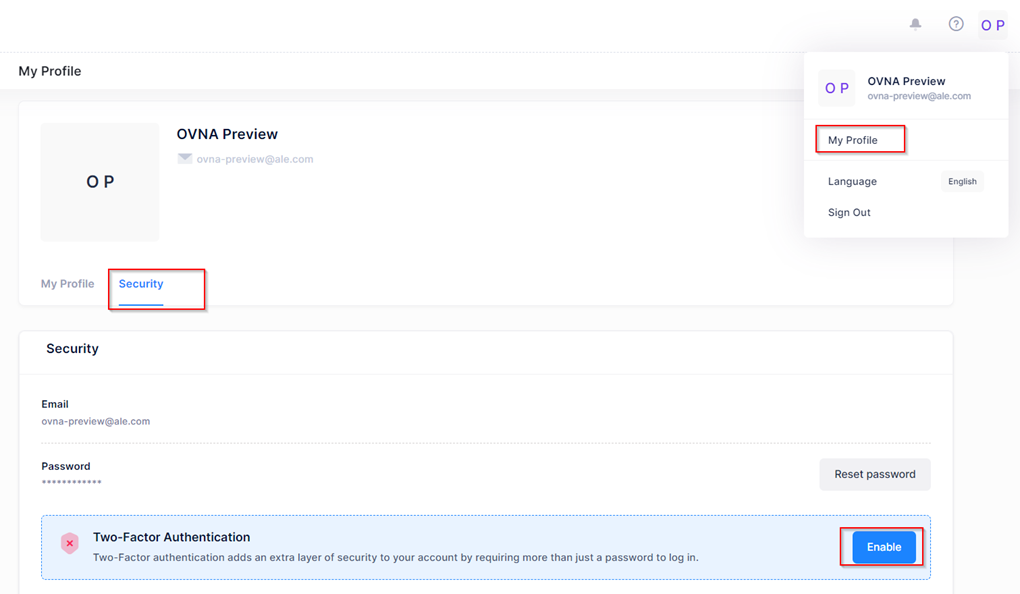
To configure 2FA for a user click on the user initials in the top-right corner and choose My Profile from the dropdown menu, choose the Security tab and then click Enable 2FA.
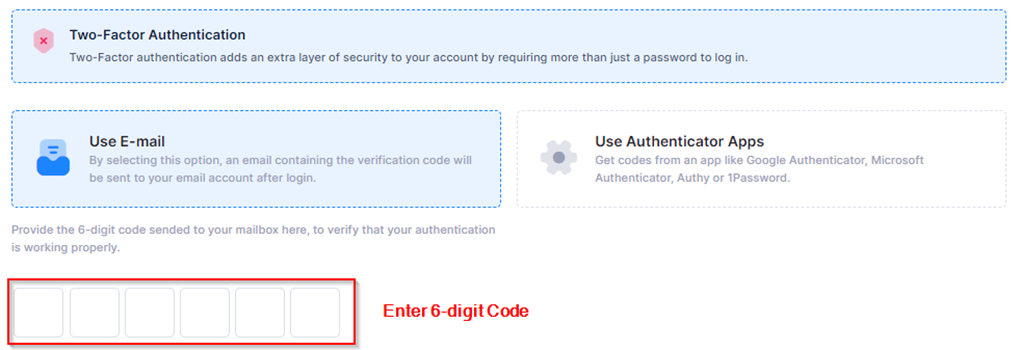
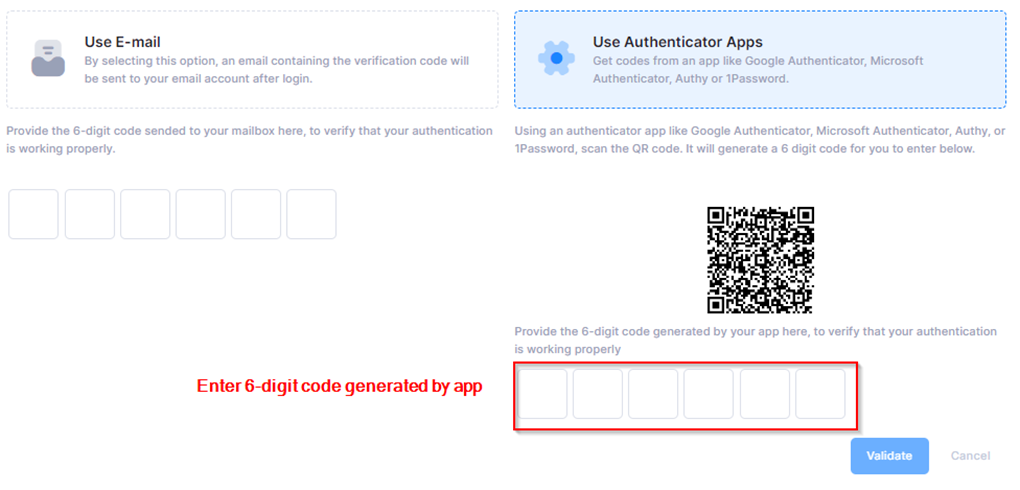
There are two 2FA methods that can be configured:
-
Use E-mail – Enter a 6-digit code and click Validate.
-
Use Authenticator Apps – Use an authenticator app such as Google or Microsoft Authenticator, enter the 6-digit code provided and click Validate.
Location
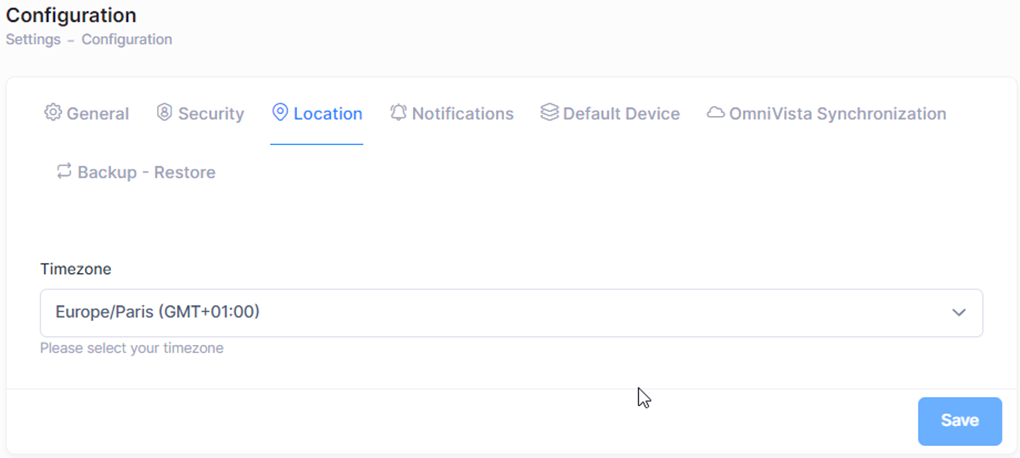
The Location section allows you to configure the following settings:
-
Timezone – Select your timezone from the drop-down menu.
Click Save to retain any changes that you have made.
Notifications
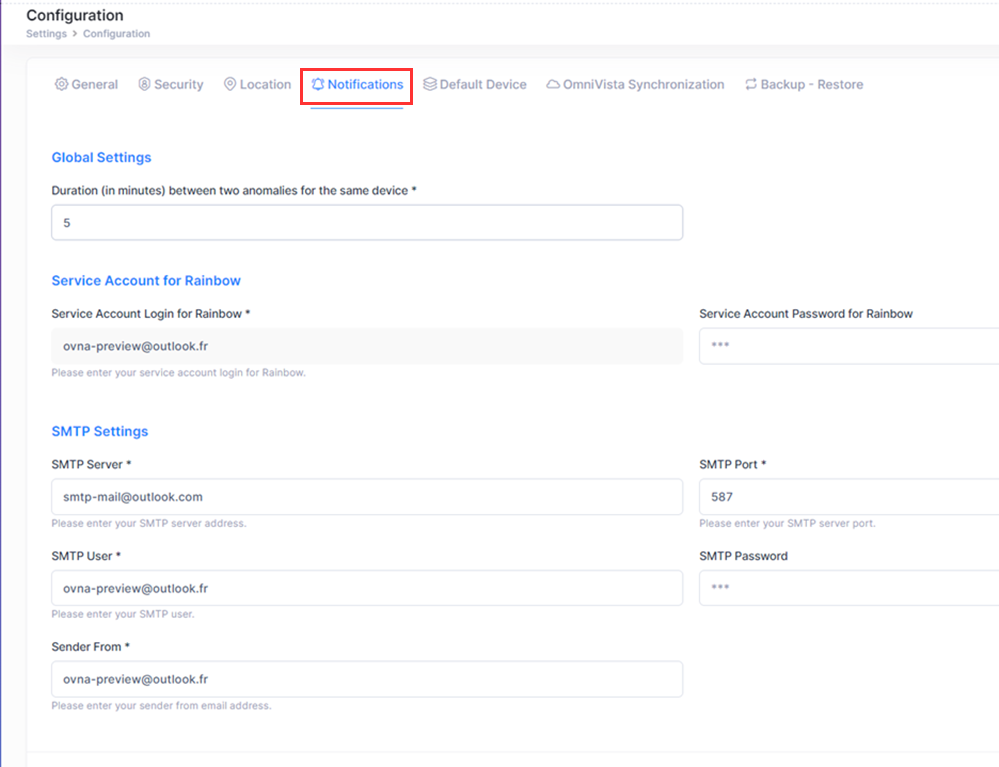
The Notifications section allows you to configure the following Rainbow and SMTP settings:
Rainbow Settings
-
Global Settings– The Rainbow notification delay timer in minutes.
If the same anomaly is detected on the same IP address, a notification is not sent to Rainbow. Notifications are only repeated after 10 minutes. This default delay can be configured in minutes, with a minimum of 1 minute, allowing you to set the alert frequency on Rainbow according to your needs. -
Service Account Login for Rainbow – The email address of a valid Rainbow user.
-
Service Account Password for Rainbow – The Rainbow password for the Rainbow account. For security reason, the user's email address associated with the specified password is not displayed in the user interface.
SMTP Settings
-
SMTP Server – The FQDN or IP address of the SMTP Server (for example, smtp.gmail.com).
-
SMTP Port – The SMTP Port number (for example, 587 for TLS with Gmail, 465 for SSL).
-
SMTP User – The email address to use for sending SMTP messages.
-
SMTP Password – The Rainbow password for the Rainbow account. For security reason, the user's email address associated with the specified password is not displayed in the user interface.
-
Sender From – Email address used as “From” address for sending mails. Should match your SMTP server configuration.
Click Save to retain any changes that you have made.
Default Device
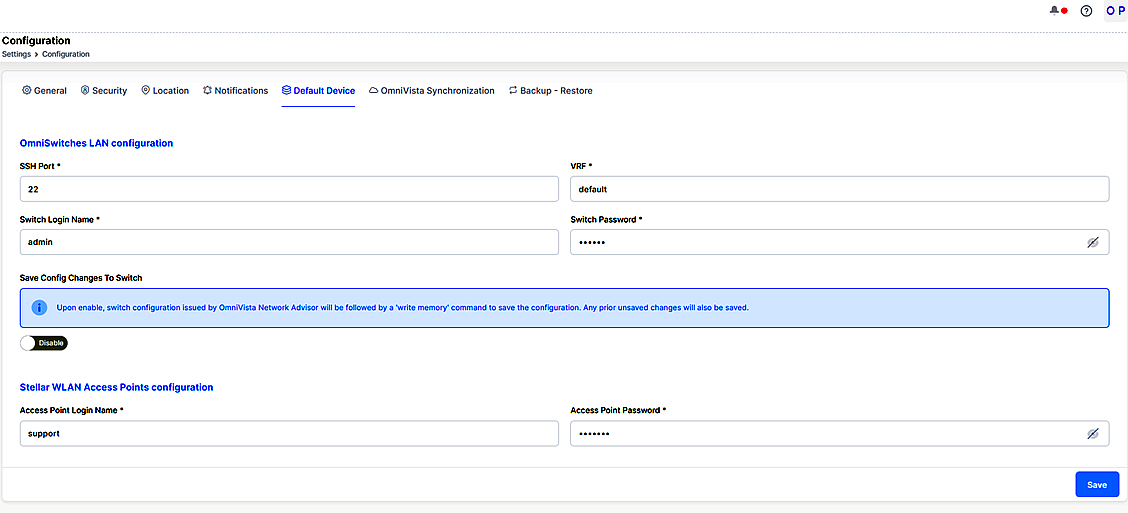
The Default Device section of the Configuration screen allows you to define the following default login information for OmniSwitch and Access Point devices that Network Advisor will monitor:
OmniSwitches LAN Configuration
-
SSH Port – The Secure Shell port number to use for secure connections to a network device.
-
VRF – The VRF instance to use when monitoring an OmniSwitch.
-
Switch Login Name –The username to use for logging into an OmniSwitch.
-
Switch Password – The password to use for logging into an OmniSwitch.
-
Save Config changes to the switch –Enable this option in OmniVista Network Advisor to ensure that the switch configuration issued by OmniVista Network Advisor is followed by the "write memory" command to save the configuration. This will also save any prior unsaved changes.
Stellar WLAN Access Points Configuration
-
Access Point Login Name – The username to use for logging into a Stellar Access Point.
-
Access Point Password – The password to use for logging into a Stellar Access Point.
Note: The SSH port, switch login/password, and AP login/password default values are overridden by values set for individual devices through the Device Management screen.
OmniVista Synchronization
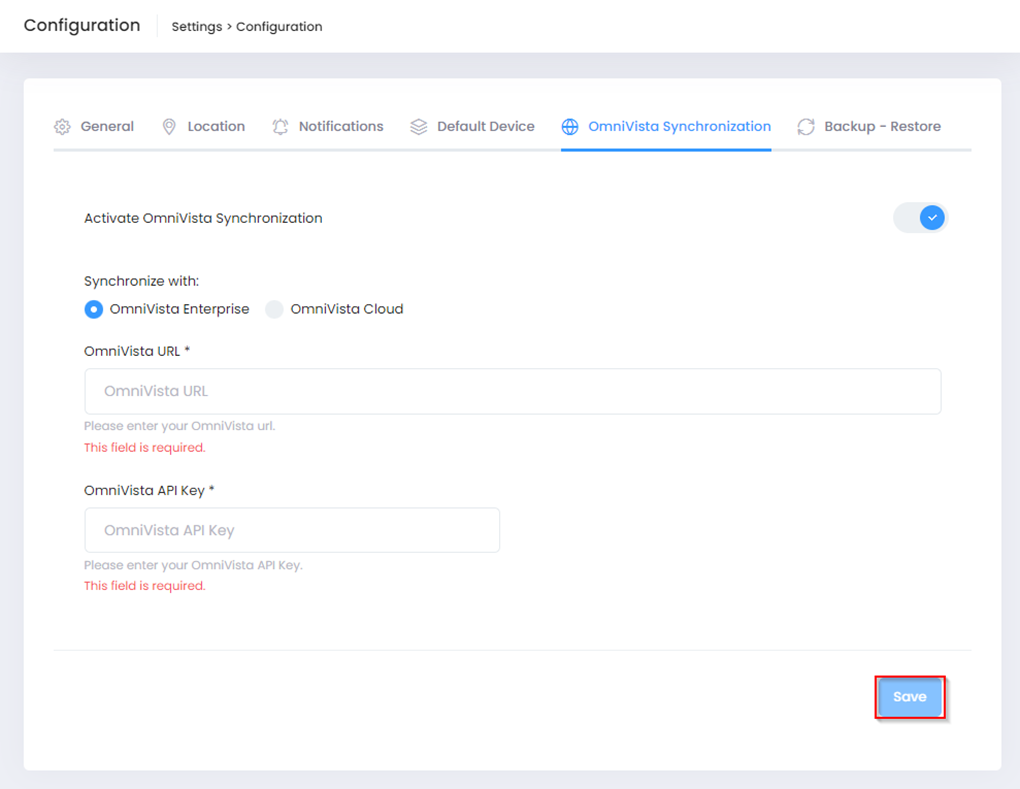
The OmniVista Synchronization section is used to specify identifying OmniVista information and activate the synchronization of data between OmniVista and Network Advisor. Complete the following fields as described and click Save to activate the synchronization.
-
Activate OmniVista Synchronization – Enables/disables the synchronization of data between OmniVista and Network Advisor
-
Synchronize with – Select OmniVista Enterprise or OmniVista Cloud.
-
OmniVista URL – Enter the URL for the selected OmniVista installation.
-
OmniVista API Key – Enter the API key for the selected OmniVista installation. See Where is the OmniVista API Key.
Important Note: There is one URL/API key association for each OmniVista installation. A single OmniVista installation can support assigning multiple Network Advisor instances, but a single Network Advisor instance only supports synchronization with one OmniVista installation.
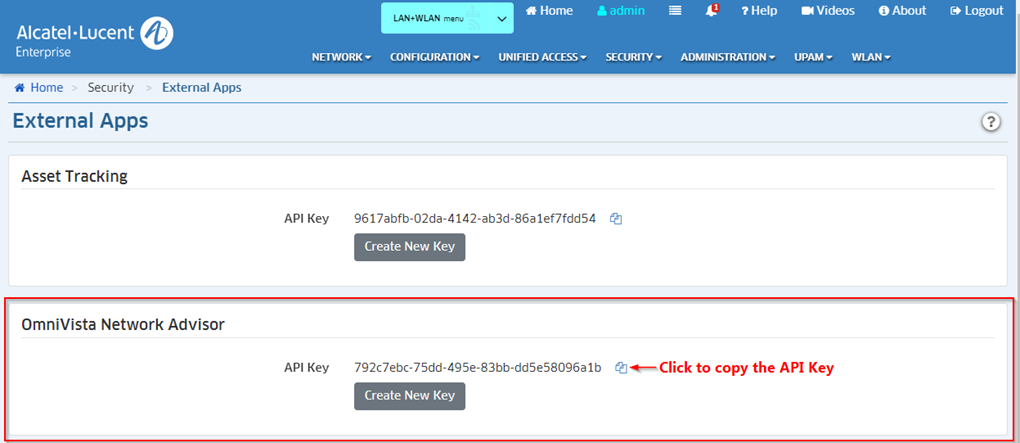
Where is the OmniVista API Key
To obtain the API Key for the OmniVista Enterprise or OmniVista Cloud installation, go to the External Apps screen (Security - External Apps). Copy the API Key from this screen and paste the key into the “OmniVista API Key” field on the Network Advisor OmniVista Synchronization screen, as described above.
Backup – Restore
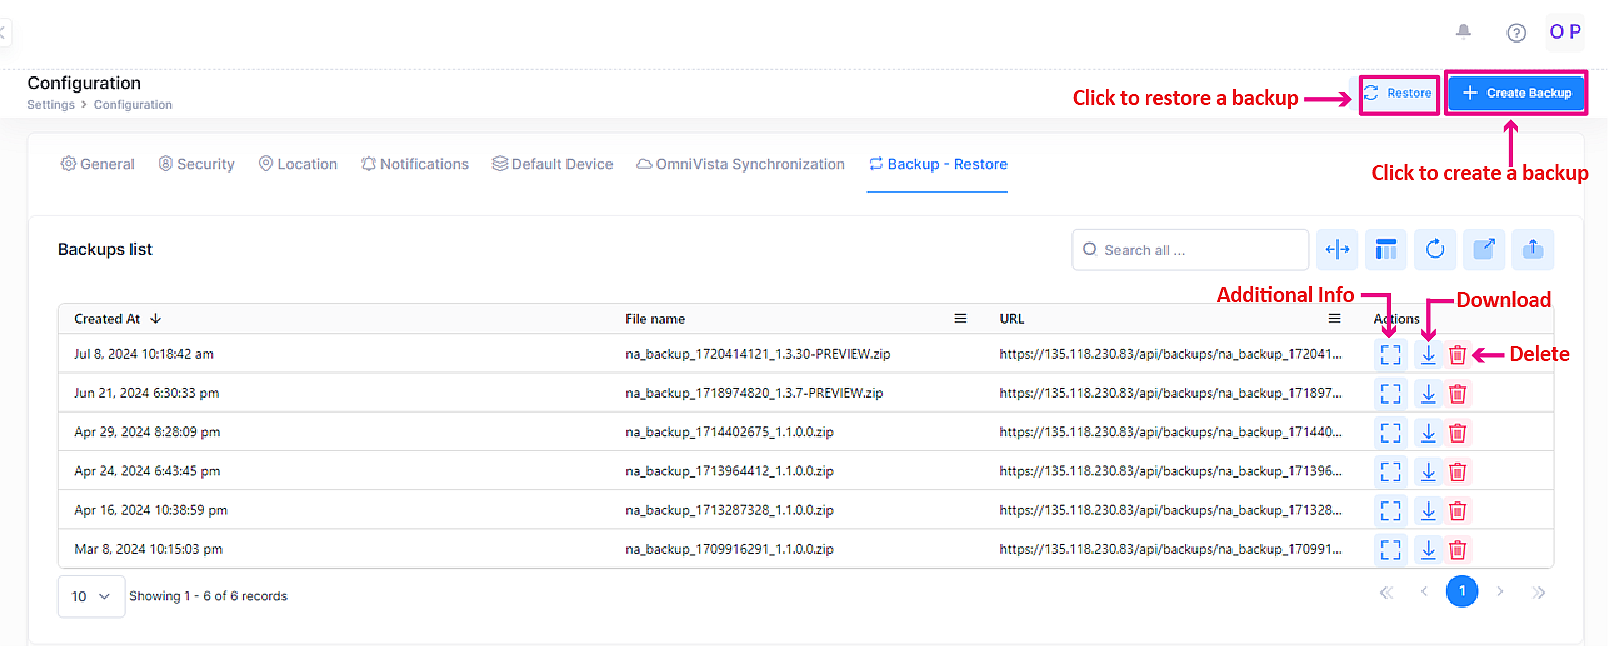
The Backup - Restore section of the Configuration screen provides the following functionality to manage the Network Advisor configuration:
-
Restore – Click to select a backup file from which to restore a Network Advisor configuration.
-
Create Backup – Click to back up the current Network Advisor configuration.
The Backups List provides the following information about each backup file:
-
Created At – The date and time the configuration backup file was created.
-
File Name – The name of the backup file.
-
File URL – The URL for the backup file.
Next to each backup file entry, there are icons under the “Actions” column that you can click on to view additional information, download a backup file, or delete a backup file.
-
Additional Information - Click to view all information related to the file.
-
Download – Click to select a location to which you want to download the backup file.
-
Delete – Click to delete the backup file.