Appendix E - Microsoft Teams Bot Setup Guide
This document provides step-by-step guidance for configuring your Microsoft Teams environment to enable integration with OmniVista Network Advisor. Complete the setup instructions before installing OmniVista Network Advisor, as the MS Teams configuration will generate essential information and IDs needed during the setup process.
The appendix outlines the prerequisites and steps required to create a Microsoft Teams bot linked to Microsoft Entra ID.
Key prerequisites include having a Microsoft company account with admin rights, obtaining a Microsoft license that includes Entra ID, and ensuring a public URL for Network Advisor.
Audience
Any technician involved in the deployment of OmniVista Network Advisor and Microsoft Teams:
ALE partners
Customers IT service, administrators, field engineers
ALE Technical Support
Prerequisites
Microsoft Company account
All the steps described in this document need to be executed with a Microsoft company account (with administrator rights on a company)
Microsoft License
Get a Microsoft license for a product which comes with at least Microsoft Entra ID.
Such products include, but are not limited to:
Standalone Microsoft Entra P1, P2
Standalone Microsoft Entra Suite
Microsoft 365 E3, E5
Microsoft 365 Business Premium
Public URL to reach Network Advisor
A public URL with a defined port exposed on the Internet must be accessible to allow MS Teams to reach your Network Advisor application.
Ex: https://omnivista.network-advisor.yourdomain.com/msteams
This is the way MS Teams will inform Network Advisor that an action is required following a notification.
Ex: Apply remediation, Collect Logs, Acknowledge…
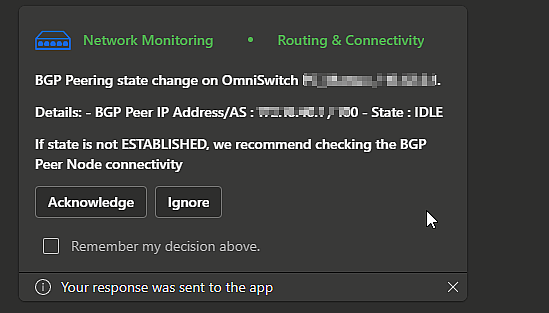
The process is divided into four phases:
Each phase includes detailed steps to guide users through the setup process, emphasizing the importance of securely recording IDs and client secrets.
Phase 1 of 4: Creating the Entra App and Teams Bot
You will need to create an App registered into Entra ID and link a Teams Bot to this app. Then you will be able to add the bot to your team channel to send anomaly notifications.
Step 1 of 6: Go to Microsoft Teams’s dev page (https://dev.teams.microsoft.com/ ) and login with your company’s admin account.
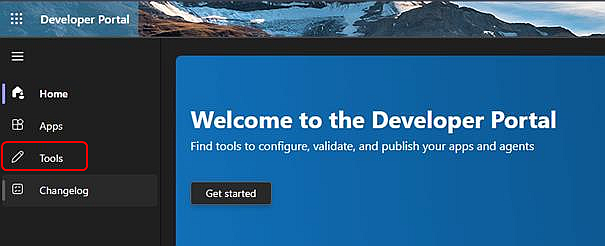
Step 2 of 6: In the sidebar, navigate to Tools → Bot Management

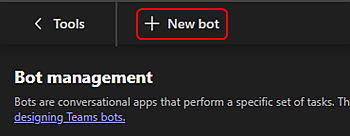
Step 3 of 6: Click “New bot”
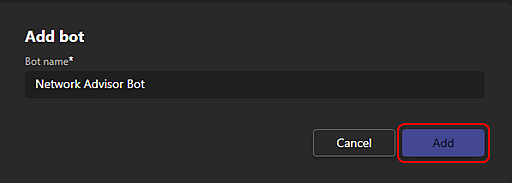
Step 4 of 6: Choose a name for your bot, then click “Add”
Be careful as this name will also be the name of your Entra ID app and the display name of your bot in MS Teams, so choose an easily identifiable name.
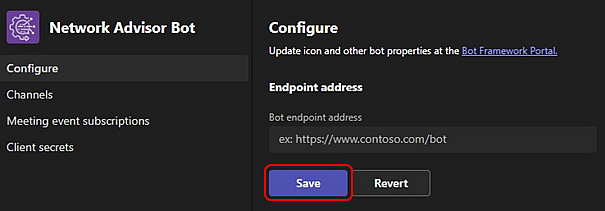
Step 5 of 6: Add your bot endpoint
This is the URL at which your bot will be hosted. It will also receive messages and requests from Microsoft Teams through that address.
Make sure the endpoint is publicly accessible and follows this format:
Ex: https://omnivista.network-advisor.yourdomain.com/msteams
If your bot is hosted locally, you can use tunneling tools like ngrok to create a temporary public URL for testing purposes. This URL will later need to be replaced with the final production endpoint when the bot is deployed.
Then click “Save.”
Step 6 of 6: Add a secret for your app.
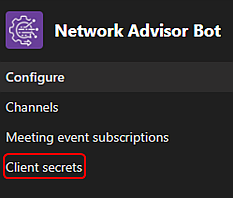
On the side menu, click on “Client secrets,” then select “Add a client secret for your bot.” This will generate a secret in Microsoft Entra ID (formerly Azure Active Directory).
Be sure to securely record the secret value immediately, as it will not be displayed again. This secret will be necessary for your bot to authenticate with Microsoft Teams.


Your bot is now created! Let us now create an MS Teams app to link our bot.
Additional Step: Record Your Bot ID
On the Bot Management page, locate and make a note of your Bot ID. This ID also serves as your Entra App ID and will be essential for linking your bot to the Teams app in the next phase. Be sure to save this ID in a secure location.

Phase 2 of 4: Creating the Teams App
This is the app that you will upload to your Teams Client app, this app contains the notification Bot.
Step 1 of 8: Go to https://dev.teams.microsoft.com/home
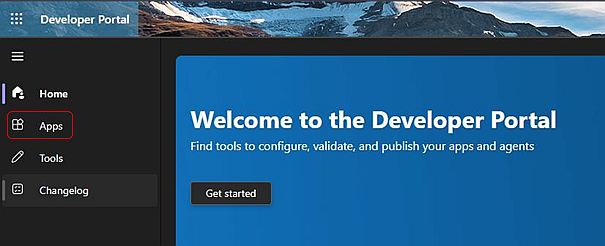
Step 2of 8: In the sidebar, navigate to Apps
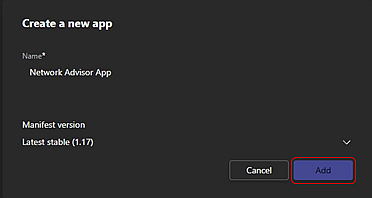
Step 3of 8: Click “New App”, choose a name for your notification bot app, and click “Add”

Step 4 of 8: Make sure you fill in all the required information in the “Basic information” section accessible from the side menu.
Fill in the following fields: (copy/paste)
Short Description:
OmniVista Bot sends real-time alerts from ALE OmniVista to Microsoft Teams.
Long Description:
Network Advisor Bot is an advanced notification bot designed to seamlessly integrate with ALE OVNA’s suite of network security and management tools. This bot ensures that users receive real-time alerts and notifications directly within their preferred communication platform, Microsoft Teams. Whether it is for security alerts, network performance updates, or other critical information, TeamsBot provides a reliable and efficient way to stay informed. It helps streamline communication, improves response times to network incidents, and enhances overall network management efficiency.
Developer or company name:
ALE International
Website:
https://www.al-enterprise.com/en/products/network-management-security/omnivista-network-advisor
Privacy policy:
https://www.al-enterprise.com/en/legal/privacy
Terms of use:
https://www.al-enterprise.com/en/legal/terms-of-use
Application (client) ID
The Bot ID you got at the “Additional step” of Phase 1
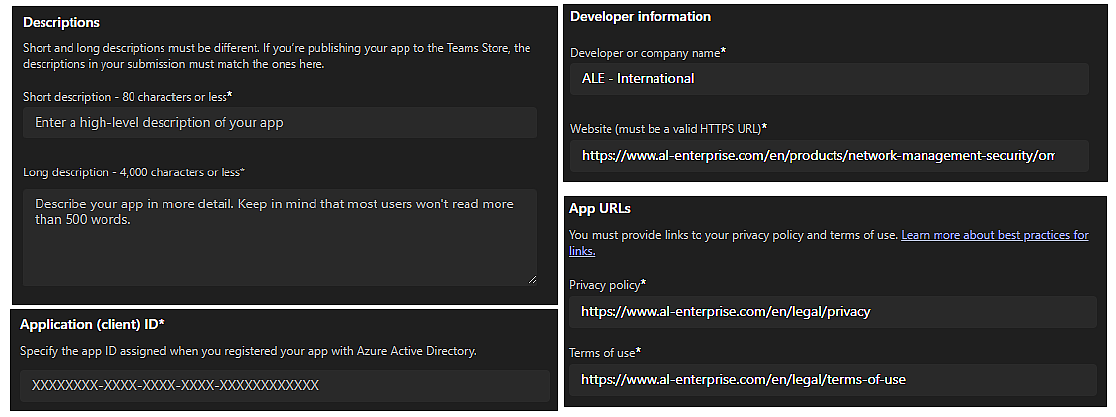
Make sure to save your changes at the bottom of the page!
Step 5of 8: Add your Bot to your Teams app, click “App Features” on the side menu.
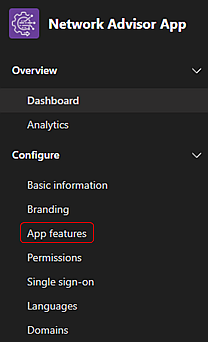
Then click “Bot.”

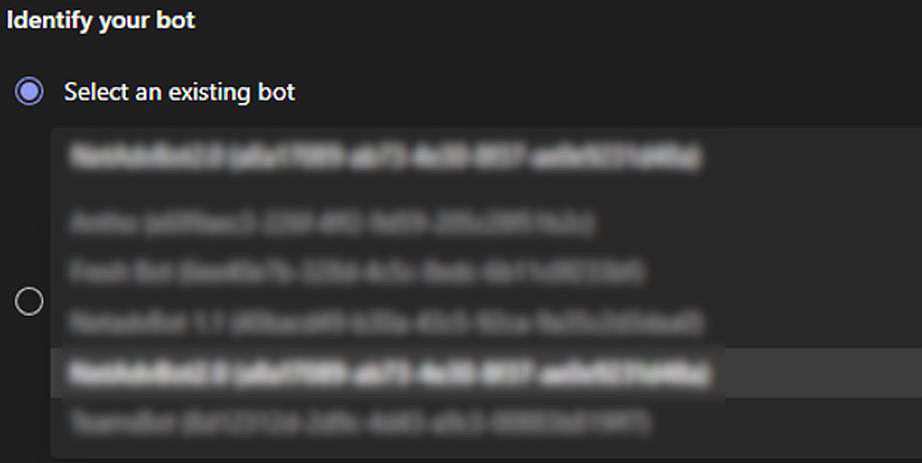
Step 6 of 8: Click “Select an existing bot” and select your bot in the list (the very same one you had created at Step 4 of Phase 1)
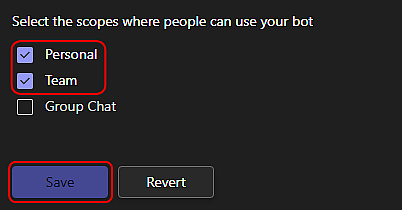
Make sure you check “Personal” and “Team” as the bot’s scopes, then click “Save” at the bottom of the page.
Your application is now ready to be added to your team! All you need is the ZIP package.
Step 7of 8: In the sidebar, navigate to Publish → App package
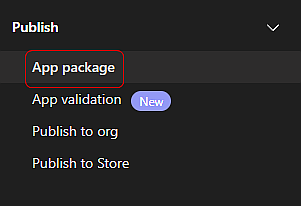
At the top right corner of the page, click “Publish.”

Click “Download the app package.” Save it to an easily accessible location for later use.
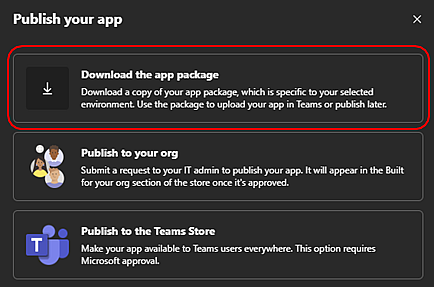
Step 8 of 8: After downloading the app package, you will have two options: you can either deploy your bot locally or publish it organization-wide.
Option 1: Deploy Locally
This option allows you to make the bot available only to specific teams. If you choose this option, ensure that “Custom application upload” is enabled in https://admin.teams.microsoft.com/, under Teams apps → Manage apps (then click the “Actions” dropdown in the top right corner and select “Org-wide app settings.” If it is not enabled already, follow Microsoft’s guide on allowing users to upload custom apps.
Now you will want to add your bot your team’s channel. From your general channel, go to “+” → Manage your Apps → Upload an app. There select and upload the ZIP package you had downloaded previously.


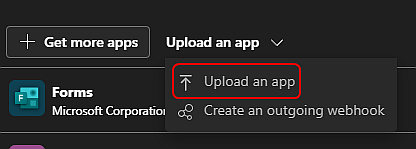
The bot should then be available instantly.
Option 2: Publish Organization-Wide
To make the app available across your entire organization, follow Microsoft’s guide on uploading a custom app through the Teams admin center.
The bot should become available after a few hours.
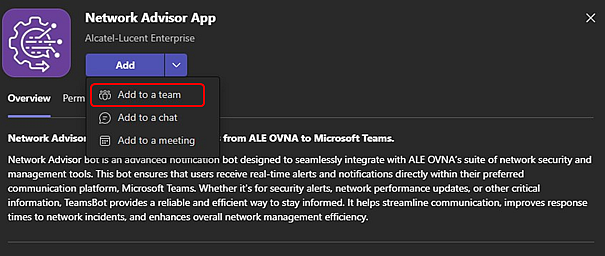
Now you will want to add your bot your team’s channel. From your general channel, go to “+” → Manage your Apps → Get more apps → Built for your org. There, you will be able to add the app to your team.
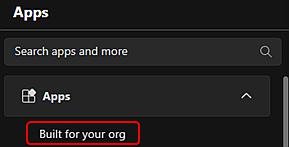
When adding the bot to your team, make sure you choose “Add to a team” and select the right team you want to receive notification in.
Phase 3 of 4: Get your IDs
Step 1 of 4: Go to https://entra.microsoft.com/
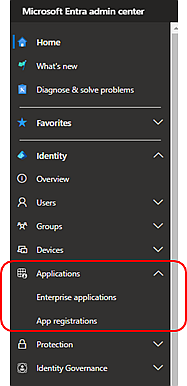
Step 2 of 4: In the left-hand side panel, click “Applications → App registrations”
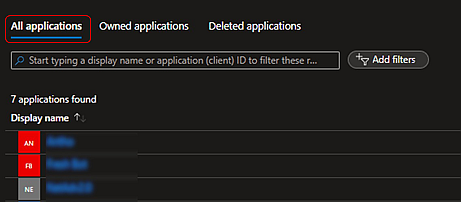
Step 3 of 4: Click “All applications”. Look for and click the app you just created at Step 4 of Phase 1.
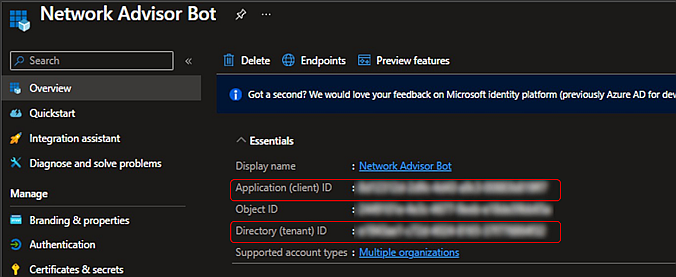
Step 4 of 4: In the overview menu make a note of your Application (client) ID and Directory (tenant) ID.
At this point you should have:
Application (client) ID
Directory (tenant) ID
Client secret Value (from Step 6 of Phase 1)
Phase 4 of 4: Enable Graph API authorizations
To allow the application to manage Teams and channels (e.g., creating and deleting them) through the user interface, you will need to enable Graph API permissions. A detailed list of the required permissions is provided below.
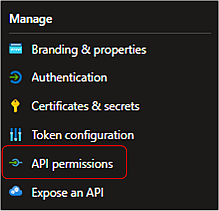
Step 1 of 3: From the previous page, click “API permissions” in the sidebar.
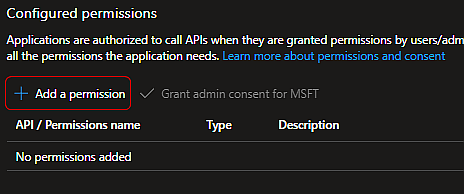
Then click “Add a permission.”
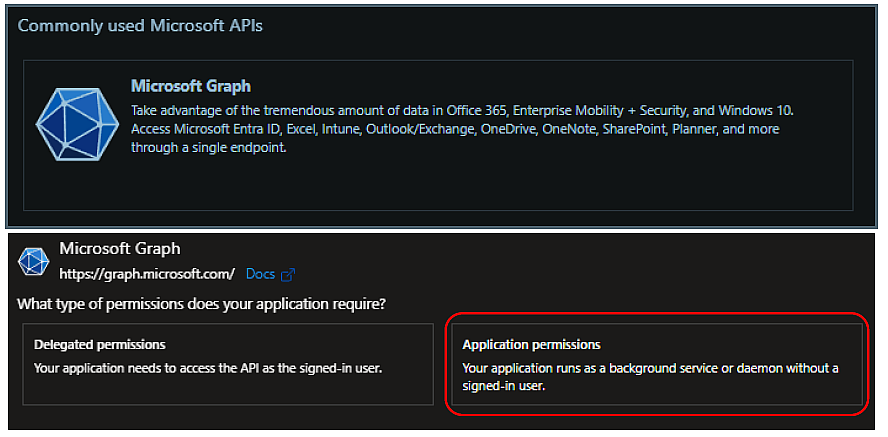
Step 2of 3: Choose “Microsoft Graph” then select “Application permission.”
Step 3of 3: Manually add all permissions for the app.

These are the permissions you want:
Team.ReadBasic.All: Read basic information on all teams.
TeamSettings.Read.All: Read team settings.
TeamSettings.ReadWrite.All: Read and modify team settings.
Group.ReadWrite.All: Manage Microsoft 365 groups (read, create, modify, delete).
Channel.Create: Create channels in teams.
Channel.Delete: Delete channels in teams.
ChannelSettings.ReadWrite.All: Read and modify channel settings.
User.Read.All: Read organization user information.
Directory.ReadWrite.All: Read and modify Azure AD directory information.
Member.ReadWrite.All: Manage members in groups and teams.
PRO TIP: When adding these permissions, you can simplify the process:
Search for a permission: Copy/paste a permission name in the search bar
Expand all: Click “expand all” in the top right corner of the search bar
Select everything: Make sure to tick every checkbox matching the query
Go back to Step 1: Replace your search query with the next permission in the list (all previously selected permissions will be retained)
Submit: Repeat until all permissions have been checked, then click “Add permissions”
Apply your changes: You must finally click “Grand admin consent for (your organization)” to confirm your changes
Next step
Once all these steps have been strictly implemented, you can now proceed with OmniVista Network Advisor installation.
It is important to note that the step 8 of phase 3 (bot installation) must be repeated for all the Teams which might receive notifications from OmniVista Network Advisor.
