The Device Management screen is used to manage devices that Network Advisor is monitoring in your network. To access this screen, click on Device Management under the “Settings” section of the Network Advisor Dashboard.
This screen is divided into two sections:
-
Monitored devices list – Displays a list of network devices currently monitored by Network Advisor. You can view information about each device, add one or more devices to monitor and edit device information. Each time a new device of type Switch is added, the application will push the following commands:
-> swlog output socket <ip_address> 10514 vrf-name <vrf>
-> interfaces ddm enable
-> interfaces ddm-trap enable
-
Protected IPs – Displays a list of IP addresses that are protected from Network Advisor actions. This can be used to ensure critical resources such as a DNS or RADIUS server are not accidently blocked.
OmniVista Network Advisor can support a maximum of 2,000 devices, enabling real-time monitoring of network devices in large organizations without scalability issues.
Monitored Devices List
The Monitored Devices List is displayed by default and provides the following information for each device:
-
Host Name – The name assigned to the device. This name will also be displayed in the Rainbow anomaly.
-
Device Type – Whether the device is an OmniSwitch or an OmniAccess Stellar AP.
-
IP Address – The IP address of the device.
-
Login / Password– The credentials used to log into the device. The login name and password configured through the Default Device screen is used by default.
-
SSH Port – The SSH port number on which a secure connection is made with the device. The SSH port number configured through the Default Device screen is used by default.
Add Devices to the Monitored Devices List
There are two options for adding the devices you want Network Advisor to monitor: add a single device and import a list of devices.
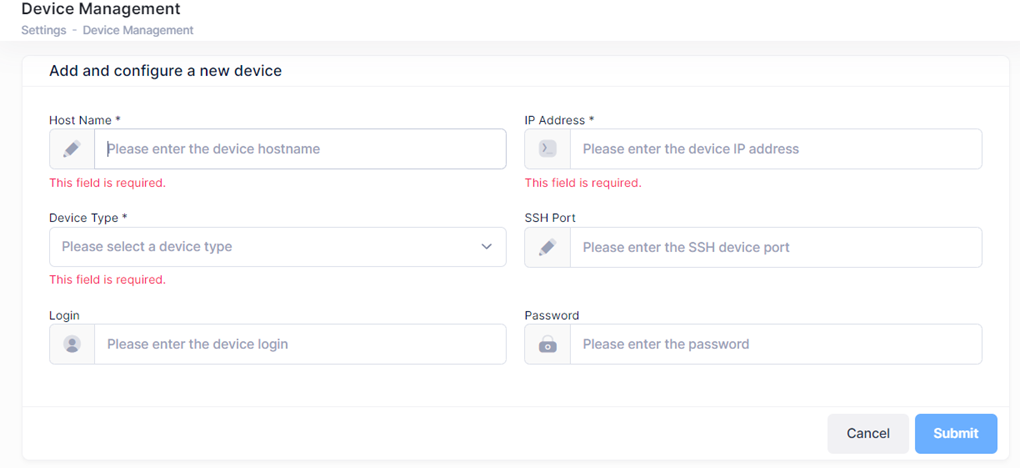
To add a single device to monitor, click on Add Device at the top-right corner of the Monitored Devices List tab. The Add and Configure a New Device screen will appear. Complete the fields as described below, then click on Submit. The device is added to the List of Monitored Devices screen.
-
Host Name – The name assigned to the device.
-
IP Address – The IP address of the device.
-
Device Type – Whether the device is an OmniSwitch or an OmniAccess Stellar AP.
-
SSH Port (optional) – The SSH port number on which a secure connection is made with the device. If not set, the SSH port number configured through the Default Device screen is used by default.
-
Login (optional) – The login used to log into the device. If not set, the login name and password configured through the Default Device screen is used by default.
-
Password (optional) – The password used to log into the device. If not set, the login name and password configured through the Default Device screen is used by default.
To import a list of devices that you want Network Advisor to monitor, click on Import at the top-right of the Monitored Devices List tab. The Import screen will appear:
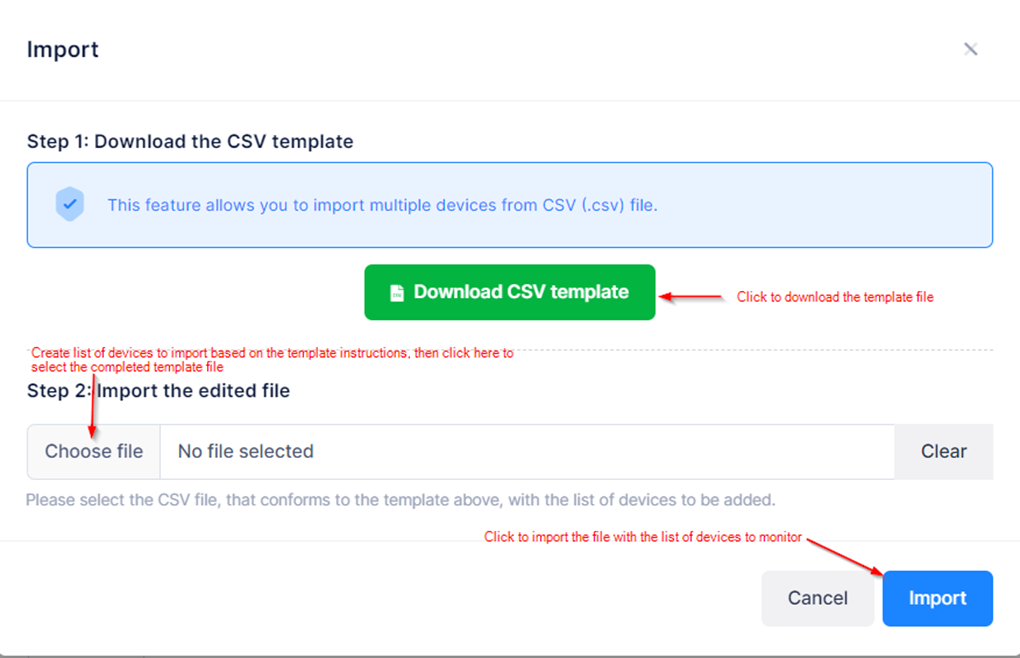
Step 1: Download the CSV template – Click on this option to download a CSV template file and add device information based on the template instructions.
Step 2: Import the edited file - Click on Choose file to select the CSV file that contains devices that you want to monitor, then click on Import to upload the file to Network Advisor. The imported devices are added to the Monitored Devices List screen.
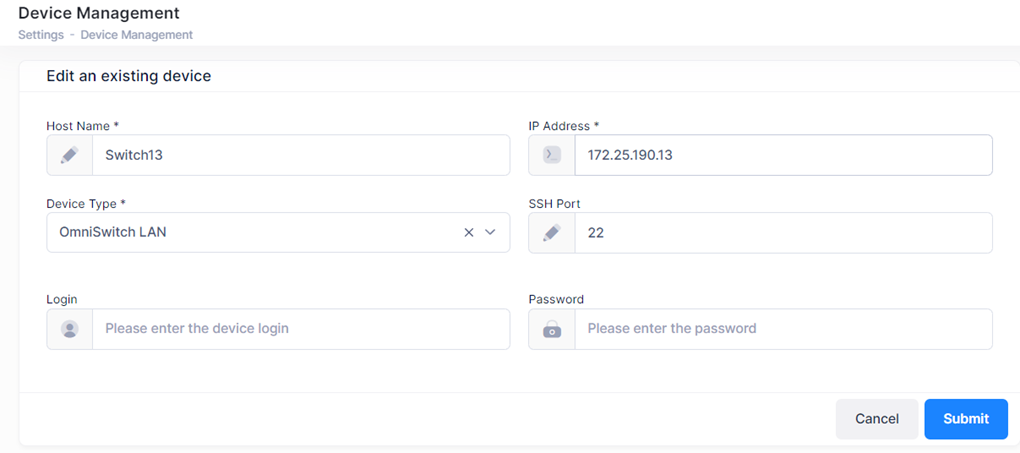
Edit Device Information
To edit the information for a specific device, click on the Edit icon next to the device entry. The following screen will appear. When you are done editing the device information, click on Submit.
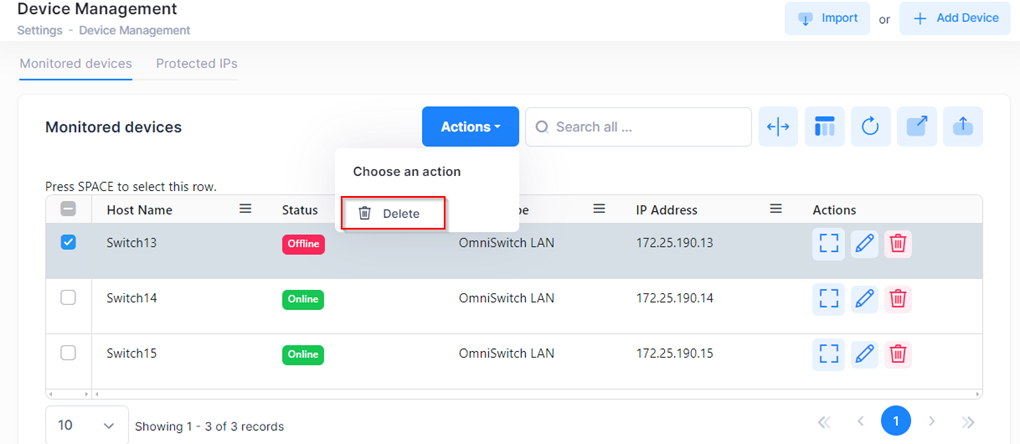
Delete a Device from the Monitored Devices List
To remove a device from the Monitored Devices List, select the device entry and click on Actions. A drop-down menu appears from which you can select delete. You can also remove a device entry by clicking on the Delete icon under the “Actions” column.
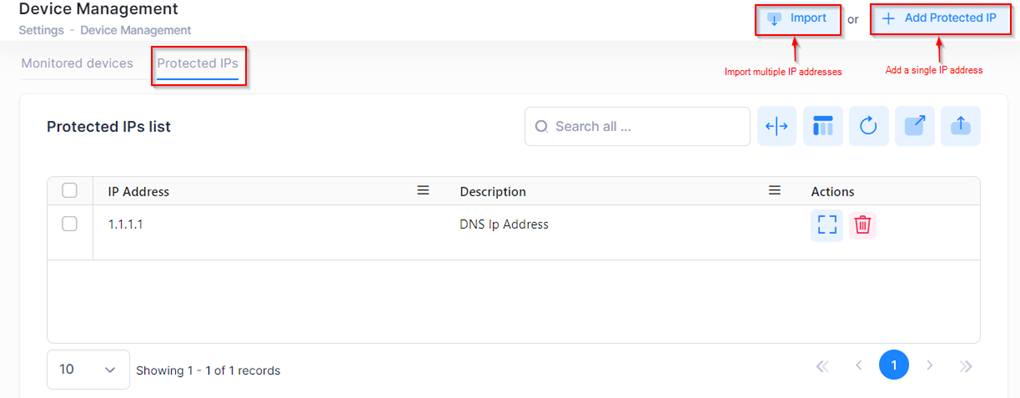
Protected IPs
The Protected IPs tab displays a list of IP addresses that you want to exclude from Network Advisor actions. For example, if a user decides to block a duplicate IP address but the IP address matches a monitored device IP address or a DNS IP address, the IP address would not be blocked if it was a protected IP.
Next to each IP address list entry, there are icons under the “Actions” column that you can click on to view additional information or remove the IP address from the list.
-
Additional Information – Click to view field values for the protected IP address.
-
Delete – Click to remove the IP address from the protected IP list.
Add IP Addresses to the Protected IP List
There are two options for adding IP addresses to protect: add a single IP address and import a list of IP addresses.
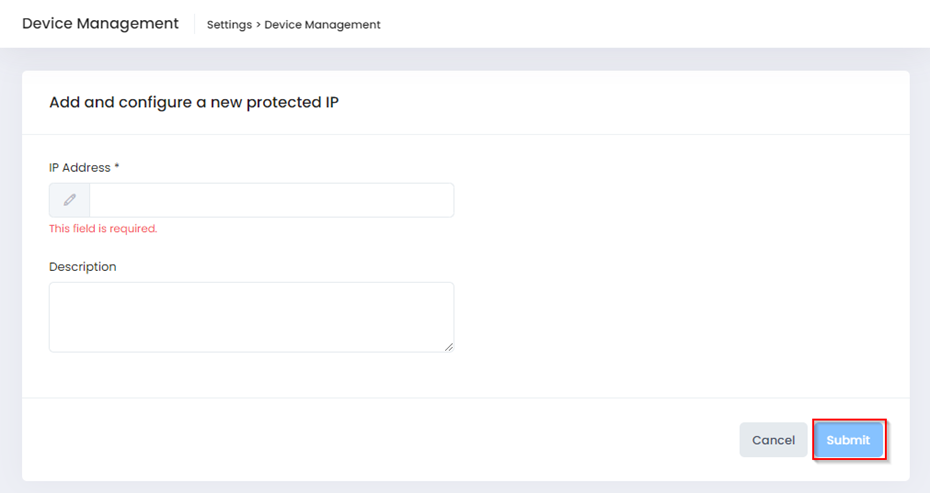
To add a single IP address to protect, click on Add Protected IP at the top-right corner of the Protected IPs tab. The Add and Configure a New Protected IP screen will appear. Enter the IP address and a description, then click on Submit. The device is added to the Protected IPs screen.
To add a list of IP addresses to the Protected IPs list, click on Import at the top-right corner of the Protected IPs tab. The Import Protected IPs screen will appear.
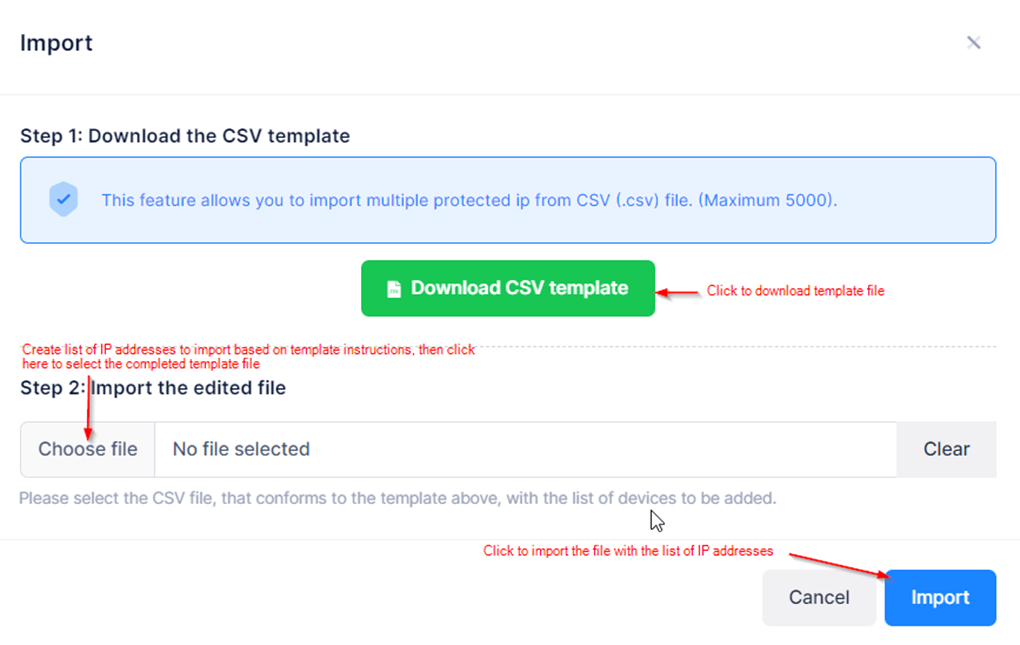
Step 1: Download the CSV template – Click on this option to download a CSV template file and add IP addresses based on the template instructions.
Step 2: Import the edited file - Click on Browse to select the CSV file that contains the IP addresses that you want to protect, then click on Import to upload the file to Network Advisor. The imported IP addresses are added to the list of Protected IPs.
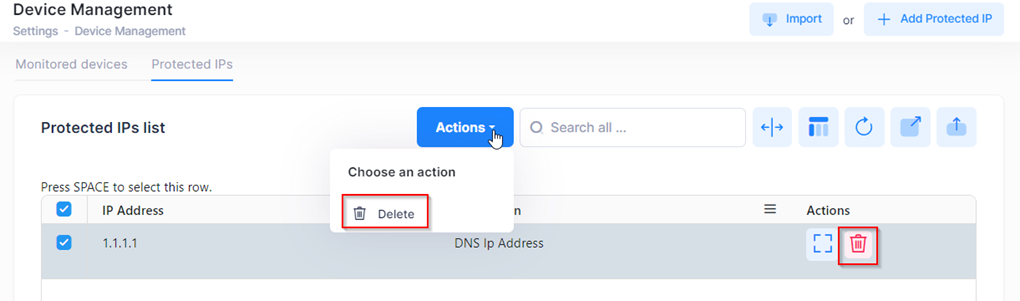
Delete an IP Address from the Protected IP List
To delete an IP address from the Protected IP list, select the IP address entry and click on Actions. A drop-down menu appears from which you can select delete. You can also delete an IP address entry by clicking on the Delete icon under the “Actions” column.