To access the Anomaly Monitoring screen, click on Anomaly Monitoring under the “Anomaly Management” section of the Network Advisor Dashboard.
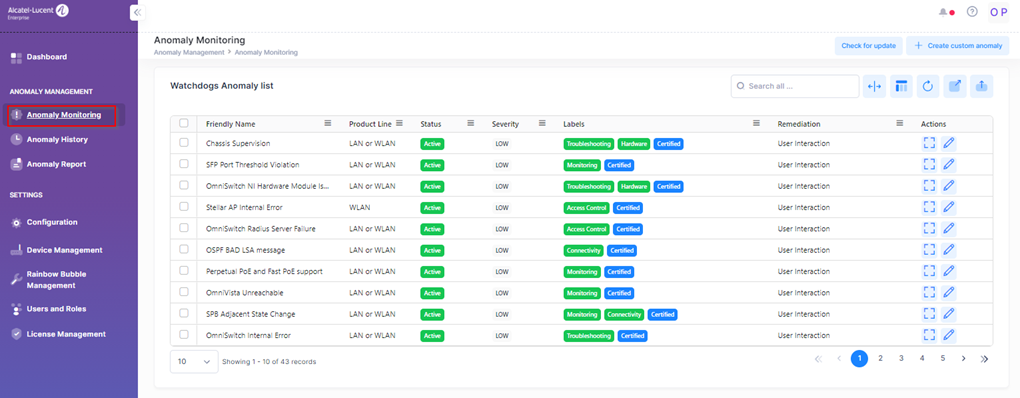
Viewing the Anomaly List
All the anomalies that Network Advisor is monitoring are displayed in the anomalies list. The following information is provided for each anomaly in the list:
-
Friendly Name – The name of the anomaly.
-
Product Line – A description of the product line the anomaly is applicable to, either LAN or WLAN.
-
Status – Whether monitoring for this anomaly is active (On) or inactive (Off). When inactive, the network is not monitored for this anomaly.
-
Severity – The severity level of the Alert message sent to Rainbow (High or Low).
-
Labels – The label(s) assigned to the anomaly. There are two types of labels:
-
Labels used to tag an anomaly as a method for categorizing anomalies. For example, multiple anomalies that are used for troubleshooting can all be tagged with the “Troubleshooting” label. You can then do a search for all anomalies tagged with “Troubleshooting”.
-
Labels that identify the type of anomaly:
-
“Certified” – An ALE certified anomaly.
-
“Custom” – User-defined anomaly.
-
“Support” – An anomaly used by technical support for troubleshooting.
-
-
-
Remediation – The corrective action that is taken when this anomaly is detected (User Interaction, Automated, Advanced). See Types of Notifications.
-
User Interaction – When selected, the user is prompted with an Alert message in Rainbow every time the anomaly occurs. The message provides actions to correct the reported issue. The user simply clicks on one of the actions in the Rainbow Alert message.
-
Automated – When selected, every time the anomaly occurs, no notification to do anything. Remediation occurs automatically with the recommended action, not the alternative action. For example, an Alert may recommend “Block MAC” and offer “Ignore” as an alternative action. The recommended “Block MAC” action is taken every time this specific Alert occurs.
-
Advanced – Automatically selected if the “Remember my decision above” checkbox in a Rainbow Alert message is checked, the action selected by the user is automatically applied the next time the anomaly occurs. The user does not receive any notification; the previously selected action is automatically applied. Note that this option is specific to the context of the Alert message. For example, if a POE power failure Alert is received for port 1/1/15 on Switch A and you select the “Disable POE” action, Network Advisor will only remember this Alert response for port 1/1/15 on Switch A and automatically disable the POE each time this Alert is received for that port/switch. If the same Alert is reported for port 1/1/12 on Switch B, the action taken for port 1/1/15 is not applied, even though port 1/1/15 is on the same switch.
-
By default, all anomalies are displayed in the list. You can look for a specific anomaly in the list by entering the name of an anomaly in the Search Bar at the top of the Anomaly Management screen.

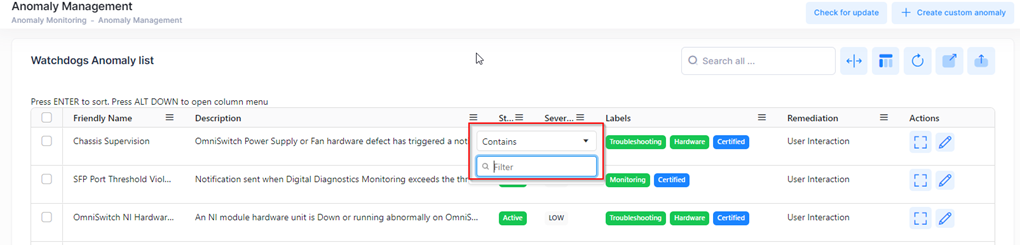
Filtering on the Anomaly List Entry
To filter which anomalies are displayed in the list, click on the filter icon for the column you wish to filter on. A drop-down menu appears from which you can select to choose a fixed value or enter a value depending on the column being filtered.
Editing Anomaly Information
There are two ways to edit anomaly functionality:
-
Change the status and severity for an anomaly from the Anomaly list.
-
Use the Edit Anomaly screen to make changes.
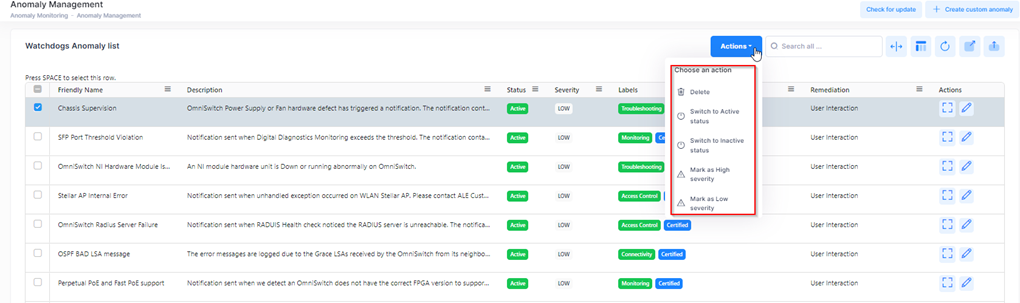
Change the Status and Severity on the Anomaly List Entry
To edit the status and severity of any anomaly, select the anomaly list entry and click on Actions. A dropdown menu appears from which you can select to change the status and severity level of an anomaly.
-
Switch to Active status – Changes the status of the anomaly to On (active).
-
Switch to Inactive status – Changes the status of the anomaly to or Off (inactive).
-
Mark as High Severity – Changes the severity level of the anomaly to high.
-
Mark as Low Severity – Changes the severity level of the anomaly to low.
Once you make a change to either the status (Active//Inactive) or severity (High/Low), the “Status” and “Severity” field values for the anomaly will reflect the change.
Edit Anomaly Screen
To edit the information for a specific anomaly, click on the Edit icon for that anomaly. The Edit Anomaly screen will open.
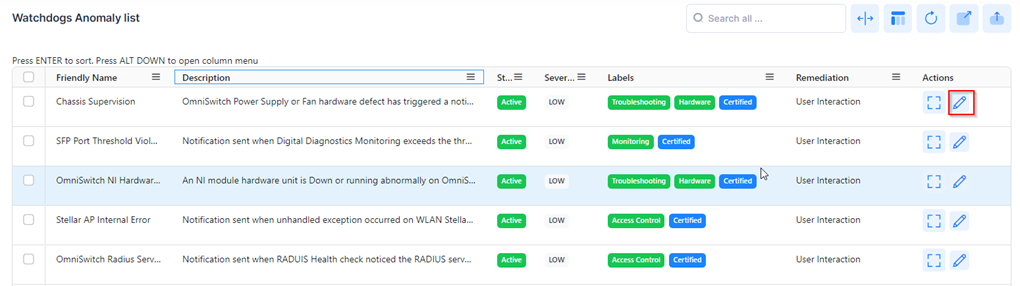
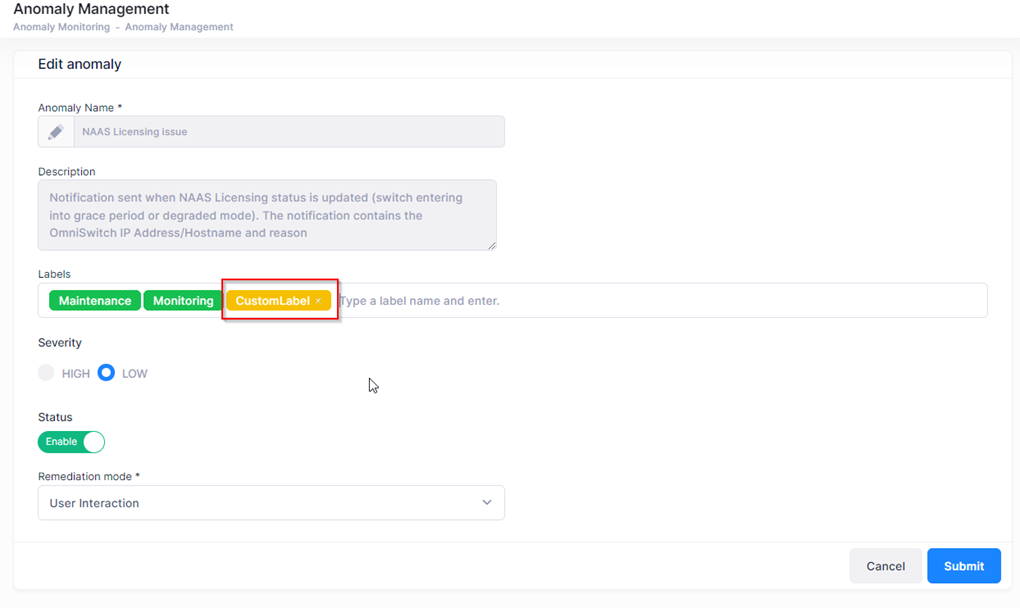
The Edit Anomaly screen displays information for the anomaly that you selected. Use this screen to change the information for the fields. Modify the field values/options of the Edit Anomaly screen then click Submit. Note that you cannot change the name or description for Certified and Support anomalies, but custom labels can be added. In addition, you cannot change the name or description for a Custom (user-defined) anomaly.
-
Severity – Changes the Severity of the anomaly.
-
Status – Changes the Status of the severity.
-
Remediation mode – Changes the Remediation mode of the anomaly.
Creating a Custom Anomaly
A set of pre-defined ALE Certified anomalies are provided. You can edit certain information for these anomalies, but you cannot delete them. However, you can create a custom anomaly.
To create a custom anomaly notification, click on Create a Custom Anomaly at the top-right of the Anomaly Management screen to open the New Custom Anomaly screen. Complete the fields as described below, then click Submit. The new custom anomaly will appear in the anomalies list.
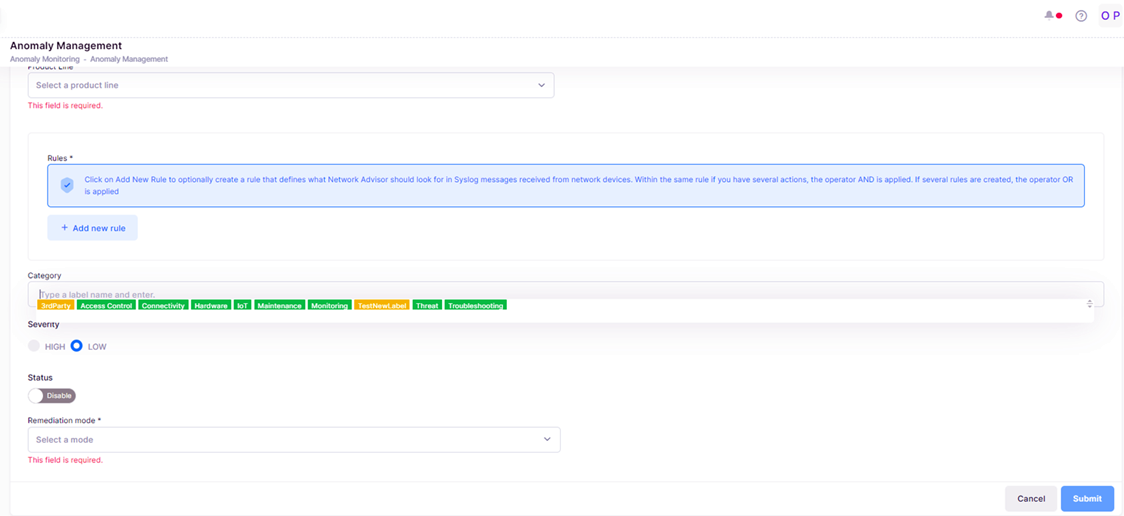
The New Custom Anomaly screen is where you specify information to configure a custom anomaly notification. Complete the fields as described below to create a custom anomaly.
-
Anomaly Name – The name to assign to the custom anomaly.
-
Description – Enter a description for the custom anomaly.
-
Product Line – A description of the product line the anomaly is applicable to, either LAN or WLAN.
-
Rules – Click on Add new rule to optionally create a rule that defines what Network Advisor should look for in syslog messages received from network devices.
-
Within the same rule if you have several actions, the operator AND is applied.
-
Example:

-
Category – Click on this field to select one or more category or labels from the drop-down list to categorize the type of monitoring the anomaly will perform. By default, the “Custom” label is selected.
-
Severity – Set the severity level of the notification message sent to Rainbow (High or Low).
-
Status – Click on the slider to toggle the status On (active) or Off (inactive). When On is selected:
-
Remediation – The corrective action that is taken when this anomaly is detected (User Interaction, Automated, or Advanced).
Deleting a Custom Anomaly
The default set of pre-defined ALE Certified anomalies cannot be deleted. You can only delete custom (user-defined) anomalies. To delete a custom anomaly, click on the Delete icon under the “Actions” column.

Click Delete on the Confirmation Prompt to remove the custom anomaly entry.