External Captive Portal
The External Captive Portal Configuration file is used to provide secure communication between APs and an External Captive Portal Server. The management of external configuration files is done through Access Role Profiles. When the Captive Portal option for the Access Role Profile is set to “External”, you can specify the name of an External Captive Portal Configuration file to use. Traffic assigned to the profile will be redirected to the External Captive Portal Server identified in the configuration file.
The External Captive Portal screen displays information about External Captive Portal Configuration files and is used to create, edit, download, and delete an external configuration file. To access this screen, click on Wireless > Advanced > External Captive Portal under the “Configure” section of the OmniVista Cirrus Menu.

Creating an External Captive Portal Configuration File
To create an External Captive Portal Configuration file, click on Create External Captive Portal Config File to open the New External Captive Portal Config File screen.
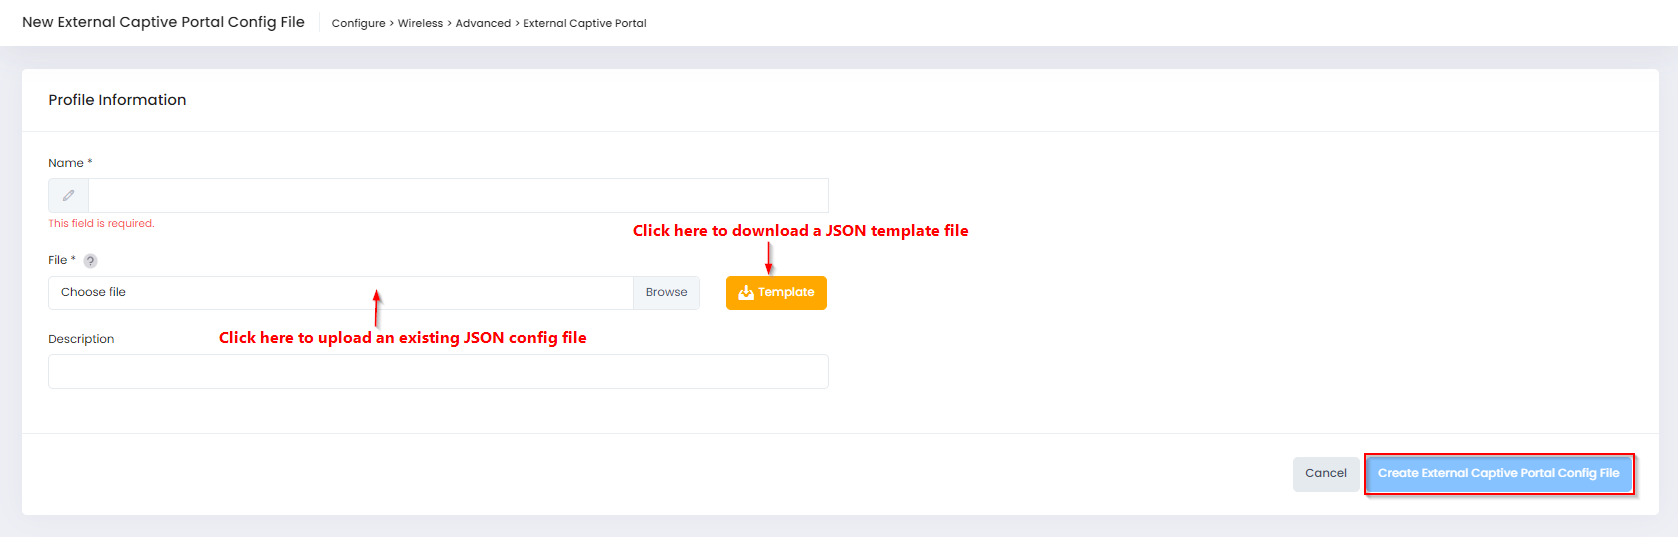
Complete the fields as described below, then click on Create External Captive Portal Config File.
Name - Enter a unique name to identify the external configuration file.
File - Click on this field to locate and upload an existing JSON file. Note that only JSON files are supported.
Template - You can click on Template to download a JSON template file that you can use to create an External Captive Portal Configuration file. Once you have completed and saved the external configuration file, click on Browse to locate and upload the file you created.
Description - Enter an optional description for the External Captive Portal Configuration file.
When you are done creating and/or uploading an External Captive Portal Configuration file, you must push the configuration file(s) to all of the APs in the network. Click here for more information.
Editing an External Captive Portal Configuration File
You can edit the values for an existing External Captive Portal Configuration file by accessing the Edit External Captive Portal Config File screen. Use one of the following methods to access this screen:
Select the configuration file to edit by clicking o the checkbox next to the entry, click on Actions, then select Edit from the drop-down menu.
Click on the pencil icon under the “Actions” column next to the configuration file that you want to edit.
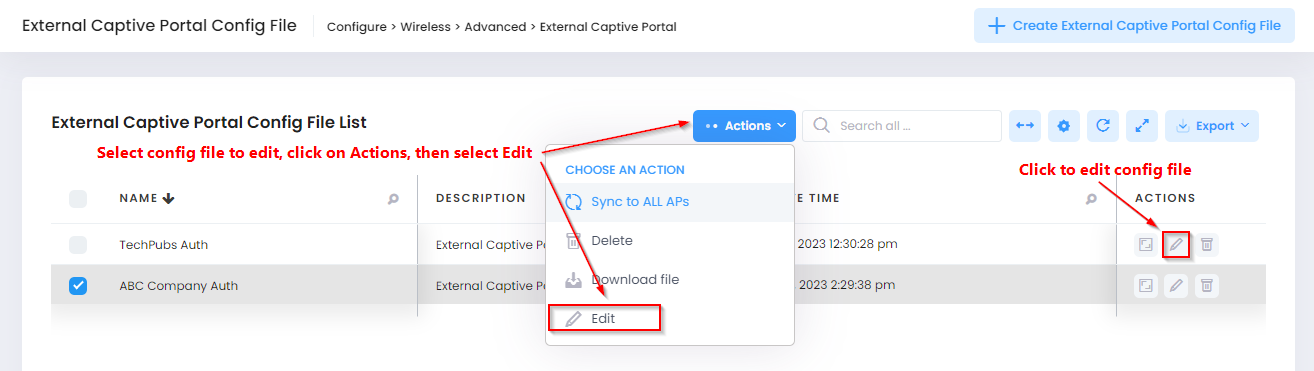
The following Edit External Captive Portal Config File screen displays. Edit the fields as described above, then click on Save.

When you are done editing an External Captive Portal Configuration file, you must push the configuration file(s) to all of the APs in the network. Click here for more information.
Deploying the External Captive Portal Configuration File
When you are done creating or editing an External Captive Portal Configuration file, you can push the configuration files to all the APs in your network. Use one of the following methods to select the configuration files to push to the APs:
Click on Actions and select Sync to ALL APs to push all of the configuration files to all of the APs.
Select the configuration file(s) to push to all of the APs by clicking on the checkbox next to the table entry, click on Actions, then select Sync to ALL APs.
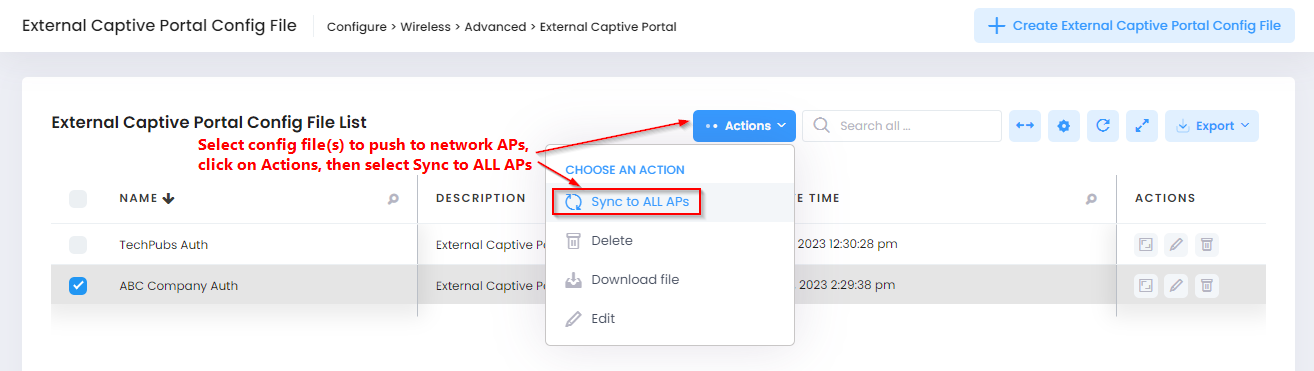
The External Captive Portal Configuration file that an AP should use is designated in the Access Role Profile to which AP client traffic is assigned.
Downloading the External Captive Portal Configuration File
You can download one or more External Captive Portal Configuration files to your machine. Select the configuration file(s) to download by clicking on the checkbox next to the table entry.

The JSON configuration file will be downloaded to your designated download folder.
Deleting an External Captive Portal Configuration File
To delete an External Captive Portal Configuration file, use one of the following methods to select the configuration file(s) that you want to delete:
Select the configuration file(s) to delete by clicking on the checkbox next to the table entry, click on Actions, then select Delete from the drop-down menu.
Click on the trash can icon under the “Actions” column next to the configuration file that you want to delete.
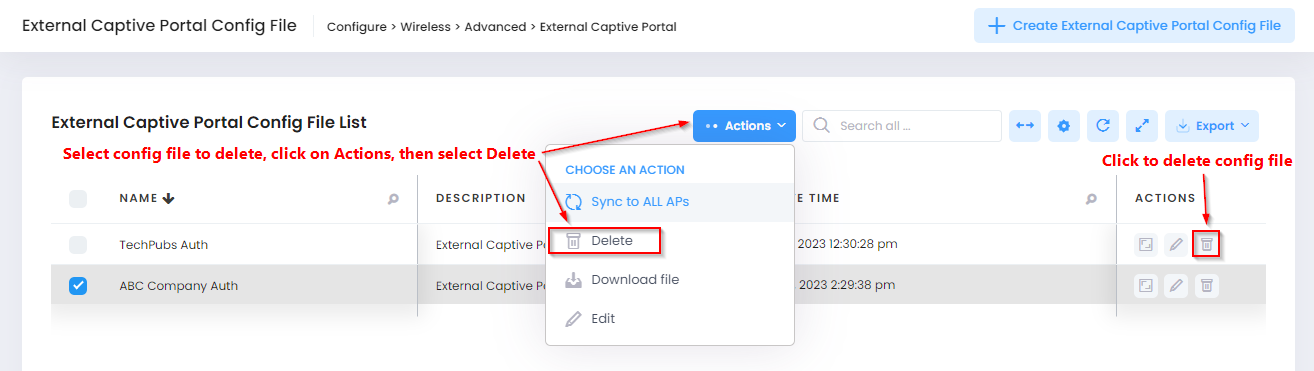
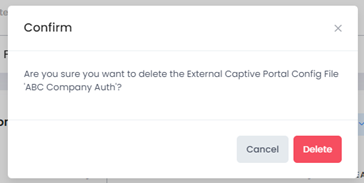
When the following confirmation prompt appears, click Delete to delete the selected configuration file.
External Captive Portal Configuration File List
Name - The name of the configuration file.
Description - User-configured description for the configuration file
Create Time - The date and time when the configuration file was uploaded to OmniVista Cirrus.